
The Pip-Boy: A RobCo Industries Technological Wonder!
Knowing your way around your Pip-Boy is one of the first lessons you learn after entering a vault, assuming nuclear obliteration hasn’t hastened acclimatization activities. Study the following indicators and near-field enhancements, as your life may well depend on the wealth of important information contained within this wondrous device!
Optimized Viewing Portal
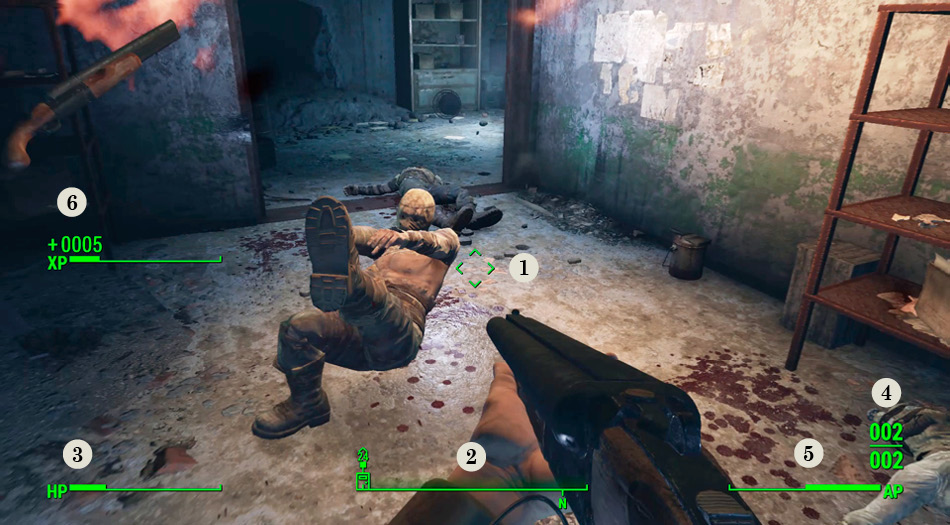
Optimized viewing portal (normal view).
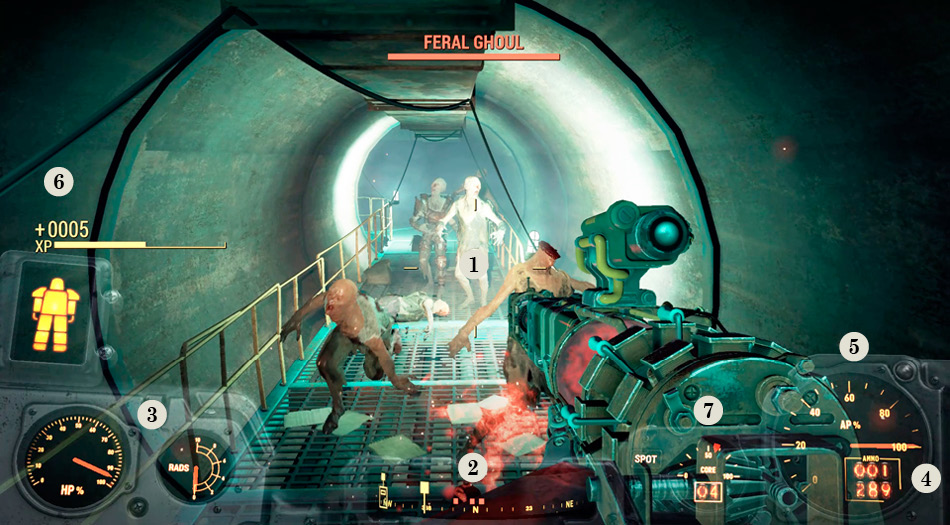
This is your optimized viewing portal, where Pip-Boy functionality helps you navigate the hostile environment outside the safety of Vault 111.
Both views detail the following:
[1] Target/Dot: This changes from a dot to a target of varying dimensions, depending on the weapon you are carrying or have unholstered. Use this to point yourself in the correct direction or aim when firing from the hip.
[2] Compass: Spin around to view all directions. Use your World Map menu to add markers that show up on your compass. Quest objectives appear as the same square-shaped markers. Enemies appear as red dots. Primary locations appear as icons that are the same as the world map in both your Pip-Boy and this guide.
[3] Health and Radiation: This shows the percentage of your Health left, regardless of the number of Health Points you have (in Power Armor, this also shows the state of your armor sections). Any time you take radiation damage, the bar always shows how many of the 1000 rads you can take are left. Employ chems or medical treatment to alleviate any radiation poisoning or trauma you may be experiencing.
Damage Type (not shown): This appears if you’re struck by radiation damage, although sometimes poison damage has an accompanying visual effect.
[4] Ammunition: This shows the number of total bullets, shells, or ammunition you have for the weapon you’re using, along with the current number left in your chamber. Reload manually during brief periods of down-time in combat.
[5] Action Points: Every time you sprint or utilize a weapon in combat, you use Action Points, and this bar shows the percentage of your total that you have available. They refill when you refrain from attempting either activity. Keep an eye on this bar to determine how long you can sprint before tiring out or fire (or swing) a weapon.
[6] Information: Occasionally, your Pip-Boy may relay pertinent information in this corner of your viewing portal. It is usually a warning, hint, or quest activity to perform.
[7] Core (Power Armor only): This measures the remaining energy in the Fusion Core that provides the “juice” your Power Armor requires to function normally. Continuously locate Fusion Cores to keep your Power Armor recharged, or face an impeding lack of maneuverability (and no Action Points to sprint with). Fusion Cores are automatically swapped, so always carry a spare. Or six.
Status Screens
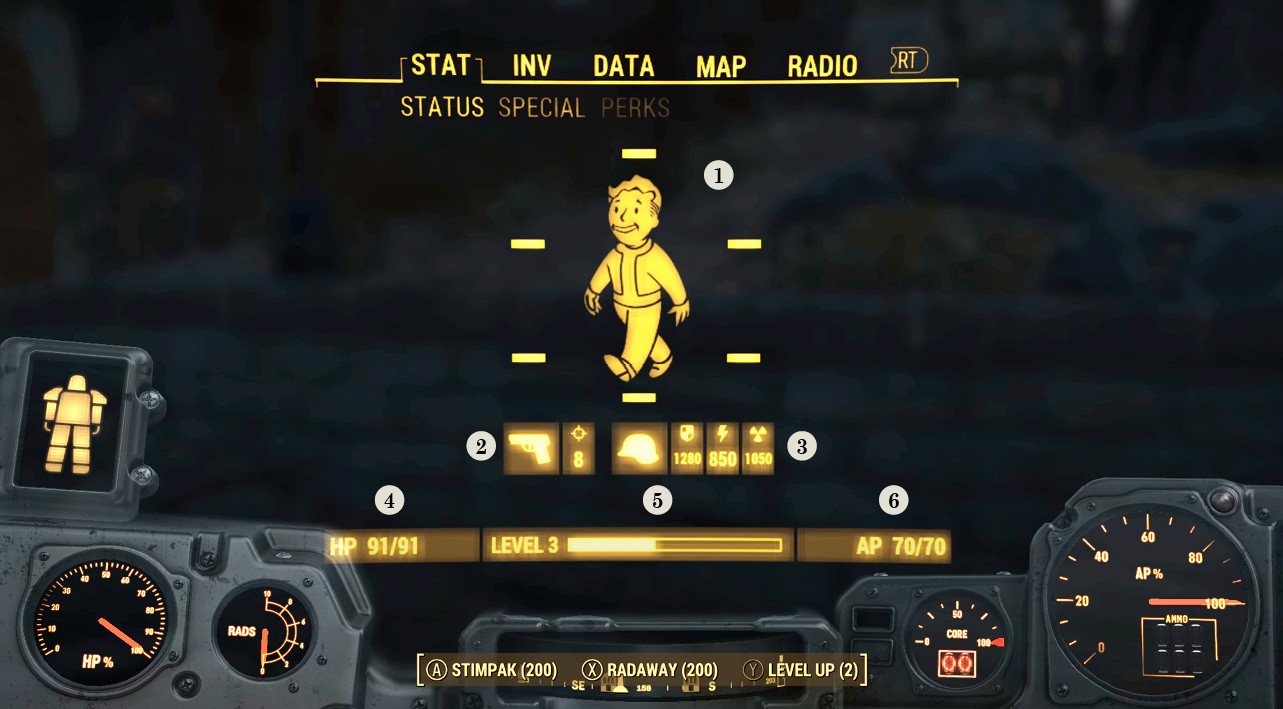
Your personal status is measured on your Pip-Boy. It reveals the following:
[1] The condition of your various appendages (head, both arms and legs, and entire Health). If the Vault Boy is looking less than healthy (ghoulish or with a bandaged appendage), seek chems or medical attention. Check the Help menu for more information on penalties you receive while crippled.
[2] Your offensive capabilities, which is the damage your current weapon inflicts. Some weapons inflict additional radiation, energy, or poison damage and are listed as appropriate. Change your weapon, and this value changes.
[3] Your defensive capabilities, which is the Damage Resistance of the armor you are currently wearing. Power Armor obviously provides an impressive level of protection. If your apparel also offers resistance against radiation, energy, and poison, it is also listed here.
[4] Health Points: This shows the current and maximum Health Points you have. This is useful if you are, for example, administering a stimpak. You know the stimpak increases your Health by 30% of your health, so you may wish to use it when you’re a little closer to death (when it is more effective). So you don’t waste the additional Health Points, you may wish to then wait to heal yourself.
Remember your Health increases every time you level up.
[5] Level: This reveals your current level and a progression bar that fills up as you edge closer to your next level.
[6] Action Points: This shows your current and total number of Action Points. Simply rest to increase this back to the maximum total.
Other Screens
Your SPECIAL screen details your attributes. This is detailed in the next section.
Your PERKS screen details any perks you have uncovered or unlocked. This is also detailed in the next section.
The INV chapter has more details regarding the associated Pip-Boy screens, but if you wish to know your Carry Weight and Caps total, look to the bottom left and bottom middle of this menu screen.
The DATA chapter has information on the Quests, Workshops, and Stats menus.
The MAP chapter has information on the world map and local map functionality, as well as marker and settlement information.
If you wish to know the date and current time, look to the bottom left and bottom middle of either of these menu screens.
The RADIO menu plays any current music or transmitting station within a specific radius. Aside from a variety of pleasant music, you can use the radio to locate distress calls from numerous sources and even track adversaries during specific quests. The available radio stations appear on your main screen as you near their range. As radio stations reveal locations already detailed in this guide’s Map chapter, they aren’t listed.
Favorites
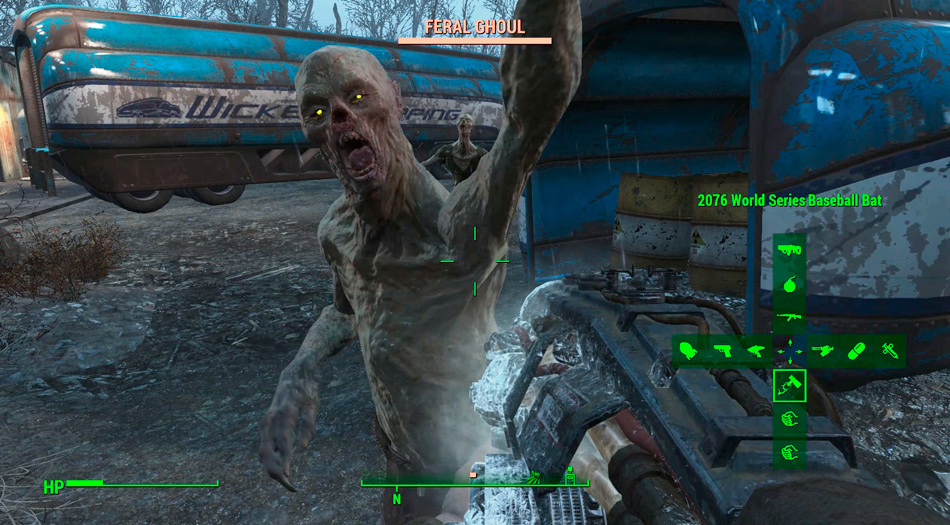
A fully stocked Favorites menu, filled with the items and weapons you use the most.
To ease and quicken the act of swapping between often-used items, be sure to access your Favorites menu every time you wish to switch between items. A total of 12 items can be given “Favorite” status within your INV menu. These include weapons, apparel, and aid. The objects you highlight as favorites are given a heart icon. Simply highlight them again and change to a new favorite as you wish.
Holotapes
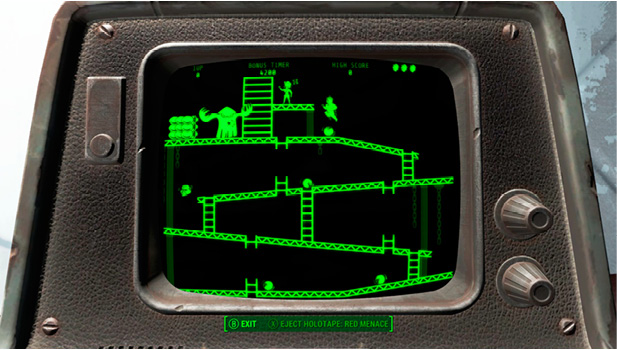
A classic Holotape Game; one is found in Vault 111, and the others are free in every copy of RobCo Fun! Magazine.
Remember your Pip-Boy (and terminals) can play most Holotapes, which usually have audio recordings on them. Certain rare Holotapes have some classic video games to play. Have you found all five? You will if you check the Radio chapter of this guide.
Flashlights
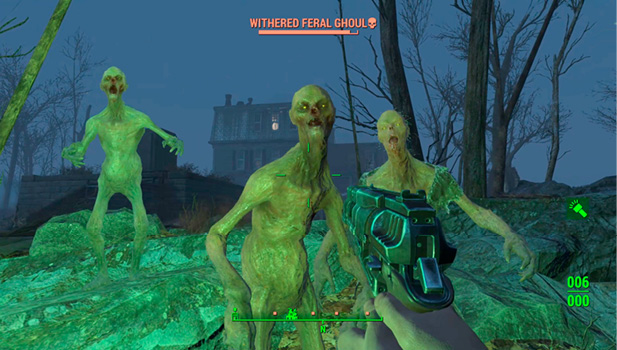
Employ the flashlight while in the dark, and without any subtlety to your exploration.
Remember your Pip-Boy, certain mining helmets, and Power Armor all have flashlight capabilities for adventuring in dark and gloomy locations. Though you’re more easily spotted (making this a less-than-ideal plan for the stealth expert), you’re far less likely to get turned around, miss loot or foes, or remain in the dark for long.
Practice Makes Perfect
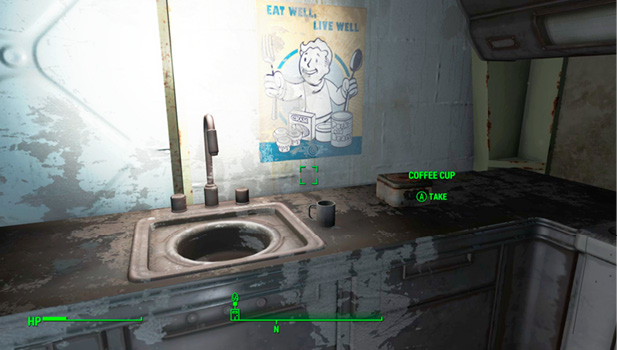
Activate is a ubiquitous command that helps you complete tasks, from inspecting a loot trunk to the trousers of the recently deceased. Mostly it is used to open doors and access terminals.
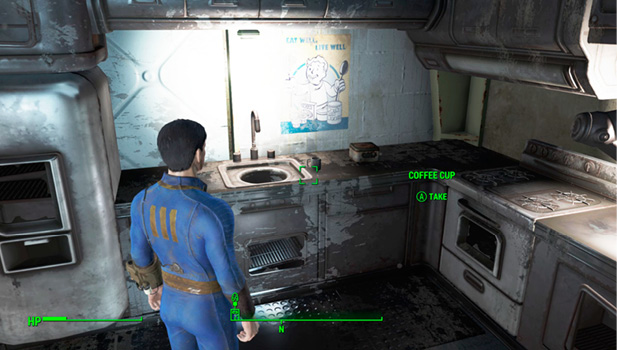
Though strange to have an out-of-body experience, changing your point of view allows for greater peripheral vision.
You may have woken from a period of enforced isolation. It is normal to feel a little light-headed and groggy. As your coordination returns, it is worth remembering the basic maneuvers you took for granted. Why not stay in the relative safety of Vault 111 and rid the corridors of the minor Radroach infestation while you familiarize yourself with the most basic of passive controls?
Activate
Whether you’re inspecting the contents of a desk, unlocking a door, activating a terminal, or disarming a trap, use this function.
Reload or Transfer
If you want to transfer a large amount of loot, this is the function to complete. Otherwise, this reloads or holsters your weapon (if held).
Toggle POV
Need to see behind you? That’s a good idea, as you’re able to enhance your peripheral vision quite considerably, while at the expense of completing more complex and pinpoint-accurate maneuvers (especially jumping).
Jump
Leaping over low walls and across gaps and climbing rocky slopes is made not only more easy, but also actually possible if you jump.
Pausing
Need to take a breather? Don’t worry, we all need a little time to pause, check the Main menu, and perhaps look at the large number of incredibly astute hints in the Help menu.