
Prima Games eGuides
primagames.com Browse Redeem a code Help
Fallout 4 eGuide
Sign in My Guides

Sign in or create an account

We'll email you a link. No password needed, and if you don't have an account yet, the link makes one.

By creating an account or signing in, you agree to our Terms of Service and Privacy Policy.

Have a password?

Had an account on the old eGuides site, or a code from a printed guide? Help and troubleshooting

Sign in with a password

By signing in, you agree to our Terms of Service and Privacy Policy.

Check your email

A sign-in link is on its way. It works once and expires in 15 minutes. Open it and you're in, with an account if you didn't already have one.

Contents

  • Changelog
    • Updates
  • STAT
    • Status
      • Introduction: Training for the Commonwealth
      • The Pip-Boy: A RobCo Industries Technological Wonder!
      • Social Status: How to React If the Worst Happens
    • S.P.E.C.I.A.L.
      • What Makes You S.P.E.C.I.A.L.?
    • Perks
      • Vault Life Has Its Perks!
      • Strength-Related Perks
      • Perception-Related Perks
      • Endurance-Related Perks
      • Charisma-Related Perks
      • Intelligence-Related Perks
      • Agility-Related Perks
      • Luck-Related Perks
      • Other Perks: Resting
      • Companion Perks
      • Required Reading (Magazine) Perks
      • Perk Availability by Level
      • Far Harbor DLC Perks
      • You're Not Alone: Companions
      • Crafting
    • Combat
      • Overview
      • Groups, Gangs, and Factions
      • Creatures of the Commonwealth
  • INV
    • Weapons
      • Choosing a Weapon
    • Guns
      • Weapon Frames
      • Non-Automatic Pistols
      • Non-Automatic Rifles
      • Automatic Weapons
      • Heavy Guns
    • Melee Weapons and Punching Weapons
      • Overview
      • Melee Weapons
      • Punching Weapons
    • Explosives
      • Overview
      • Crafted Explosives
      • Faction Explosives
      • Miscellaneous Explosives
    • Legendary Weapon Effects
    • Unique Weapons
    • Apparel
      • Overview
      • Clothing
      • Outfits
      • Armor Pieces
      • Headgear
      • Accessories
      • Power Armor
      • Specialty Items
      • Legendary Armor Effects
      • Unique Apparel
    • Aid
      • Overview
      • Food
      • Alcohol
      • Chems
      • Syringer Ammo
      • Stealth Boys
    • Miscellaneous
      • Overview
      • Utility Items
      • Perks and Bonuses
      • Redeemables
      • Access and Information
      • Quest Items
      • Knickknacks
    • Junk
      • Overview
      • Base Components
      • Junk Items
    • Mods
      • Overview
      • Weapon Mods
      • Armor Mods
      • Power Armor Mods
    • Mods Charts
      • Melee Mods
      • Gun Mods
      • Armor Mods
      • Power Armor Mods
    • Ammo
      • Overview
  • DATA
    • Introduction: Helping Others to Help Yourself
    • Questing the Vault-Tec Way
    • Quests: A Big Table
    • Main Quest: Act I
      • War Never Changes
      • Out of Time
      • Jewel of the Commonwealth
      • Unlikely Valentine
      • Getting a Clue
      • Reunions
    • Main Quest: Act II
      • Dangerous Minds
      • Shattered
      • The Glowing Sea
      • Hunter/Hunted
      • The Molecular Level
      • Institutionalized
    • The Institute Quests
      • Overview
      • Synth Retention
      • The Battle of Bunker Hill
      • Mankind Redefined
      • Mass Fusion
      • Pinned
      • Powering Up
      • End of the Line
      • Airship Down
      • Nuclear Family
    • The Institute Miscellaneous Quests
      • Overview
      • Building a Better Crop
      • Plugging a Leak
      • A House Divided
    • The Institute Radiant Quests
      • Overview
      • Pest Control
      • Hypothesis
      • Appropriation
      • Reclamation
      • Political Leanings
    • Brotherhood of Steel Quests
      • Overview
      • Reveille
      • Fire Support
      • Call to Arms
      • Semper Invicta
      • Shadow of Steel
      • Tour of Duty
      • Show No Mercy
      • From Within
      • Outside the Wire
      • Liberty Reprimed
      • Blind Betrayal
      • Tactical Thinking
      • Spoils of War
      • Ad Victoriam
      • The Nuclear Option (Brotherhood of Steel)
      • A New Dawn
    • Brotherhood of Steel: Miscellaneous Quests
      • Overview
      • The Lost Patrol
      • Duty or Dishonor
      • A Loose End
      • Getting Technical
      • Blood Bank
      • Reactor Coolant
    • Brotherhood of Steel Radiant Quests
      • Overview
      • Cleansing the Commonwealth
      • Quartermastery
      • Leading by Example
      • Learning Curve
      • Feeding the Troops
    • The Railroad Quests
      • Overview
      • Road to Freedom
      • Tradecraft
      • Underground Undercover
      • Operation Ticonderoga
      • Precipice of War
      • Rockets' Red Glare
      • The Nuclear Option (The Railroad)
      • Burning Cover
    • The Railroad Miscellaneous Quests
      • Overview
      • Boston After Dark
      • Memory Interrupted
    • The Railroad Radiant Quests
      • Overview
      • Butcher's Bill 1
      • Butcher's Bill 2
      • Mercer Safehouse
      • Jackpot
      • Concierge
      • Weathervane
      • Randolph Safehouse
      • Variable Removal
      • To the Mattresses
      • Lost Soul
      • A Clean Equation
      • High Ground
    • The Minutemen Quests
      • Overview
      • When Freedom Calls
      • Sanctuary
      • The Sight
      • Taking Independence
      • Old Guns
      • Inside Job
      • Form Ranks
      • Defend the Castle
      • The Nuclear Option (the Minutemen)
      • With Our Powers Combined
    • The Minutemen Radiant Quests: Recruitment
      • Overview
      • The First Step and Raider Troubles
      • Kidnapping
      • Abernathy Farm: Retribution
      • Greenskins
      • Clearing the Way
      • Taking Point
      • Ghoul Problem
      • Rogue Courser
      • Resettle Refugees
    • The Minutemen Radiant Quests: Ownership
      • Overview
      • Defend a Settlement or Defend Artillery at a Settlement
      • Stop the Raiding
      • Kidnapped Trader
      • Water, Food, or Power
      • Suspected Synth
    • Side Quests
      • Overview
      • Benign Intervention
      • The Big Dig
      • Confidence Man
      • Curtain Call
      • Miscellaneous: Detective Case Files
      • Detective Case Files: The Disappearing Act
      • Detective Case Files: The Gilded Grasshopper
      • Detective Case Files: Long Time Coming
      • Diamond City Blues
      • The Devil's Due
      • Emergent Behavior
      • Here There Be Monsters
      • Human Error
      • Kid in a Fridge
      • Last Voyage of the USS Constitution
      • Long Road Ahead
      • The Secret of Cabot House: Special Delivery
      • The Secret of Cabot House: Emogene Takes a Lover
      • The Secret of Cabot House
      • The Silver Shroud
      • Vault 81 and Hole in the Wall
    • Random Encounters
      • The Commonwealth: Not as Desolate as First Postulated
      • Static Encounters
      • Fluid Encounters
      • General Encounters
      • Campsite Encounters
      • Animosity Encounters
      • Treasure Hunt Encounters
      • Chokepoint Encounters
      • Companion Encounters
    • Workshops
      • Workshop Settlements
      • The Workshop Items
      • Managing Settlements
  • MAP
    • Location Types
    • Map Legends
    • Area Statistics
    • The Commonwealth: World Map
    • Greater Boston Neighborhoods
    • Zone 1: Lexington and Northwest Commonwealth
      • Overview
      • Primary Locations
        • [1.01] Vault 111
        • [1.02] Sanctuary
        • [1.03] Red Rocket Truck Stop
        • [1.04] Robotics Disposal Ground
        • [1.05] Thicket Excavations
        • [1.06] USAF Satellite Station Olivia
        • [1.07] Tenpines Bluff
        • [1.08] Ranger Cabin
        • [1.09] Wicked Shipping Fleet Lockup
        • [1.10] Abernathy Farm
        • [1.11] Concord (Concord Township)
        • [1.12] Museum of Freedom (Concord Township)
        • [1.13] Bedford Station
        • [1.14] Gorkski Cabin
        • [1.15] Drumlin Diner
        • [1.16] Starlight Drive-In
        • [1.17] Lonely Chapel
        • [1.18] Sunshine Tidings Co-op
        • [1.19] Walden Pond
        • [1.20] Mystic Pines (Lexington Township)
        • [1.21] Super Duper Mart (Lexington Township)
        • [1.22] Lexington* (Lexington Township)
        • [1.23] Lexington Apartments (Lexington Township)
      • Secondary Locations
    • Zone 2: North Central Commonwealth
      • Overview
      • Primary Locations
        • [2.01] Outpost Zimonja
        • [2.02] Lake Quannapowitt
        • [2.03] Radio Tower 3SM-U81
        • [2.04] Recon Bunker Theta
        • [2.05] Lynn Woods
        • [2.06] Parsons Creamery
        • [2.07] Parsons State Insane Asylum
        • [2.08] Rotten Landfill
        • [2.09] Wildwood Cemetery
        • [2.10] Skylanes Flight 1981
        • [2.11] General Atomics Galleria
        • [2.12] Dark Hollow Pond
        • [2.13] Mass Fusion Containment Shed
        • [2.14] Old Gullet Sinkhole
        • [2.15] Greentop Nursery
        • [2.16] Breakheart Banks
        • [2.17] Listening Post Bravo
        • [2.18] The Slog
        • [2.19] Saugus Ironworks
        • [2.20-2.24] Malden Township
        • [2.20] Medford Memorial Hospital (Malden Township)
        • [2.21] Malden Center (Malden Township)
        • [2.22] Slocums Joe Corporate HQ (Malden Township)
        • [2.23] Malden Middle School (Vault 75) (Malden Township)
        • [2.24] Med-Tek Research (Malden Township)
        • Secondary Locations (Malden Township )
        • [2.25] Covenant
        • [2.26] Taffington Boat House
        • [2.27] Tucker Memorial Bridge
        • [2.28] Poseidon Energy Turbine #18-F
        • [2.29] West Everett Estates
        • [2.30] Irish Pride Industries Shipyard
        • [2.31] Relay Tower OMC-810
        • [2.32] National Guard Training Yard
        • [2.33] County Crossing
        • [2.34] Revere Satellite Array
        • [2.35] Finch Farm
      • Secondary Locations
    • Zone 3: Western Commonwealth
      • Overview
      • Primary Locations
        • [3.01] Federal Ration Stockpile
        • [3.02] ArcJet Systems
        • [3.03] Rocky Narrows Park
        • [3.04] Graygarden
        • [3.05] Jalbert Brothers Disposal
        • [3.06] Corvega Assembly Plant
        • [3.07] Mass Gravel & Sand
        • [3.08] Wattz Consumer Electronics
        • [3.09] Fort Hagen Satellite Array (Fort Hagen Township)
        • [3.10] Relay Tower 0BB-915 (Fort Hagen Township)
        • [3.11] Fort Hagen Filling Station (Fort Hagen Township)
        • [3.12] Fort Hagen (Fort Hagen Township)
        • [3.13] Greater Mass Blood Clinic (Fort Hagen Township)
        • [3.14] Boston Mayoral Shelter
        • [3.15] Fiddlers Green Trailer Estates
        • [3.16] Weston Water Treatment Plant
        • [3.17] Forest Grove Marsh
        • [3.18] Relay Tower 1DL-109
        • [3.19] Oberland Station
        • [3.20] Beantown Brewery
        • [3.21] Mass Pike Interchange
        • [3.22] Vault 81
        • [3.23] Chestnut Hillock Reservoir
      • Secondary Locations
    • Zone 4: Coastal Commonwealth
      • Overview
      • Primary Locations
        • [4.01] Coastal Cottage
        • [4.02] Mahkra Fishpacking
        • [4.03] Dunwich Borers
        • [4.04] Hugos Hole
        • [4.05] Museum of Witchcraft (Salem Township)
        • [4.06] Sandy Coves Convalescent Home (Salem Township)
        • [4.07] Salem (Salem Township)
        • [4.08] Rook Family House (Salem Township)
        • [4.09] Crater House (Salem Township)
        • [4.10] Hub City Auto Wreckers
        • [4.11] Lynn Pier Parking
        • [4.12] Longneck Lukowskis Cannery
        • [4.13] Kingsport Lighthouse
        • [4.14] Reeb Marina
        • [4.15] Gibson Point Pier
        • [4.16] Revere Beach Station
        • [4.17] Libertalia
        • [4.18] Nahant Wharf
        • [4.19] Nahant Sheriffs Department
        • [4.20] Croup Manor
        • [4.21] Nahant Chapel
        • [4.22] Nahant Oceanological Society
        • [4.23] East Boston Police Station
        • [4.24] East Boston Preparatory School
        • [4.25] Easy City Downs
        • [4.26] Nordhagen Beach
        • [4.27] Boston Airport
        • [4.28] Prydwen
        • [4.29] Fort Strong
      • Secondary Locations
    • Zone 5: Natick and the Glowing Sea
      • Overview
      • Primary Locations
        • [5.01] Poseidon Reservoir
        • [5.02] Roadside Pines Motel (Natick Township)
        • [5.03] Natick Banks (Natick Township)
        • [5.04] Natick Police Department (Natick Township)
        • [5.05] Lake Cochituate
        • [5.06] Mass Fusion Disposal Site
        • [5.07] Electrical Hobbyists Club
        • [5.08] WRVR Broadcast Station
        • [5.09] Federal Supply Cache 84NE
        • [5.10] Robotics Pioneer Park
        • [5.11] Scrap Palace
        • [5.12] Cutler Bend
        • [5.13] Edge of the Glowing Sea
        • [5.14] Waypoint Echo
        • [5.15] Vault 95
        • [5.16] Somerville Place
        • [5.17] Forgotten Church
        • [5.18] Abandoned Shack
        • [5.19] Atlantic Offices
        • [5.20] Capsized Factory
        • [5.21] Cave (Red Rocket Filling Station)
        • [5.22] Decayed Reactor Site
        • [5.23] Decrepit Factory
        • [5.24] Crater of Atom
        • [5.25] Cave (Super Duper Mart)
        • [5.26] Vertibird Wreckage
        • [5.27] Hopesmarch Pentecostal Church
        • [5.28] Relay Tower 0DB-521
        • [5.29] Rocky Cave (Virgil's Laboratory)
        • [5.30] O'Neill Family Manufacturing
        • [5.31] Sentinel Site
        • [5.32] Skylanes Flight 1665
      • Secondary Locations
    • Zone 6: Quincy and Southern Commonwealth
      • Overview
      • Primary Locations
        • [6.01] Westing Estate
        • [6.02] Coast Guard Pier
        • [6.03] Mass Pike Tunnel West
        • [6.04] Mass Pike Tunnel East
        • [6.05] Boston Police Rationing Site
        • [6.06] NH&M Freight Depot
        • [6.07] Fairline Hill Estates
        • [6.08] Relay Tower 0SC-527
        • [6.09] Big Johns Salvage
        • [6.10] South Boston Military Checkpoint
        • [6.11] Egret Tours Marina
        • [6.12-6.15] West Roxbury Township
        • [6.12] Fallons Department Store (West Roxbury Township)
        • [6.13] Milton General Hospital (West Roxbury Township)
        • [6.14] West Roxbury Station (West Roxbury Township)
        • [6.15] Shaw High School (West Roxbury Township)
        • Secondary Locations (West Roxbury Township)
        • [6.16] Jamaica Plain
        • [6.17] Gunners Plaza
        • [6.18] Hyde Park
        • [6.19] Suffolk County Charter School
        • [6.20] Murkwater Construction Site
        • [6.21] Quincy Quarries
        • [6.22] Neponset Park
        • [6.23] Wilson Atomatoys Factory
        • [6.24-6.26] (Quincy Township)
        • [6.24] Quincy Ruins (Quincy Township)
        • [6.25] Quincy Police Station (Quincy Township)
        • [6.26] Peabody House (Quincy Township)
        • [6.27] Atom Cats Garage
        • [6.28] Poseidon Energy
        • [6.29] Warwick Homestead
        • [6.30] Wreck of the FMS Northern Star
        • [6.31] Spectacle Island
      • Secondary Locations
    • Zone 7: Neighborhood: Cambridge
      • Overview
      • Primary Locations
        • [7.01] College Square
        • [7.02] Cambridge Police Station
        • [7.03] Collegiate Administration Building
        • [7.04] Fraternal Post 115
        • [7.05] Cambridge Campus Diner
        • [7.06] Campus Law Offices
        • [7.07] Kendall Hospital
        • [7.08] Cambridge Polymer Labs
        • [7.09] C.I.T. Ruins
        • [7.10] The Institute
        • [7.11] Greenetech Genetics
        • [7.12] Cambridge Crater
        • [7.13] Monsignor Plaza
      • Secondary Locations
    • Zone 8: Neighborhood: Charlestown
      • Overview
      • Primary Locations
        • [8.01] BADTFL Regional Office
        • [8.02] Bunker Hill
        • Side Quests: Freeform Activities: Bunker Hill
        • [8.03] U.S.S. Constitution
      • Secondary Locations
    • Zone 9: Neighborhood: The Fens
      • Overview
      • Primary Locations
        • [9.01] Wreck of the USS Riptide
        • [9.02] Hangman's Alley
        • [9.03] Back Street Apparel
        • [9.04] Police Precinct 8
        • [9.05] Parkview Apartments
        • [9.06] Fens Street Sewer
        • [9.07] Diamond City
        • [9.08] Diamond City Market
        • [9.09] Home Plate
        • Side Quests: Freeform Activities: Diamond City
        • [9.10] Hardware Town
      • Secondary Locations
    • Zone 10: Neighborhood: Esplanade
      • Overview
      • Primary Locations
        • [10.01] Charles View Amphitheater
        • [10.02] HalluciGen, Inc.
      • Secondary Locations
    • Zone 11: Neighborhood: Back Bay
      • Overview
      • Primary Locations
        • [11.01] Boston Public Library
        • [11.02] Trinity Plaza
        • [11.03] Hubris Comics
        • [11.04] Vault 114 (Exit)
        • [11.05] Trinity Tower
        • [11.06] Dartmouth Professional Building
        • [11.07] Layton Towers
        • [11.08] Wilson Atomatoys Corporate HQ
      • Secondary Locations
    • Zone 12: Neighborhood: Beacon Hill
      • Overview
      • Primary Locations
        • [12.01] Vault-Tec Regional HQ
        • [12.02] Boston Bugle Building
        • [12.03] Cabot House
      • Secondary Locations
    • Zone 13: Neighborhood: North End
      • Overview
      • Primary Locations
        • [13.01] Pickman Gallery
        • [13.02] Old North Church
      • Secondary Locations
    • Zone 14: Neighborhood: Boston Common
      • Overview
      • Primary Locations
        • [14.01] Massachusetts State House
        • [14.02] Old Granary Burying Ground
        • [14.03] Swan's Pond
        • [14.04] Boston Common
        • [14.05] Park Street Station (Vault 114)
        • [14.06] Boylston Club
      • Secondary Locations
    • Zone 15: Neighborhood: Financial District
      • Overview
      • Primary Locations
        • [15.01] Mass Fusion Building
        • [15.02] Old Corner Bookstore
        • [15.03] Haymarket Mall
        • [15.04] Garden Terrace
        • [15.05] Faneuil Hall
        • [15.06] Goodneighbor
        • Side Quests: Freeform Activities: Goodneighbor
        • [15.07] Fallen Skybridge
        • [15.08] Postal Square
      • Secondary Locations
    • Zone 16: Neighborhood: Theater District
      • Overview
      • Primary Locations
        • [16.01] Combat Zone
        • [16.02] Medical Center Metro
        • [16.03] Mass Bay Medical Center
        • [16.04] D.B. Technical High School
        • [16.05] Hester's Consumer Robotics
      • Secondary Locations
    • Zone 17: Neighborhood: Boston Harbor (Waterfront)
      • Overview
      • Primary Locations
        • [17.01] Custom House Tower
        • [17.02] The Shamrock Taphouse
        • [17.03] Harbormaster Hotel
        • [17.04] Yangtze
      • Secondary Locations
    • Zone 18: Neighborhood: South Boston
      • Overview
      • Primary Locations
        • [18.01] Four Leaf Fishpacking Plant
        • [18.02] General Atomics Factory
        • [18.03] Andrew Station
        • [18.04] South Boston Police Department
        • [18.05] Gwinnett Brewery
        • [18.06] The Gwinnett Restaurant
        • [18.07] South Boston High School
        • [18.08] The Castle
        • [18.09] University Point
      • Secondary Locations
  • RADIO
    • A Collection of Appendices
    • Appendix I: Achievements and Trophies
    • Appendix II: Bobbleheads
    • Appendix III: Required Reading: Magazines
    • Appendix IV: Unique or Exceptional Items
    • Appendix V: The Commonwealth Collection
    • Credits
  • PIP-BOY MAPS
    • World Map
    • Boston Neighborhoods
    • Zone 1: Lexington & Northwest Commonwealth
      • [1.01] Vault 111
      • [1.02] Sanctuary
      • [1.05] Thicket Excavations
      • [1.06] USAF Satellite Station Olivia
      • [1.11A] Concord Township
      • [1.11B] Concord Civic Access
      • [1.12] Concord Museum of Freedom
      • [1.19] Walden Pond
      • [1.21] Super Duper Mart
      • [1.22A] Lexington
      • [1.22B] Lexington The Switchboard
    • Zone 2: Medford & North Central Commonwealth
      • [2.07A] Parson's State Insane Asylum (Exterior)
      • [2.07B] Parson's State Administration (Interior)
      • [2.07C] Parsons State Insane Asylum (Interior)
      • [2.07D] Parsons State Basement (Interior)
      • [2.11] General Atomics Galleria Exterior
      • [2.16] Breakheart Banks (Exterior)
      • [2.19A] Saugus Ironworks (Exterior)
      • [2.19B] Saugus Ironworks (Interior)
      • [2.19C] Saugus Blast Furnace (Interior)
      • [2.20–24] Malden Township (Exterior) And Surroundings
      • [2.20] Medford Memorial Hospital (Interior)
      • [2.21] Malden Center (Interior)
      • [2.23] Vault 75 (Interior)
      • [2.24A] Med-tek Research (Interior)
      • [2.24A] Med-tek Sub-levels (Interior)
      • [2.25A] Covenant (Exterior)
      • [2.25B] Sewer (Interior)
      • [2.28] Poseidon Energy Turbine #18-F (Exterior)
      • [2.29] West Everett Estates (Exterior)
      • [2.30A] Irish Pride Industries Shipyard (Exterior)
      • [2.30B] Irish Pride Industries Shipyard (Interior)
      • [2.32A] National Guard Training Yard (Exterior)
      • [2.32B] National Guard Recruitment Office (Interior)
      • [2.32C] National Guard Barracks (Interior)
      • [2.32D] National Guard Armory (Interior)
      • [2.34] Revere Satellite Array (Exterior)
    • Zone 3: Western Commonwealth
      • [3.01A] Federal Ration Stockpile (Exterior)
      • [3.01B] Federal Ration Stockpile (Interior)
      • [3.02] Arcjet Systems (Exterior)
      • [3.02A] Arcjet Systems (Interior)
      • [3.02B] Arcjet Engine Core (Interior)
      • [3.06A] Corvega Assembly Plant (Exterior)
      • [3.06B] Corvega Assembly Plant (Interior)
      • [3.08] Wattz Electronics (Interior)
      • [3.11] Fort Hagen (Exterior)
      • [3.12A] Fort Hagen (Interior)
      • [3.12B] Fort Hagen Command Center (Interior)
      • [3.14] Boston Mayoral Shelter (Interior)
      • [3.15] Fiddler’s Green Trailer Estates (Exterior)
      • [3.16A] Weston Water Treatment Plant (Exterior)
      • [3.16B] Weston Water Treatment Plant (Interior)
      • [3.17] Forest Grove Marsh (Exterior)
      • [3.20] Beantown Brewery (Interior)
      • [3.21] Mass Pike Interchange (Exterior)
      • [3.22A] Vault 81 Entry (Interior)
      • [3.22B] Vault 81 (Interior)
      • [3.22C] Secret Vault 81 (Interior)
    • Zone 4: Coastal Commonwealth
      • [4.02A] Mahkra Fishpacking (Exterior)
      • [4.02B] Mahkra Fishpacking (Interior)
      • [4.03A] Dunwich Borers (Exterior)
      • [4.03B] Dunwich Borers (Interior)
      • [4.05] Museum Of Witchcraft (Interior)
      • [4.06] Sandy Coves Convalescent Home (Interior)
      • [4.07] Salem (Exterior)
      • [4.10] Hub City Auto Wreckers (Exterior)
      • [4.12A] Longneck Lukowski’s Cannery (Exterior)
      • [4.12B] Longneck Lukowski’s Cannery (Interior)
      • [4.16A] Revere Beach Station (Exterior)
      • [4.16B] Revere Beach Station (Interior)
      • [4.17] Libertalia (Exterior)
      • [4.18] Nahant (Township)
      • [4.20A] Croup Manor (Exterior)
      • [4.20B] Croup Manor Basement (Interior)
      • [4.22A] Nahant Oceanological Society (Interior)
      • [4.22B] Nahant Oceanological Research Lab (Interior)
      • [4.24A] East Boston Preparatory School (Exterior)
      • [4.24B] East Boston Preparatory School (Interior)
      • [4.25] Easy City Downs (Exterior)
      • [4.27A] Boston Airport (Exterior)
      • [4.27B] Boston Airport Ruins (Interior)
      • [4.28A] Prydwen Main Deck (Interior)
      • [4.28B] Prydwen Command Deck (Interior)
      • [4.29A] Fort Strong (Exterior)
      • [4.29B] Fort Strong Armory (Interior)
      • [4.29C] Fort Strong Sublevel (Interior)
    • Zone 5: Natick & The Glowing Sea
      • [5.01A] Poseidon Reservoir (Exterior)
      • [5.01B] Poseidon Reservoir (Interior)
      • [5.02] Natick (township)
      • [5.08] WRVR Broadcast Center (Interior)
      • [5.12] Cutler Bend (Exterior)
      • [5.15] Vault 95 (Interior)
      • [5.18] Bunker (Interior)
      • [5.25] Parking Garage (Interior)
      • [5.29] Virgil’s Laboratory (Interior)
      • [5.31] Sentinel Site Prescott (Interior)
    • Zone 6: Quincy & Southern Commonwealth
      • [6.02] Coast Guard Pier (Exterior)
      • [6.04] Mass Pike Tunnel (Interior)
      • [6.05] Boston Police Rationing Site
      • [6.09] Big John’s Salvage (Exterior)
      • [6.11] Egret Tours Marina (Exterior)
      • [6.12A] West Roxbury (Township)
      • [6.12B] Fallon’s Department Store (Interior)
      • [6.13] Milton General Hospital (Interior)
      • [6.14] West Roxbury Station (Interior)
      • [6.15] Shaw High School (Interior)
      • [6.16A] Jamaica Plain (Exterior)
      • [6.16B] Jamaica Plain Town Hall Basement (Interior)
      • [6.17A] Gunners Plaza (Exterior)
      • [6.17B] Gunners Plaza (Interior)
      • [6.17C] Gunners Plaza Basement (Interior)
      • [6.18] Hyde Park (Exterior)
      • [6.21] Quincy Quarries (Exterior)
      • [6.19] Suffolk County Charter School (Interior)
      • [6.23] Wilson Atomatoys Factory (Exterior And Interior)
      • [6.24-6.26] Quincy Township (Exterior)
      • [6.27] Atom Cats Garage (Exterior)
      • [6.28A] Poseidon Energy (Exterior)
      • [6.28B] Poseidon Energy Sublevels (Interior)
      • [6.28C] Poseidon Energy (Interior)
      • [6.30] Wreck Of The FMS Northern Star (Exterior)
    • Zone 7: Neighborhood: Cambridge
      • [7.01A] College Square (Exterior)
      • [7.01B] College Square Station (Interior)
      • [7.02A] Cambridge Police Station (Exterior)
      • [7.02B] Cambridge Police Station (Interior)
      • [7.04] Fraternal Post 115 (Interior)
      • [7.07B] Kendall Hospital (Interior)
      • [7.08] Cambridge Polymer Labs (Interior)
      • [7.09] C.I.T. Rotunda (Interior)
      • [7.10A] Institute Concourse (Interior)
      • [7.10B] Institute Robotics (Interior)
      • [7.10C] Institute Bioscience (Interior)
      • [7.10D] Institute Advanced Systems (Interior)
      • [7.10E] Institute SRB (Interior)
      • [7.10F] Institute Sublevel 21-D (Interior)
      • [7.10G] FEV Lab (Interior)
      • [7.10H] Old Robotics (Interior)
      • [7.10I] Institute Reactor (Interior)
      • [7.10J] Public Works Maintenance Area (Interior)
      • [7.11A] Greenetech Genetics (Bottom Floors Interior)
      • [7.11B] Greenetech Genetics (Top Floors Interior)
      • [7.13] Monsignor Plaza (Interior)
      • [7.18] Ticonderoga (Interior)
    • Zone 8: Neighborhood: Charlestown
      • [8.01] BADTFL Regional Office (Interior)
      • [8.02A] Bunker Hill (Exterior)
      • [8.02B] Utility Basement (Interior)
      • [8.03A] U.S.S. Constitution (Below Deck)
    • Zone 9: Neighborhood: The Fens
      • [9.03] Back Street Apparel (Interior)
      • [9.05A] Parkview Apartments (Exterior)
      • [9.05B] Apartment Building (Interior)
      • [9.05C] Parkview Lounge (Interior)
      • [9.06] Fens Street Sewer (Interior)
      • [9.08] Diamond City Market
      • [9.10] Hardware Town (Interior)
    • Zone 10: Neighborhood: Esplanade
      • [10.02B] Hallucigen, Inc. (Interior)
    • Zone 11: Neighborhood: Back Bay
      • [11.01A] Copley Station (Interior)
      • [11.01B] Boston Public Library (Interior)
      • [11.02] Trinity Church (Interior)
      • [11.03] Hubris Comics (Interior)
      • [11.05A] Trinity Tower (Exterior)
      • [11.05B] Trinity Tower Mid-Level (Interior)
      • [11.07] Layton Towers (Interior)
      • [11.08] Wilson Atomatoys Corporate HQ (Interior)
    • Zone 12: Neighborhood: Beacon Hill
      • [12.01] Vault-Tec Regional HQ
      • [12.02] The Boston Bugle (Interior)
      • [12.03] Cabot House (Interior)
    • Zone 13: Neighborhood: North End
      • [13.01] Pickman Gallery (Interior)
      • [13.02A] Old North Church (Interior)
      • [13.02B] Railroad Headquarters (Interior)
      • [13.02C] Railroad HQ Escape Tunnel (Interior)
    • Zone 14: Neighborhood: Boston Common
      • [14.01] Massachusetts State House (Interior)
      • [14.05A] Park Street Station (Interior)
      • [14.05B] Vault 114 (Interior)
      • [14.06] The Boylston Club (Interior)
    • Zone 15: Neighborhood: Financial District
      • [15.01A] Mass Fusion (Roof Exterior)
      • [15.01B] Mass Fusion (Tower Interior)
      • [15.01C] Mass Fusion Reactor Level
      • [15.02] Old Corner Bookstore (Interior)
      • [15.03] Haymarket Mall (Interior)
      • [15.04] Commonwealth Bank
      • [15.05] Faneuil Hall (Interior)
      • [15.06A] Goodneighbor (Exterior)
      • [15.06B] Old State House (Interior)
      • [15.06C] The Third Rail (Interior)
      • [15.06D] The Memory Den (Interior)
      • [15.06E] Hotel Rexford (Interior)
      • [15.06F] Bobbi’s Place (Interior)
      • [15.06G] The Big Dig (Interior)
      • [15.07A] Fallen Sky Bridge (Exterior)
      • [15.07B] Pinnacle High-Rise (Ruined Skyscraper) (Interior)
      • [15.08A] Postal Square (Exterior)
      • [15.08B] Joe’s Spuckies (Interior)
      • [SEC 15.01] Commonwealth Bank (Interior)
      • [SEC 15.14] Water Street Apartments (Interior)
    • Zone 16: Neighborhood: Theater District
      • [16.01] Combat Zone (Interior)
      • [16.02] Medical Center Station (Interior)
      • [16.03A] Mass Bay Medical Center (Interior)
      • [16.03B] Mass Bay Medical Radiology (Interior)
      • [16.04] D.B. Technical High School (Interior)
      • [16.05] Hester’s Consumer Robotics (Interior)
    • Zone 17: Neighborhood: Boston Harbor (Waterfront)
      • [17.02] The Shamrock Taphouse (Interior)
      • [17.04] Yangtze (Interior)
    • Zone 18: Neighborhood: South Boston
      • [18.01A] Four Leaf Fishpacking Plant (Exterior)
      • [18.01B] Four Leaf Fishpacking Plant (Interior)
      • [18.01C] Marowski’s Chem Lab (Interior)
      • [18.02A] General Atomics Factory (Exterior)
      • [18.02B] General Atomics Factory (Interior)
      • [18.03B] Andrew Station (Interior)
      • [18.05B] Main Gwinnett Brewery (Interior)
      • [18.06] Gwinnett Restaurant (Interior)
      • [18.08A] The Castle (Exterior)
      • [18.08B] The Castle Tunnels (Interior)
      • [18.09A] University Point (Exterior)
      • [18.09B] University Credit Union (Interior)
      • [18.09C] University Point] Sedgwick Hall (Interior)
    • Far Harbor
    • Nuka World
  • DLC Automatron
    • Overview
      • Getting Started
      • Outfits
      • Armor Pieces
      • Headgear
      • Unique Apparel
      • Aid
      • Misc
      • Mods
      • Robot Mods
    • Automatron Main Quests
      • Mechanical Menace
      • A New Threat
      • Headhunting
      • Restoring Order
    • Automatron Radiant Quests
      • Rogue Robot
      • Robotic Reconnaissance*
  • DLC Wasteland Workshop
    • Overview
    • Items
      • Structures
      • Decorations
      • Power
      • Defense
      • Resources
      • Cages
    • Cages
      • Overview
      • Trapping for Fun and Profit
      • Creature Types
      • Possible Captives
    • Weapons
      • Overview
      • Non-Automatic Pistols
      • Non-Automatic Rifles
      • Automatic Weapons
      • Melee Weapons
      • Unique Weapons
    • Arena
      • Arena Battles
      • Arena Construction
      • Setting the Stage
  • DLC Far Harbor
    • Overview
      • Getting Started
      • Factions
      • New Companion
      • Perks
      • Enemies
      • Weapons
      • Apparel
      • Armor
      • Miscellaneous Items
      • Junk Items
      • New Mods
      • Ammo
      • Workshops
    • Far Harbor Main Quests
      • Far from Home
      • Walk in the Park
      • Where You Belong
      • Best Left Forgotten
      • The Way Life Should Be
      • Reformation
      • Cleansing the Land
      • Close to Home
    • Far Harbor Side Quests
      • Brain Dead
      • Brain Dead, Part 2
      • Living on the Edge
      • Rite of Passage
      • The Changing Tide
      • Blood Tide
      • Safe Passage
      • Hull Breach
      • Hull Breach 2
      • Hull Breach 3
      • The Hold Out
      • Turn Back the Fog
      • The Great Hunt
    • Far Harbor Radiant Quests
      • Overview
    • Far Harbor Nucleus Quests
      • Visions in the Fog
      • What Atom Requires
      • The Heretic
      • The Trial of Brother Devin
      • Witch Hunt
      • Ablutions
    • Acadia Quests
      • Acadian Ideals
      • The Arrival
      • Hunting the Hunter
      • Data Recovery
      • The Price of Memory
    • Far Harbor Map
  • DLC Contraptions Workshop
    • Overview
    • Structures
      • Overview
      • Warehouse
      • Scaffolding
      • Boxcars
      • Elevators
      • Ball Track
    • Decorations
    • Power
    • Defense
    • Resources
  • DLC Vault-Tec Workshop
    • Getting Started
    • New Quests
    • New INV Items
    • New Locations
    • New Workshops
    • Achievements and Trophies
    • Vault-Tec Quests
      • Vault-Tec Calling
      • Better Living Underground
      • A Model Citizen
      • Explore Vault 88
      • Power to the People
      • The Watering Hole
      • Vision of the Future
      • Lady Luck
      • Overseer’s Most Wanted
    • Vault-Tec Workshop Items
      • Overview
      • Special Items
      • Structures
        • Overview
        • Vault Structures
        • Domestic Structures
        • Utility Structures
      • Wide Halls
      • Rooms
      • Atrium Pieces
      • Doors
      • Railings & Stairs
      • Supports
      • Furniture
      • Decorations
      • Power
      • Defense
      • Resources
  • DLC Nuka-World
    • Getting Started
    • Factions
    • New Companion
    • Perks
    • Enemies
    • Weapons
    • Apparel
    • Armor
    • Miscellaneous Items
    • Junk Items
    • Workshop Items and Raider Outposts
    • Nuka-World Main Quests
      • All Aboard
      • Taken for a Ride
      • An Ambitious Plan
      • Open Season
      • The Grand Tour
      • Star Control
      • High Noon at the Gulch
      • A Magical Kingdom
      • Safari Adventure
      • A World of Refreshment
      • Home Sweet Home
      • Power Play
    • Nuka-World Radiant Quests
      • Overview
      • A Goods Defense
      • A Permanent Solution
      • Cache-ing In
      • Capture
      • Claiming the Commonwealth
      • Cleaning House
      • Clear Out
      • Collaring Outside the Lines
      • Shake Down
      • Subdue
      • Taking Out the Trash
      • Under the Collar
    • Nuka-World Side Quests
      • Amoral Combat
      • Cappy in a Haystack
      • Precious Medals
      • Trip to the Stars
    • Nuka-World Map

Fallout 4 Guide › DATA › Side Quests

Diamond City Blues

1. Intimidate Henry Cooke

2. Help Paul Pembroke intimidate Henry Cooke

3. Talk to Henry Cooke

4. OR Kill Henry Cooke

5. Report back to Paul Pembroke

6. Search Cooke’s body and read his note

7. Ambush Nelson Latimer’s chem deal

8. Interrogate Trish

9. OR Kill Trish

10. Search Trish and read her note

11. Divide the spoils

12. Gain access to Marowski’s chems lab

Locations to Explore
  • The Fens (Neighborhood)
  • Diamond City
  • Colonial Taphouse
  • South Boston (Neighborhood)
  • Four Leaf Fishpacking Plant
  • Financial District (Neighborhood)
  • Goodneighbor
  • Hotel Rexford

Three to Tango

After entering the Colonial Taphouse in Diamond City (upstairs in the “fancy” part of town), you observe an argument between husband (Paul Pembroke) and wife (Darcy Pembroke) and a fight between Paul and Henry Cooke, the barkeep. Paul storms out, leaving you to chat to either Darcy or Henry. But outside, Paul asks whether you could help intimidate Cooke for him. You can:

  • Agree to help.

Charisma

(Easy, Medium) Request a reward and tell him you’ll go alone.

  • (after which either a confrontation will play out between them the next time you enter the Taphouse, or -- if you leave Diamond City before visiting the Taphouse again -- Cooke will kill Paul prior to your return).
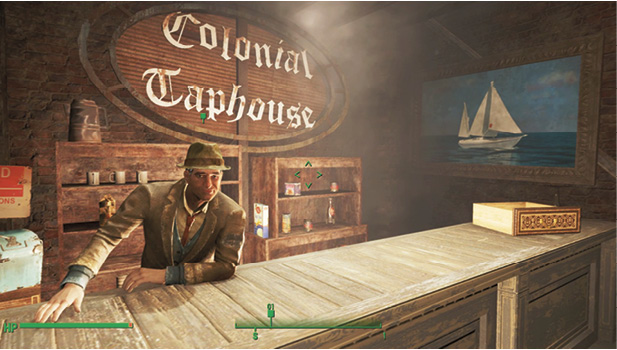
Plan A (Alone): Head up to the taphouse alone, and speak with Cooke about his infraction with the Pembrokes. Cooke feels it’s none of your business. You can:

Charisma

(Easy, Medium) Win a speech challenge (with three options) and resolve the situation peacefully (though if you fail, you are attacked).

  • Or you can say “Your move”, after which he attacks.

Plan B (with Paul): Head up to the taphouse with a seething Paul in tow. With some “muscle” behind him, Paul is more enthusiastic with his hatred for Cooke. You can egg him on or calm him down.

If the conversation ends diplomatically, Cooke tells you of a chems deal he’s involved in.

If the conversation ends in fisticuffs or worse, check his body for a note regarding a chem deal Cooke was involved in. The deal is with Nelson Latimer, a wannabe gangster. There’s a reward if you ambush Latimer at the deal spot.

The Deal Goes South

Head north to the river just west of Back Street Apparel, where Nelson’s chem deal is going down. Cooke, Paul, a companion, or no one might be with you. Nelson isn’t happy about your intrusion and the conversation ends with bullets flying.

Speak to the only survivor, a ghoul (and Nelson’s supplier) named Trish, who works for a local (and very real) gangster named Marowski. You can:

  • Agree to let her live, after which she reveals the location of a secret chems lab.
  • Remove her as a threat, searching her for a note revealing the location of a secret chems lab.
  • Promise to let her go, so she gives you a password for the terminal at the secret chems lab, allowing you easier access.

Four Leaf Security Password

Trish always tries to flee, and you can let her (though Cooke won’t let that happen if he’s with you), or gun her down (ideally after she mentions that password).

Paul Takes a Cut

If Cooke is alive at this point, he says he’s going to leave town. He’s not about to stick around and incur the wrath of the real gangster Marowski.

If Paul Pembroke is still in the picture and attended the chem deal, he’ll want you to split the spoils of the chem deal with him. He’s usually at the Dugout Inn at Diamond City. You can:

  • Split the loot 50-50.

Charisma

(Easy, Medium) Split the loot 70-30 in your favor. Or all in your favor.

  • He still wants more. Refuse, or give him 500 caps and he’ll be on his way. You’ll need to fight him if you want to keep all the loot.

If Paul Pembroke is still in the picture but you talked to Cooke alone and Paul didn’t attend the chem deal, you can inform him of the fate of Cooke, and part ways.

A Cooler of Chems and a Can of Worms

Travel southeast across town to South Boston, and find the Ghoul-infested Four Leaf Fishpacking Plant. There’s some advanced trip-wire security for a place that’s seemingly abandoned. The interior of the plant isn’t your focus (unless you enjoy mowing down living corpses). Instead, climb the exterior walkway to the roof, secure the area from any outside ferals, and locate the wall terminal on the side of the roof. You can:

  • Solve the puzzle of the tripwires by shutting them down in the correct order. Read the note from Trish to figure out the order to trip the tripwires in, so that the secret door opens.
  • (Master) Hack this impressively difficult terminal.
  • Or use the security password Trish gave you, if you didn’t immediately resort to killing her.

Once inside the lab, there are a few of Marowski’s chem lab workers who aren’t happy to see you. But the wealth of chems inside is reason enough to slay them. The quest ends. Or does it?

Marowski’s Chems

Chems and Cores at the Fishpacking Plant

Fusion Core

You might as well fully explore this plant, as there are three Fusion Cores to pick up and more chems than you can safely ingest in a week. Are you sure no one’s going to miss those chems, though?

After the Quest: The Latimer Situation

1. Kill Marowski or kill Paul Pembroke

2. Collect reward from Malcolm Latimer

About 24 hours after you dealt with Nelson Latimer at the chem ambush, his father Malcolm becomes aware of his son’s fate.

He’s close to the taphouse area of Diamond City. Try to ignore Latimer, and a few of his thugs might rough you up when you next enter Diamond City. Assuming you don’t want the entire city to turn hostile, speak with Malcolm Latimer. He lays down some options for you. You can:

  • Agree to kill Marowski after pinning the death on the gangster.
  • Agree to kill Paul Pembroke by blaming him (if Paul is still alive).
  • End the conversation at an impasse, and expect Latimer to send thugs to thwart you.
  • End the conversation with Malcolm furious at you; paying him off or killing him are your only two options.

Assuming you ended the talk diplomatically, find your target, slay them (which solves the “Marowski situation” if this gangster is targeted but causes subsequent problems if Paul is slain) and claim your reward.

Bottlecaps (50+)

After the Quest: The Marowski Situation

1. Talk to Marowski about his missing chems

2. Pay Marowski 2,000 (or 1,000) caps

If you let anyone live (Nelson or Trish) during the chem ambush, around 24 hours later you receive word that Marowski wants to talk to you at Hotel Rexford in Goodneighbor. You can head there on your own volition, or receive a stern warning from some of Marowski’s thugs that their boss wants to see you.

Ignore Marowski’s wishes, and expect periodic encounters with his thugs in both Goodneighbor and across the Commonwealth.

Meet Marowski, and he isn’t pleased with you snooping around in his chem lab and wants reparations—2,000 Caps’ worth. You can:

Charisma

(Medium) Convince him you only need pay 1,000 Caps.

  • Pay up, ending the conflict with Marowski.
  • Ask for a week to pay, which Marowski grants you. After that, the thug attacks start up again until you pay.
  • Or show Marowski a heist photo you obtained during “The Darcy Situation” (below). This starts a subsequent task: “Marowski’s Mercenary.”

After the Quest: The Colette Situation

Did Henry Cooke die during the quest (for any reason)? Then his daughter Colette appears in the Dugout Inn, around one week after the quest concludes, investigating what happened. Your responses are based on Cooke’s fate. You can:

  • Confess to killing Cooke (if you did the deed), then diplomatically talk with her or resort to violence (you need to kill her).
  • Tell her Cooke is dead or vanished, with subsequent diplomatic talking; she either accepts your story, is suspicious, or starts a fight with you.
  • Tell her you don’t know anything. She either suspects you (but doesn’t resort to violence) or thinks you’re telling the truth. Either way, she still hangs around to investigate further.

Is Colette still sniffing around in town? Then if Paul Pembroke is alive, he tries to speak with you, worried he’ll be found out. You can:

  • Calm him down.
  • Agree to let Paul go off and kill Colette.
  • Agree to kill Colette yourself.

Another week passes in Diamond City. If Colette is still investigating, you can run into her again (usually at the Dugout Inn).

If you split the chem ambush deal with Paul Pembroke at 70/30 percent, or if you took it all, he’ll squeal on you and tell Colette you killed Cooke. She is very confrontational.

Or if she was suspicious when you first met her, she still thinks you had a hand in her father’s murder.

End this conversation in several ways:

  • Combat (using violence or not answering her questions).
  • Your confession (if you killed him), which leads to combat or her leaving town.
  • You tell the truth (if you didn’t kill him) and she leaves town.
  • You tell her Paul is the murderer (if he accused you) and she leaves town, not sure who to believe.

Finally, if Colette leaves town still suspicious of you, be wary of her turning up at one of your settlements in the future, which leads to combat.

Or, if Colette leaves town still suspicious of Paul, you later hear of his death and can speak to Darcy about it.

After the Quest: The Darcy Situation

Darcy Pembroke isn’t some wilting flower in all of this, either! Sometime in the 72 hours after the completion of this quest, and if you weren’t rude to her both times you had a chance to talk to her (at the start of the quest), she tries to talk and wants to know what happened. You can:

  • Tell the truth.
  • Answer with evasive or unpleasant responses. She ends her talking with you.
  • Agree to help her find out what happened to Cooke and Paul.
  • Or tell her you don’t know anything.

Do you actually know what happened to Paul (if he isn’t in Diamond City)? You can:

  • Confront Cooke about Paul’s disappearance and obtain a confession before informing Darcy.
  • Stumble upon Paul’s body in town and tell Darcy he’s dead.

One week later, and if you’ve been helpful to Darcy, she finds a heist photo—some incriminating evidence of past malfeasance that Marowski, Cooke, and Malcolm Latimer were involved in.

Heist Photo

The following Miscellaneous objectives are available:

1. Talk to Marowski, Cooke, or Latimer about the photo

2. Kill Cooke and Latimer

3. Talk to Marowski

You have a few options, which obviously depend on who’s still alive in both Diamond City and Goodneighbor. You can:

  • Talk to Marowski in Hotel Rexford (Goodneighbor). You can sell the photo to Marowski, or use it to pay off your reparations. Marowski wants the other two fellows dead. Oblige him for a caps reward.
  • Talk to Cooke or Latimer about the photo. They offer to pay you for the photo. Agree if you want the caps.

Then return to Darcy and split the caps with her, if you’re a kind soul.

Bottlecaps

PreviousDetective Case Files: Long Time Coming NextThe Devil's Due