
Fallout 4 Guide DATA Workshops
The Workshop Items
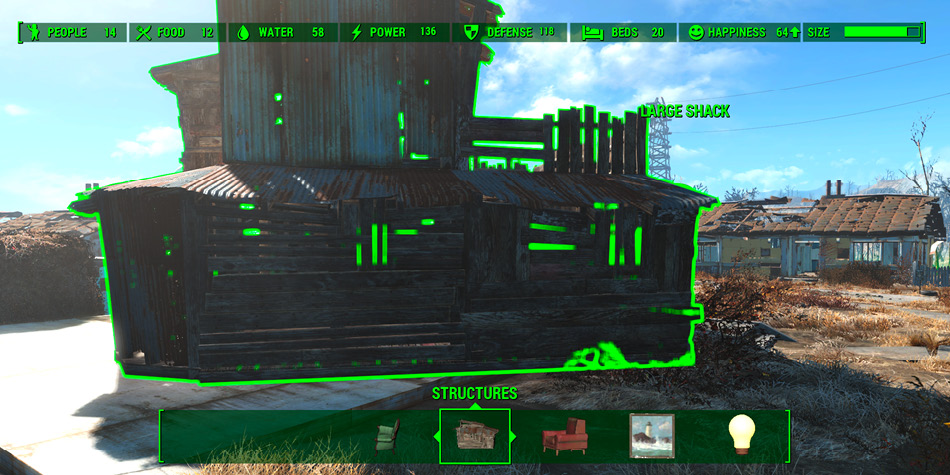
A well-stocked workshop makes even the most ambitious construction project a simple affair. Just select an item from the Workshop menu, choose a location, and construction is done in an instant. Many workshop items snap together for perfect placement, but all items can be moved and rotated to meet your exacting standards. All workshop items require construction materials, and many items can only be built after you’ve completed certain quests or invested in specific perks. Plan ahead to ensure that your settlement lives up to your expectations.
Special Items
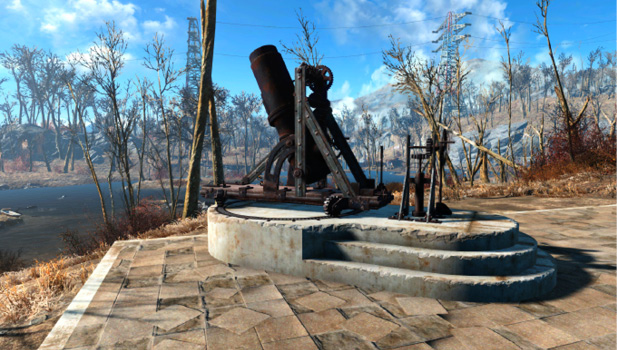
This category contains buildable quest-related items. Many of these special items can only be built at certain times or in certain locations, and the category only appears in the workshop menu when you can build at least one of these items at the settlement in question.
| Name | Build With | Prerequisites | Notes |
|---|---|---|---|
| Mama Murphy’s Chair | Wood (4), Cloth (3), Steel (1) | Mama Murphy requests a chair. | Build this chair for Mama Murphy. |
| Artillery Piece | Oil (4), Screw (4), Gear (6), Spring (5), Steel (16), Concrete (4), Wood (4) | Artillery Schematic (collected in the Castle armory during the “Old Guns” quest) | Use Artillery Smoke Grenades to call in artillery strikes on your enemies. Produces 6 Defense. Requires an assigned worker. |
| Control Console | Rubber (2), Copper (3), Steel (5), Biometric Scanner (1) | Progress through the “The Molecular Level” quest. | Wire this into the same power grid as the Beam Emitter. Requires 2 Power. |
| Molecular Beam Emitter | Rubber (2), Steel (10), Copper (5), Military-Grade Circuit Board (1), Circuitry (3) | Progress through the “The Molecular Level” quest. | Snap this in place over the Reflector Platform. Requires 20 Power. |
| Relay Dish | Copper (3), Steel (3), Cloth (6), Gold (3) | Progress through the “The Molecular Level” quest. | Wire this into the same power grid as the Beam Emitter. Requires 5 Power. |
| Stabilized Reflector Platform | Aluminum (10), Circuitry (3), Steel (5) | Progress through the “The Molecular Level” quest. | The first piece of a very large machine. |
| Electromagnetic Actuator | Circuitry (5), Screw (1), Steel (10), Fiber Optics (3), Rubber (5), High Powered Magnet (1) | Progress through the “Liberty Reprimed” quest. | A special request from the Brotherhood of Steel. |
Structures
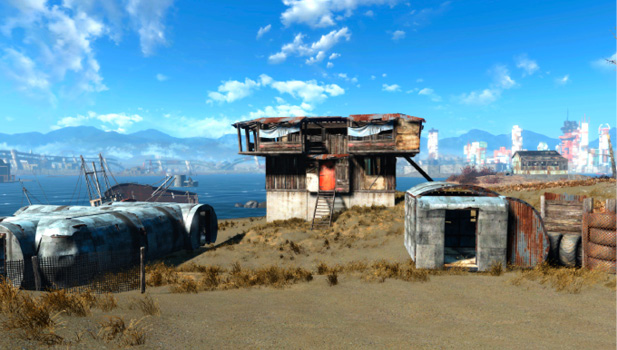
This category contains items geared toward basic construction. Here, you’ll find basic items like floors, walls, and roofs, but this category also contains doors, fences, completed structures, and more. Whether you’re looking to build a simple shelter or a stately manor, this is likely to be your first stop in the workshop menu.
Subcategories
- Structures > Wood
- Structures > Metal
- Structures > Doors
- Structures > Fences
- Structures > Miscellaneous
Structures > Wood
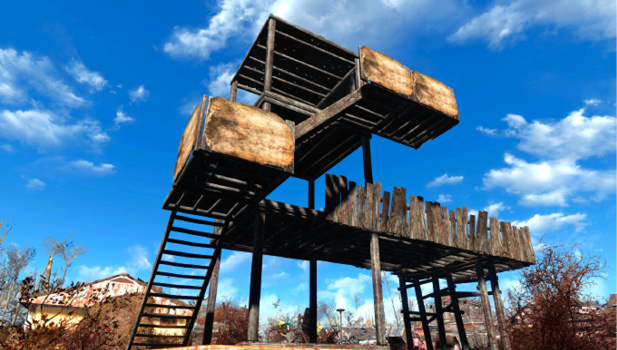
The Workshop menu contains a wide variety of woods structures. In addition to the basic floors, walls, and roofs, this subcategory contains items like stairs, bridges, and railings. On the whole, wood structures are efficient, versatile, and made from relatively common materials.
Subcategories
- Structures > Wood > Prefabs
- Structures > Wood > Floors
- Structures > Wood > Walls
- Structures > Wood > Roofs
- Structures > Wood > Stairs
- Structures > Wood > Miscellaneous
Structures > Wood > Prefabs
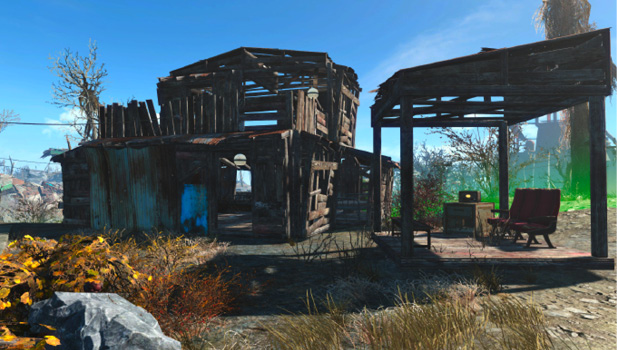
This subcategory features convenient, readymade structures. These items vary in size, shape, and complexity. Some prefabs are easily combined to build larger structures, while others are a bit more difficult to modify. Every prefab features some sort of roof, however, so they can serve as a basic shelter without any additional construction.
Wood Prefabs
| Name | Build With | Prerequisites | Notes |
|---|---|---|---|
| Floor and Roof | Wood (10), Steel (10) | — | A simple structure. |
| Wall and Roof | Wood (12), Steel (10) | — | A simple structure. |
| Hallway | Wood (12), Steel (10) | — | A simple structure. |
| Hallway End | Wood (14), Steel (10) | — | A simple structure. |
| Corner | Wood (15), Steel (12) | — | A simple structure. |
| Wall and Roof | Wood (16), Steel (10) | — | A simple structure. |
| Corner | Wood (20), Steel (15) | — | A simple structure. |
| Small Shack | Wood (30), Steel (20) | — | A completed shack. |
| Large Shack | Wood (40), Steel (20) | — | A completed shack. |
Structures > Wood > Floors
When you’re building a structure from scratch, it’s usually best to start with the floor. In addition to simple floor tiles, this category contains some particularly handy items. The foundation pieces can sink into the ground, serving as a level base for structures on uneven terrain. The stairwell features a one-story flight of stairs anchored between two floor tiles. Once a stairwell is in place, constructing a second story is as simple as snapping a few floor tiles to the top of the steps.
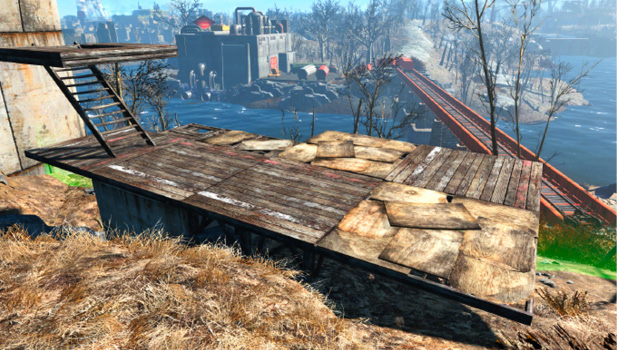
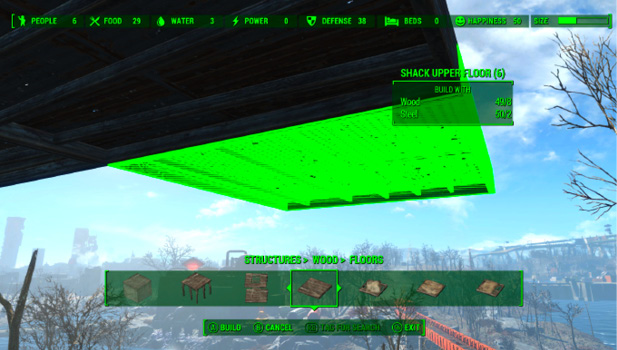
Another noteworthy item is the “Shack Upper Floor” piece. This floor tile is thick enough to meet any walls placed on the level beneath it. You’re free to use thinner tiles on upper floors, but doing so will leave gaps along the exterior of multistory structures.
Wood Floors
| Name | Build With | Prerequisites | Notes |
|---|---|---|---|
| Shack Floor | Wood (7), Steel (2) | — | A standard floor. |
| Shack Foundation | Wood (12), Concrete (3) | — | Used to level uneven ground. |
| Shack Foundation | Wood (12), Steel (3) | — | Used to level uneven ground. |
| Shack Stairwell | Wood (12), Steel (3) | — | Two floors connected by stairs. |
| Shack Upper Floor | Wood (8), Steel (2) | — | A double-thick floor. |
| Floor—Small | Wood (3), Steel (1) | — | A small floor tile. |
| Floor—Small | Wood (3), Steel (1) | — | A small floor tile. |
| Floor—Small | Wood (3), Steel (1) | — | A small floor tile. |
| Floor—Small | Wood (3), Steel (1) | — | A small floor tile. |
| Floor—Small | Wood (3), Steel (1) | — | A small floor tile. |
Structures > Wood > Walls
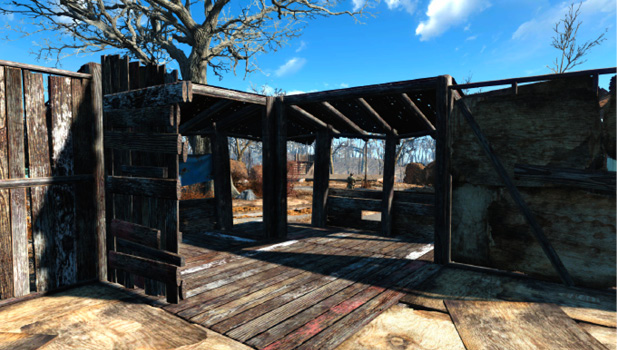
Wood walls come in a wide variety of shapes and sizes. Here you’ll find everything from simple panels to elaborate wall/roof combinations. Most walls can snap neatly to floors and other wall panels, but there are a few exceptions. End pieces don’t snap to any items, and they’re a bit taller than standard walls. Covered corner pieces only snap to covered wall panels. Every wood wall has its uses, however, making this a very important section of the Workshop menu.
Wood Walls
| Name | Build With | Prerequisites | Notes |
|---|---|---|---|
| Shack Wall—Doorway | Wood (5), Steel (3) | — | Includes a slight overhang. |
| Shack Wall—Outer Cap | Wood (4), Steel (9) | — | Includes a slight overhang. |
| Shack Wall—Corner | Wood (12), Steel (8) | — | A large, open corner piece. |
| Shack Wall—Corner | Wood (5), Steel (8) | — | A small, covered corner piece. |
| Shack Wall—Corner | Wood (6), Steel (3) | — | A small, covered corner piece. |
| Shack Wall and Roof | Wood (5), Steel (4) | — | A narrow, covered structure. |
| Shack Wall and Roof | Wood (4), Steel (4), Cloth (2) | — | A narrow, covered structure. |
| Wall | Wood (8), Steel (5) | — | A narrow, covered structure. |
| Wall | Wood (8) Steel (5) | — | A narrow, covered structure. |
| Wall | Wood (5), Steel (9) | — | A narrow, covered structure. |
| Wall | Wood (5), Steel (9) | — | A narrow, covered structure. |
| Wall | Wood (8), Steel (5) | — | A narrow, covered structure. |
| Wall | Wood (8), Steel (5) | — | A narrow, covered structure. |
| Wall | Wood (8), Steel (5) | — | A narrow, covered structure. |
| Wall | Wood (5), Steel (9) | — | A narrow, covered structure. |
| Wall—Corner | Wood (7), Steel (3) | — | A small, covered corner piece. |
| Wall—Corner | Wood (10), Steel (4) | — | A small, covered corner piece. |
| Wall—Corner | Wood (10), Steel (4) | — | A small, covered corner piece. |
| Wall—Corner | Wood (10), Steel (4) | — | A small, covered corner piece. |
| Wall—Corner | Wood (7), Steel (3) | — | A small, covered corner piece. |
| Wall—Corner | Wood (7), Steel (3) | — | A small, covered corner piece. |
| Wall—End | Wood (4), Steel (1) | — | A narrow, uneven wall. |
| Wall—End | Wood (4), Steel (1) | — | A narrow, uneven wall. |
| Wall—Small | Wood (8), Steel (2) | — | A basic wall. |
| Wall—Small | Wood (8), Steel (2) | — | A basic wall. |
| Wall—Small | Wood (8), Steel (2) | — | A basic wall. |
| Wall—Small | Wood (4), Steel (9) | — | Includes a slight overhang. |
| Wall—Small | Wood (4), Steel (9) | — | Includes a slight overhang. |
Structures > Wood > Roofs
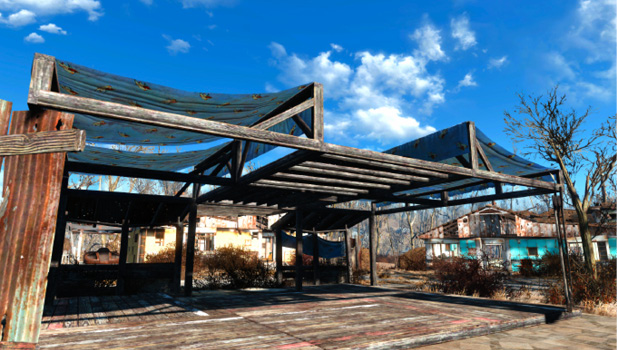
Every settler expects a roof over his or her head, and this area of the Workshop menu has plenty of options. Roofs snap to each other and to the tops of most wall panels. Wood roofs come in a variety of shapes, but they all serve the same purpose in shelter construction.
Wood Roofs
| Name | Build With | Prerequisites | Notes |
|---|---|---|---|
| Shack Roof | Wood (3), Steel (6) | — | A flat roof. |
| Shack Roof | Wood (5), Cloth (5), Steel (2) | — | A sloped roof. |
| Shack Roof | Wood (4), Steel (6) | — | A sloped roof. |
| Shack Roof | Wood (3), Steel (6) | — | A flat roof. |
| Shack Roof | Wood (5), Steel (6) | — | A sloped roof. |
| Shack Roof | Wood (4), Cloth (6), Steel (2) | — | A sloped roof. |
| Shack Roof | Wood (4), Steel (6) | — | A sloped roof. |
| Shack Roof | Wood (5), Steel (6) | — | A sloped roof. |
| Shack Roof | Wood (5), Steel (6) | — | A sloped roof. |
Structures > Wood > Stairs
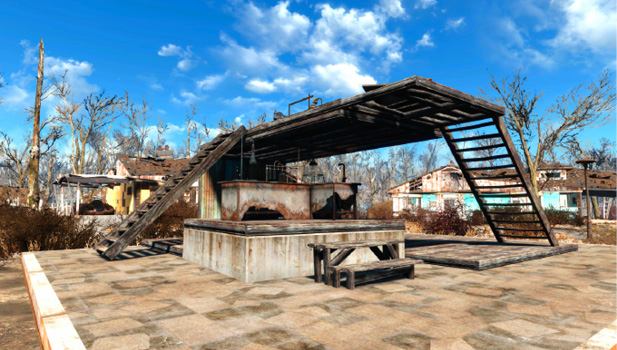
Stairs are obviously an important part of any multistory building, but they also make it much easier to move in and out of structures built on raised foundations. Stairs can be placed anywhere, but they snap to floors and sometimes to each other. Most stairs can also sink into the ground.
Wood Stairs
| Name | Build With | Prerequisites | Notes |
|---|---|---|---|
| Shack Stairs | Wood (9), Steel (2) | — | A long set of stairs between two anchor points. |
| Stairs | Wood (7), Steel (2) | — | A small set of stairs. |
| Stairs | Wood (7), Steel (2) | — | A medium set of stairs. |
| Stairs | Wood (7), Steel (2) | — | A long set of stairs. |
Structures > Wood > Miscellaneous
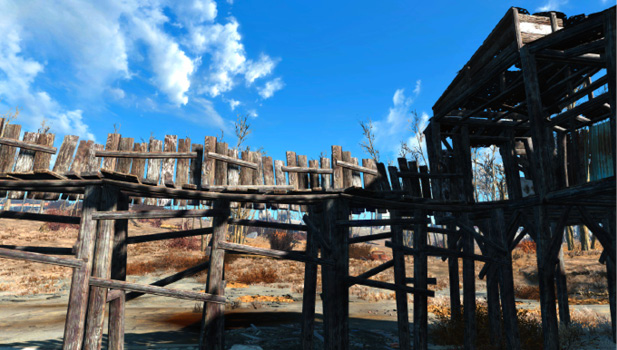
This subcategory includes a bridge and an assortment of railing pieces. Bridges snap to each other, but they can also sink into the ground. They make excellent walkways, of course, but they’re also handy when you want to build a few turret platforms or place some support beams under an existing structure. Railings are also quite versatile, but they’re an excellent way to mark hazardous areas and prevent accidental falls.
Miscellaneous Wood Structures
| Name | Build With | Prerequisites | Notes |
|---|---|---|---|
| Bridge | Wood (6), Steel (2) | — | A narrow bridge. |
| Railing | Railing (2), Steel (1) | — | A short railing. |
| Railing | Wood (2), Steel (1) | — | A long railing. |
| Railing | Wood (2), Steel (1) | — | A short railing. |
| Railing | Wood (2), Steel (1) | — | A short railing. |
| Railing | Wood (2), Steel (1) | — | A short railing. |
Structures > Metal
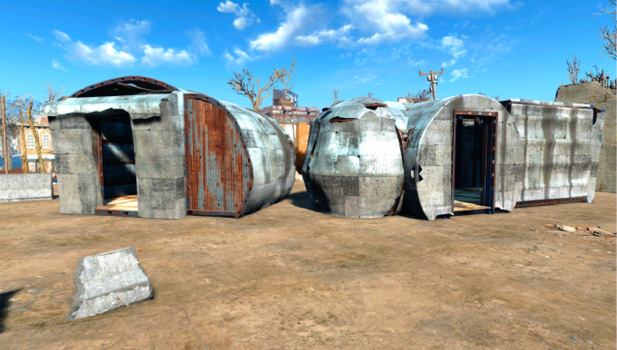
The Workshop menu contains far fewer options for metal structures than you’ll find for wood structures—there are no metal-based floors, stairs, or miscellaneous items, and there are only two options for roofs. Of course, your stock of materials will likely determine which structures are the best fit for a settlement, but metal boasts an industrial aesthetic that wood simply can’t match.
Subcategories
- Structures > Metal > Prefabs
- Structures > Metal > Walls
- Structures > Metal > Roofs
Structures > Metal > Prefabs
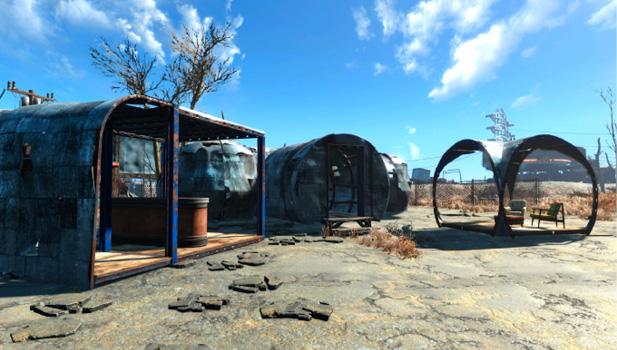
Like wood prefabs, metal prefabs are ready-made structures. Many of these items are easily incorporated into larger structures, but some metal prefabs feature rounded shapes that prohibit some walls and roofs from snapping into place.
Metal Prefabs
| Name | Build With | Prerequisites | Notes |
|---|---|---|---|
| Corner | Steel (10), Wood (4) | — | A simple structure. |
| Doorway | Steel (10), Wood (4) | — | Features an interior doorway. |
| Floor and Roof | Steel (10), Wood (4) | — | A simple structure. |
| Floor and Roof | Steel (10), Wood (4) | — | A simple structure. |
| Floor and Roof | Steel (10), Wood (4) | — | A simple structure. |
| Hallway | Steel (10), Wood (4) | — | A simple structure. |
| Hallway End | Steel (10), Wood (4) | — | A simple structure. |
| Wall and Roof | Steel (12), Wood (8) | — | A simple structure. |
| Wall and Roof | Steel (10), Wood (4) | — | A simple structure. |
| Small Metal Shack | Wood (20), Steel (30) | — | A completed shack. |
| Small Metal Shack | Wood (20), Steel (30) | — | A completed shack. |
| Large Metal Shack | Wood (20), Steel (40) | — | A completed shack. |
Structures > Metal > Walls
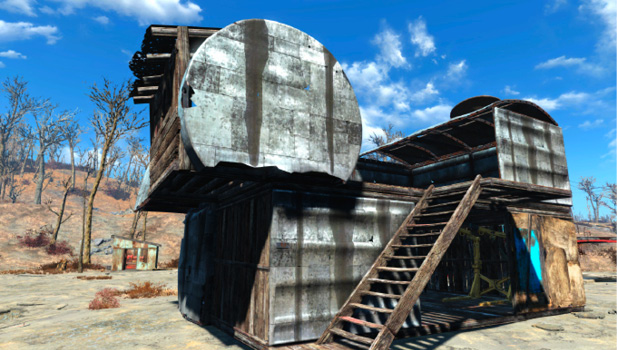
For the most part, a metal wall can be used anywhere a similarly shaped wood wall can be placed. The rounded walls found in this area of the Workshop menu don’t have a wooden counterpart. Rather than snapping to floors, round metal walls snap to the framework found in most prefabs and wall/roof combos.
Metal Walls
| Name | Build With | Prerequisites | Notes |
|---|---|---|---|
| Shack Wall | Wood (3), Steel (4) | — | A basic wall. |
| Shack Wall—Doorway | Wood (5), Steel (3) | — | Includes a slight overhang. |
| Shack Wall—Outer Cap | Wood (4), Steel (9) | — | Includes a slight overhang. |
| Shack Wall—Corner | Wood (12), Steel (8) | — | A large, open corner piece. |
| Shack Wall—Corner | Wood (5), Steel (8) | — | A small, covered corner piece. |
| Shack Wall—Corner | Wood (6), Steel (3) | — | A small, covered corner piece. |
| Shack Wall and Roof | Wood (5), Steel (4) | — | A narrow, covered structure. |
| Shack Wall and Roof | Wood (4), Steel (4), Cloth (2) | — | A narrow, covered structure. |
| Wall | Wood (8), Steel (5) | — | A narrow, covered structure. |
| Wall | Wood (8), Steel (5) | — | A narrow, covered structure. |
| Wall | Wood (5), Steel (9) | — | A narrow, covered structure. |
| Wall | Wood (5), Steel (9) | — | A narrow, covered structure. |
| Wall | Wood (8), Steel (5) | — | A narrow, covered structure. |
| Wall | Wood (8), Steel (5) | — | A narrow, covered structure. |
| Wall | Wood (8), Steel (5) | — | A narrow, covered structure. |
| Wall | Wood (5), Steel (9) | — | A narrow, covered structure. |
| Wall—Corner | Wood (7), Steel (3) | — | A small, covered corner piece. |
| Wall—Corner | Wood (10), Steel (4) | — | A small, covered corner piece. |
| Wall—Corner | Wood (10), Steel (4) | — | A small, covered corner piece. |
| Wall—Corner | Wood (10), Steel (4) | — | A small, covered corner piece. |
| Wall—Corner | Wood (7), Steel (3) | — | A small, covered corner piece. |
| Wall—Corner | Wood (7), Steel (3) | — | A small, covered corner piece. |
| Wall—End | Wood (4), Steel (1) | — | A narrow, uneven wall. |
| Wall—End | Wood (4), Steel (1) | — | A narrow, uneven wall. |
| Wall—Small | Wood (8), Steel (2) | — | A basic wall. |
| Wall—Small | Wood (8), Steel (2) | — | A basic wall. |
| Wall—Small | Wood (8), Steel (2) | — | A basic wall. |
| Wall—Small | Wood (4), Steel (9) | — | Includes a slight overhang. |
| Wall—Small | Wood (4), Steel (9) | — | Includes a slight overhang. |
Structures > Metal > Roofs
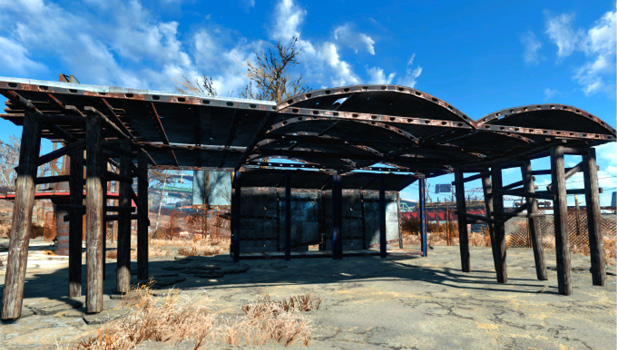
All roofs snap to walls and to each other, so a metal roof can be used anywhere a wood roof would fit.
Metal Roofs
| Name | Build With | Prerequisites | Notes |
|---|---|---|---|
| Shack Roof | Wood (3), Steel (10) | — | A rounded roof. |
| Shack Roof | Wood (3), Steel (10) | — | A flat roof. |
Structures > Doors
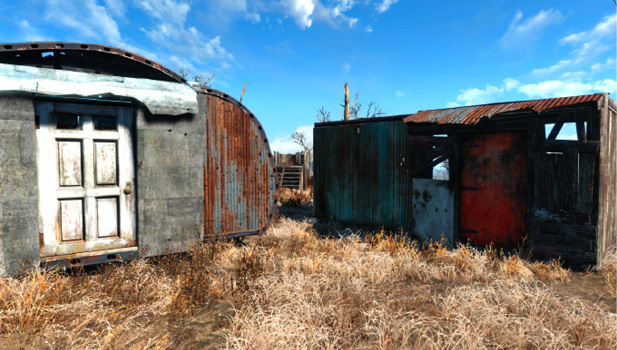
Doors snap to any wall or prefab that features a doorway. There are several doors to choose from, but the differences are purely cosmetic.
Doors
| Name | Build With | Prerequisites | Notes |
|---|---|---|---|
| Door | Wood (3), Steel (3) | — | A basic door. |
| Door | Wood (3), Steel (3) | — | A basic door. |
| Door | Wood (3), Steel (3) | — | A basic door. |
| Door | Wood (3), Steel (3) | — | A basic door. |
| Door | Wood (3), Steel (3) | — | A basic door. |
| Door | Wood (3), Steel (3) | — | A basic door. |
| Door | Wood (3), Steel (3) | — | A basic door. |
| Door | Wood (3), Steel (3) | — | A basic door. |
| Door | Wood (3), Steel (3) | — | A basic door. |
Structures > Fences
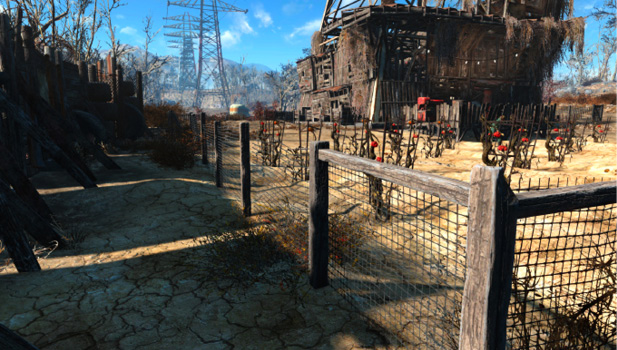
Fences are largely cosmetic, but they do have some practical uses. Well-placed fences can keep residents where you want them and limit enemy access to a settlement.
Subcategories
- Structures > Fences > Junk Fence
- Structures > Fences > Picket Fence
- Structures > Fences > Wire Fence
Structures > Fences > Junk Fence
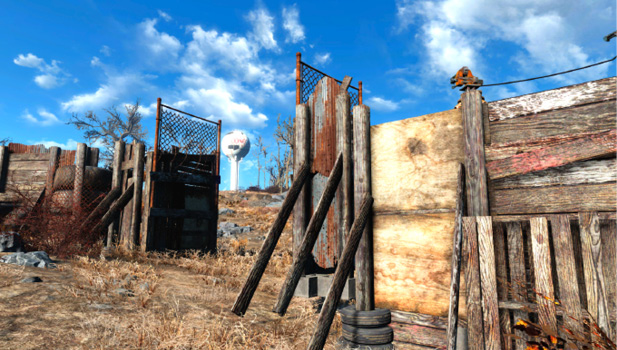
Junk fences are large and relatively costly, but they’re great for fortifying vulnerable settlements. Fences don’t contribute to a settlement’s Defense rating, but well-positioned junk fences can funnel invaders into heavily defended areas. Forcing attackers toward a settlement’s turrets and guard posts is one of the best ways to guarantee a raid ends quickly.
Junk Fences
| Name | Build With | Prerequisites | Notes |
|---|---|---|---|
| Gate | Wood (10), Steel (15) | — | A large gate. |
| Junk Fence | Wood (15), Steel (4) | — | A large, corner piece. |
| Junk Fence | Wood (6), Steel (9), Rubber (4) | — | A makeshift fence. |
| Junk Fence | Wood (10), Steel (4) | — | A makeshift fence. |
| Junk Fence | Wood (10), Steel (4), Rubber (2) | — | A makeshift fence. |
| Junk Fence | Wood (10), Steel (4), Rubber (2) | — | A makeshift fence. |
| Junk Fence | Wood (10), Steel (4) | — | A makeshift fence. |
| Junk Fence | Wood (6), Steel (9), Rubber (4) | — | A makeshift fence. |
| Junk Fence | Wood (15), Steel (4) | — | A large corner piece. |
| Junk Fence | Wood (2), Steel (6) | — | Features a doorway. |
| Junk Fence | Wood (2), Steel (6) | — | Features a doorway. |
Structures > Fences > Picket Fence
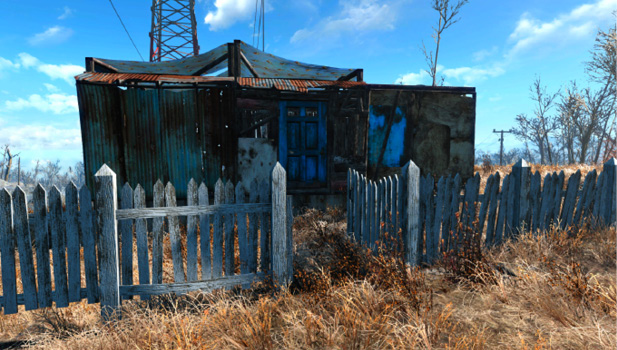
Picket fences not only offer a classic aesthetic, but they also snap together for easy installation. Just place a post between each fence panel to maintain a perfect line. Picket fences must be unlocked before they can be built. This subcategory only appears in the Workshop menu after you’ve collected the Picket Fences magazine located in the Beantown Brewery.
Picket Fences
| Name | Build With | Prerequisites | Notes |
|---|---|---|---|
| Gate | Wood (3) | Picket Fences (Issue #1, located in Beantown Brewery) | A small gate. |
| Picket Fence Post | Wood (2) | Picket Fences (Issue #1, located in Beantown Brewery) | A single fence post. |
| Picket Fence | Wood (3) | Picket Fences (Issue #1, located in Beantown Brewery) | A short fence. |
| Picket Fence | Wood (3) | Picket Fences (Issue #1, located in Beantown Brewery) | A short fence. |
| Picket Fence | Wood (3) | Picket Fences (Issue #1, located in Beantown Brewery) | A short fence. |
| Picket Fence | Wood (3) | Picket Fences (Issue #1, located in Beantown Brewery) | A short fence. |
| Picket Fence—Long | Wood (6) | Picket Fences (Issue #1, located in Beantown Brewery) | A long fence. |
| Picket Fence—Long | Wood (6) | Picket Fences (Issue #1, located in Beantown Brewery) | A long fence. |
| Picket Fence | Wood (3) | Picket Fences (Issue #1, located in Beantown Brewery) | A long fence. |
| Picket Fence | Wood (3) | Picket Fences (Issue #1, located in Beantown Brewery) | A short fence. |
| Picket Fence | Wood (3) | Picket Fences (Issue #1, located in Beantown Brewery) | A short fence. |
| Picket Fence | Wood (3) | Picket Fences (Issue #1, located in Beantown Brewery) | A short fence. |
Structures > Fences > Wire Fence
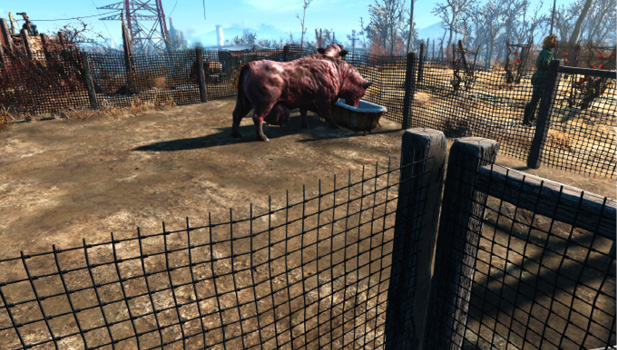
These rustic fences are often found in farming settlements. Wire fence pieces snap together whenever the edge of a mesh panel is moved toward a post.
Wire Fences
| Name | Build With | Prerequisites | Notes |
|---|---|---|---|
| Wire Fence | Wood (2) | — | A single fence post. |
| Wire Fence | Wood (2), Steel (2) | — | A basic fence. |
| Wire Fence | Wood (2), Steel (4) | — | A long fence. |
| Wire Fence | Wood (4), Steel (4) | — | A corner piece. |
| Wire Fence | Wood (4), Steel (2) | — | A wide gate. |
| Wire Fence | Wood (2), Steel (4) | — | A long fence. |
| Wire Fence | Wood (2), Steel (2) | — | A basic fence. |
| Wire Fence | Wood (2) | — | A single fence post. |
| Wire Fence | Steel (2) | — | A wire mesh panel. |
Structures > Miscellaneous
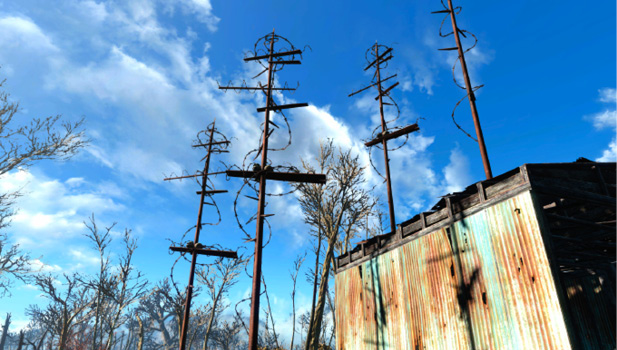
This subcategory only contains two items, both of which are tall poles wrapped in razor wire. These items are purely cosmetic, but they certainly make a statement.
Miscellaneous Structures
| Name | Build With | Prerequisites | Notes |
|---|---|---|---|
| Spiked Pole | Steel (6), Skull (3) | — | A pole covered in razor wire and skulls. |
| Spiked Pole | Steel (6) | — | A pole covered in razor wire. |
Furniture
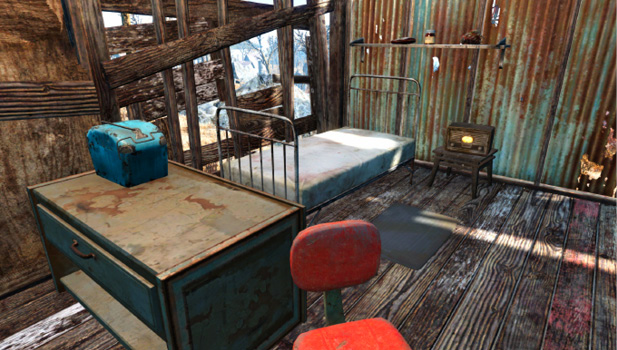
This category contains a variety of beds, chairs, shelves, and more. Although furniture plays an important role in a settlement’s overall aesthetic, each type of furniture offers at least one useful feature.
Subcategories
- Furniture > Beds
- Furniture > Chairs
- Furniture > Containers
- Furniture > Shelves
- Furniture > Tables
- Furniture > Miscellaneous
Furniture > Beds
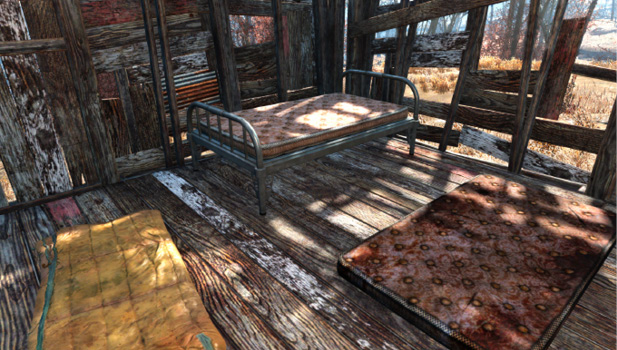
If you hope to keep the residents of your settlement happy and productive, you must provide one bed for each one. If you wish, you can even assign a settler to a specific bed. You’re also free to use any bed you build—remember that each time you sleep, you receive the Well Rested perk. This temporary perk grants a 10 percent bonus to earned XP for a limited time, so it pays to take regular naps.
Beds
| Name | Build With | Prerequisites | Notes |
|---|---|---|---|
| Bed | Steel (4), Cloth (5) | — | Accommodates one person. |
| Bed | Steel (4), Cloth (5) | — | Accommodates one person. |
| Bed | Steel (4), Cloth (5) | — | Accommodates one person. |
| Bed | Steel (4), Cloth (5) | — | Accommodates one person. |
| Mattress | Cloth (6) | — | Accommodates one person. |
| Sleeping Bag | Cloth (3) | — | Accommodates one person. |
Furniture > Chairs
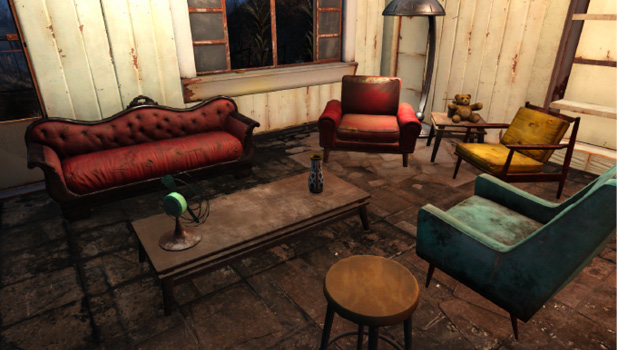
This subcategory contains a wide variety of benches, chairs, couches, and stools. These items are largely decorative, but idle settlers often seek out places to sit. You can also use these items to wait for hours at a time. Chairs don’t offer the Well Rested perk granted by beds, but after you sit down, you’re free to relax as time flies by.
Chairs
| Name | Build With | Prerequisites | Notes |
|---|---|---|---|
| Airplane Seat | Cloth (6), Aluminum (4) | — | A row of two airplane seats. |
| Airplane Seat | Cloth (8), Aluminum (5) | — | A row of three airplane seats. |
| Airplane Seat | Cloth (4), Aluminum (3) | — | A single airplane seat. |
| Bench | Steel (3), Wood (4) | — | A simple bench. |
| Bench | Wood (5), Steel (1) | — | A simple bench. |
| Chair | Leather (4), Steel (4) | — | A simple chair. |
| Chair | Cloth (4), Steel (4) | — | A small seat. |
| Chair | Cloth (4), Steel (4) | — | A basic chair. |
| Chair | Cloth (4), Steel (4) | — | A basic chair. |
| Chair | Cloth (4), Steel (4) | — | A small seat. |
| Chair | Cloth (4), Steel (4) | — | Three connected seats. |
| Chair | Cloth (3), Wood (5) | — | A basic chair. |
| Chair | Wood (4), Cloth (4) | — | A basic chair. |
| Chair | Wood (4), Cloth (2) | — | A basic chair. |
| Chair | Wood (4), Plastic (1) | — | A basic chair. |
| Chair | Steel (3), Cloth (1), Plastic (1) | — | A basic chair. |
| Chair | Steel (3), Cloth (2), Plastic (2) | — | A basic chair. |
| Chair | Wood (3), Cloth (5), Steel (1) | — | A basic chair. |
| Chair | Wood (4), Steel (1) | — | A basic chair. |
| Chair | Steel (3), Cloth (2), Plastic (2) | — | A basic chair. |
| Chair | Wood (4), Cloth (4) | — | A basic chair. |
| Chair | Cloth (4), Steel (4) | — | A basic chair. |
| Chair | Cloth (4), Steel (4) | — | Three connected seats. |
| Chair | Steel (4) | — | A basic chair. |
| Couch | Wood (5), Cloth (9) | — | A basic couch. |
| Couch | Wood (5), Cloth (10) | — | A basic couch. |
| Couch | Wood (4), Cloth (7), Steel (2) | — | A basic couch. |
| Couch | Wood (6), Cloth (10), Steel (2) | — | A basic couch. |
| Couch | Wood (6), Cloth (9) | — | A basic couch. |
| Patio Chair | Steel (4), Plastic (2) | Picket Fences (Issue #5, located in Weston Water Treatment Plant) | A basic chair. |
| Stool | Steel (3) | — | A simple stool. |
| Stool | Steel (3) | — | A simple stool. |
| Stool | Steel (2), Wood (1) | — | A simple stool. |
| Stool | Wood (3), Steel (1) | — | A simple stool. |
| Stool | Steel (4) | — | A simple stool. |
| Stool | Steel (3) | — | A simple stool. |
| Stool | Steel (5) | — | A stool with an attached back. |
| Stool | Steel (3), Plastic (1) | — | A simple stool. |
Furniture > Containers
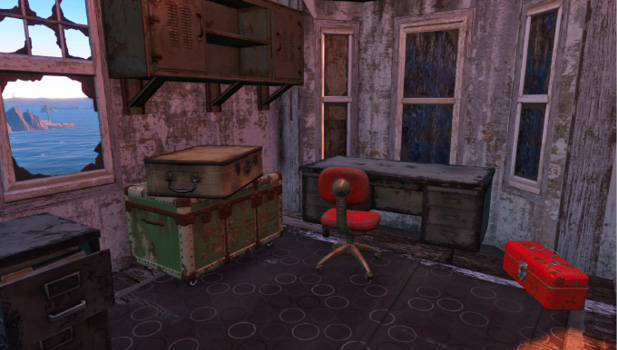
Containers come in all shapes and sizes, but from the massive bureau to the compact toolbox, all containers can store as many items as you choose. Simply approach a container and begin transferring items to or from your inventory.
Containers
| Name | Build With | Prerequisites | Notes |
|---|---|---|---|
| Bureau | Wood (4) | — | A tall bureau. |
| Cabinet | Steel (8) | — | A narrow cabinet. |
| Cabinet | Steel (8) | — | A wide cabinet. |
| Cabinet | Steel (8) | — | A tall cabinet. |
| Cabinet | Steel (8) | — | A wall-mounted cabinet. |
| Cabinet | Steel (8) | — | A long cabinet. |
| Cooler | Steel (2), Fiberglass (1) | — | A small cooler. |
| Desk | Steel (6) | — | A simple desk. |
| Desk | Steel (2), Wood (4) | — | A simple desk. |
| Dresser | Wood (4), Steel (2) | — | A narrow dresser. |
| Dresser | Wood (4), Steel (2) | — | A wide dresser. |
| File Cabinet | Steel (4) | — | A short file cabinet. |
| File Cabinet | Steel (4) | — | A tall file cabinet. |
| File Cabinet | Steel (4) | — | A tall file cabinet. |
| Filing Cabinet | Steel (2), Wood (6) | — | A large filing cabinet. |
| Footlocker | Steel (2), Wood (4) | — | A small box. |
| Metal Box | Steel (4) | — | A large box. |
| Safe | Spring (5), Steel (10), Gear (3) | — | A simple floor safe. |
| Steamer Trunk | Steel (4) | — | A large trunk. |
| Suitcase | Steel (1), Cloth (2) | — | A simple suitcase. |
| Tool Chest | Steel (4) | — | A large tool chest. |
| Toolbox | Steel (2) | — | A small toolbox. |
| Wooden Crate | Wood (3) | — | A large box. |
Furniture > Shelves
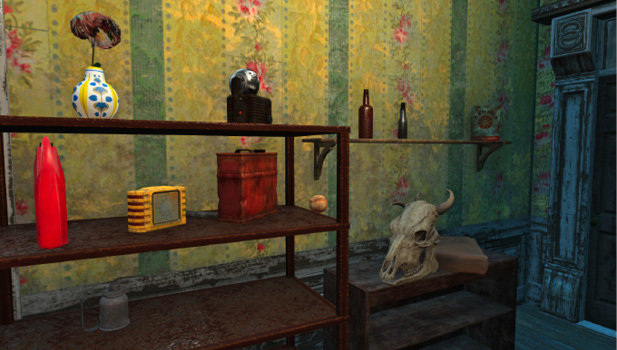
Use shelves to hold and display items from your inventory. Just drop an item on the ground, activate the Workshop menu, then grab the item and place it wherever you like.
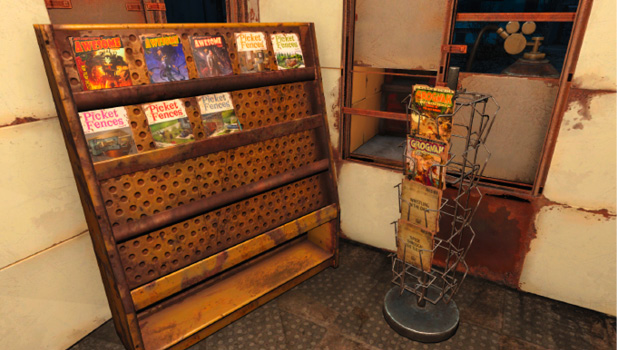
This subcategory also contains two magazine racks. Use these special shelves to store and display any magazines you collect as you explore the Commonwealth.
Shelves
| Name | Build With | Prerequisites | Notes |
|---|---|---|---|
| Bookcase | Wood (7), Steel (1) | — | A tall bookcase. |
| Bookcase | Wood (3), Steel (1) | — | A short bookcase. |
| Magazine Rack | Screw (1), Steel (4) | — | A small rack that only holds magazines. |
| Magazine Rack | Screw (1), Steel (4) | — | A large rack that only holds magazines. |
| Shelf | Steel (4) | — | A simple shelf unit. |
| Shelf | Wood (10), Steel (3) | — | A large shelf unit. |
| Shelf | Wood (13), Steel (4) | — | A large, double-sided shelf unit. |
| Wall Shelf | Steel (2) | — | A wall-mounted shelf. |
| Wall Shelf | Steel (2) | — | A wall-mounted shelf. |
| Wall Shelf | Wood (2) | — | A wall-mounted shelf. |
| Wall Shelf | Wood (2) | — | A wall-mounted shelf. |
Furniture > Tables
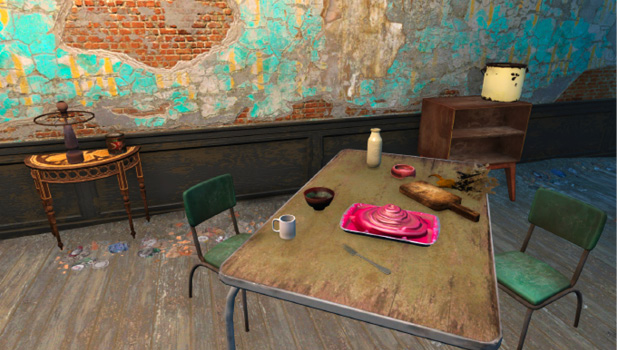
Like shelves, tables can hold and display items from your inventory. This subcategory contains everything from coffee tables to pool tables, so you’re sure to find something to match any décor.
Tables
| Name | Build With | Prerequisites | Notes |
|---|---|---|---|
| Coffee Table | Wood (3), Steel (1) | — | A low coffee table. |
| Coffee Table | Wood (4) | — | A high coffee table. |
| End Table | Wood (3), Steel (1) | — | A small end table. |
| End Table | Wood (4), Steel (1) | — | A large end table. |
| Kitchen Table | Wood (4), Steel (3) | — | A short table. |
| Kitchen Table | Wood (4), Steel (2) | — | A medium table. |
| Kitchen Table | Wood (4), Steel (3) | — | A long table. |
| Patio Table | Steel (10) | Picket Fences (Issue #5, located in Weston Water Treatment Plant) | A round table with an attached umbrella. |
| Picnic Table | Wood (8), Steel (2) | Picket Fences (Issue #5, located in Weston Water Treatment Plant) | A large picnic table. |
| Pool Table | Cloth (3), Wood (8), Plastic (2), Rubber (1), Steel (2) | — | A large pool table. |
| Table | Wood (4), Steel (1) | — | A small table. |
| Table | Wood (4) | — | A small table. |
| Table | Wood (4), Steel (1) | — | A short table. |
| Table | Wood (7), Steel (1) | — | A large table. |
| Table | Steel (5) | — | A small table. |
| Table | Wood (7), Steel (1) | — | A large table. |
| Table | Wood (4), Steel (1) | — | A small table. |
| Table | Wood (3), Steel (1) | — | A small table. |
| Table | Wood (7), Steel (1) | — | A large table. |
| Table | Wood (4), Steel (1) | — | A small table. |
| Table | Wood (3), Steel (1) | — | A small table. |
| Table | Wood (6), Steel (1) | — | A large table. |
| Table | Wood (2), Steel (2) | — | A small table. |
| Table | Wood (3), Steel (2) | — | A large table. |
| Table | Wood (2), Steel (2) | — | A medium table. |
| Table | Steel (5) | — | A small table. |
| Table | Steel (2) | — | A small table. |
| Table | Wood (4) | — | A high table. |
| Wet Bar | Wood (4), Steel (1) | — | An open wet bar. |
| Wet Bar | Wood (4), Steel (1) | — | A closed wet bar. |
Furniture > Miscellaneous
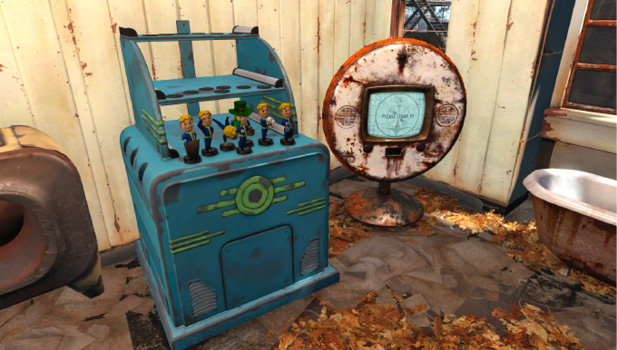
This area of the Workshop menu contains miscellaneous furniture items like televisions, bathroom fixtures, and more. Dedicated explorers would do well to build the Bobblehead stand—this stylish piece of furniture is a great way to proudly display your Bobblehead collection.
Miscellaneous Furniture
| Name | Build With | Prerequisites | Notes |
|---|---|---|---|
| Bathtub | Ceramic (8), Steel (2) | — | A damaged bathtub. |
| Bobblehead Stand | Screw (3), Steel (4), Fiberglass (3) | — | A unit to hold and display collected Bobbleheads. |
| Counter | Wood (6), Steel (2) | — | A large counter. |
| Ottoman | Wood (2), Cloth (3), Steel (1) | — | A small ottoman. |
| Television | Steel (2), Circuitry (3), Wood (2), Glass (2), Aluminum (2) | — | Requires power. |
| Television | Steel (2), Circuitry (3), Wood (3), Glass (2), Aluminum (2) | — | Requires power. |
| Television | Steel (2), Circuitry (3), Wood (2), Glass (2), Aluminum (2) | — | Requires power. |
| Toilet | Ceramic (5), Plastic (1) | — | A damaged toilet. |
Decorations
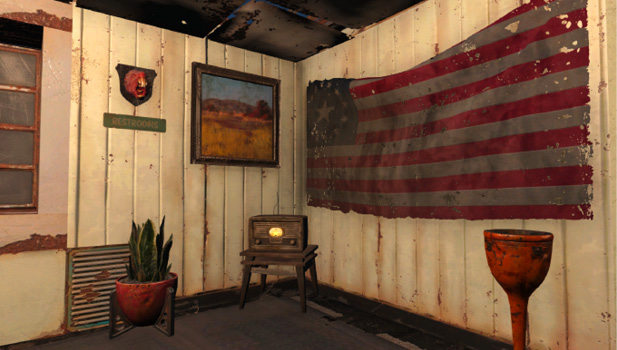
This category features an impressive assortment of decorative items. When you just want to add a bit of flair to a settlement, make sure you visit this section of the Workshop menu.
Subcategories
- Decorations > Floor Coverings
- Decorations > Wall Decorations
- Decorations > Statues
- Decorations > Miscellaneous
Decorations > Floor Coverings
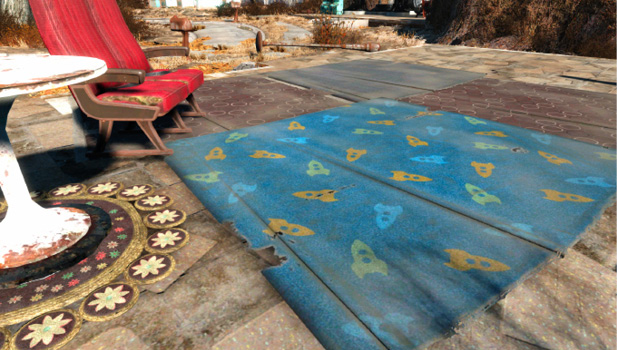
This section of the Workshop menu contains a variety of rugs and floor mats.
Floor Coverings
| Name | Build With | Prerequisites | Notes |
|---|---|---|---|
| Floor Mats | Cloth (2), Rubber (1) | — | A small mat. |
| Floor Mats | Cloth (2), Rubber (1) | — | A small mat. |
| Floor Mats | Cloth (2), Rubber (1) | — | A small mat. |
| Floor Mats | Cloth (2), Rubber (1) | — | A small mat. |
| Floor Mats | Cloth (2), Rubber (1) | — | A small mat. |
| Floor Mats | Cloth (2), Rubber (1) | — | A small mat. |
| Rug | Cloth (6) | — | A large rug. |
| Rug | Cloth (3) | — | A small rug. |
| Rug | Cloth (4) | — | A small rug. |
| Rug | Cloth (6) | — | A large rug. |
| Rug | Cloth (6) | — | A large rug. |
Decorations > Wall Decorations
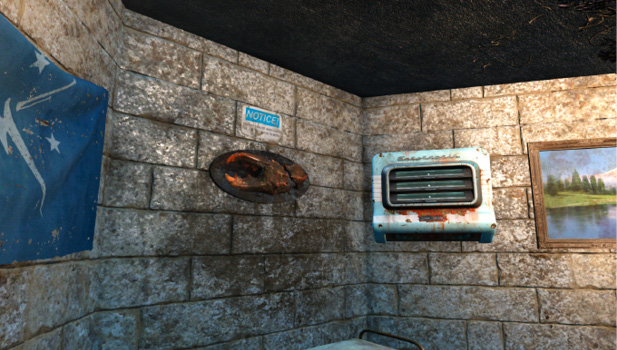
This section of the Workshop menu contains wall-mounted items like flags, trophies, and paintings.
Subcategories
- Decorations > Wall Decorations > Flags
- Decorations > Wall Decorations > Mounted Creatures
- Decorations > Wall Decorations > Paintings
- Decorations > Wall Decorations > Signs
- Decorations > Wall Decorations > Miscellaneous
Decorations > Wall Decorations > Flags
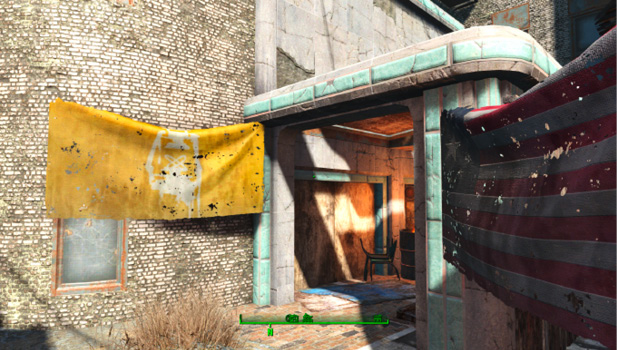
Initially, the Workshop menu only offers the U.S. flag, but more flags become available as you gain new allies. You’re only able to build a faction’s flag while you’re a recognized member—if you’re kicked out of a faction, the related flag is removed from the Workshop menu.
Flags
| Name | Build With | Prerequisites | Notes |
|---|---|---|---|
| Brotherhood of Steel Flag | Cloth (5) | Complete the “Fire Support” quest and be part of the Brotherhood of Steel faction. | A wall-mounted flag. |
| Institute Flag | Cloth (5) | Complete the “Institutionalized” quest and be part of the Institute faction. | A wall-mounted flag. |
| Railroad Flag | Cloth (5) | Complete the “Tradecraft” quest and be part of the Railroad faction. | A wall-mounted flag. |
| Minutemen Flag | Cloth (5) | Become the leader of the Minutemen. | A wall-mounted flag. |
| U.S. Flag | Cloth (5) | — | A wall-mounted flag. |
Decorations > Wall Decorations > Mounted Creatures
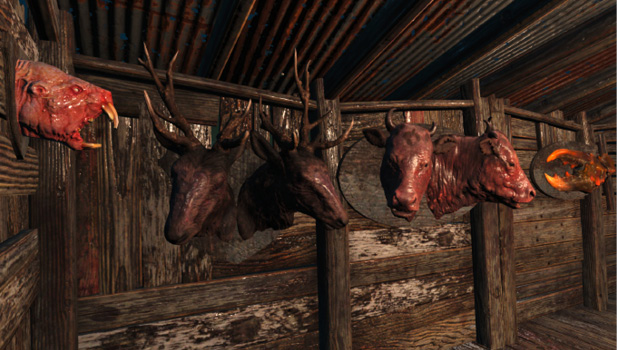
This subcategory offers a small collection of wall-mounted hunting trophies.
Mounted Creatures
| Name | Build With | Prerequisites | Notes |
|---|---|---|---|
| Mounted Brahmin Heads | Wood (1), Cloth (2), Brahmin Skull (2) | — | A wall-mounted trophy. |
| Mounted Mirelurk Claw | Wood (1), Cloth (1), Mirelurk Meat (1) | — | A wall-mounted trophy. |
| Mounted Mole Rat Head | Wood (1), Cloth (1), Mole Rat Meat (1), Mole Rat Teeth (1) | — | A wall-mounted trophy. |
| Mounted Radstag Heads | Wood (1), Cloth (2), Radstag Meat (1) | — | A wall-mounted trophy. |
Decorations > Wall Decorations > Paintings
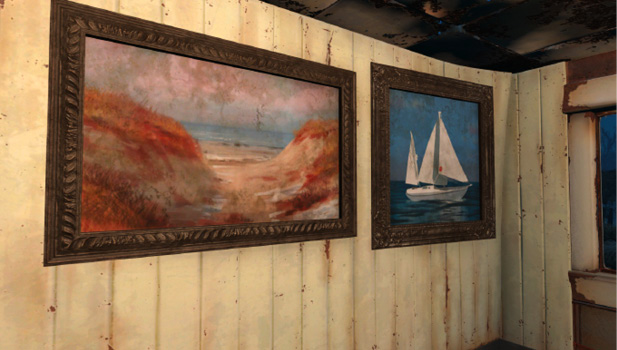
This section of the Workshop menu offers paintings of various styles and sizes.
Paintings
| Name | Build With | Prerequisites | Notes |
|---|---|---|---|
| Painting | Wood (5) | — | A wall-mounted painting. |
| Painting | Wood (5) | — | A wall-mounted painting. |
| Painting | Wood (5) | — | A wall-mounted painting. |
| Painting | Wood (5) | — | A wall-mounted painting. |
| Painting | Wood (5) | — | A wall-mounted painting. |
| Painting | Wood (5) | — | A wall-mounted painting. |
| Painting | Wood (5) | — | A wall-mounted painting. |
| Painting | Wood (5) | — | A wall-mounted painting. |
| Painting | Wood (5) | — | A wall-mounted painting. |
| Painting | Wood (5) | — | A wall-mounted painting. |
| Painting | Wood (5) | — | A wall-mounted painting. |
| Painting | Wood (5) | — | A wall-mounted painting. |
| Painting | Wood (5) | — | A wall-mounted painting. |
| Painting | Wood (5) | — | A wall-mounted painting. |
| Painting | Wood (5) | — | A wall-mounted painting. |
| Painting | Wood (5) | — | A wall-mounted painting. |
| Painting | Wood (5) | — | A wall-mounted painting. |
| Painting | Wood (5) | — | A wall-mounted painting. |
| Painting | Wood (5) | — | A wall-mounted painting. |
| Painting | Wood (5) | — | A wall-mounted painting. |
Decorations > Wall Decorations > Signs
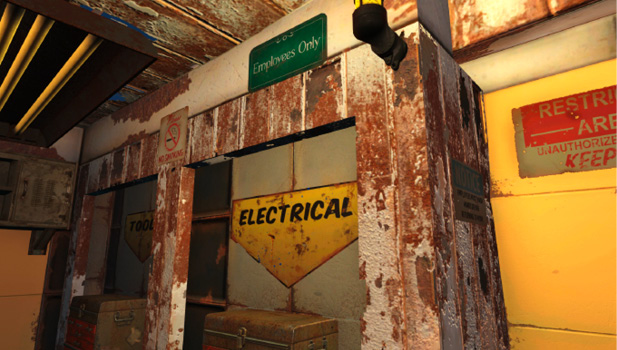
In this section of the Workshop menu, you’ll find signs in a variety of shapes, styles, and sizes.
Signs
| Name | Build With | Prerequisites | Notes |
|---|---|---|---|
| Signs | Steel (4) | — | A wall-mounted sign. |
| Signs | Steel (4) | — | A wall-mounted sign. |
| Signs | Steel (4) | — | A wall-mounted sign. |
| Signs | Steel (4) | — | A wall-mounted sign. |
| Signs | Steel (4) | — | A wall-mounted sign. |
| Signs | Steel (4) | — | A wall-mounted sign. |
| Signs | Steel (4) | — | A wall-mounted sign. |
| Signs | Steel (4) | — | A wall-mounted sign. |
| Signs | Steel (4) | — | A wall-mounted sign. |
| Signs | Steel (4) | — | A wall-mounted sign. |
| Signs | Steel (4) | — | A wall-mounted sign. |
Decorations > Wall Decorations > Miscellaneous
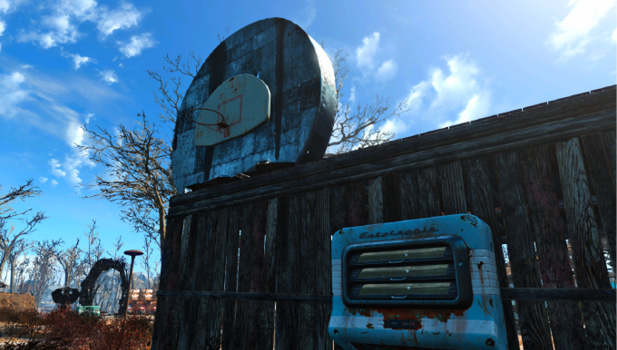
This section of the Workshop menu features two miscellaneous wall decorations: a mountable basketball hoop and a stylish Eat-O-Tronic unit.
Miscellaneous Wall Decorations
| Name | Build With | Prerequisites | Notes |
|---|---|---|---|
| Basketball Hoop | Steel (4) | — | A wall-mounted basketball hoop. |
| Eat-O-Tronic | Steel (4), Glass (2) | — | A wall-mounted vending machine. |
Decorations > Statues
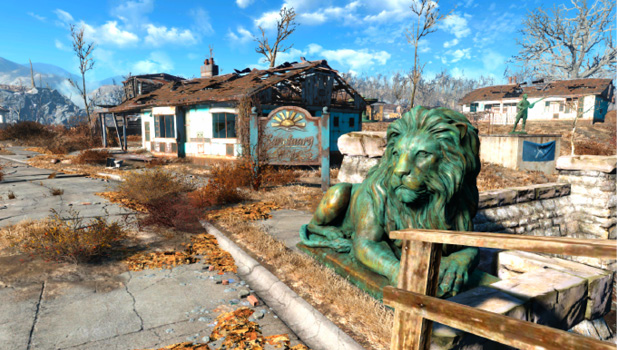
This subcategory only appears in the Workshop menu after you collect the Picket Fences magazine located in the Saugus Ironworks. Once you unlock these items, you can use workshops to build some rather impressive statues.
Statues
| Name | Build With | Prerequisites | Notes |
|---|---|---|---|
| Statue | Copper (10) | Picket Fences (Issue #3, located in Saugus Ironworks) | A small statue. |
| Statue | Copper (10) | Picket Fences (Issue #3, located in Saugus Ironworks) | A large statue. |
| Statue | Copper (20) | Picket Fences (Issue #3, located in Saugus Ironworks) | A very large statue. |
| Statue | Copper (20) | Picket Fences (Issue #3, located in Saugus Ironworks) | A very large statue. |
| Fountain | Copper (20) | Picket Fences (Issue #3, located in Saugus Ironworks) | A very large fountain. |
Decorations > Miscellaneous
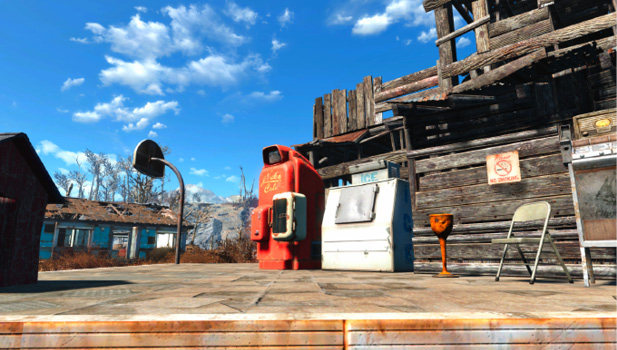
This section of the Workshop menu contains some particularly interesting decorations, many of which offer additional functionality. Some vending machines and trash receptacles can be used as containers. The doghouse gives your canine companion a place to relax between outings. Radios and jukeboxes add a bit of life to any settlement. Initially, the workshop offers a good selection of miscellaneous decorations, but many more can be unlocked as you explore the Commonwealth.
Miscellaneous Decorations
| Name | Build With | Prerequisites | Notes |
|---|---|---|---|
| Ashtray | Steel (4) | — | A standing ashtray. |
| Basketball Hoop | Steel (6) | — | A standing basketball hoop. |
| Cigarette Machine | Steel (4), Rubber (1) | — | A small vending machine. |
| Crib | Steel (1), Wood (5), Cloth (2) | — | A baby’s crib. |
| Doghouse | Wood (3), Steel (1) | — | A simple doghouse. |
| Grill | Steel (4), Rubber (1) | Picket Fences (Issue #5, located in Weston Water Treatment Plant) | A small grill. |
| Ice Cooler | Steel (4), Rubber (1) | — | A large ice machine. |
| Lawn Flamingos | Steel (1), Plastic (4) | Wasteland Survival Guide (Issue #5, located in Lynn Woods) | A lawn Flamingo. |
| Lawn Flamingos | Steel (1), Plastic (4) | Wasteland Survival Guide (Issue #5, located in Lynn Woods) | A lawn Flamingo. |
| Milk Vending Machine | Steel (4), Rubber (1) | — | A large vending machine. |
| Nuka-Cola Machine | Steel (2), Rubber (1), Plastic (2) | — | A large vending machine. |
| Potted Plant | Steel (2), Wood (2) | Picket Fences (Issue #4, located in Combat Zone) | A small potted plant. |
| Potted Plant | Steel (2), Wood (2) | Picket Fences (Issue #4, located in Combat Zone) | A small potted plant. |
| Potted Plant | Steel (2), Wood (2) | Picket Fences (Issue #4, located in Combat Zone) | A large potted plant. |
| Potted Plant | Steel (2), Wood (2) | Picket Fences (Issue #4, located in Combat Zone) | A small potted plant. |
| Potted Plant | Steel (2), Wood (2) | Picket Fences (Issue #4, located in Combat Zone) | A large potted plant. |
| Potted Plant | Steel (2), Wood (2) | Picket Fences (Issue #4, located in Combat Zone) | A small potted plant. |
| Potted Plant | Steel (2), Wood (2) | Picket Fences (Issue #4, located in Combat Zone) | A large potted plant. |
| Potted Plant | Steel (2), Wood (2) | Picket Fences (Issue #4, located in Combat Zone) | A large potted plant. |
| Radio | Circuitry (1), Plastic (2), Copper (1), Rubber (2) | — | Tuned to Diamond City Radio. |
| Radio | Circuitry (1), Plastic (2), Copper (1), Rubber (2) | — | Tuned To Classical Radio. |
| Radio | Circuitry (1), Plastic (2), Copper (1), Rubber (2) | Complete The Minutemen Quest: Taking Independence. | Tuned to Radio Freedom. |
| Sign | Steel (4), Rubber (1) | — | A large, freestanding sign. |
| Trash Bin | Steel (4), Rubber (1) | — | A large trash receptacle. |
| Trash Can | Steel (4) | — | A small trash receptacle. |
| Jukebox | Circuitry (2), Plastic (2), Copper (2), Glass (2), Steel (2) | — | Requires 2 Power. |
| Shaun’s Crib | Cloth (2), Steel (1), Wood (5) | Scrap Shaun’s crib. | Unique item. Can only be built in Sanctuary Hills. |
Power
This category contains all of the items you’ll need to generate and deliver power, but it also offers some very useful high-tech devices. With this selection of generators, switches, lights, and special electronics, you can build a power grid that rivals anything found in the Commonwealth.
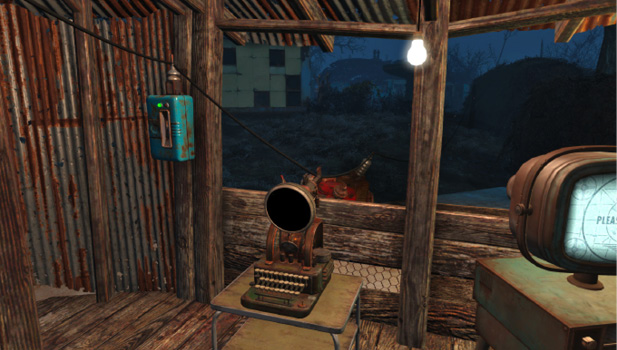
Subcategories
- Power > Generators
- Power > Connectors and Switches
- Power > Lights
- Power > Miscellaneous
Power > Generators
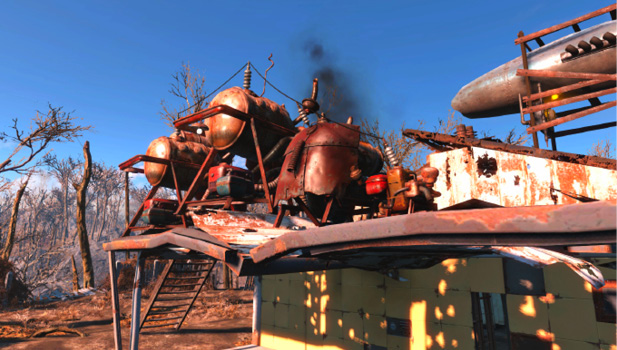
Generators produce the power needed to run lights, turrets, and all of a settlement’s electronic devices. Each generator features its own size, output, and building materials, and the most powerful generator requires an investment in the Science! perk.
Generators
| Name | Build With | Prerequisites | Notes |
|---|---|---|---|
| Generator—Small | Gear (2), Steel (4), Rubber (2), Copper (2), Ceramic (1) | — | Produces 3 Power |
| Generator—Medium | Screw (3), Gear (3), Steel (7), Rubber (3), Copper (3), Ceramic (1) | — | Produces 5 Power |
| Generator—Large | Gear (6), Screw (5), Rubber (4), Copper (10), Aluminum (12), Nuclear Material (3) | Rank 1: Science! | Produces 10 Power |
| Generator—Windmill | Steel (15), Copper (4), Aluminum (10), Gear (2) | — | Produces 3 Power |
Power > Connectors and Switches
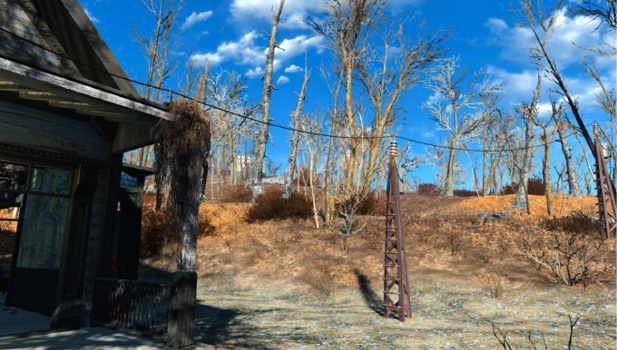
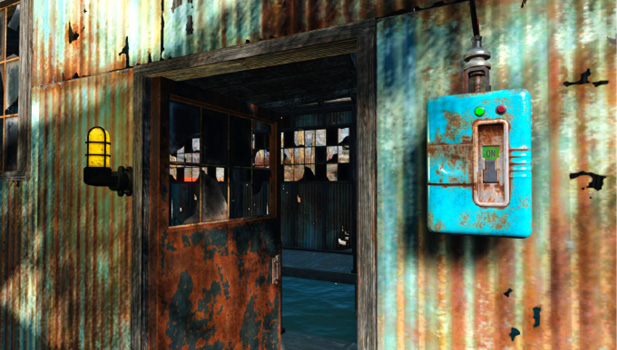
This section of the Workshop menu offers an assortment of pylons, conduits, and switches. By connecting these devices to a power source, you can expand and control the flow of electricity within a settlement. Pylons and conduits serve as anchor points for wires, and you can link them to deliver power to buildings and devices located anywhere within a settlement. As long as they’re attached to a suitable power source, these connectors also radiate energy needed to power televisions, jukeboxes, and most lights.
Use switches to determine when and if power is transmitted to specific areas or devices. You’ll find everything from basic on/off switches to programmable power counters. Connect switches to terminals to access additional options; combine switches to create new effects. Like basic connectors, switches radiate the energy needed to power simple devices. Of course, this energy field is only active while a switch is turned on.
Connectors and Switches
| Name | Build With | Prerequisites | Notes |
|---|---|---|---|
| Power Pylon | Copper (2), Wood (2), Ceramic (1), Steel (1) | — | A short pylon |
| Power Pylon—Large | Copper (4), Ceramic (3), Steel (8), Rubber (1) | — | A tall pylon. Requires power. |
| Power Conduit | Copper (2), Ceramic (2), Steel (2) | — | Mounts to floors |
| Power Conduit | Copper (2), Ceramic (2), Steel (2) | — | Mounts to walls |
| Power Conduit | Copper (2), Ceramic (2), Steel (2) | — | Mounts to ceilings |
| Switched Power Pylon | Copper (3), Wood (2), Steel (2), Ceramic (1), Rubber (1) | — | Features an on/off switch. Requires power. |
| Switched Power Pylon—Large | Copper (5), Steel (9), Ceramic (3), Rubber (1) | — | Features an on/off switch. Requires power. |
| Switch | Steel (2), Copper (1), Rubber (1) | — | A wall-mounted on/off switch. Requires power. |
| Pressure Plate | Copper (3), Steel (3), Spring (2) | — | Transmits power when activated. Requires power. |
| Laser Tripwire | Fiber Optics (2), Steel (4), Crystal (1), Fusion Cell (6) | Rank 1: Science! | Transmits power when disarmed. Use a connected terminal to access additional functionality. Requires power. |
| Laser Tripwire | Fiber Optics (2), Steel (4), Crystal (1), Fusion Cell (6) | Rank 1: Science! | Transmits power when disarmed. Use a connected terminal to access additional functionality. Requires power. |
| Delayed Off Switch | Copper (2), Wood (2), Ceramic (1) | — | Stops transmitting power after a short delay. Use a connected terminal to change the delay. Requires power. |
| Delayed On Switch | Copper (2), Wood (2), Ceramic (1) | — | Transmits power after a short delay. Use a connected terminal to change the delay. Requires power. |
| Interval Switch | Copper (2), Wood (2), Ceramic (1) | — | Switches on and off repeatedly. Use a connected terminal to change the on/off intervals. Requires power. |
| Power Counter | Copper (1), Wood (1), Ceramic (1), Steel (2) | — | Transmits power briefly after cycling power 10 times. Use a connected terminal to change the max count. Requires power. |
Power > Lights
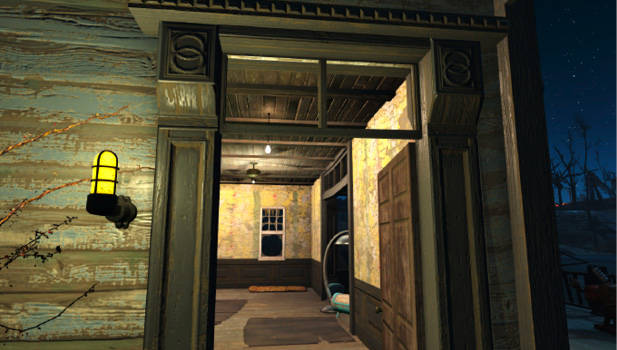
Initially, the Workshop menu contains a good variety of lighting options, but you can unlock many more by collecting the Picket Fences magazine located in Hardware Town. Nearly all lights are powered by radiant energy—the one exception is the construction light. This freestanding light must be wired directly to a power grid in order to function.
Lights
| Name | Build With | Prerequisites | Notes |
|---|---|---|---|
| Lightbulb | Glass (1), Copper (1), Steel (2) | — | A hanging light. Requires power. |
| Industrial Wall Light | Glass (1), Copper (1), Steel (2) | — | A wall-mounted light. Requires power. |
| Construction Light | Glass (2), Copper (1), Steel (4) | — | A freestanding light. Requires 1 Power. |
| Ceiling Fan | Glass (1), Copper (1), Gear (1), Wood (1), Steel (2) | — | A hanging fan. Requires power. |
| Lamp | Glass (1), Copper (1), Steel (2) | — | A freestanding light. Requires power. |
| High Tech Lights | Glass (1), Copper (1), Steel (2) | Picket Fences (Issue #2, located in Hardware Town) | A freestanding light. Requires power. |
| High Tech Lights | Glass (1), Copper (1), Steel (2) | Picket Fences (Issue #2, located in Hardware Town) | A freestanding light. Requires power. |
| High Tech Lights | Glass (1), Copper (1), Steel (2) | Picket Fences (Issue #2, located in Hardware Town) | A freestanding light. Requires power. |
| High Tech Lights | Glass (1), Copper (1), Steel (2) | Picket Fences (Issue #2, located in Hardware Town) | A hanging light. Requires power. |
| High Tech Lights | Glass (1), Copper (1), Steel (2) | Picket Fences (Issue #2, located in Hardware Town) | A hanging light. Requires power. |
| High Tech Lights | Glass (1), Copper (1), Steel (2) | Picket Fences (Issue #2, located in Hardware Town) | A hanging light. Requires power. |
| High Tech Lights | Glass (1), Copper (1), Steel (2) | Picket Fences (Issue #2, located in Hardware Town) | A hanging light. Requires power. |
| High Tech Lights | Glass (1), Copper (1), Steel (2) | Picket Fences (Issue #2, located in Hardware Town) | A freestanding light. Requires power. |
| High Tech Lights | Glass (1), Copper (1), Steel (2) | Picket Fences (Issue #2, located in Hardware Town) | A freestanding light. Requires power. |
| High Tech Lights | Glass (1), Copper (1), Steel (2) | Picket Fences (Issue #2, located in Hardware Town) | A freestanding light. Requires power. |
| High Tech Lights | Glass (1), Copper (1), Steel (2) | Picket Fences (Issue #2, located in Hardware Town) | A freestanding light. Requires power. |
| Mirror Ball | Glass (6), Copper (1), Steel (2) | — | A hanging light. Requires power. |
| Strobe Light | Glass (1), Copper (1), Steel (2), Circuitry (1) | Rank 1: Science! | A hanging light. Requires power. |
Power > Miscellaneous
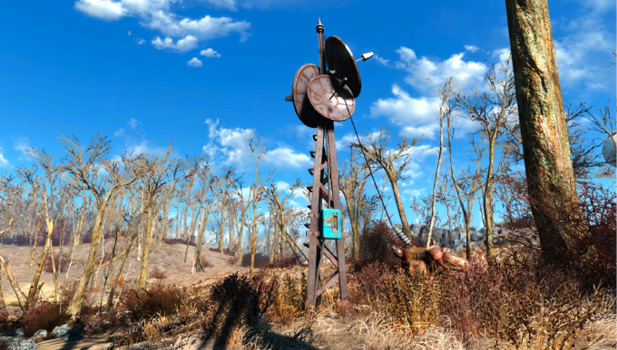
This section of the Workshop menu contains a small selection of interesting items. The recruitment radio beacon is particularly useful—this powered transmitter draws new residents to a specific settlement, allowing your population to grow fairly quickly.
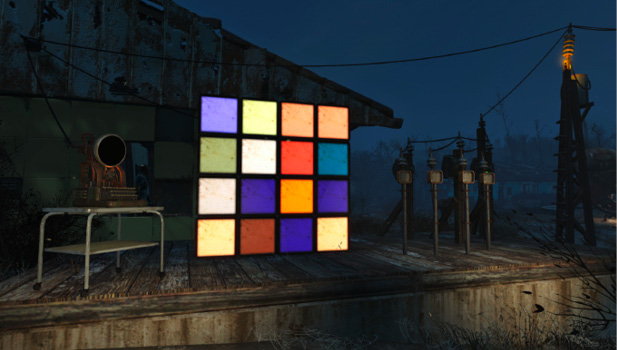
Use terminals to access additional functionality on attached devices. Not every powered device offers extra features, but all terminals can be used with switches, lightboxes, powered speakers, and powered turrets.
Miscellaneous Power Items
| Name | Build With | Prerequisites | Notes |
|---|---|---|---|
| Recruitment Radio Beacon | Circuitry (2), Crystal (2), Copper (6), Steel (10), Ceramic (3), Rubber (1) | — | Attracts new settlers to your settlement when turned on. Requires 1 Power. |
| Terminal | Rubber (2), Copper (2), Circuitry (2), Aluminum (4) | Rank 1: Hacker | Access additional functionality on connected objects. Requires 1 Power. |
| Lightbox | Glass (1), Copper (1), Steel (2) | — | Use a connected terminal to access additional functionality. Requires 1 Power. |
| Powered Speaker | Copper (1), Wood (1), Steel (2), Circuitry (1) | — | Plays a musical tone when powered. Use a connected terminal to change the pitch. Requires 1 Power. |
Defense
Use the items in this category to boost your settlement’s Defense rating. A high Defense rating makes your settlement a much less appealing target for would-be attackers. This, in turn, results in a more self-sufficient settlement with a happier, more productive population.
Subcategories
Defense > Guard Posts
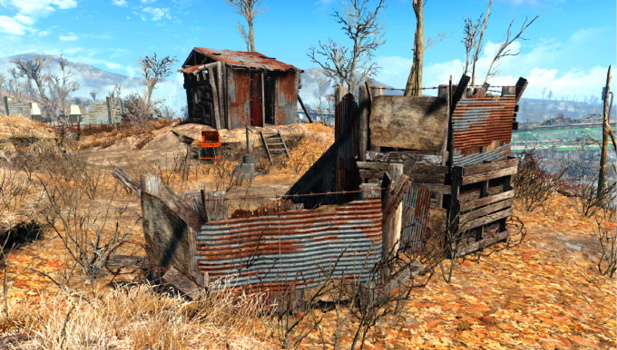
Guard posts are made from common materials—in most cases, a newly acquired settlement contains more than enough scrap to build at least a few of these defensive items. You must assign a worker to a guard post before it contributes to a settlement’s Defense rating, but because each guard can generate a maximum of 6 Defense, a single guard can man up to three posts.
Guard Posts
| Name | Build With | Prerequisites | Notes |
|---|---|---|---|
| Guard Post | Wood (10), Steel (4) | — | Provides 2 Defense. Requires an assigned worker. |
| Guard Tower | Wood (12), Steel (6) | — | Provides 2 Defense. Requires an assigned worker. |
Defense > Turrets
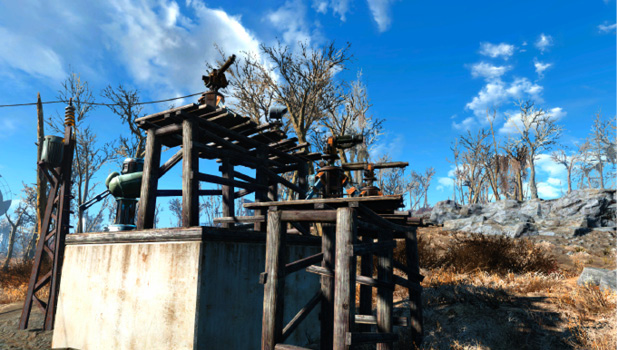
The Workshop menu offers a variety of turrets. These automated weapons boost a settlement’s Defense rating without compromising its workforce. It does, however, take a fair amount of uncommon and rare materials to build them, and most turrets require power to function. Still, if you have the required resources and skills, building a collection of powerful turrets will go a long way toward keeping your settlements safe.
Turrets
| Name | Build With | Prerequisites | Notes |
|---|---|---|---|
| Machine-Gun Turret | Steel (8), Circuitry (1), Gear (2), Oil (2) | — | Provides 5 Defense. |
| Heavy Machine-Gun Turret | Steel (10), Circuitry (2), Gear (2), Oil (4) | Rank 1: Gun Nut | Provides 8 Defense. |
| Laser Turret | Aluminum (5), Circuitry (3), Screw (3), Fiber Optics (4), Gear (2), Nuclear Material (2), Steel (5), Glass (3) | Rank 1: Science! | Requires 2 Power. Produces 8 Defense. |
| Shotgun Turret | Aluminum (4), Circuitry (5), Screw (4), Gear (4), Oil (5), Steel (6) | Rank 2: Gun Nut | Requires 2 Power. Produces 8 Defense. |
| Spotlight | Circuitry (1), Screw (1), Gear (2), Steel (6), Oil (1), Glass (2) | — | Requires 2 Power. Produces 2 Defense. |
| Heavy Laser Turret | Crystal (4), Aluminum (7), Circuitry (4), Screw (4), Fiber Optics (4), Gear (3), Nuclear Material (4), Steel (3) | Rank 3: Science! | Requires 2 Power. Produces 12 Defense. |
| Missile Turret | Aluminum (6), Circuitry (6), Screw (5), Gear (5), Oil (6), Steel (6) | Rank 3: Gun Nut | Requires 2 Power. Produces 15 Defense. |
Defense > Traps
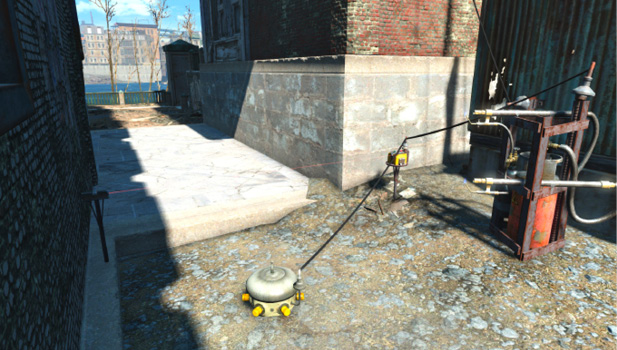
Like turrets, traps function without the help of assigned workers. Unlike turrets, traps must be repaired after each use. A trap triggers the moment it receives power, and it will continue to attack until it breaks. Use switches like pressure plates and laser tripwires to better control when and how trap can be activated. To count toward a settlement’s Defense rating, a trap must be undamaged and wired to a power grid.
Traps
| Name | Build With | Prerequisites | Notes |
|---|---|---|---|
| Tesla Arc | Steel (2), Copper (3), Circuitry (1) | — | Requires power. Produces 2 Defense. |
| Radiation Emitter | Screw (2), Nuclear Material (3), Lead (2), Steel (2) | — | Requires power. Produces 2 Defense. |
| Flamethrower Trap | Screw (2), Rubber (4), Aluminum (4), Oil (6) | — | Requires power. Produces 3 Defense. |
Resources
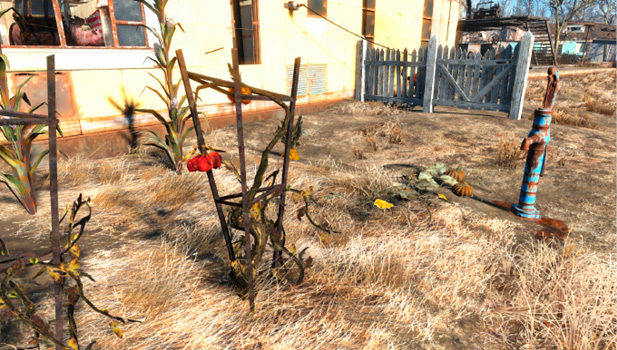
Most of the items in this category are geared toward water collection and food production, but you’ll also find an assortment of items that can make a settlement more productive and easier to manage.
Subcategories
- Resources > Water
- Resources > Food
- Resources > Miscellaneous
Resources > Water
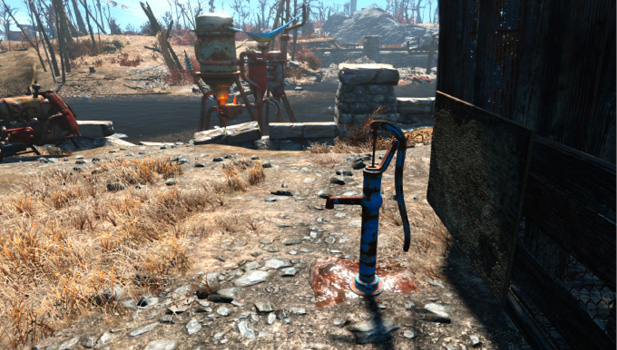
To keep your settlements happy, it’s important to provide enough water for the current population. Water pumps are simple devices that generate a small amount of water. They can only be placed in dirt, but virtually every settlement has terrain that can accommodate at least a few water pumps. Water purifiers, on the other hand, can only be placed in water. These machines are more difficult to build, and they require power, but they’re able to generate an impressive amount of drinkable water.
Water Items
| Name | Build With | Prerequisites | Notes |
|---|---|---|---|
| Water Pump | Concrete (1), Steel (4), Gear (1) | — | Can only be placed in dirt. Produces 3 Water. |
| Water Purifier | Oil (2), Ceramic (2), Rubber (5), Copper (2), Steel (10), Cloth (2) | — | Must be placed in the water. Requires 2 Power. Produces 10 Water. |
| Water Purifier—Industrial | Oil (4), Ceramic (2), Rubber (10), Copper (4), Steel (20), Cloth (4), Screw (6) | Rank 1: Science! | Must be placed in the water. Requires 5 Power. Produces 40 Water. |
Resources > Food
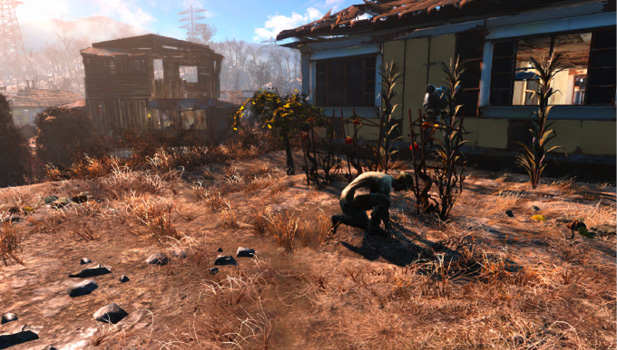
Like water, food is an important factor in a settlement’s overall happiness. The crops found in the Workshop menu can only be placed in dirt, and they only count toward your settlement’s Food rating if workers are assigned to care for them. A single worker can generate up to 6 Food, and he or she can tend any combination of crops that doesn’t exceed this limit.
Assigned crops also produce food that you can harvest yourself. You can consume this food, sell it, or use it to plant new crops and create items at workstations. Harvesting food has no effect on your settlement’s Food rating.
Food Items
| Name | Build With | Prerequisites | Notes |
|---|---|---|---|
| Carrot | Carrot (1) | — | Can only be placed in dirt. Produces 0.5 Food. Requires an assigned worker. |
| Corn | Corn (1) | — | Can only be placed in dirt. Produces 0.5 Food. Requires an assigned worker. |
| Corn | Corn (1) | — | Can only be placed in dirt. Produces 0.5 Food. Requires an assigned worker. |
| Gourd | Gourd (1) | — | Can only be placed in dirt. Produces 0.5 Food. Requires an assigned worker. |
| Melon | Melon (1) | — | Can only be placed in dirt. Produces 0.5 Food. Requires an assigned worker. |
| Mutfruit Plant | Mutfruit (1) | — | Can only be placed in dirt. Produces 1 Food. Requires an assigned worker. |
| Razorgrain | Razorgrain (1) | — | Can only be placed in dirt. Produces 0.5 Food. Requires an assigned worker. |
| Razorgrain | Razorgrain (1) | — | Can only be placed in dirt. Produces 0.5 Food. Requires an assigned worker. |
| Tato Plant | Tato (1) | — | Can only be placed in dirt. Produces 0.5 Food. Requires an assigned worker. |
| Tato Plant | Tato (1) | — | Can only be placed in dirt. Produces 0.5 Food. Requires an assigned worker. |
Resources > Miscellaneous
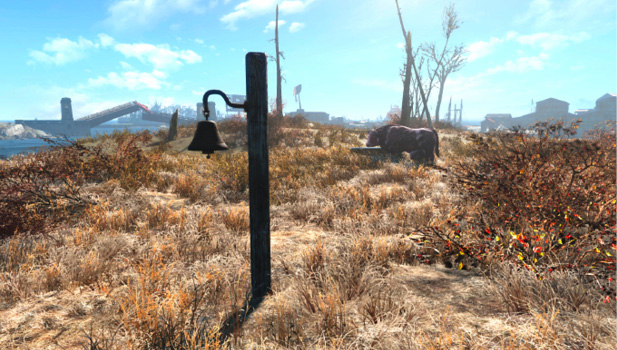
This section of the Workshop menu contains some very useful items. Scavenging stations increase the amount of scrap salvaged by the workers assigned to them. Feed troughs keep Brahmin from wandering around your settlements. Bells and sirens make it easier to manage your settlers, and the Fast-Travel target adjusts your arrival point at a given settlement.
Miscellaneous Resource Items
| Name | Build With | Prerequisites | Notes |
|---|---|---|---|
| Scavenging Station | Wood (5), Steel (3) | — | Extra scavenging production. Requires an assigned worker. |
| Brahmin Feed Trough | Steel (2), Ceramic (8) | — | Brahmin will tend to stay near their feed trough. |
| Bell | Wood (4), Steel (4) | — | Ring to gather nearby settlers. |
| Siren | Copper (5), Steel (9), Ceramic (3), Rubber (1) | — | Alerts nearby settlers to danger when triggered. Requires 1 Power. |
| Fast-Travel Target | Cloth (2), Rubber (1) | — | Only 1 per location. Moves the Fast-Travel arrival point. |
Stores
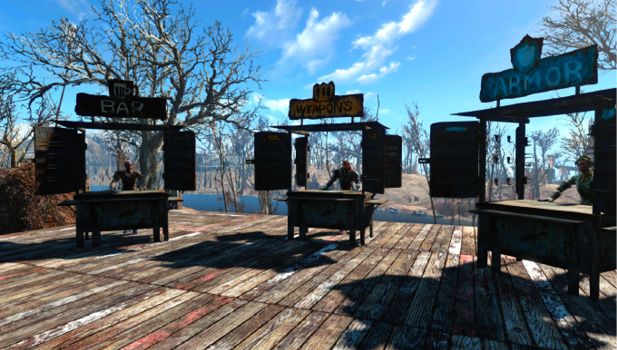
In addition to buying and selling goods, stores you build within a settlement generate income based on the current population. Many stores even increase a settlement’s total Happiness rating. You must assign a worker to a store before it can be used—once you do, a worker stays at his or her store during its hours of operation. You must have both ranks of the Local Leader perk before you can build a store, and many stores have additional perk requirements.
Subcategories
- Stores > Trader
- Stores > Armor
- Stores > Weapons
- Stores > Food and Drink
- Stores > Clinic
- Stores > Clothing
Stores > Trader
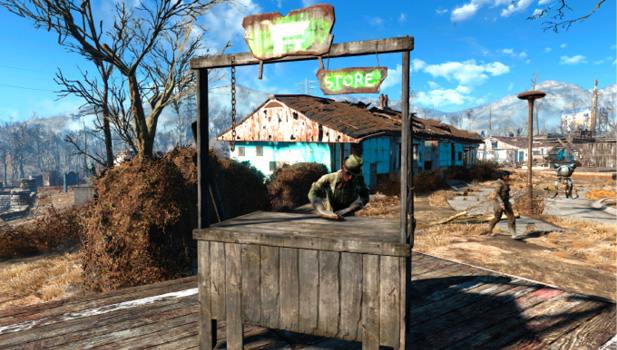
Trading stores specialize in junk items. Larger stores offer a better selection of rarer goods and keep more money on hand. These stores also increase a settlement’s Happiness rating.
Trading Stores
| Name | Build With | Prerequisites | Notes |
|---|---|---|---|
| Trading Stand | Wood (5), Bottlecap (300), Steel (3) | Rank 2: Local Leader | Produces income based on the total population. Makes settlements happier. Requires an assigned worker. |
| Trading Shop | Wood (5), Bottlecap (600), Steel (3) | Rank 2: Local Leader | Produces income based on the total population. Makes settlements happier. Requires an assigned worker. |
| Trading Emporium | Wood (5), Bottlecap (1500), Steel (3) | Rank 2: Cap Collector, Rank 2: Local Leader | Produces income based on the total population. Makes settlements happier. Requires an assigned worker. |
Stores > Armor
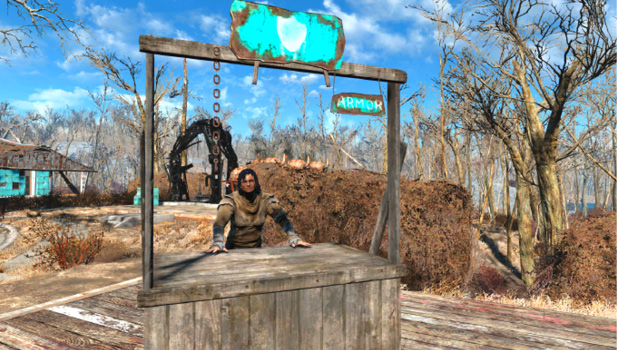
Armor stores specialize in protective apparel. Larger stores offer a better selection of rarer goods and keep more money on hand.
Armor Stores
| Name | Build With | Prerequisites | Notes |
|---|---|---|---|
| Armor Stand | Wood (5), Bottlecap (500), Steel (3) | Rank 2: Local Leader | Produces income based on the total population. Requires an assigned worker. |
| Armor Shop | Wood (5), Bottlecap (1000), Steel (3) | Rank 2: Local Leader | Produces income based on the total population. Requires an assigned worker. |
| Armor Emporium | Wood (5), Bottlecap (3000), Steel (3) | Rank 2: Cap Collector, Rank 2: Local Leader | Produces income based on the total population. Requires an assigned worker. |
Stores > Weapons
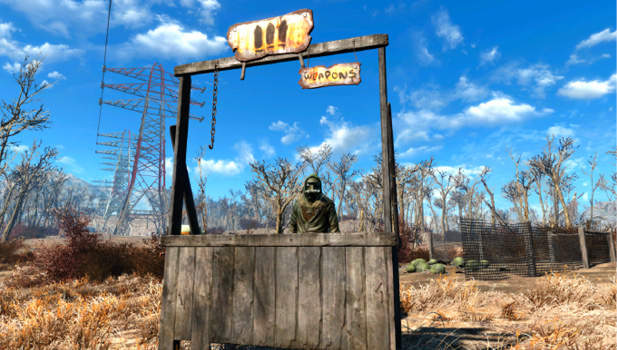
Weapon stores specialize in weapons and ammunition. Larger stores offer a better selection of rarer goods and keep more money on hand.
Weapon Stores
| Name | Build With | Prerequisites | Notes |
|---|---|---|---|
| Weapons Stand | Wood (5), Bottlecap (500), Steel (3) | Rank 2: Local Leader | Produces income based on the total population. Requires an assigned worker. |
| Weapons Shop | Wood (5), Bottlecap (1000), Steel (3) | Rank 2: Local Leader | Produces income based on the total population. Requires an assigned worker. |
| Weapons Emporium | Wood (5), Bottlecap (3000), Steel (3) | Rank 2: Cap Collector, Rank 2: Local Leader | Produces income based on the total population. Requires an assigned worker. |
Stores > Food and Drink
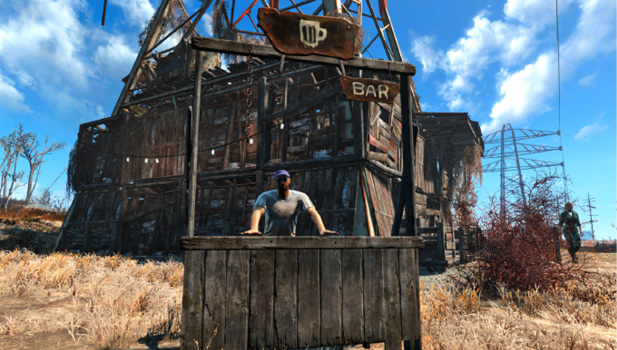
Food and drink stores specialize in comestible aid items. Larger stores offer a better selection of rarer goods and keep more money on hand. These stores also increase a settlement’s Happiness rating.
Food and Drink Stores
| Name | Build With | Prerequisites | Notes |
|---|---|---|---|
| Drink Stand | Wood (5), Bottlecap (250), Steel (3) | Rank 2: Local Leader | Produces income based on the total population. Makes settlements happier. Requires an assigned worker. |
| Bar | Wood (5), Bottlecap (500), Steel (3) | Rank 2: Local Leader | Produces income based on the total population. Makes settlements happier. Requires an assigned worker. |
| Restaurant | Wood (5), Bottlecap (1500), Steel (3) | Rank 2: Cap Collector, Rank 2: Local Leader | Produces income based on the total population. Makes settlements happier. Requires an assigned worker. |
Stores > Clinic
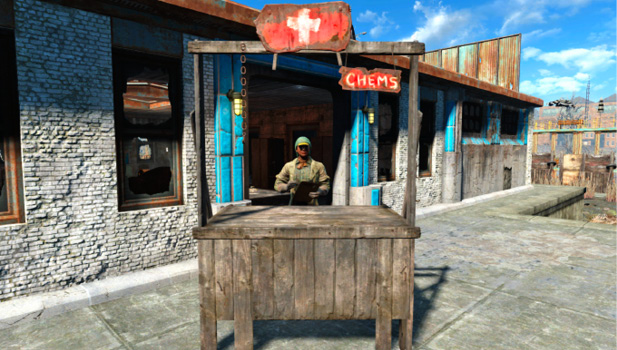
Clinics restore health and offer cures for chem addiction and radiation sickness. They also sell medicinal aid items. Larger stores offer a better selection of rarer goods and keep more money on hand. Clinics also increase a settlement’s Happiness rating.
Clinics
| Name | Build With | Prerequisites | Notes |
|---|---|---|---|
| First Aid Station | Wood (5), Bottlecap (600), Steel (3) | Rank 2: Local Leader, Rank 1: Medic | Produces income based on the total population. Makes settlements happier. Requires an assigned worker. |
| Clinic | Wood (5), Bottlecap (1200), Steel (3) | Rank 2: Local Leader, Rank 1: Medic | Produces income based on the total population. Makes settlements happier. Requires an assigned worker. |
| Surgery Center | Wood (5), Bottlecap (1800), Steel (3) | Rank 2: Local Leader, Rank 1: Medic | Produces income based on the total population. Makes settlements happier. Requires an assigned worker. |
Stores > Clothing
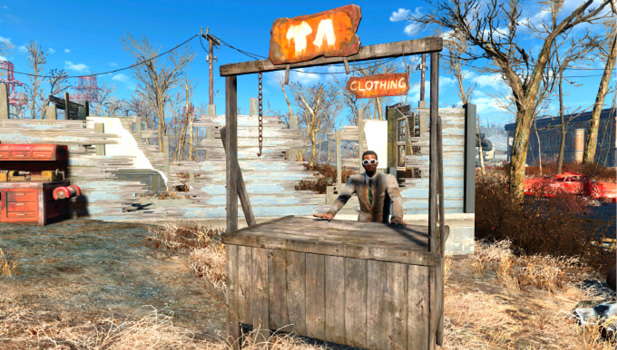
Clothing stores specialize in cosmetic apparel. Larger stores offer a better selection of rarer goods and keep more money on hand. These stores also increase a settlement’s Happiness rating.
Clothing Stores
| Name | Build With | Prerequisites | Notes |
|---|---|---|---|
| Clothing Stand | Wood (5), Bottlecap (200), Steel (3) | Rank 2: Local Leader | Produces income based on the total population. Makes settlements happier. Requires an assigned worker. |
| Clothing Shop | Wood (5), Bottlecap (400), Steel (3) | Rank 2: Local Leader | Produces income based on the total population. Makes settlements happier. Requires an assigned worker. |
| Clothing Emporium | Wood (5), Bottlecap (1000), Steel (3) | Rank 2: Cap Collector, Rank 2: Local Leader | Produces income based on the total population. Makes settlements happier. Requires an assigned worker. |
| Category | Required Store | Merchant | Min. Population | Notes |
|---|---|---|---|---|
| Armor | Armor Emporium | The Scribe | 10 | Met during Random Encounter: Workshop Armor Vendor. |
| Clinic | Surgery Center | Doc Anderson | 20 | Met during Random Encounter: The Walking Wounded. |
| Clothing | Clothing Emporium | Ann Hargraves | — | Found in WRVR Broadcast Station. |
| Food & Drink | Restaurant | Ron Staples | 20 | Met during Random Encounter: Time to Party. |
| General | Trading Emporium | Vault-Tec Rep | — | Found in Goodneighbor. |
| General | Trading Emporium | Rylee | — | Met during Random Encounter: Rylee the Trader |
| General | Trading Emporium | Tina De Luca | — | Found in Vault 81. |
| Weapons | Weapons Emporium | Smiling Larry | 30 | Met during Random Encounter: Smiling Larry. |
Crafting
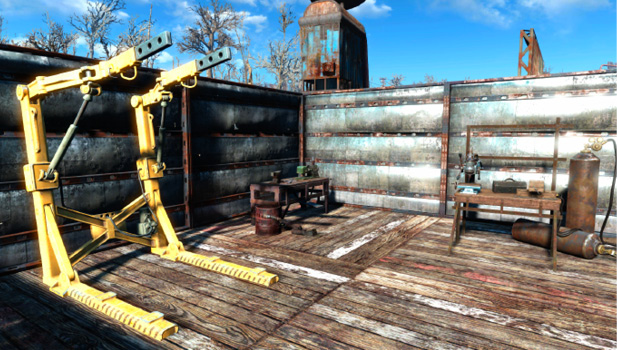
If you invest in both ranks of the Local Leader perk, you can build workstations in any of your settlements.
Workstations
| Name | Build With | Prerequisites | Notes |
|---|---|---|---|
| Armor Workbench | Wood (3), Gear (5), Spring (4), Screw (4), Aluminum (8) | Rank 2: Local Leader | Used to modify or scrap armor. |
| Chemistry Station | Wood (8), Steel (6), Glass (6), Rubber (3), Screw (4) | Rank 2: Local Leader | Used to craft chems and explosives. |
| Chemistry Station | Wood (3), Steel (6), Copper (4), Rubber (3), Screw (3), Glass (4) | Rank 2: Local Leader | Used to craft chems and explosives. |
| Cooking Station | Steel (5), Concrete (3), Wood (3), Screw (3) | Rank 2: Local Leader | Used to cook consumables. |
| Cooking Station | Steel (4), Gear (3), Wood (2), Screw (2) | Rank 2: Local Leader | Used to cook consumables. |
| Cooking Stove | Steel (4), Gear (3), Wood (2), Screw (2) | Rank 2: Local Leader | Used to cook consumables. |
| Power Armor Station | Gear (6), Oil (4), Screw (4), Plastic (4), Aluminum (12), Fiberglass (6), Circuitry (3) | Rank 2: Local Leader | Used to modify or repair Power Armor. |
| Weapons Workbench | Wood (4), Gear (4), Screw (3), Aluminum (7), Rubber (4) | Rank 2: Local Leader | Used to modify or scrap weapons. |
| Weapons Workbench | Wood (3), Gear (3), Screw (4), Aluminum (6), Rubber (6) | Rank 2: Local Leader | Used to modify or scrap weapons. |