
Map Legends
Before continuing, familiarize yourself with what the different map icons mean.
World Map Legend
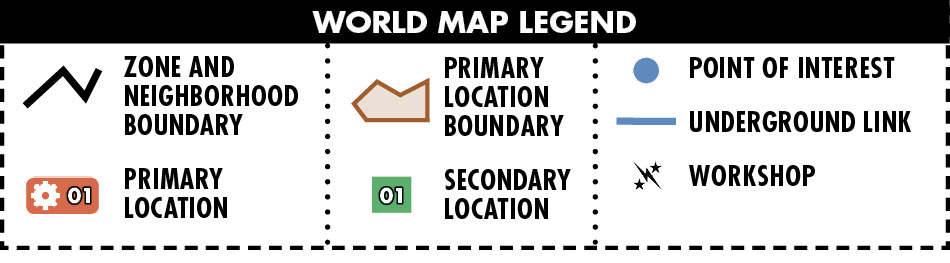
This legend is shown at the beginning of each zone (or neighborhood) and refers to the overview map.
 Zone and Neighborhood Boundary
This is the perimeter of the zone. Outside of Boston, this usually follows an easy-to-see landmark, such as a winding river, main thoroughfare, or elevated freeway.
 Primary Locations
These are usually sizable locations that, once discovered, appear and remain on your Pip-Boy’s world map. You are fortunate that Vault-Tec’s ground-penetrating radar and the latest in topographical advancements have allowed purveyors of this guide to see every single primary location prior to discovery. Primary locations may require an interior investigation; if they do, an interior map is provided where necessary. Each location has a Vault-Tec–approved number code. For example, Vault 111 has the number [1.01], indicating it is in Zone 1 and is Primary Location 01 within the zone.
 Primary Location Boundary
If primary locations or townships have a perimeter, a reasonably accurate boundary will be shown on the zone map so you can see how big the location is in a general sense before visiting it. If primary locations merge together, such as with townships, the entire area will be in a single boundary.
 Secondary Locations
These are smaller locations that rarely require an interior investigation. They are color-coded, do not feature a Pip-Boy icon, and do not ever appear on your Pip-Boy world map. Each location has a similar number code. For example, the Dry Creek Bed north of Vault 111 is [1.01], indicating it is in Zone 1 and is secondary location 01 within the zone.
 Points of Interest
There are dozens of small, strange, and interesting areas you may wish to investigate that are too tiny to be a secondary location but may yield a random encounter, small stash of goods, or other item of use.
 Underground Link
While adventuring across the Commonwealth, it is often worth knowing if one location has a hidden underground link to another. If you see this line, you’ll know two (or more) locations are linked.
 Workshops
Certain primary locations have the additional benefit of having a workshop on the premises, which are used to build defenses and power and to attract settlers as part of the Minutemen faction’s plan for the future. Find and connect all the locations with this icon and create a Commonwealth community of farmers and traders, all looking out for one another.
Local Map Legend
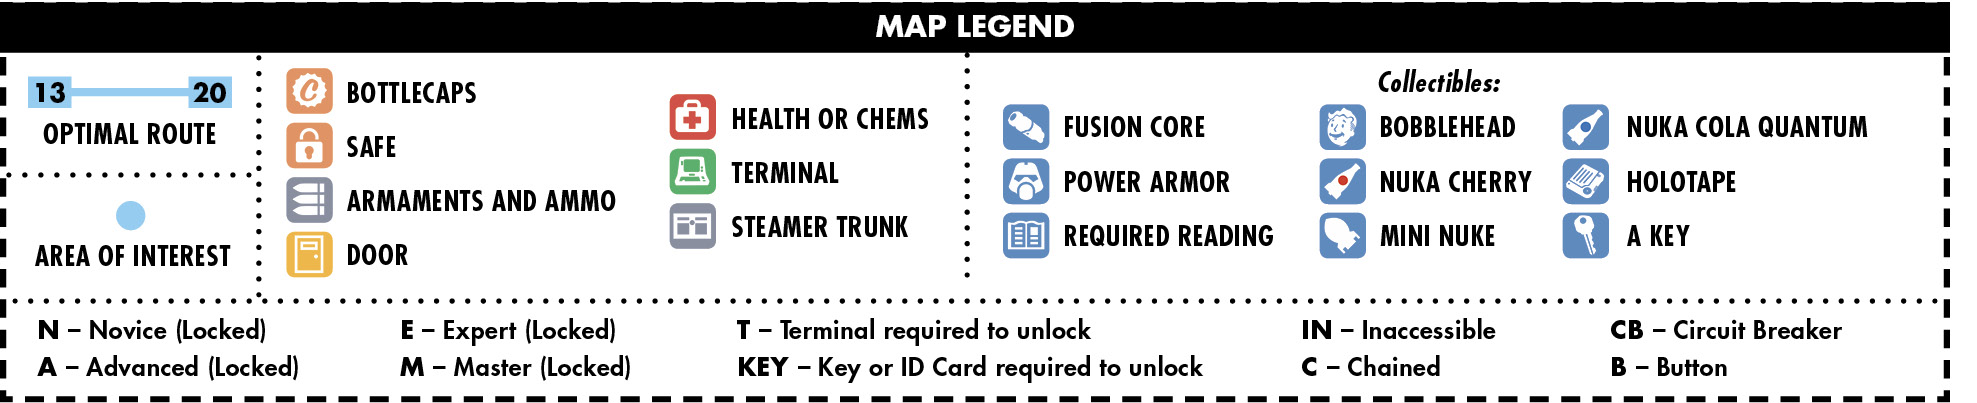
This legend is shown whenever a location is large enough to require an interior map. Most of the icons are self-explanatory, as they show doors, safes, terminals, ammo, and a variety of collectibles. The letter by some doors, terminals, or safes indicates how it is accessed.
Optimal Route
This is a series of waypoints that charts one method of completing a thorough investigation of the premises. It doesn’t usually involve stealth but does result in the location receiving a “Cleared” rating on your Pip-Boy afterward. If you get lost, use this to find your way out. Here’s how it works:
- The usual start location is flagged, though sometimes a location may have more than one starting point.
- The waypoints are numbered: When the number and route stop and the same number is seen on another level of the interior map, it means the route has changed floors (you’ve gone upstairs or down or used an elevator).
When the number is shown and a subsequent number on the same level map is shown afterward, this waypoint usually indicates an important event must occur, like using a terminal to unlock a path to continue or locating a key.