
The Hive
This parasitic alien presence, predominantly encroaching across the methane base of Titan, has a skeletal appearance and a nesting habit. They exist to exterminate all other life forms in an almost religious fervor. They cannot be reasoned with. Toughened Hive foes are usually known by the prefix “Revenant.”
Thrall
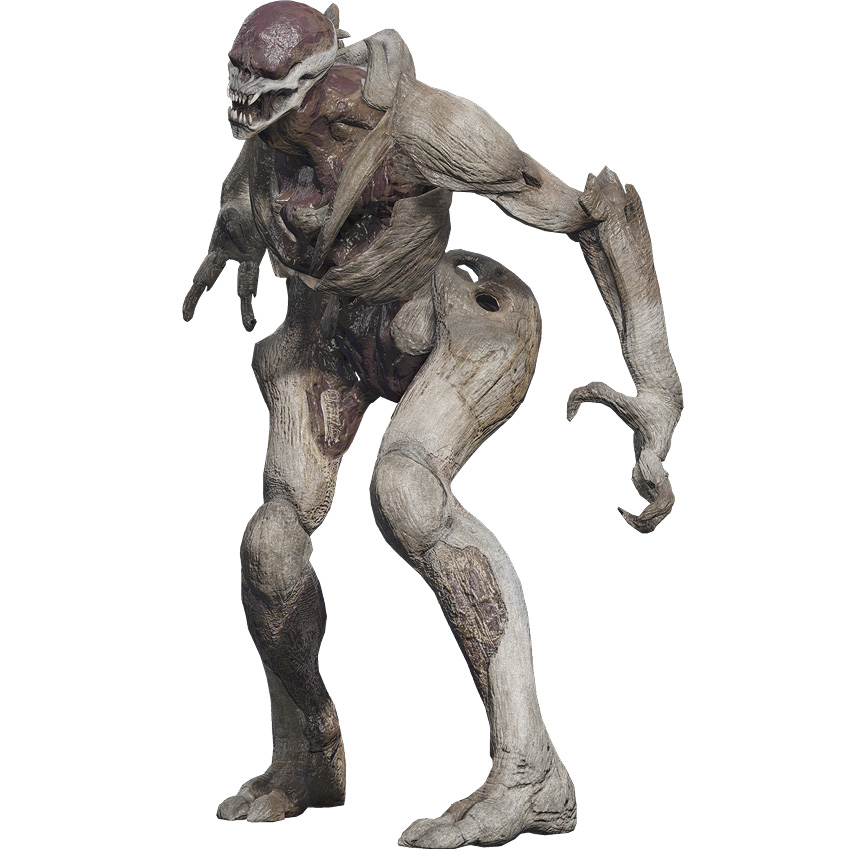
Threat Level: 1
Weak Spot: Head
| Loadout | Types | Role | Survival Tactics | Takedown Tactics |
|---|---|---|---|---|
|
Claws |
Base |
Fodder |
Melee Pressure |
Target Practice |
Notes: These husk-like foes exist to swarm and overwhelm you before savaging you with their claws and bites. Their lack of subtlety means you should employ similarly savage counterattacks; make these priority targets (unless Cursed Thralls are active), and mow them down with a rapid-fire weapon. Push back with melee and gun attacks, and retreat if you’re overwhelmed.
Cursed Thrall
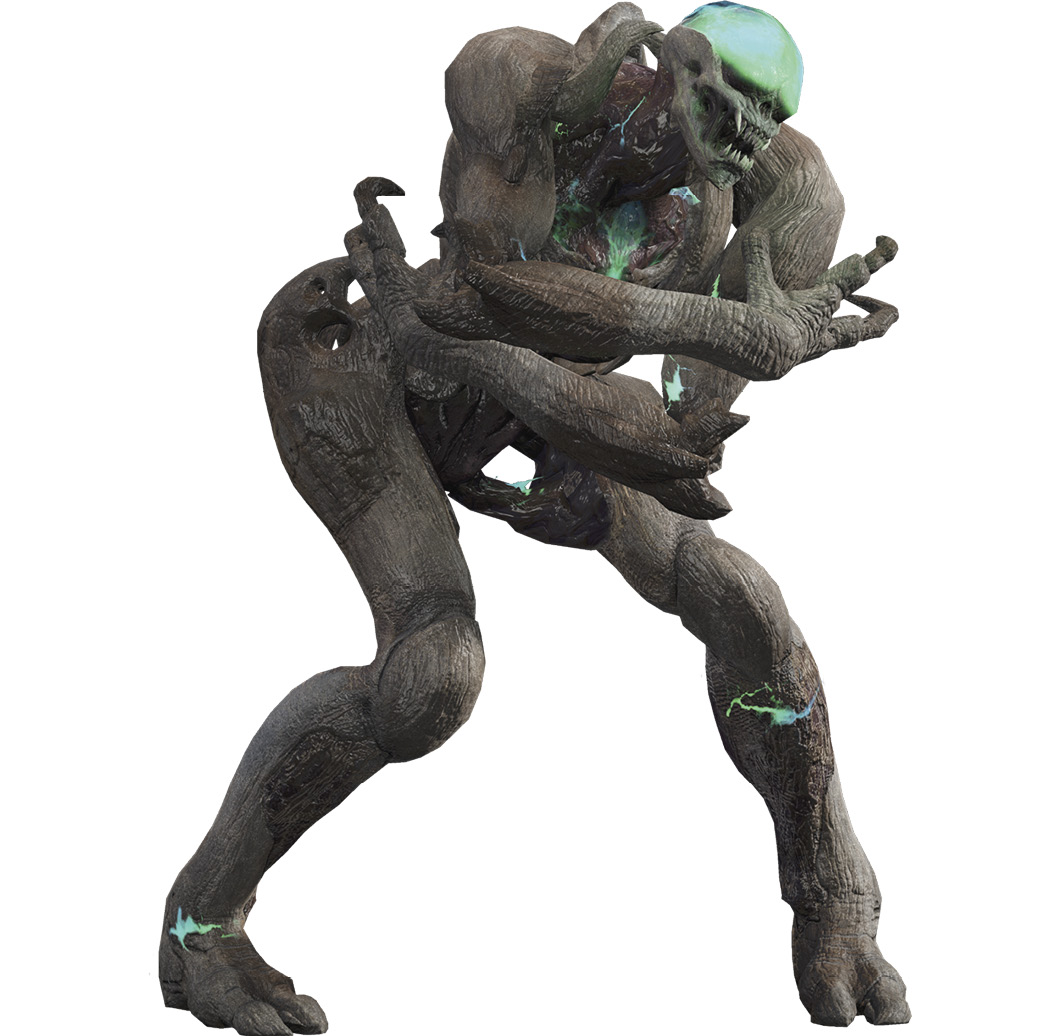
Threat Level: 3
Weak Spot: Head
| Loadout | Types | Role | Survival Tactics | Takedown Tactics |
|---|---|---|---|---|
|
Explosion |
Base |
Fodder |
Melee Pressure (Explode) |
Target Practice |
Notes: Cursed Thralls move more slowly than their revolting cousins, but they carry a glowing and rancid explosive growth within themselves, detonating it when in melee range. Make these priority targets, not least because the explosion can remove other foes (usually Thralls and Cursed Thralls) in the immediate vicinity. Otherwise, Thrall tactics apply here, although you never want to be at melee range.
Acolyte
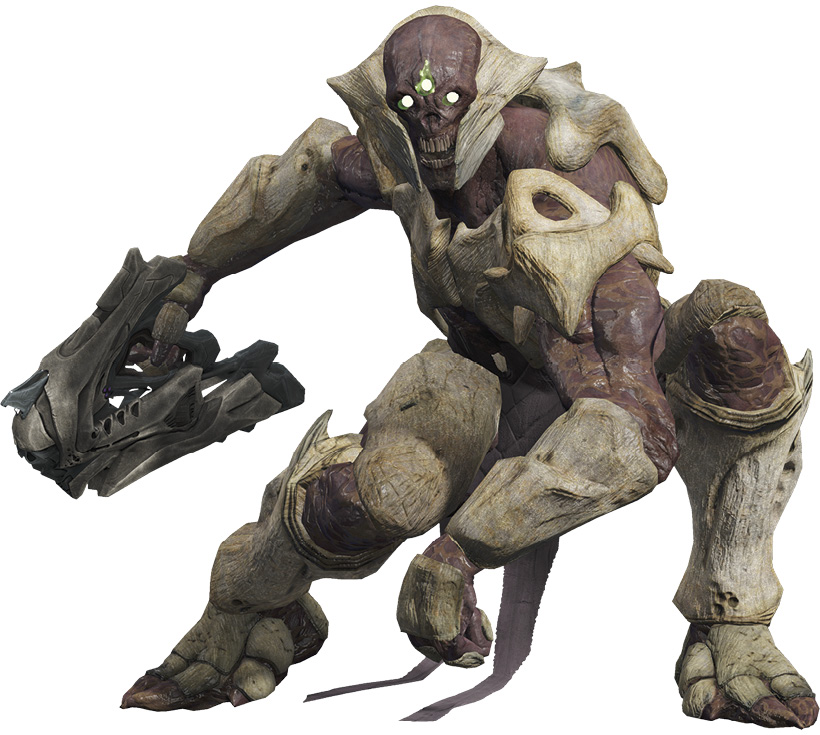
Threat Level: 2
Weak Spot: Head
| Loadout | Types | Role | Survival Tactics | Takedown Tactics |
|---|---|---|---|---|
|
Arc rifle |
Base, Elite, Sub-Boss, Boss |
Soldier |
Dodge Enemy Fire |
Weaken and Beat Down |
|
Splinter |
Base, Elite, Sub-Boss, Boss |
Soldier |
Stay Mobile, Area of Denial |
Weaken and Beat Down |
Notes: Possessing the intelligence and tactical knowledge to hide, flank, use cover, and engage in different ways depending on their main weapon, Acolytes aren’t happy when you’re making deft maneuvers. Finish up with rapid-fire shots into their skulls and a melee attack flourish to complete the takedown. Acolytes also have a fireball grenade, creating area of denial. Watch for it!
Knight
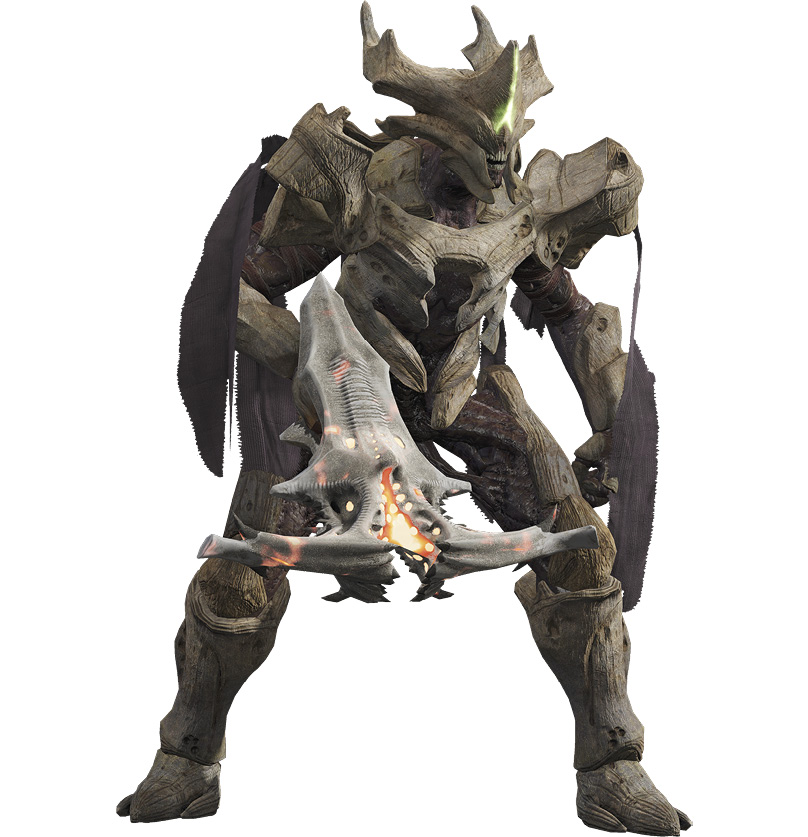
Threat Level: 3-4
Weak Spot: Head
| Loadout | Types | Role | Survival Tactics | Takedown Tactics |
|---|---|---|---|---|
|
Boomer |
Base, Elite, Sub-Boss, Boss |
Commander |
Dodge Enemy Fire |
Flank Target (Wall of Darkness) |
|
Splinter |
Base, Elite, Sub-Boss, Boss |
Commander |
Stay Mobile |
Flank Target (Wall of Darkness) |
|
Cleaver |
Base, Elite, Sub-Boss, Boss |
Commander |
Melee Pressure |
Flank Target (Wall of Darkness) |
Notes: The most troublesome of the regularly encountered Hive foes, the Knight is large, fast, and capable of wreaking havoc with a close-range attack if you let him. It’s best to take him out at range with well-aimed headshots while remaining active so the Knight can’t successfully shoot you. The Knight has a Wall of Darkness Ability, a protective barrier it conjures while it heals after taking damage. You can wait the few seconds it takes for the wall to disappear, and then complete the Knight takedown. Or, if you want to conserve ammunition, you can move to the Knight’s flank where the wall isn’t active and finish the job.
Wizard
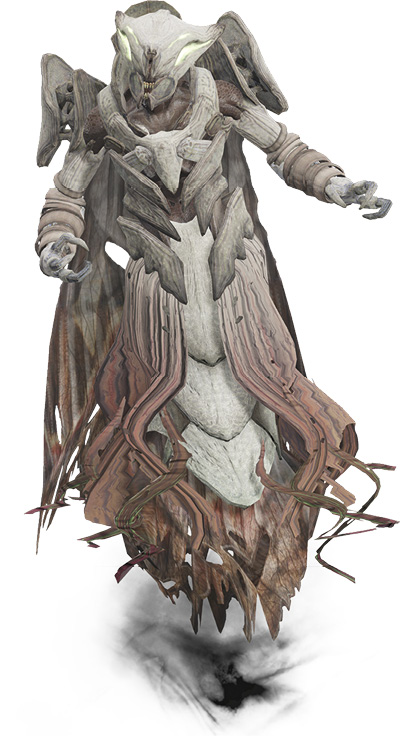
Threat Level: 4
Weak Spot: Head
| Loadout | Types | Role | Survival Tactics | Takedown Tactics |
|---|---|---|---|---|
|
Darkness Blast |
Base, Elite, Sub-Boss, Boss |
Commander |
Suppression (Line of Sight), Area Denial (Darkness Cloud) |
Maintain Pressure (Shield) |
Notes: These floating fiends are extremely dangerous, and they sometimes come with a Thrall entourage. At all other times, consider them a priority target due to their Darkness Cloud, which inflicts area-of-effect damage and can block your visibility. Retaliate by staying out of their line of sight, and when you’re ready, attack their shields. Match the Energy weapon to the Wizard’s shield type (mainly Solar have been seen), and keep up the pressure until the shield is removed. The Wizard is then very susceptible to your continued gunfire. Do not break off combat at this point; you don’t want the Wizard’s shield to recharge.
Ogre
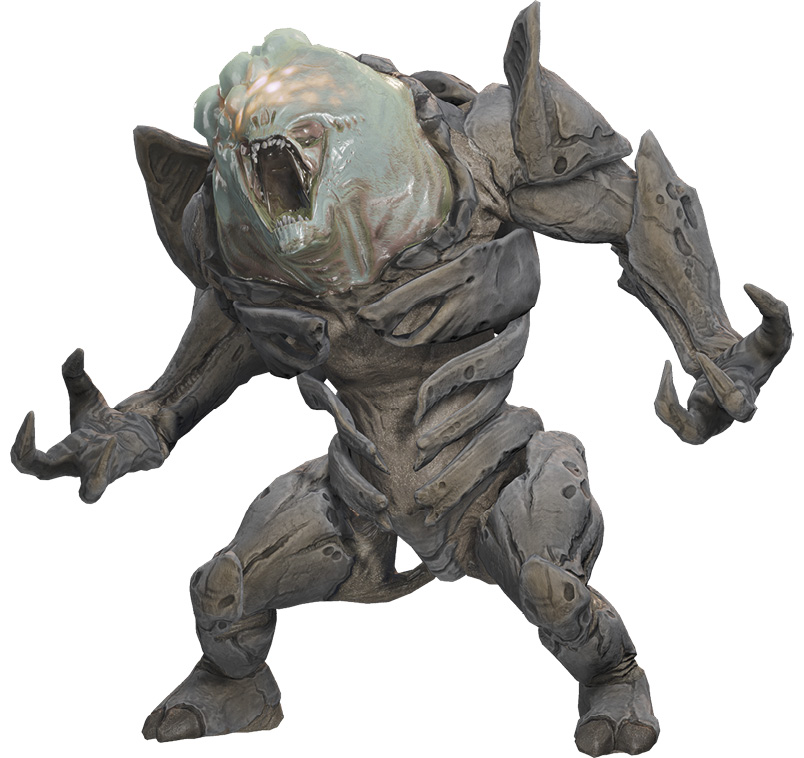
Threat Level: 5
Weak Spot: Head
| Loadout | Types | Role | Survival Tactics | Takedown Tactics |
|---|---|---|---|---|
|
Eye Blast |
Base, Elite, Sub-Boss, Boss |
Artillery |
Suppression (Line of Sight) |
Line of Sight |
Notes: Ogres can be terrifying, as their bulk and their Eye Blast attacks are extremely intimidating. Seek cover immediately so you aren’t cut down in seconds. Then, train your weaponry at the Ogre’s glowing “eye head” (though most of its body can also be struck). Take it down with precise shooting as often as you can, avoiding hits from that stream of energy. Make Ogres a priority target when you (occasionally) encounter them.
Shrieker
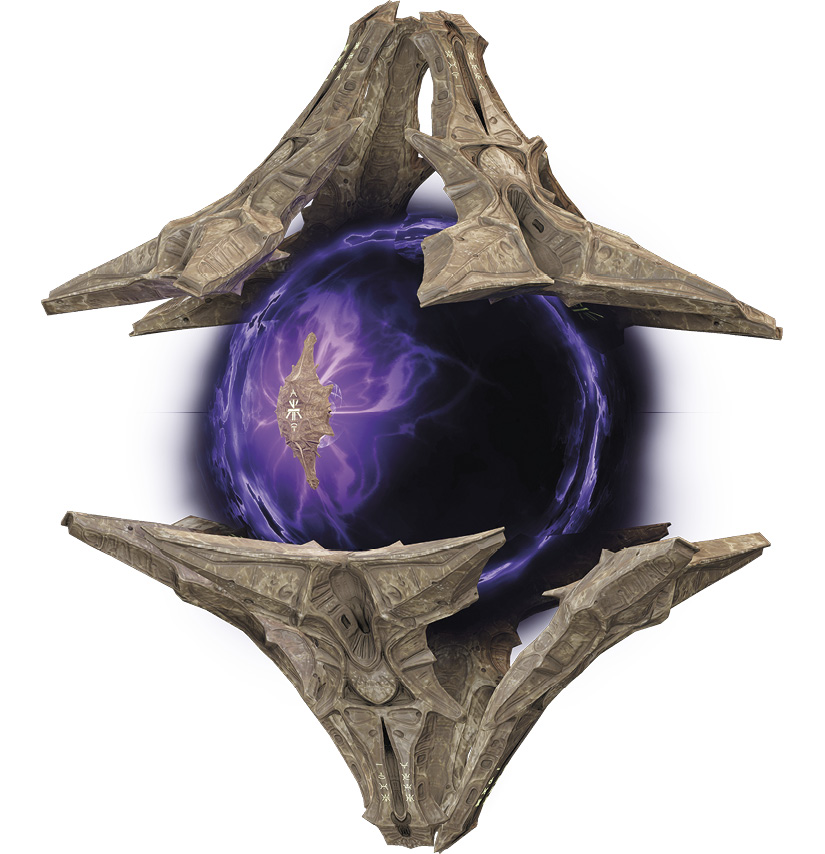
Threat Level: 4
Weak Spot: Central “eye”
| Loadout | Types | Role | Survival Tactics | Takedown Tactics |
|---|---|---|---|---|
|
Energy bolts |
Base, Elite |
Artillery |
Dodge Enemy Fire, Suppression (Line of Sight) |
Target Practice |
Notes: A large floating eye with a piercing shriek and (usually) a good number of Hive infantry to provide additional headaches as you try to take this tough foe down. Seek cover, making this a priority target after any hostile that charges you. Continue to stay in cover, peeking out to fire at the central “eye” of the Shrieker to damage it before returning to cover. Its energy bolts are fired in highly damaging, almost continuous streams of projectiles.