
Overview
The Crucible is a series of fast-paced contests that pit Guardians against one another in open combat. Some come to find honor and renown; some come for more tangible rewards. No matter your reasons, you’ll find the Crucible a suitable setting to hone your skills.
Quickplay contains a rotation of exciting match types with relatively straightforward rulesets. It’s intended to provide a more casual experience, suitable for Guardians interested in a bit of spirited competition. You can access this playlist via the Director as soon as the Crucible is unlocked.
The Competitive playlist features two challenging objective-based match types. With a strong emphasis on combat proficiency and team tactics, this playlist is intended for skilled Guardians determined to compete at the highest level. The Competitive playlist becomes available once you’ve completed two Quickplay matches.
Each playlist contains a specific selection of map/mode combinations. Upon joining a playlist, you’re automatically teamed up with (and pitted against) other willing competitors.
While participating in the Crucible, actions like defeating enemy Guardians and completing match-specific objectives grant Experience. Upon completing a match, each participant receives a large amount of Experience, a Crucible Token, and at least one randomly selected piece of equipment. You also have the chance to complete daily Challenges and weekly Milestones for additional rewards.
Teams
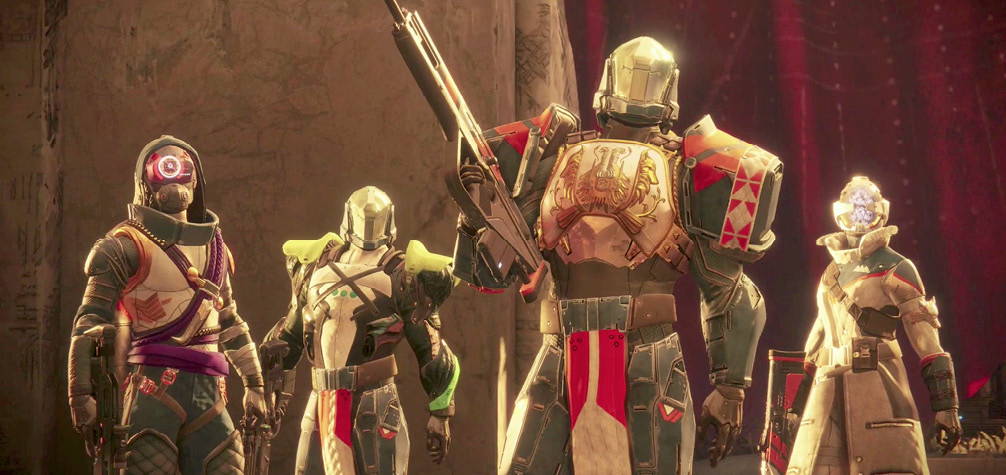
Regardless of the game mode, every Crucible match features a 4v4 team format. Both playlists accommodate fireteams of up to four players, so you’re free to play with a premade team of trusted allies. Otherwise, you’ll be grouped with one or more randomly selected Guardians.
Team Assignments
Returning players should note that Crucible teams no longer have official designations—they’re simply displayed on your screen as “Your Team” and “Opponents.” This streamlined system means that when it comes to the color-coded display and objectives, you’re always a member of the blue team.
Team Starting Areas
Each team begins a match in one of two predetermined locations. These areas are always located across the map from each other, allowing Guardians to scramble for strategically important locations once the match begins.
A map’s team starting areas can vary between match types, but they’re always consistent within a specific map/match combo, and any mode-specific variations tend to be minor.
Teamwork
Whether you’re running with friends or teamed up with strangers, working with your allies is an important part of the Crucible. If you’re looking for a crash course in teamwork, consider the following advice:
Communicate with your teammates. Use of the team voice channel isn’t required, but it’s one of the best ways to ensure effective teamwork. Your team’s performance is bound to improve when everyone is kept apprised of high-priority targets and objectives.
Understand the User Interface ( UI). It can be easy to develop tunnel vision in the heat of battle, but the UI provides a number of ways to keep tabs on your allies. When open communication isn’t an option, knowing where your teammates are heading is the best way to predict what they’re hoping to accomplish. Of course, knowing how your teammates are faring always makes it much easier to determine your best course of action.
Team-firing is key. Experienced Guardians tend to know exactly how much damage they can safely absorb, and most will decide whether to engage or retreat within the opening seconds of a firefight. Team-firing helps take the option to retreat off the table. If you’re communicating with your team, coordinate your attacks for maximum impact. Otherwise, just make an effort to join in on any firefights that break out. In a close battle, a little extra firepower can make all the difference.
Find strength in numbers. Try to stay near at least one teammate at all times. It allows for consistent team-firing, maximizes the effectiveness of support-related Class Abilities, and helps ensure that an approaching enemy never goes unnoticed. Just make sure you leave enough space to minimize the effects of incoming splash damage.
PvP Display
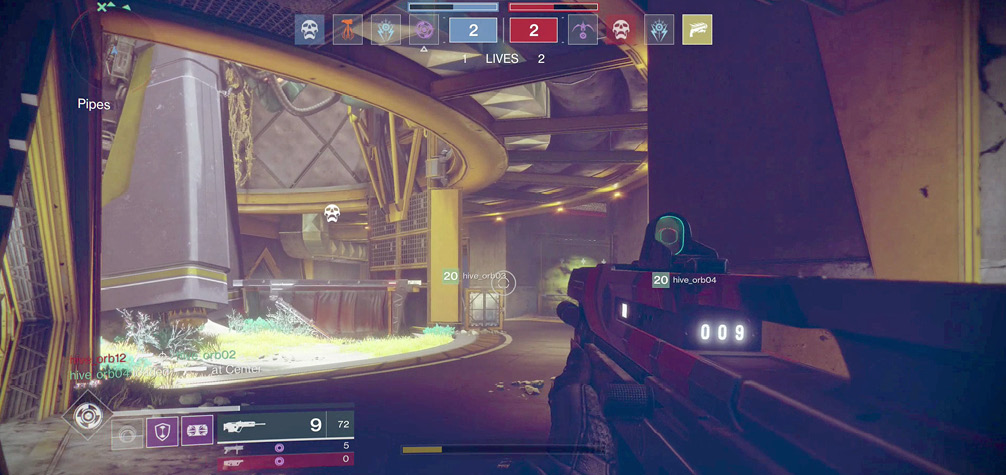
Crucible Heads Up Display (HUD)
Located at the top of the screen, the Crucible HUD displays useful information about your teammates, your opponents, and the overall state of the match:
- The remaining time is displayed at the top of the HUD.
- Team scores are related via the color-coded progress bars and tally boxes near the center of the HUD.
- The icons grouped on either side of the HUD represent the members of each team.
- The bottom of the HUD is reserved for match-specific objectives and features like allotted lives, available Revive Tokens, and controlled zones.
While all of this information will prove useful during a match, the Guardian icons warrant special attention. Initially, these icons display each Guardian’s currently equipped Subclass. However, these icons can change to reflect important developments as they occur:
- A skull indicates a defeated Guardian.
- A gold icon means that the corresponding Guardian has a fully charged Super Ability.
- A pulsing gold icon means that the corresponding Guardian has activated their Super Ability.
Motion Tracker
The motion tracker is useful in PvE, but it’s an essential tool in PvP—and one that new players tend to underuse. Before you step foot in the Crucible, remember that the motion tracker’s radial grid shows:
- Approximate locations of nearby enemies (direction and range)
- Locations of nearby allies
- Elevation of nearby allies
- Status of nearby allies (active/defeated)
- Locations of nearby objectives
- Locations of nearby Power Ammo
Just outside of the radial grid, markers are used to indicate detected allies, objectives, and Power Ammo that are otherwise out of range.
Motion Tracker Ranges
| Segment Location | Indicated Range |
|---|---|
|
Outer Ring |
24-48 meters |
|
Main Ring |
6-24 meters |
|
Center |
0-6 meters |
Proper use of the motion tracker can take a bit of practice, but it’s a skill that’s well worth developing. As you become familiar with each battleground, combining your knowledge of the terrain with the information contained on the motion tracker will lead to greatly improved situational awareness.
Notifications
During PvP combat, you’ll find a variety of notifications appearing on your screen:
Alerts: Urgent messages are typically displayed just below the Crucible HUD. The most common alert is “Last Guardian Standing,” indicating that you’re the last surviving member of your team.
Map Location: The area just below the motion tracker indicates your current map location.
Medals: Appearing just above the center of the screen, medals are typically used to acknowledge skillful play during PvP. While an earned medal offers no benefits, it serves as a useful indication of your performance.
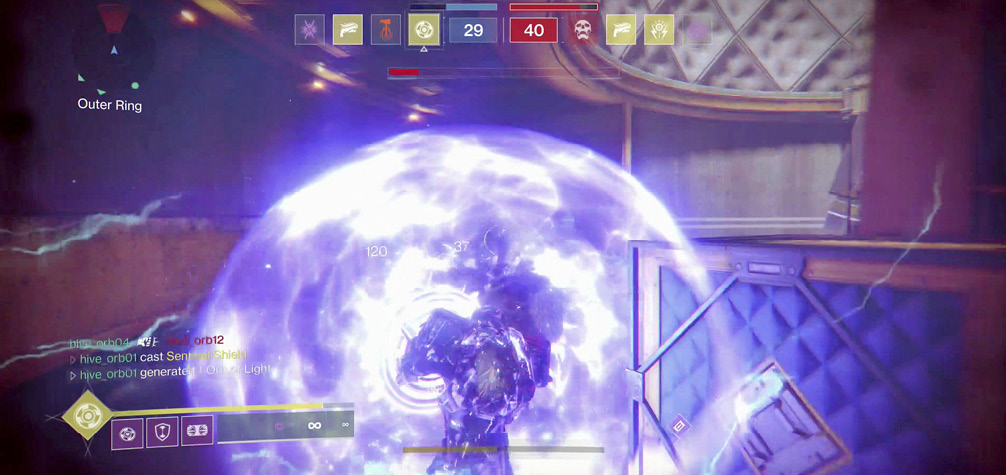
Combat Feed: Located in the lower-left corner of the screen, the combat feed (sometimes called the “kill feed”) offers a variety of notifications. The bulk of these have to do with Guardian deaths, listing the victim, the victor, and the weapon type that struck the killing blow. However, you’ll also find updates about active Super Abilities, collected Power Ammo, and more.
Loadouts
You can use all weapons, armor pieces, and Abilities at your disposal in the Crucible. However, most players find that some loadouts are better suited to competitive play than others. After all, your fellow Guardians are sure to be more formidable and far less predictable than the enemies you face out in the wild.
It can take significant experimentation to find the best mix of items and Abilities, especially because arsenals and playstyles both tend to change over time.
Subclasses and Abilities
Every Subclass has a place in the Crucible, and you’re under no obligation to select one over another. However, if you find that your PvE playstyle is at odds with your PvP goals, it might be time for a change.
Experimenting with different Subclasses, Grenades, Movement Modes, and Melee Abilities can be an enjoyable and illuminating experience, and it’s worth trying every available combination at one point or another. Still, if you’re looking for a place to start, take a step back and consider the basics:
- Solar Subclasses tend to focus on powerful, direct-damage attacks.
- ArcSubclasses tend to focus on short-range, multi-target attacks.
- VoidSubclasses tend to focus on survivability.
Once you’ve chosen a Subclass, take a closer look at the abilities it offers.
Movement Modes
In PvP, hang time is more of a liability than a benefit—an airborne Guardian makes for an easy target. Start with a Movement Mode that favors directional control. If it doesn’t suit you, swap it out for something else.
Grenades
While specifics vary, grenades generally fall into at least one of five basic categories:
- Seeker grenades produce one or more projectiles that home in on nearby foes. They’re great for blind (or panicked) tosses near a suspected enemy location.
- Persistent grenades produce damaging fields or other lasting effects. They’re useful map control tools, perfect for blocking off chokepoints or chasing opponents from strategically important locations.
- Blast grenades produce a straightforward explosion. They tend to deal fairly high damage.
- Sticky grenades can attach to targets. They take a bit of skill to use, but a well-thrown sticky grenade usually deals considerable damage.
- Status grenades afflict enemies with temporary effects. The clearest examples are both found in Titan Subclasses: the Striker’s Flashbang Grenade disorients enemies, and the Sentinel’s Suppressor Grenade prevents enemies from using Abilities.
Once you’ve identified your available grenade options, consider how it meshes with your playstyle and how useful it might be in a specific match type.
Class Abilities
Your choice of Subclass has no effect on your available Class Ability (assuming you’ve unlocked them, at least). All Class Abilities can be useful in PvP. Selecting one is usually just a matter of supporting your intended playstyle.
Titans will find that Towering Barricade is the better choice for defensive applications. The extra height makes it a much better option for providing cover at strategically important locations like Capture Points and Power Ammo spawns. It’s also a better option for blocking chokepoints and flanking routes. However, Rally Barricade’s ability to instantly reload your weapon makes it the better offensive option.
A Hunter who favors close combat should take a hard look at Gambler’s Dodge. Using this Class Ability near an enemy automatically recharges your Melee Ability. If you prefer to keep a bit of distance between yourself and your enemy, Marksman’s Dodge is the better option. A well-timed Dodge will reload your weapon, minimizing your downtime during heated encounters.
If you’re playing as a Warlock, simply weigh the benefits of Healing Rift’s group healing against the Empowering Rift’s damage boost. They’re both excellent support skills, so the choice often comes down to which effect your teammates are likely to prefer—especially because your allies must stay within your Rift to enjoy its primary effect.
Melee Abilities
Melee Abilities come bundled with unique and powerful effects. When you select a Melee Ability, consider the impact the related enhancements might have on your Super Ability, Class Ability, and more. It can be a difficult choice (of course, it’s easily reversed). It’s usually best to simply choose the option you find most appealing and give it a whirl.
Weapons
Finding the right combination of Kinetic and Energy weapons can be a complicated task. Obviously, you must select from the weapons available to you, but that’s just the beginning. The right choice depends on everything from the specific map/match combo to your skill level with a particular weapon archetype. Again, experimentation is your best option, but there are a few factors worth focusing on.
First, consider range. Does the map support long-range weapon use, or are you more likely to spend your time running through a maze of tight corridors? Never bring a scout rifle to a submachine gun fight.
Next, consider flexibility. While you’re free to equip a Kinetic weapon and Energy weapon of the same archetype, it’s rarely wise to do so. Crucible maps generally feature varied terrain, and the ability to adapt as the battle moves from one location to the next is an important part of effective play.
Then, consider your default playstyle. Habits can and do change over time, but you’ve probably got a good idea of how you’ll react when things get hairy. If you tend to go charging in for a melee attack, even when you’re exposed and outnumbered, own it. Drop a short-range weapon into one of your slots. If you head for cover the moment your target spots you, be honest with yourself and grab something suitable for long-range combat. Use your remaining weapon slot for something more map/match appropriate, and work on breaking any bad habits you might have.
Finally, consider your Power weapon. Once you’ve got your Kinetic/Energy weapons sorted, use the same process to narrow your search for a Power weapon. Consider the likely range of combat (make sure you factor in potential splash damage), the flexibility it might add to your loadout, and any persistent habits that might undermine your use of a particular weapon.
Armor
In the Crucible, assembling the best mix of armor usually boils down to three factors:
- The supported attributes
- The attached mods
- How cool it looks
You may be able to overlook aesthetic concerns, but you should always consider the two remaining factors.
As for attributes, your goal is to strike the proper balance between Resilience, Mobility, and Recovery. As always, the most effective combination depends on your playstyle and skill level. One word of warning: there’s no benefit to boosting an attribute above 10. Go any higher than that, and you’re wasting points.
When it comes to mods, the benefits you choose are entirely up to you. Determine the mods that support your playstyle, then work toward assembling a proper collection.
Combat
Most of the skills you develop outside of the Crucible will prove useful within it, but competing against your fellow Guardians can be a jarring experience. Luckily, you can do several things to ease the transition from PvE to PvP.
Keep moving. Seriously—this is one of the most important habits you can develop, and the sooner you do so, the better off you’ll be. In the Crucible, taking cover is more a matter of breaking line of sight. Your opponents won’t hang back and wait as you hunker down to regenerate health. Unless you’re collecting Power Ammo, dealing with a charge, or reviving an ally, you should be moving.
Understand ammo. You begin the match with a set amount of ammo for your Kinetic and Energy weapons. You can restock this ammo by collecting drops from defeated Guardians. You also receive a fresh supply of ammo after return to battle following a death (a less desirable option, to be sure.) You can only collect Power Ammo from designated spawn points. It only appears at certain times, and each crate can only be collected by a single Guardian.
Understand range. This has already been covered, but it’s worth repeating. Each weapon has a specific range of efficacy, and it’s important to keep that in mind whenever you engage in a firefight.
Understand sniping lanes. Essentially, any high-traffic area that features a decent line of sight can be considered a sniping lane. This means that each map’s most effective sniping lanes tend to change as players learn to avoid certain areas.
Aim for the head. When two Guardians square off, every bullet counts. Remember that Level Advantages are disabled during all Crucible matches. If two Guardians are firing similar weapons under similar conditions, Precision Damage is usually the deciding factor.
Pre-aim for the head. Well, with rapid-fire weapons, it’s usually best to pre-aim for the neck. At any rate, “pre-aiming” simply involves predicting where an approaching opponent will appear, and making sure that your sights are in place. As you become familiar with each map, you can use the terrain to help determine exactly where to aim.
Crouch wisely. Crouching renders you invisible to motion trackers, but only for a few seconds at a time. It makes you a smaller target, but it also slows down your movement. Crouching can be very effective, no doubt, but timing is everything.
Slide freely. Sliding is a great way to execute a level change as you’re sprinting through a vulnerable area. There’s more than a little luck involved, but a well-timed slide can drop your head directly under an incoming shot. It’s also a stylish way to initiate a crouch, meaning that sliding allows you to pulse on the motion trackers of nearby opponents.
Sprint often. The faster you move, the harder you are to hit. It’s important to note that you can’t sprint and reload a weapon at the same time. Reloading will drop you out of a sprint, and sprinting will cancel a reload.
Cancel your jumps. Again, an airborne Guardian tends to make an easy target; avoid lingering in the air. Press Jump while your Movement Mode is active to drop to the ground (for some classes), or better yet, aim down sights for a split second to hit the ground even faster.
Put it all together. Moving is good; moving in unpredictable ways is better. Sprint, slide, jump, zig, and zag your way through dangerous areas. Mix it up as much as possible. When you’re in the line of fire, it’s best to keep your enemies guessing.
Mind your Supers. How and when you use your Super Ability is entirely up to you, but keep in mind that your allies are bound to be grateful for any Orbs of Light you might create in the process.
Be a team player. You won’t always agree with your team’s basic strategy, but when you can’t get convince your allies to follow your lead, it’s generally best to follow theirs. The same applies for commonly debated issues like the use of Super Abilities and Power Ammo. If victory is your priority, do whatever you can to make sure everyone’s on the same page.
Expect to lose. Losses are inevitable, and if you’re playing with a team of randomly selected Guardians, you can’t realistically expect to win more than half the time. It’s fine. Don’t worry about it. You’ll still get your Crucible rewards, and you’ll have a new story to tell.
To move forward, look back. Try to learn something from every death, and don’t wait until the match ends. When you come up short in a firefight, you’ll always have at least a few seconds before you’re returned to the battlefield. Use this time to ponder what went wrong and formulate a plan to avoid making the same mistake.
If you want to improve, practice. Practice with your favorite loadout, practice with new loadouts, and practice new playstyles and match-specific strategies. The more time you spend in each map, the more developed your situational awareness will become. And situational awareness is what separates top-level competitors from the rest of the pack.