
Destiny 2 Guide Curse of Osiris PVP
Wormhaven (PS4 Exclusive)


Wormhaven Map Locations
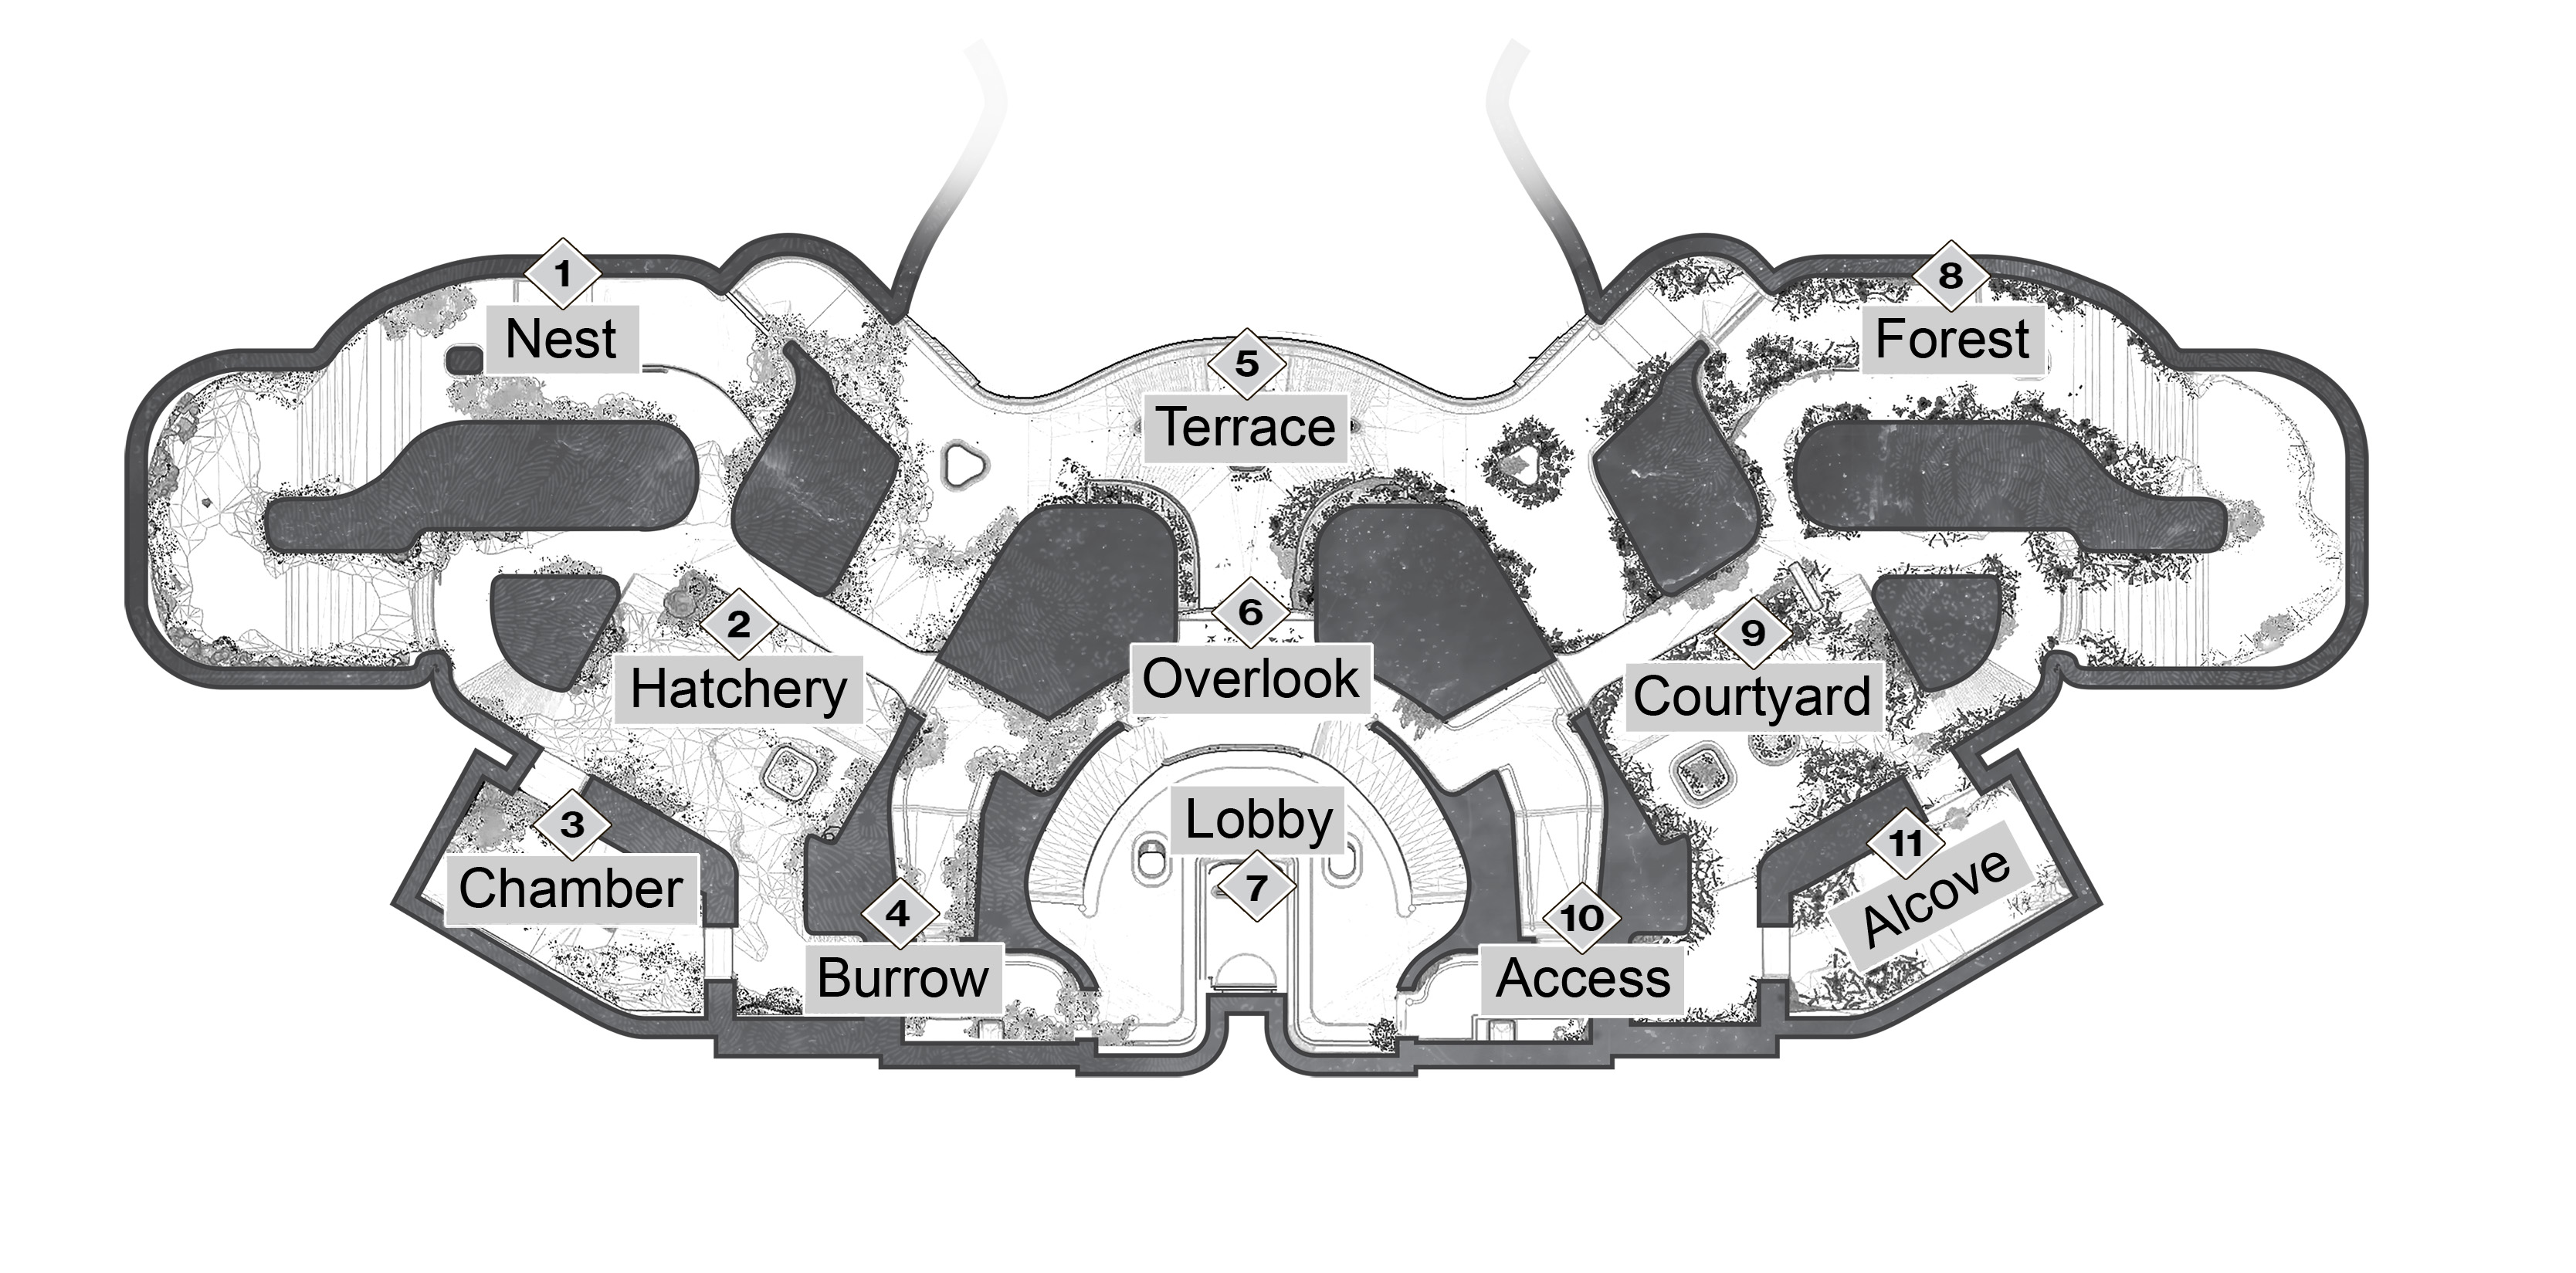
Overview

Wormhaven is set on a symmetrical section of the Arcology on Titan. One side is pristine and unblemished, while the other is dilapidated and corrupted.

There’s plenty of cover to get behind and a chance meet in the open areas. The space easily lends itself to short-to mid-range bouts, however, you can still carve a niche for yourself running long-range weapons.
Match Types
 Quickplay

- Clash
- Supremacy
- Control
 Competitive

- Survival
Survival
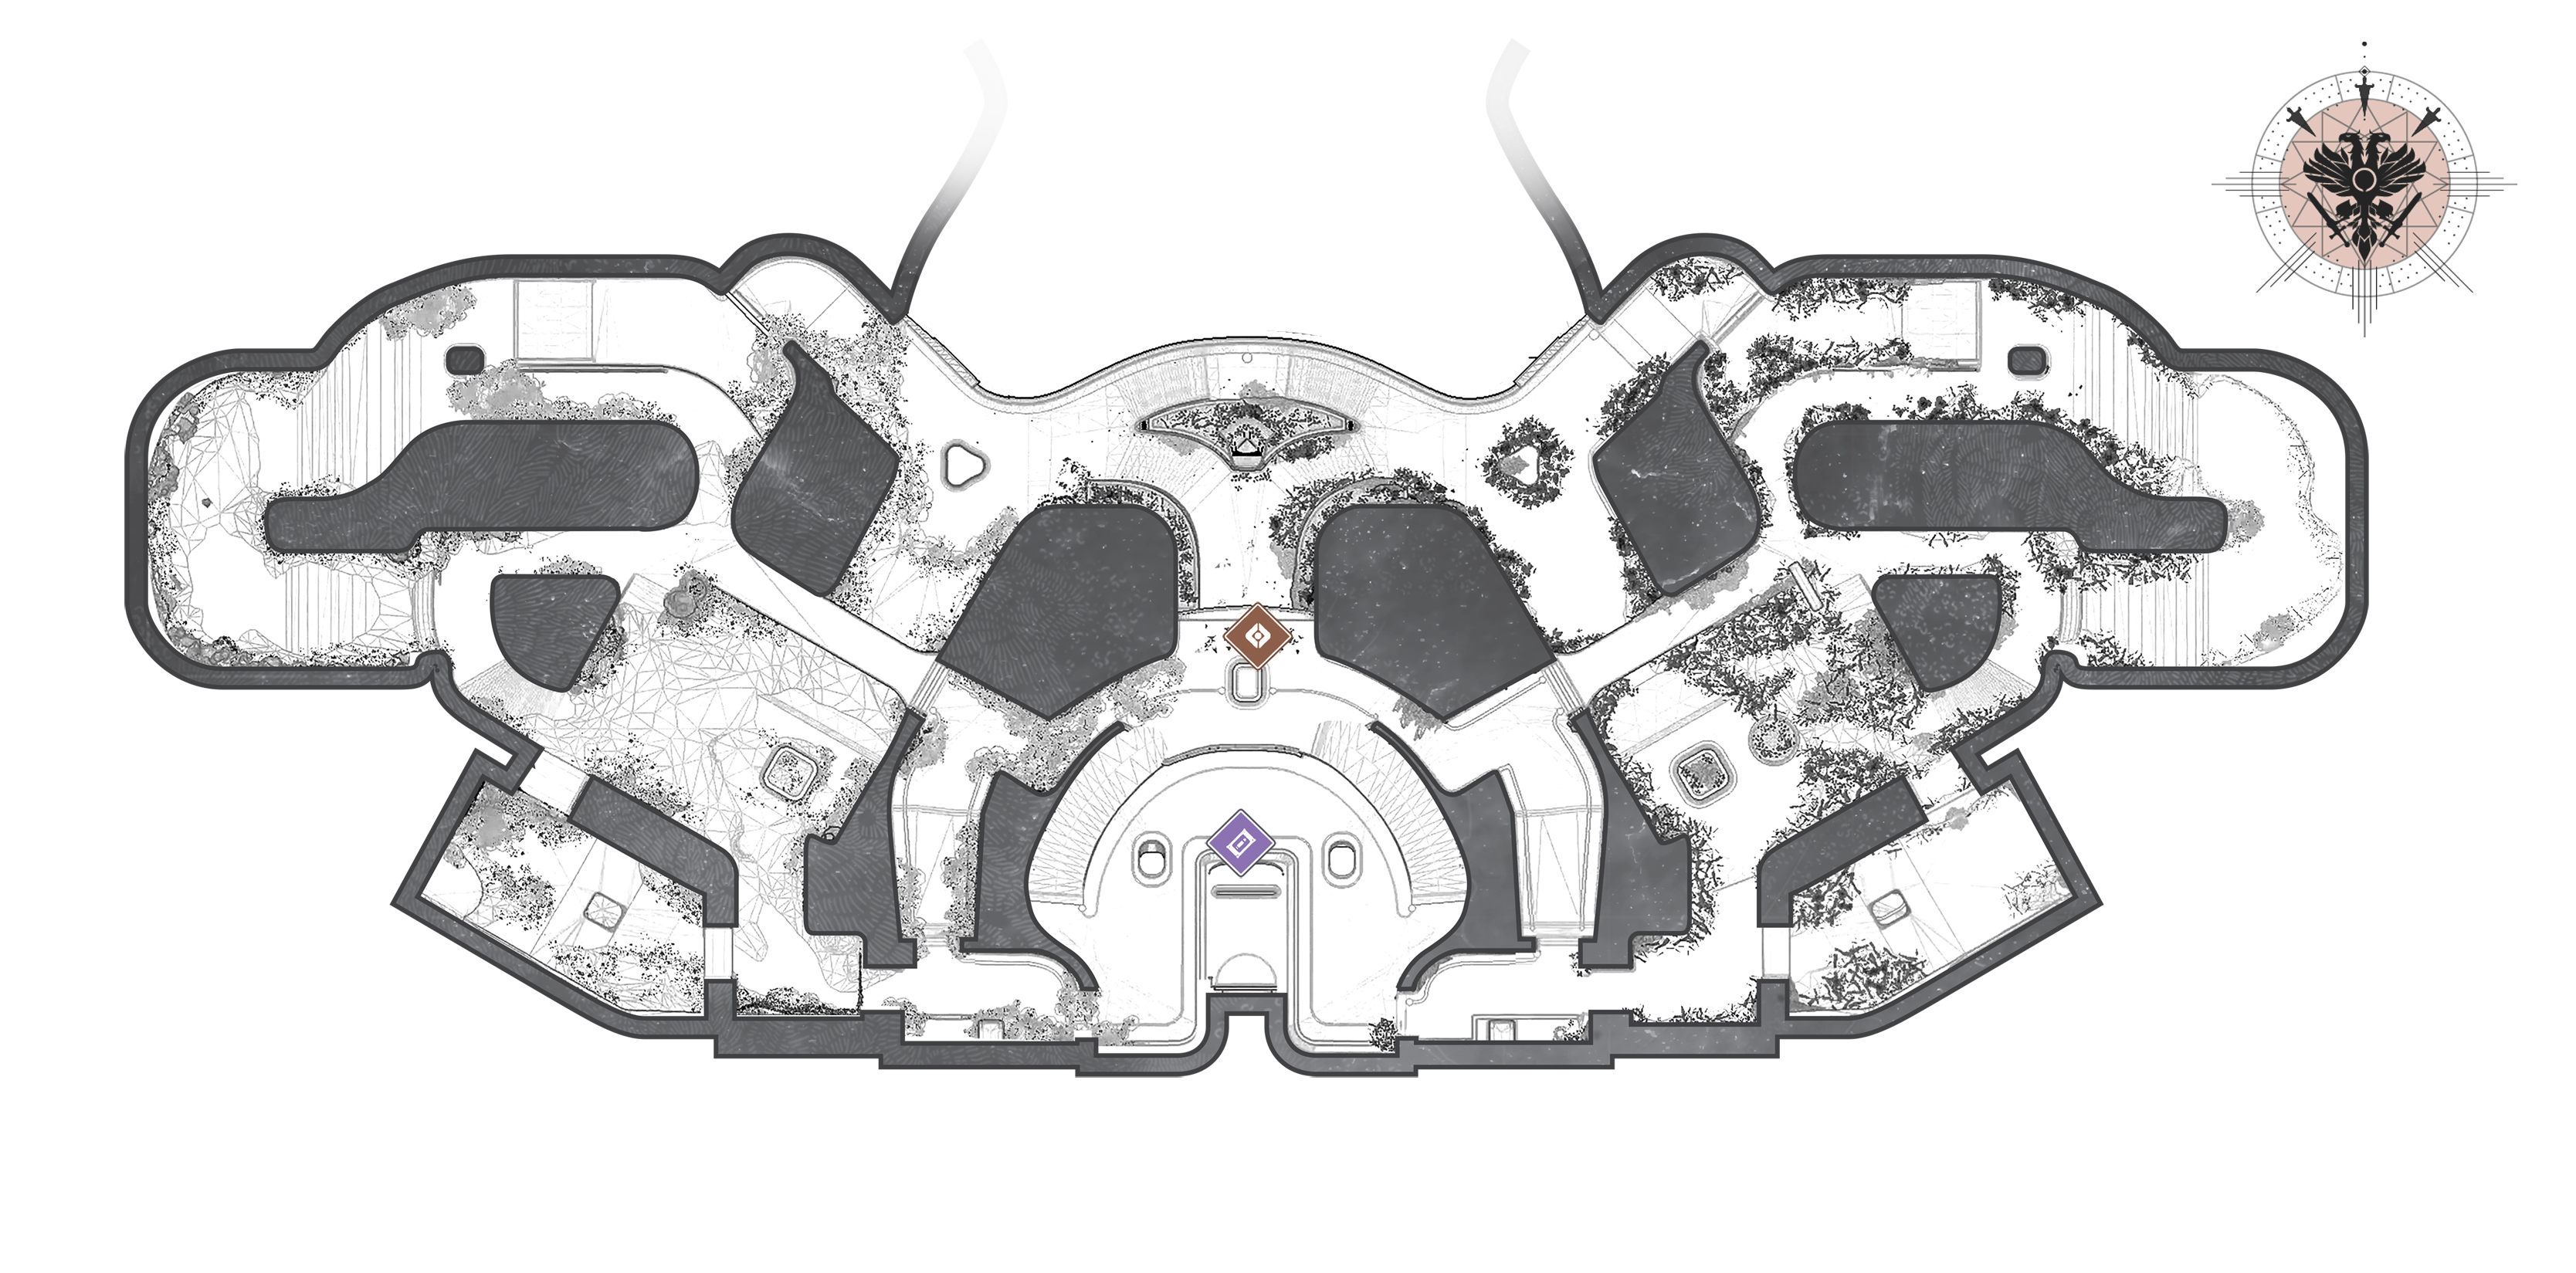
Clash, Supremacy
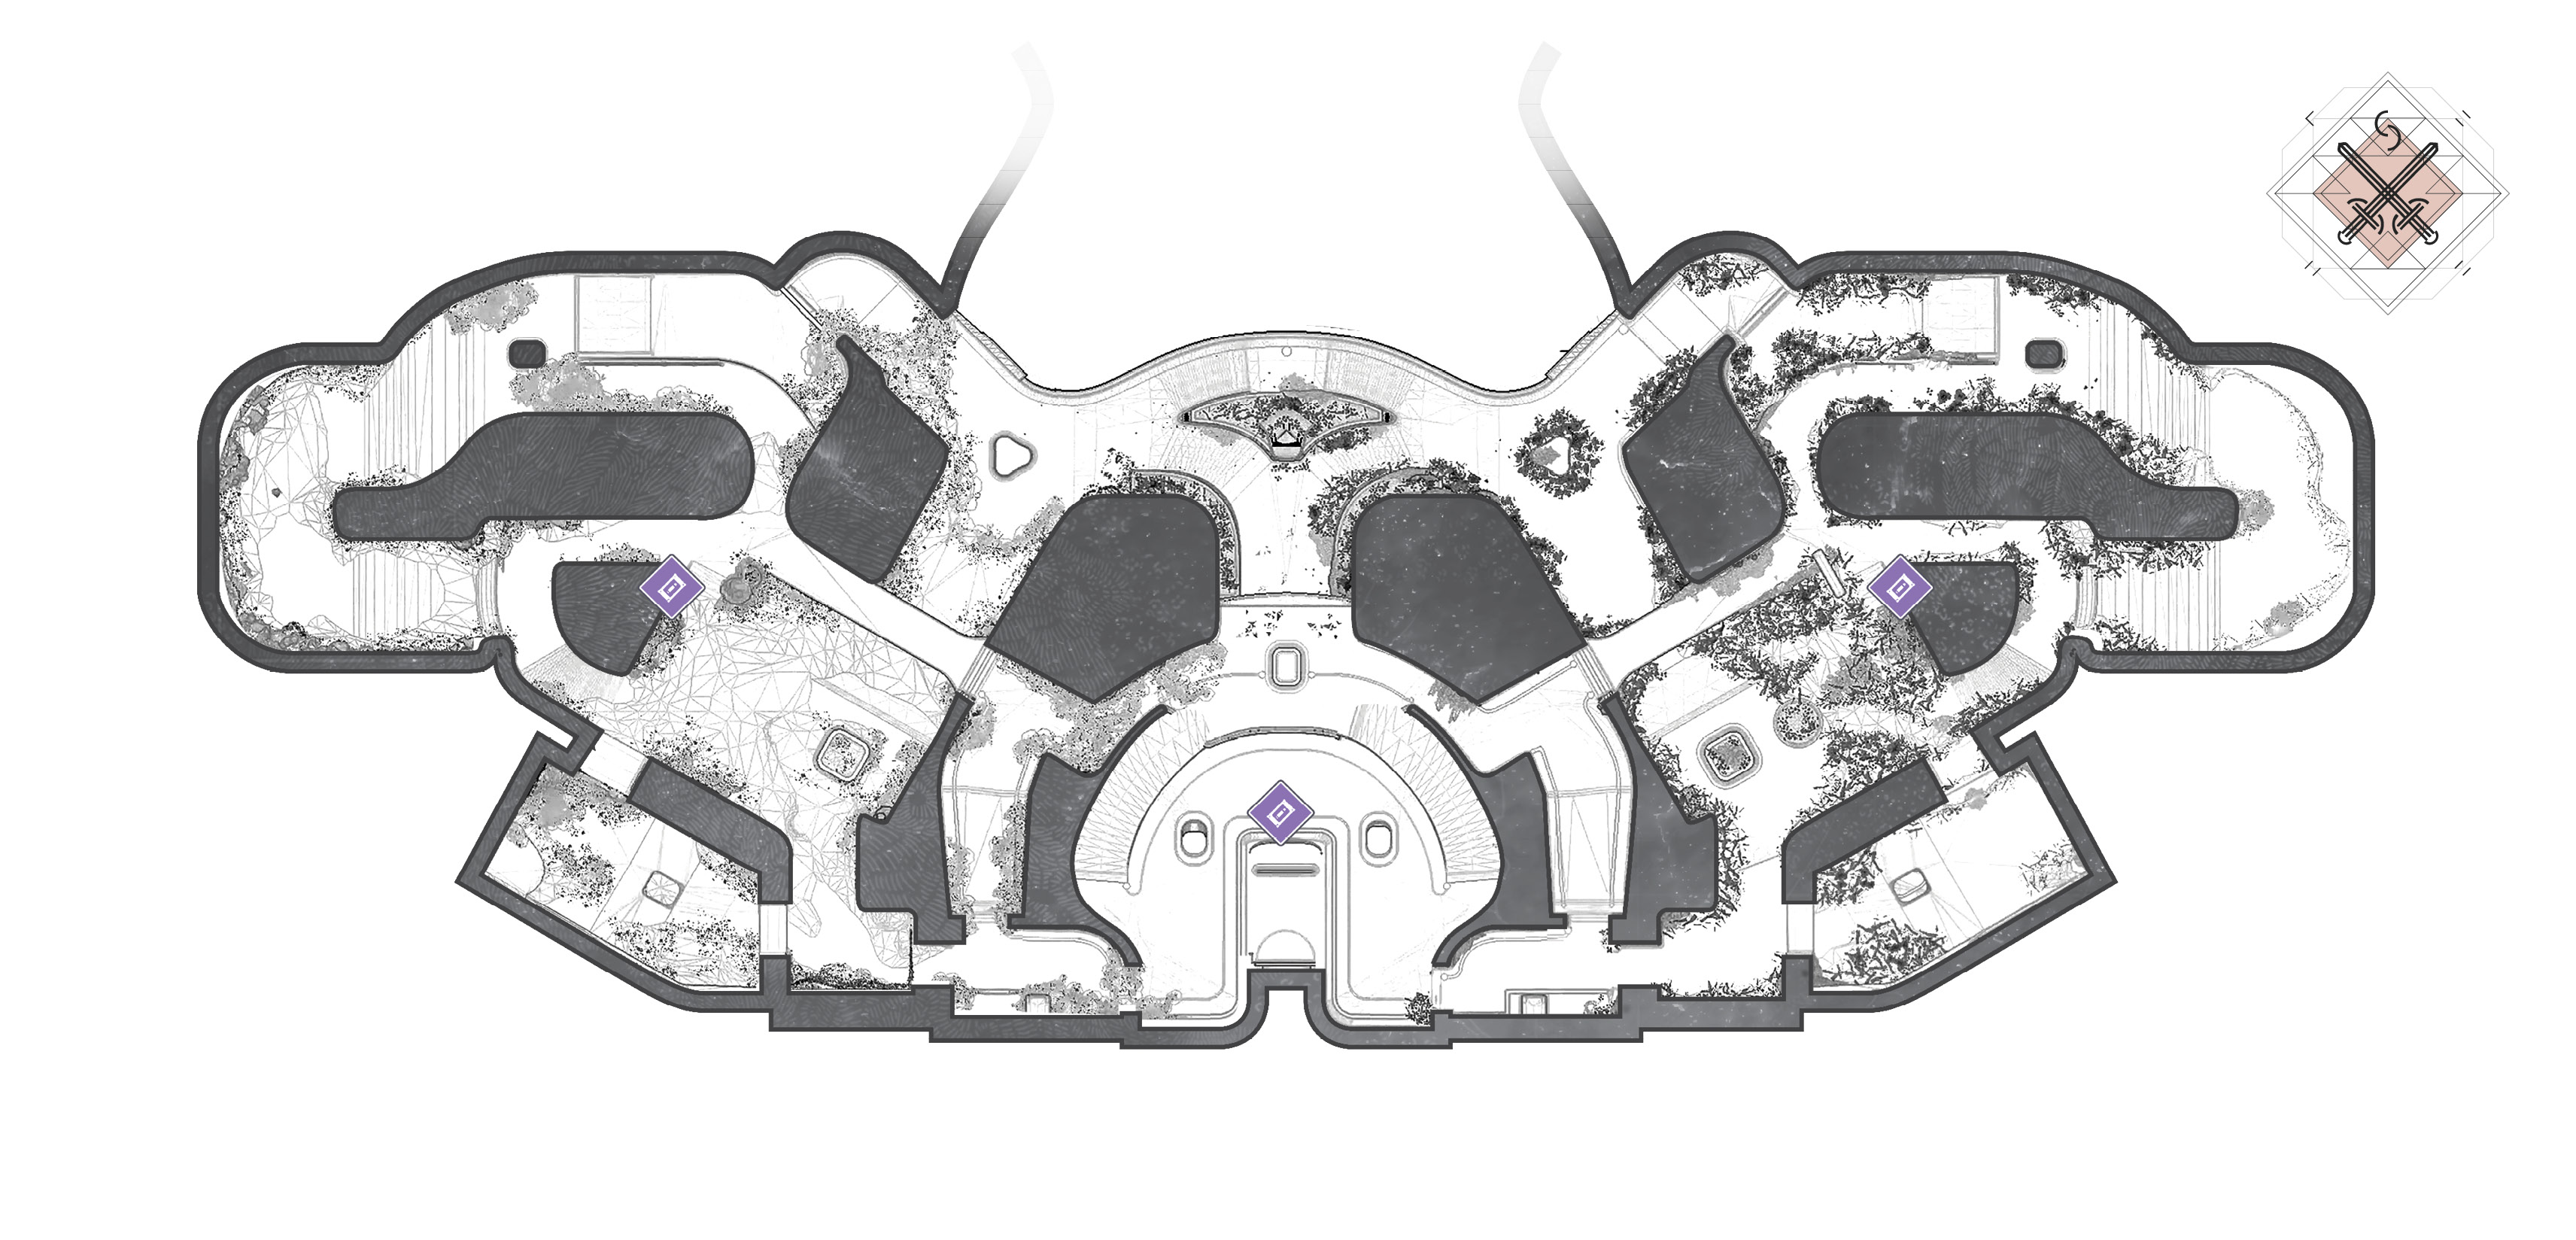
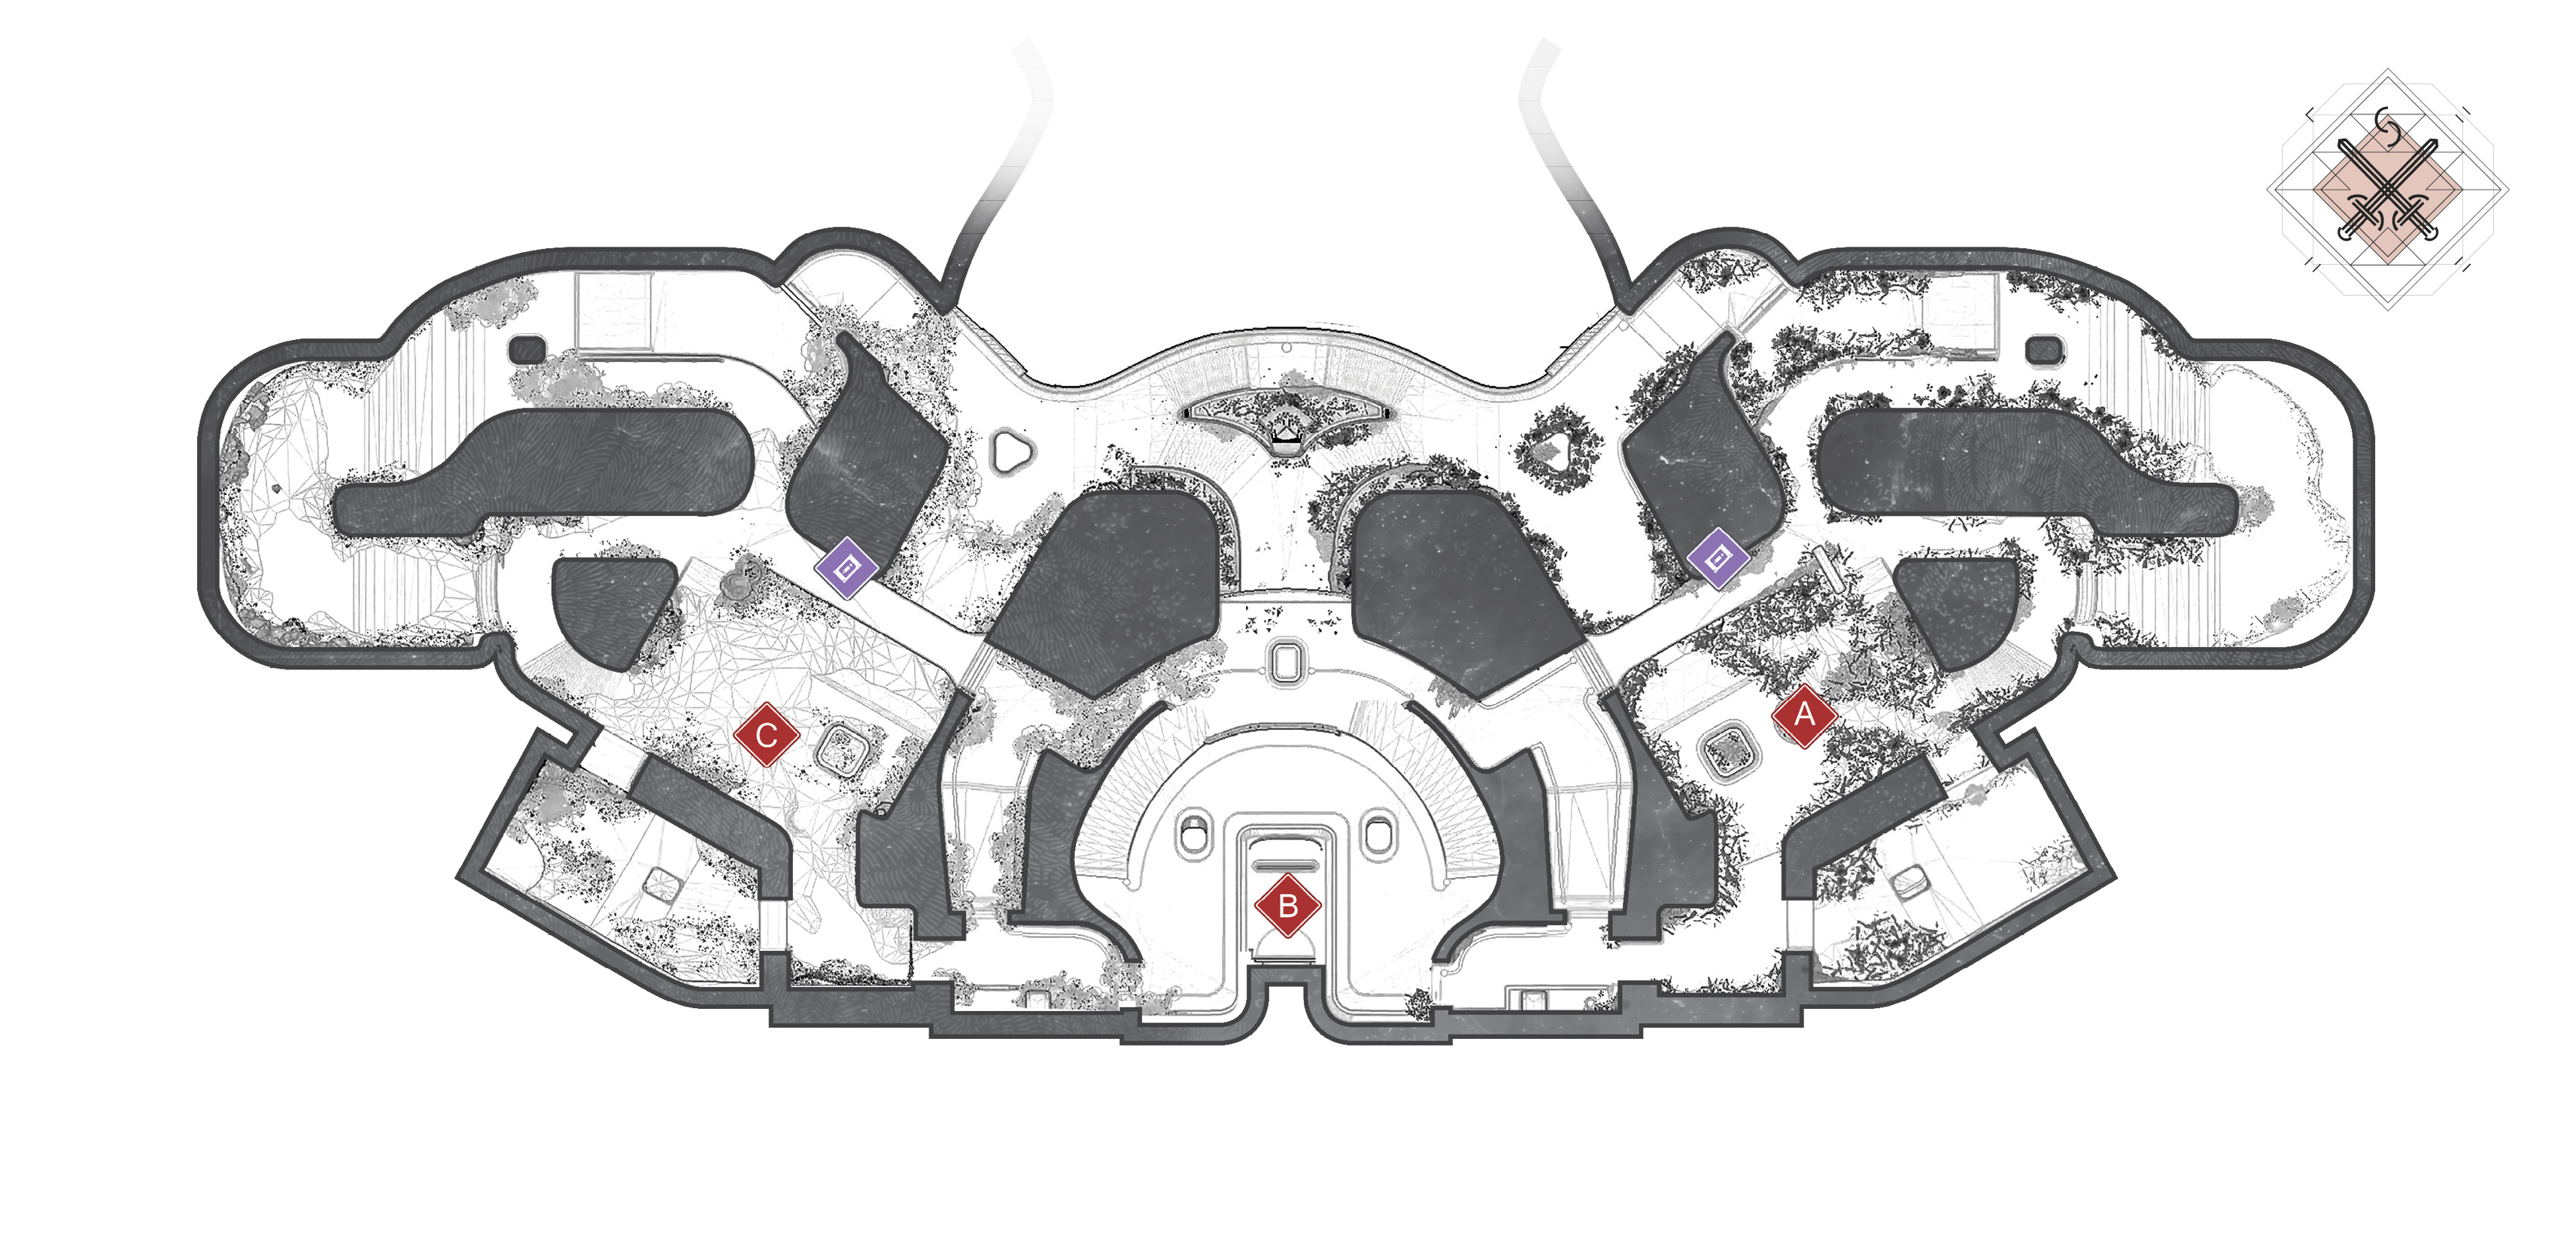
Control
 Nest
Nest

This has the same strategy as the Forest. The Forest and the Nest are areas that lend themselves to the benefit of the team that spawns here. It may come into play for a fallback position or escape route. The U-shape allows a Guardian to take a post up on the high ground, move to either side for cover, and take out incoming enemies.
 Hatchery
Key Location: Hatchery

This has the same strategy as the Courtyard. The Courtyard and Hatchery are going to be hotly-contested areas. Engagements will end quickly here. There are a lot of accessways for enemies to pour out of, so during Control, capture C and move to cover quickly.
 Chamber

The Chamber is a good byway and useful for providing cover on the adjacent Control Zone, as well as quick access down into the B Control Zone to protect it from capture.
 Burrow

Cautiously move through the Burrow, expecting heavy fighting in the Lobby, and move up for a quick kill or two on the Overlook or down into Courtyard. It’s going to be tempting to linger here. Take cover and run quickly to other hotspots to take out more enemies.
 Terrace

The Terrace is going to be a hotbed of gunfire, so approach with care and don’t fly off the side. Make sure enemies aren’t flanking. Enemies will have a good sightline from the opposite side of the Terrace.
 Overlook
Key Location: Overlook

This area is an excellent overwatch to Overlook Control Zone B or nearby Power ammo. You may also use the window overlooking the Terrace to hit anyone walking through. The nearby hallways make for a good retreat if the position is no longer safe.
 Lobby
Lobby
Key Location: Lobby

This is a nice, long hall with one bit of cover in it and too many entrances to cover, so it’s ideal for a Control Point. Controling this area is best done by peeking from a coridor and firing when someone is running in the open, or patrolling the nearby routes leading into it.
 Forest

This has the same strategy as the Nest. The Forest and the Nest are areas that lend themselves to the benefit of the team that spawns here. It may come into play for a fallback position or escape route. The U-shape allows a Guardian to take a post up on the high ground, move to either side for cover, and take out incoming enemies.
 Courtyard
Key Location: Courtyard

This has the same strategy as the Hatchery. The Courtyard and the Hatchery are going to be hotly-contested areas. Engagements will end quickly here. There are a lot of accessways for enemies to pour out of, so during Control, capture A and move to cover quickly.
 Access

Cautiously move through Access, expecting heavy fighting in the Lobby. Then, move up for a quick kill or two on the Overlook or down into the Courtyard. It’s going to be tempting to linger here. Take cover and run quickly to other hotspots to take out more enemies.
 Alcove

The Alcove is a good byway and useful for providing cover on the adjacent Control Zone and quick access down into the B Control Zone to protect it from capture.