Prima Games eGuides
primagames.com Browse Redeem a code Help
Destiny 2 eGuide
Sign in My Guides

Sign in or create an account

We'll email you a link. No password needed, and if you don't have an account yet, the link makes one.

By creating an account or signing in, you agree to our Terms of Service and Privacy Policy.

Have a password?

Had an account on the old eGuides site, or a code from a printed guide? Help and troubleshooting

Sign in with a password

By signing in, you agree to our Terms of Service and Privacy Policy.

Check your email

A sign-in link is on its way. It works once and expires in 15 minutes. Open it and you're in, with an account if you didn't already have one.

Contents

  • Curse of Osiris
    • An Overview
      • Osiris Backstory
      • What’s New?
    • The Lighthouse
    • Infinite Forest
    • Campaign and Strikes
      • The Gateway
      • A Deadly Trial
      • Beyond Infinity
      • Deep Storage
      • Tree of Probabilities (Campaign and Strike)
      • Hijacked
      • A Garden World (Campaign and Strike)
      • Omega
    • Mercury Adventures
    • PVP
      • Radiant Cliffs
      • Pacifica
      • Wormhaven (PS4 Exclusive)
  • Field Manual
    • Introduction and Overview
    • Guardian Creation
    • Basic Actions
    • Guardian Abilities
    • Titan Abilities
    • Hunter Abilities
    • Warlock Abilities
    • Weaponry
    • Armor
    • Other Gear and Vehicles
    • Navigation
    • Progression
    • Grinding and Gear
  • Campaign
    • Overview
    • Homecoming
      • Overview
      • Tower Watch
      • Tower Hangar
      • Tower Plaza
      • Tower North
      • The Chosen
    • Adieu
      • Overview
      • Escaping the Last City
      • The Farm
    • Spark—Pt. 1
      • Overview
      • Quarantine Sector 236
      • Blackened Forest
    • Spark—Pt. 2
      • Overview
      • The Dark Forest
    • Hope
      • Overview
      • Sinking Docks
      • Siren’s Watch
    • Combustion
      • Overview
      • Salt Mines (1st Mission)
      • Salt Mines (2nd Mission)
      • Salt Mines (3rd Mission)
    • Riptide
      • Overview
      • The Rig
      • Tidal Anchor
    • Utopia
      • Overview
      • Access Terminal
      • Festering Halls
    • Looped
      • Overview
      • Artifact’s Edge
      • Hallows
      • Sunken Cavern
      • Well of Giants
    • Six
      • Overview
      • The Cistern and Pools of Luminance
      • Glade of Echoes
      • Exodus Black
    • Sacrilege
      • Overview
      • Terrabase Charon (1st Mission)
      • The Wraith Mines
      • Terrabase Charon (2nd Mission)
    • Fury
      • Overview
      • Giant’s Scar (1st Mission)
      • Excavation Site II
      • Giant’s Scar (2nd Mission)
      • Warmind VaultJYS-2
    • Payback
      • Overview
      • The Tunnels
      • Sunken Isles
    • Unbroken
      • Overview
      • Legion’s Hold
      • Legion’s Watch
    • Larceny
      • Overview
      • Legion’s Anchor
    • 1AU
      • Overview
      • Starboard Landing
      • Mineral Processing
      • Sunside (1st Mission)
      • Sunside (2nd Mission)
    • Chosen
      • Overview
      • Peregrine District
      • Systems Deck
      • Quarterdeck
  • Strikes
    • Overview
    • The Pyramidion
      • Overview
      • The Rupture (Entrance)
      • The Rupture
    • The Inverted Spire
      • Overview
      • The Cistern
      • The Anchor
      • Legion Drill Site
      • The Inverted Spire
    • Exodus Crash
      • Overview
      • Prodromus Down
      • Exodus Black
      • Glade of Echoes
      • EX-077 Command
    • The Arms Dealer
      • Overview
      • Legion’s Anchor
      • Sunken Isles
      • Legion’s Hold
      • Echion Vae
    • Savathun’s Song
      • Overview
      • Solarium
      • Arboretum
      • Chasm of Screams
  • Crucible
    • Overview
    • Match Types
    • Crucible Map Icons
    • The Dead Cliffs
      • Overview
      • Locations and Match Types
    • Endless Vale
      • Overview
      • Locations and Match Types
    • The Fortress
      • Overview
      • Locations and Match Types
    • Legion’s Gulch
      • Overview
      • Locations and Match Types
    • Altar of Flame
      • Overview
      • Locations and Match Types
    • Vostok
      • Overview
      • Locations and Match Types
    • Midtown
      • Overview
      • Locations and Match Types
    • Javelin-4
      • Overview
      • Locations and Match Types
  • Adventures
    • Overview
    • EDZ Adventures
      • A New Frontier
      • Calling Them Home
      • Poor Reception
      • A Frame Job
      • Dark Alliance
      • Reverse the Polarity
      • Getting Your Hands Dirty
      • Unsafe at Any Speed
      • Red Legion, Black Oil
      • No Safe Distance
      • Stop and Go
      • Anti-Anti-Air
      • Supply and Demand
    • Titan Adventures
      • Thief of Thieves
      • Bad Neighbors
      • Siren Song
      • Deathless
    • Nessus Adventures
      • Unbreakable
      • Ghost in the Machine
      • The Vex Trial
      • Release
      • A Tale of Two Confluxes
      • Assault of Black
      • Key to the Network
    • Io Adventures
      • Arecibo
      • Postmodern Prometheus
      • Unexpectred Guests
      • Cliffhanger
      • Road Rage
  • Lost Sectors
    • Overview
  • World Quests
    • Overview
    • EDZ World Quest: Enhance!
      • Mission 1: Odd Symptoms
      • Mission 2: Show and Intel
      • Mission 3: Differential Diagnosis
      • Mission 4: Experimental Treatment
    • Titan World Quest: Enemy of My Enemy
      • Mission 1: A Visit to Command
      • Mission 2: Data Requisition
      • Mission 3: Report to Sloane
      • Mission 4: Lighting the Dark
      • Mission 5: Chances and Choices
      • Mission 6: At Full Power
    • Nessus World Quest: The Exodus Black
      • Introduction
      • Mission 1: Speak to Failsafe
      • Mission 2: Uncovering the Past
      • Mission 3: The Captain
      • Mission 4: Talk to Failsafe
    • Io World Quest: King’s Shadow
      • Mission 1: The Hunt
      • Mission 2: The Conversion
      • Mission 3: Asher’s Theory
      • Mission 4: The Army
      • Mission 5: Trapped
  • Patrols
    • Overview
  • Public Events
    • Overview
    • Full Public Event Types (Eight Types, 34 Total)
    • Secret Public Event Types (10 Types, 93 Total)
    • Public Event Availability Chart
  • Challenges
    • Overview
  • Director
    • Introduction and Overview
    • European Dead Zone
      • EDZ Overview
      • EDZ: Initial Activities
      • EDZ: All Activities
      • The Farm
      • Sojourner’s Camp
      • Outskirts
      • Trostland
      • Salt Mines
      • Maevic Square
      • The Reservoir
      • The Sludge
      • The Dark Forest
      • Quarantine Sector 236: Blackened Forest
      • Winding Cove
      • The Gulch
      • The Tunnels
      • Firebase Hades
      • Sunken Isles
      • Legion’s Anchor
      • Legion’s Hold
      • Legion’s Watch
      • Echion Vae
    • Titan
      • Titan Overview
      • Titan: Activities
      • Sinking Docks
      • Siren’s Watch
      • The Rig
      • Tidal Anchor
      • Solarium
      • Festering Halls
      • Arboretum
      • Chasm of Screams
    • Nessus
      • Nessus Overview
      • Nessus: Activities
      • Artifact’s Edge
      • The Tangle
      • Chamber of Stone
      • The Mists
      • Well of Echoes
      • Watcher’s Grave
      • Chamber of Water
      • The Cistern
      • Pools of Luminance
      • Well of Flame
      • The Anchor
      • Excavation Site VII
      • The Inverted Spire
      • Hallows
      • Glade of Echoes
      • EX-077 Command
      • Sunken Cavern
      • Well of Giants
      • Exodus Black
      • Chamber of Sky
      • Prodromus Down
    • Io
      • Io Overview
      • Io: Activities
      • Lost Oasis
      • Spine Burrows
      • The Rupture
      • The Endless Gate
      • Pyramidion
      • Terrabase Charon
      • The Wraith Mines
      • Warmind Vault JYS-2
      • Giant’s Scar
      • Excavation Site II
    • The Tower
      • The Tower Overview
  • The Bestiary
    • Overview
    • Cabal: The Red Legion
    • Fallen
    • The Hive
    • The Vex
    • The Taken
  • Weapons
    • Overview
    • Kinetic and Energy Weapons
    • Power Weapons
    • Exotic Kinetic Weapons
    • Exotic Energy Weapons
    • Exotic Power Weapons
  • Armor
    • Overview
    • Titan Armor
    • Hunter Armor
    • Warlock Armor
  • Trophies and Achievements
    • Achievements List
  • PS4 Exclusive Content
    • Strike: Lake of Shadows
      • Overview
      • Trostland and Maevic Square
      • The Reservoir
    • Crucible: Retribution
      • Overview
      • Locations and Match Types

Destiny 2 Guide › Campaign › Looped

Sunken Cavern

Nessus, Unstable Centaur

Objectives
  • Follow Cayde’s signal (continued).
  • Find Cayde-6.
Enemies Encountered
  • Vex: Goblins, Hobgoblins, Minotaurs

First Descent

Super: Not recommended

Grenades: Not recommended

Warning!: Restricted Zone
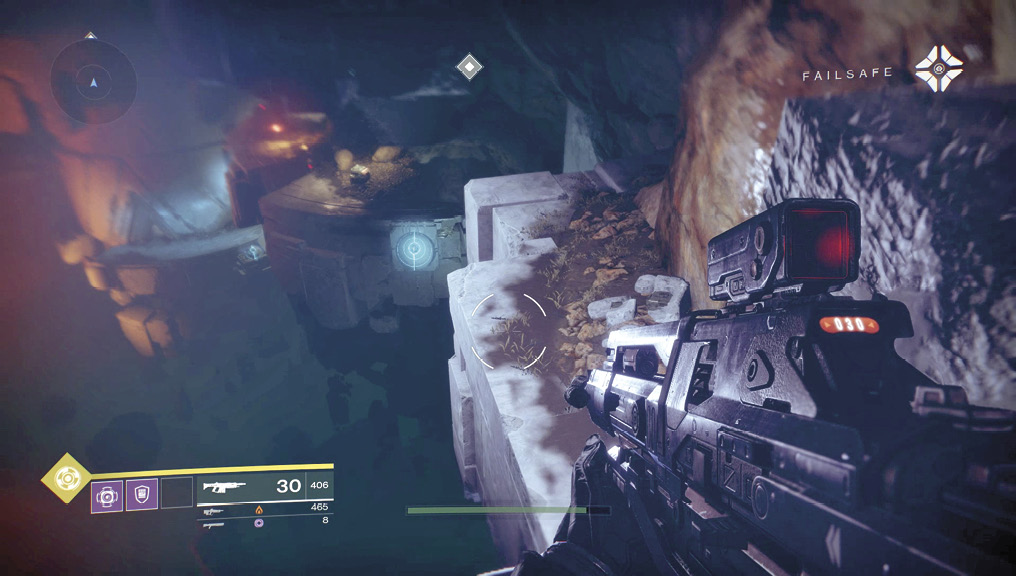
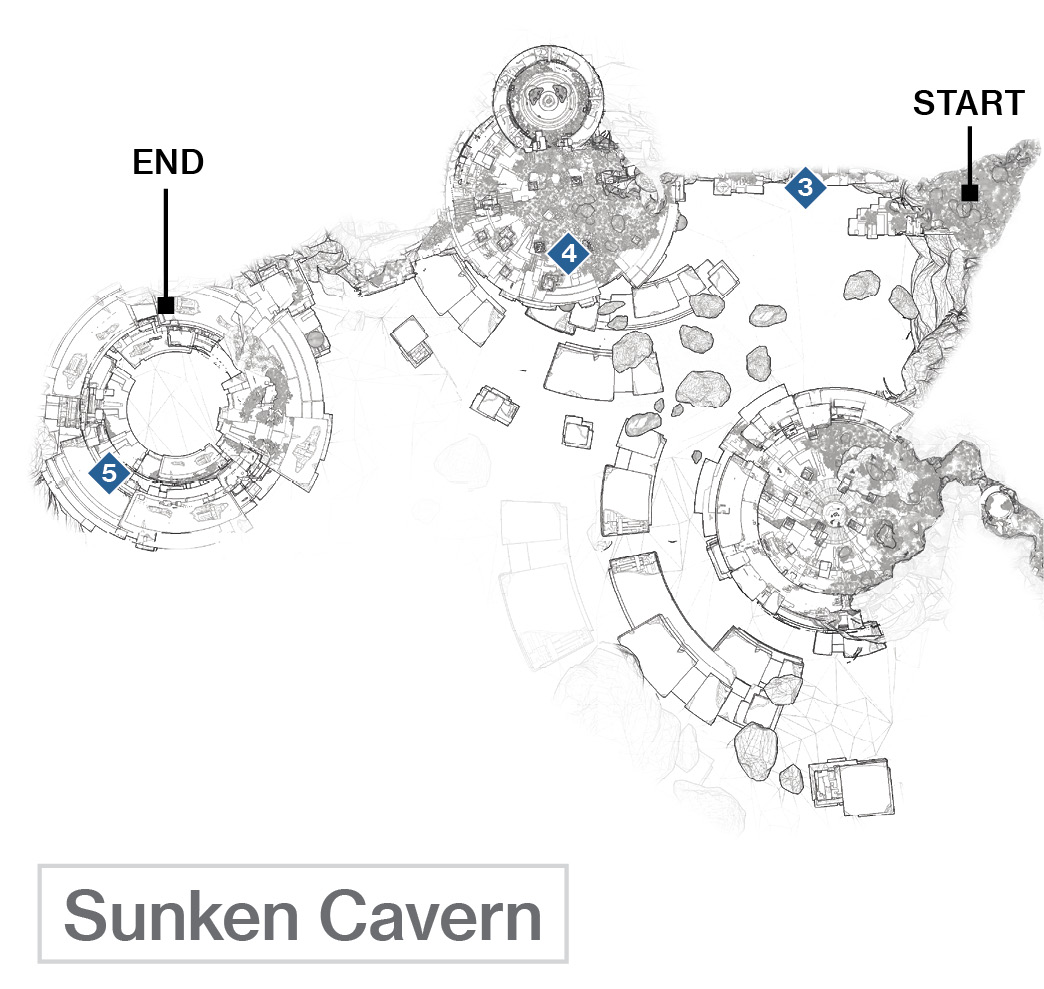
Weave your way through the connecting tunnel slowly to take a view of what appears to be the core of Nessus in a gigantic void of darkness and glowing fire. Look down at a dome-shaped (and inactive) energy catapult far below you.

Now, make some precise, vertigo-inducing jumps, landing on the huge floating block and sections of wall to reach the massive curved floor structure the catapult is attached to. If you haven’t fallen into the inky blackness, you’re doing well.

Energy Catapult Active

This energy catapult is now active and allows you to ascend back up to the entrance area (during future explorations of Nessus). However, this isn’t necessary for the continuation of the mission.

Vex Plateau

Super: Recommended

Grenades: Recommended

Warning!: Restricted Zone

Creep along the cover of this rocky plateau, visually checking the Vex entities in the vicinity. A new foe known as the Vex Hobgoblin is active in this area. It doesn’t move quite as often as a Goblin but fires a sniper-like line rifle that is extremely damaging. After being hit by your first shot, it creates

a three-second invulnerable shield, similar to a Hive Knight. During this time, the shield replenishes, so make your first shot a single bullet from a burst-fire weapon to avoid wasting ammo. Lay waste to the Hobgoblin’s “white point” lower torso weak spot before and afterward. Shoot this enemy’s head, and it goes berserk like a Goblin. Note that a Hobgoblin cannot enter an invulnerable state while berserk, which is a potentially positive trade-off.

There are three Hobgoblins to worry about (one on the ground, and one on each column that warp in a few moments after you engage the ground foes). These should be your priority targets because they are longer-ranged threats than the group of Goblins and Minotaur that appears on the ground ahead of you. Tag them at range from cover before you’re spotted, or while darting in and out of cover. Or, you can jump onto the cluster of columns in the center of the enemy group, land next to the Hobgoblin, and remove it with a shotgun or high-powered pistol. Then, drop a grenade and remove the rest of the foes from this vantage point.

Usually, simply sidestepping between the rocks without advancing too far forward and letting the first wave of six or so Goblins head into your low-recoil mid-range rifle (or hand cannon) fire is a good tactic. Then, when the Hobgoblins warp in, shoot them from their pedestal, and save a grenade for the Minotaur, severely damaging it without having to worry about removing its shield.

Second Descent

With this contingent of Vex defeated, you have another couple of extremely vertical (and vertigo-inducing) drops, avoiding a plummet into the void to an even lower floating plateau with massive crumbling walls. Head into the triangle-shaped hole entrance, and peer over the bottomless edge. Traverse a circular bottomless cavern of floating platforms in a clockwise manner, proceeding to a Vex teleport gate.

Scan if you Can

One of the most cunningly hidden scannable items is available if you can jump to the right wall from the top platform here. Consult the Director chapter for clues to its whereabouts.

Keep reading with a free account

The first 3 sections of Destiny 2 are open to everyone. An account opens the rest of it, and every other guide in the archive. It's free, and there's nothing to buy.

Bought guides on the old Prima Games site? Your account and every guide you own moved here, so there's nothing to buy again. Sign in.

Create a free account Or browse our free guides

PreviousHallows NextWell of Giants