
Cabal: The Red Legion
A Cabal invasion force led by Dominus Ghaul. They favor advancements in technology to aid in their plans for the destruction of humanity. Toughened infantry from this force may have the prefix “Impact.” Higher-ranking infantry from this force are known as the Blood Guard.
War Beast
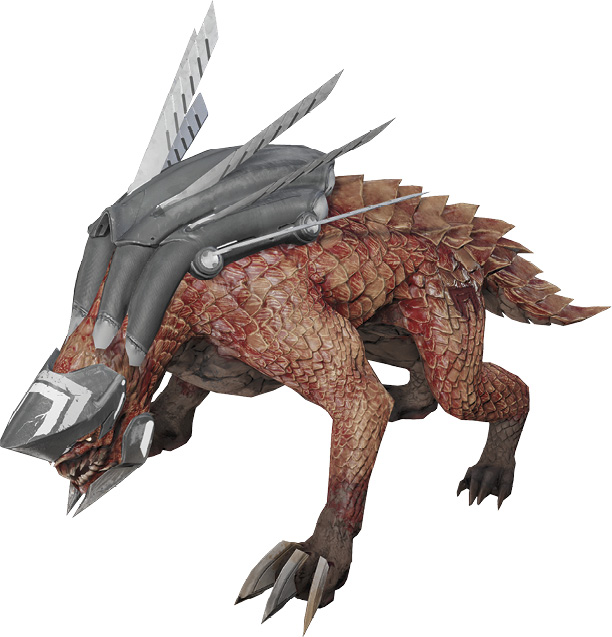
Threat Level: 1
Weak Spot: Head
| Loadout | Types | Role | Survival Tactics | Takedown Tactics |
|---|---|---|---|---|
|
Bite and claws |
Base, Elite, Sub-Boss, Boss |
Fodder |
Melee Pressure |
Target Practice |
Notes: Found in packs of around a dozen, they attack three or four at a time. Treat as priority targets (as they don’t find cover), even if other foes are causing you difficulty. Defeat by aiming at the head. At melee range, just fire at the heads or melee attack and back up, taking evasive maneuvers or finding higher ground to shoot down from.
Psion

Threat Level: 2
Weak Spots: Head and jetpack
| Loadout | Types | Role | Survival Tactics | Takedown Tactics |
|---|---|---|---|---|
|
Sniper rifle |
Base, Elite |
Fodder |
Stay in Cover |
Weaken and Beat Down |
|
Slug rifle |
Base, Elite, Sub-Boss, Boss |
Fodder |
Dodge Enemy Fire |
Weaken and Beat Down |
|
Shotgun |
Base, Elite, Sub-Boss, Boss |
Fodder |
Close-range Pressure |
Weaken and Beat Down |
|
Cabal Bronto Cannon |
Elite, Sub-Boss, Boss |
Fodder |
Dodge Enemy Fire |
Weaken and Beat Down |
Notes: The Psion can launch a projectile ball that causes a rolling distortion along the ground. It eventually knocks you high into the air, allowing them and others to strike you while you’re exposed during this unwelcome jump. They also tend to use their jetpacks to maneuver at speed along the ground, though they also head through the air. Fortunately, Psions are only lightly armored, and they don’t usually withstand more than a couple of headshots or a melee attack at close range.
Legionary
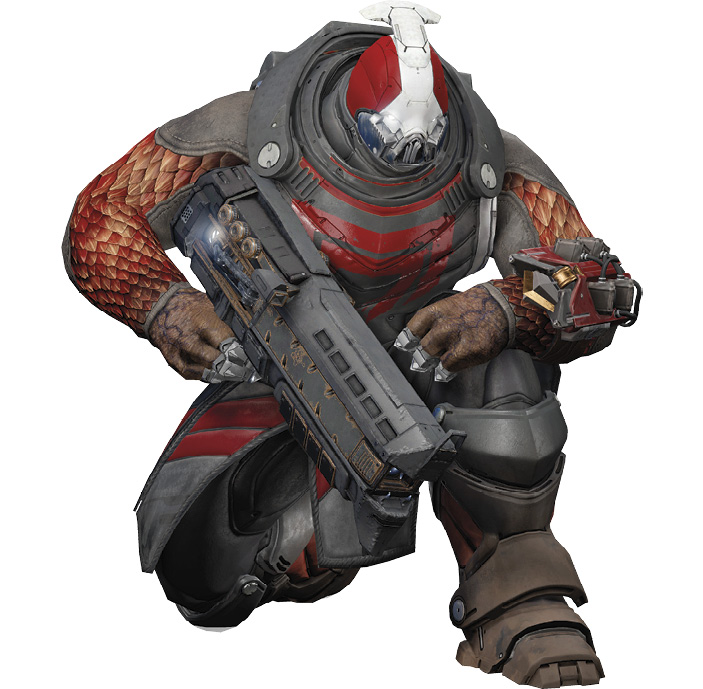
Threat Level: 2
Weak Spots: Head and jetpack
| Loadout | Types | Role | Survival Tactics | Takedown Tactics |
|---|---|---|---|---|
|
Shotgun |
Base, Elite, Sub-Boss, Boss |
Soldier |
Close-range Pressure |
Target Practice |
|
Slug rifle |
Base, Elite, Sub-Boss, Boss |
Soldier |
Dodge Enemy Fire |
Target Practice |
|
Sniper rifle |
Elite, Sub-Boss, Boss |
Soldier |
Stay in Cover |
Target Practice |
|
Projection rifle |
Elite, Sub-Boss, Boss |
Soldier |
Stay Mobile |
Target Practice |
Notes: All Legionary types have a close-combat gauntlet blade, and they charge at their targets to inflict a powerful melee strike. They can also use this blade as a grenade to push you around.. They use jetpacks in open areas to cover distance. Shoot them in the head whenever possible. If that’s not possible, aim for their jetpack if you’re striking from behind. Softening them up with gunfire and melee striking them is also a viable proposition.
Incendior

Threat Level: 2
Weak Spots: Flame launcher backpack and a jetpack
| Loadout | Types | Role | Survival Tactics | Takedown Tactics |
|---|---|---|---|---|
|
Flame Launcher |
Base, Elite, Sub-Boss, Boss |
Soldier |
Area Denial |
Weak Spot |
Notes: Aim for the center of the backpack (behind the head of the foe, between the two tanks), and watch the Incendior explode and topple over. This explosion can also coat you in fire, so back away and attempt ranged takedowns if you’re after the explosive dispatch. Time the piercing of the fuel tanks to coincide with the Incendior being close to other foes. This can set off a chain reaction or badly wound nearby Cabal, a little like a grenade does.
Phalanx

Threat Level: 3
Weak Spots: Shield, head, and jetpack
| Loadout | Types | Role | Survival Tactics | Takedown Tactics |
|---|---|---|---|---|
|
Slug rifle |
Base, Elite, Sub-Boss, Boss |
Soldier |
Dodge Enemy Fire |
Flank Target (Shield), Weak Spot |
|
Shotgun |
Base, Elite, Sub-Boss, Boss |
Soldier |
Close-range Pressure |
Flank Target (Shield), Weak Spot |
|
Projection rifle |
Elite, Sub-Boss, Boss |
Soldier |
Stay Mobile |
Flank Target (Shield), Weak Spot |
Notes: The biggest concern is the defensive posture the Phalanx takes, enabling it and other Cabal forces to hide behind a wide shield that expands when the Phalanx anchors himself in place. React by attacking from the flanks (left, right, or above), shooting over the shield. Grenades landing behind the Phalanx are also excellent. If the shield is up and flanking is impossible, shoot the center of the shield so it retracts, and mow with Phalanx down with headshots as it staggers back.
Gladiator
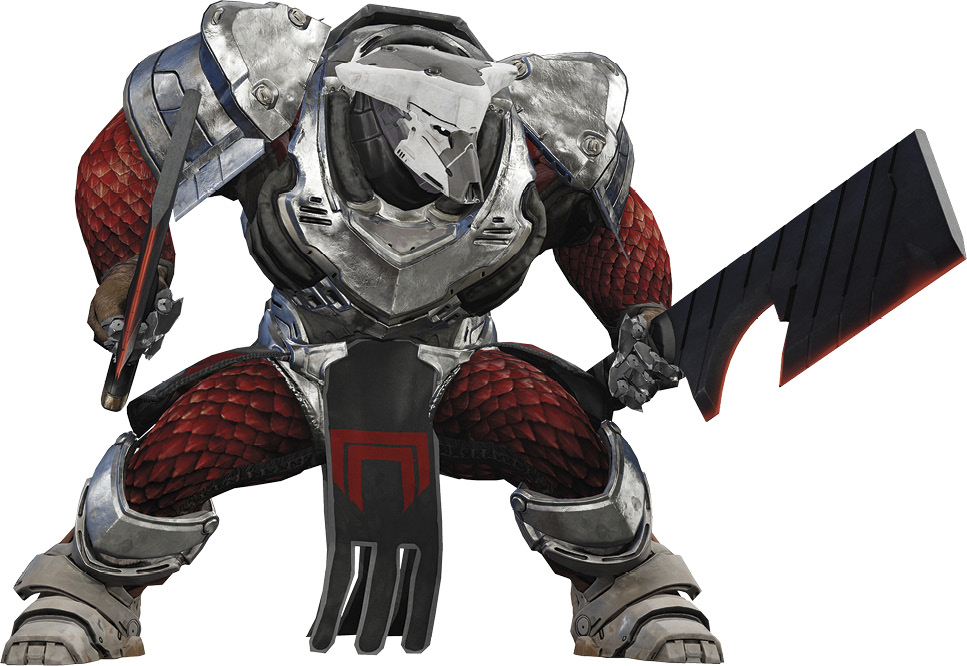
Threat Level: 4
Weak Spot: Head and jetpack
| Loadout | Types | Role | Survival Tactics | Takedown Tactics |
|---|---|---|---|---|
|
Thermal Cleaver |
Base, Elite, Sub-Boss, Boss |
Commander |
Melee Pressure |
Targeting Challenge (Jetpack) |
Notes: Arguably the most problematic of Cabal foes to face, Gladiators are extremely aggressive. They can charge in quickly and deliver devastating melee strikes. If you can use your dodges and jumps effectively while pressuring the Gladiator as it rushes you, attempt to strike the enemy’s jetpack, which damages it more quickly than headshots or general fire. Gladiators are always priority targets.
Centurion
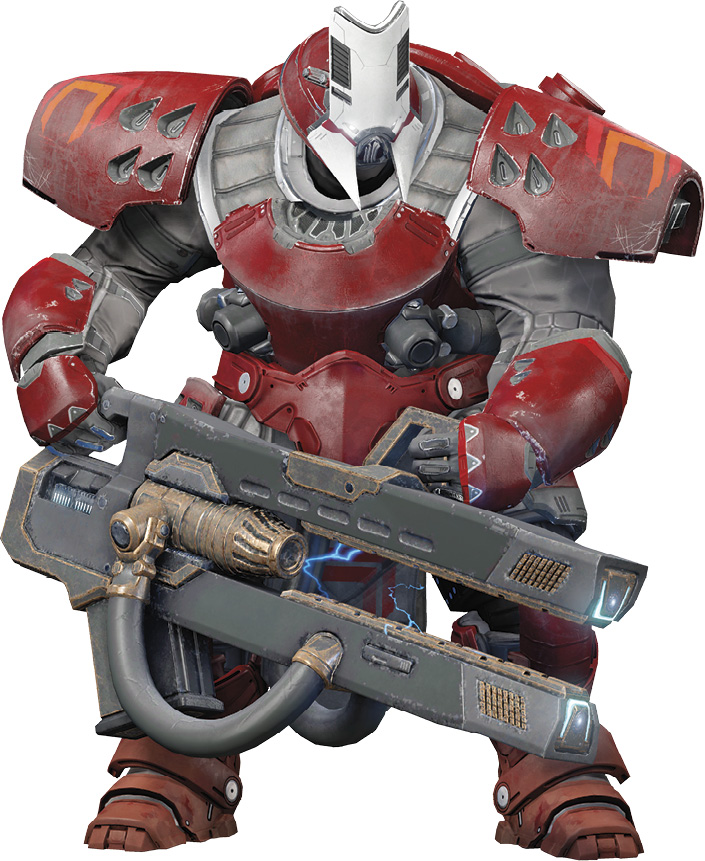
Threat Level: 5
Weak Spot: Head and jetpack
| Loadout | Types | Role | Survival Tactics | Takedown Tactics |
|---|---|---|---|---|
|
Rail cannon |
Base, Elite, Sub-Boss, Boss |
Artillery |
Suppression (Line of Sight), Stay Mobile (MIRV missiles) |
Line of Sight |
|
Heavy slug thrower |
Base, Elite, Sub-Boss, Boss |
Artillery |
Suppression (Line of Sight), Stay Mobile (MIRV missiles) |
Line of Sight |
Notes: These walking artillery batteries are of great concern if you’re caught in their line of sight. You can be cut down in seconds if you remain an open target. It’s better to seek cover or take evasive maneuvers so the Centurion cannot quickly aim and strike you. Move to a ranged cover position, start to whittle down the Centurion’ health with a good line of sight, and don’t stop until the foe falls. Follow up with grenades to stagger before continuing a rapid-fire assault.
Centurion

Threat Level: 4
Weak Spot: Head and jetpack
| Loadout | Types | Role | Survival Tactics | Takedown Tactics |
|---|---|---|---|---|
|
Cabal Bronto Cannon |
Base, Elite, Sub-Boss, Boss |
Commander |
Dodge Enemy Fire |
Maintain Pressure (Shield), Targeting Challenge (Jetpack) |
|
Projection rifle |
Base, Elite, Sub-Boss, Boss |
Commander |
Stay Mobile |
Maintain Pressure (Shield), Targeting Challenge (Jetpack) |
|
Slug rifle |
Base, Elite, Sub-Boss, Boss |
Commander |
Dodge Enemy Fire |
Maintain Pressure (Shield), Targeting Challenge (Jetpack) |
Notes: Centurions have active shields to remove, which are almost always powered by Solar energy (so have an Energy weapon of this type ready). Kinetic weapons also work, but they take much longer to neutralize the shield defenses. Centurions also like to jet vertically up before firing down on you. Learn to accurately shoot up at them, or find higher ground or cover. Remove the shield, then finish the Centurion with shots to its jetpack if you can navigate to aim at it, or slower takedowns with headshots (from either Kinetic or Energy weaponry).
Scorpius
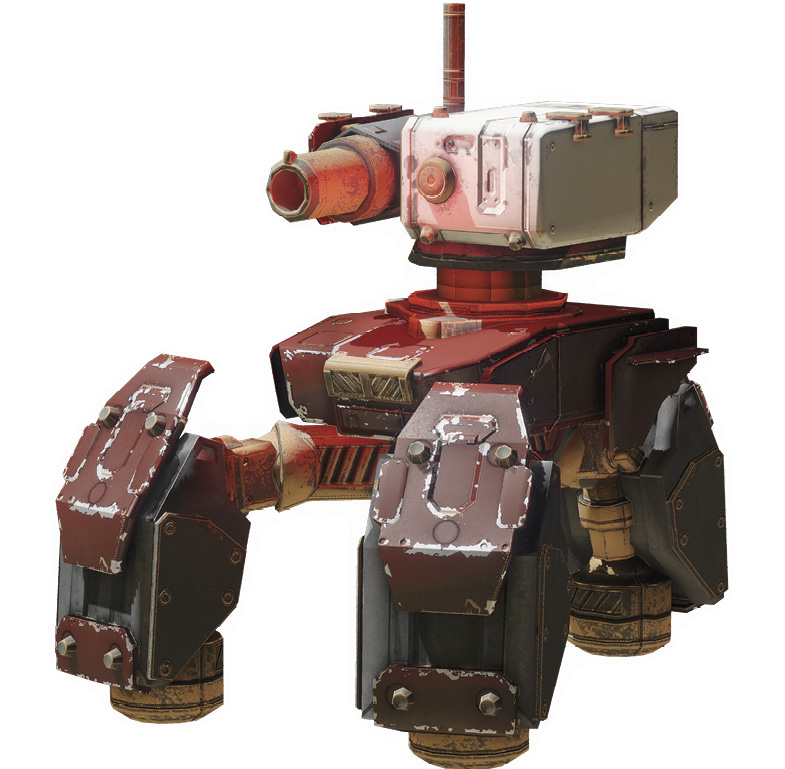
Threat Level: 3
Weak Spot: Top, cube-shaped section
| Loadout | Types | Role | Survival Tactics | Takedown Tactics |
|---|---|---|---|---|
|
Machinegun or Flamethrower |
Base, Elite, Sub-Boss, Boss |
Artillery |
Dodge Enemy Fire |
Line of Sight |
Notes: These sentry guns activate when they receive visual confirmation of your presence, and then fire rapidly. The incoming fire is highly damaging and can shred you to death in seconds. Use cover, range, grenades, and rapid-fire weaponry to destroy these sentries. Make them a priority.
Interceptor
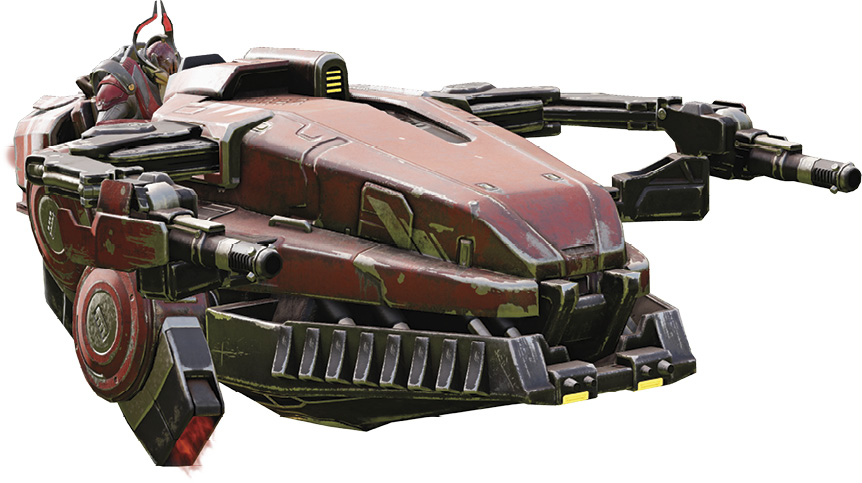
Threat Level: 4
Weak Spot: Psion pilot
| Loadout | Types | Role | Survival Tactics | Takedown Tactics |
|---|---|---|---|---|
|
Rockets |
Vehicle |
Soldier |
Dodge Enemy Fire |
Target Practice |
Notes: Slower than a Sparrow or Pike but more durable, the Cabal Interceptor has excellent offensive capabilities (rockets with area-of-effect damage). Hijacking one requires you to aim for the head of the Interceptor pilot until you execute him. The Interceptor is then neutralized, and you can drive it. Otherwise, you can blast the vehicle repeatedly until it catches fire and explodes (which isn’t optimal).
Goliath Tank
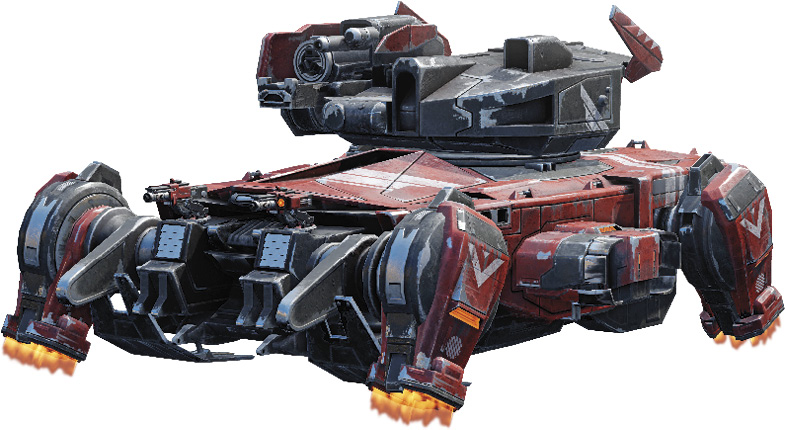
Threat Level: 5
Weak Spot: Corner thrusters
| Loadout | Types | Role | Survival Tactics | Takedown Tactics |
|---|---|---|---|---|
|
Missile swarm, slug repeater |
Vehicle |
Artillery |
Suppression (Line of Sight) |
Target Practice |
Notes: This heavy hover tank can cause havoc with a massive main turret and a secondary cluster missile swarm of (usually) Solar rockets. It can slay you with a direct hit, so remaining mobile is a must. Aim at the corner thrusters until they are set on fire, which damages the tank more quickly than just firing everything you’ve got at it.
Thresher
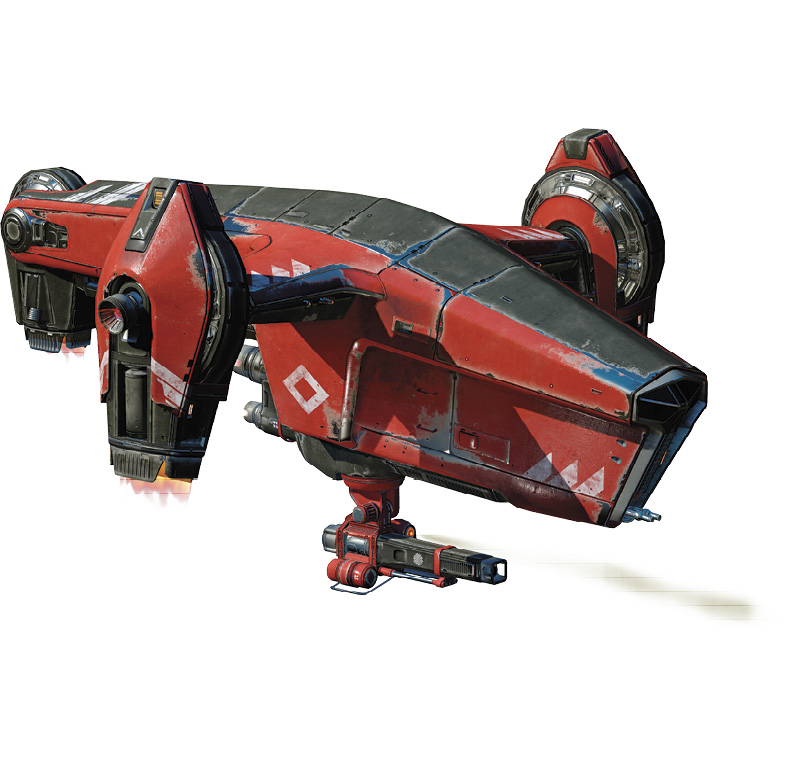
Threat Level: 4
Weak Spot: None
| Loadout | Types | Role | Survival Tactics | Takedown Tactics |
|---|---|---|---|---|
|
Rockets |
Vehicle |
Artillery |
Suppression (Line of Sight) |
Line of Sight |
Notes: Not usually encountered as a hostile (except on a Strike, or when you’re able to easily counter it in a Drake tank), this ship occasionally deposits foes before leaving the theater of battle. You have a slight advantage if you can seek cover and rake the engines of the craft (attached at the end of each wing). However, damaging the hull until the craft flees or explodes is the main way to tackle it.