
Destiny 2 Guide Curse of Osiris PVP
Pacifica

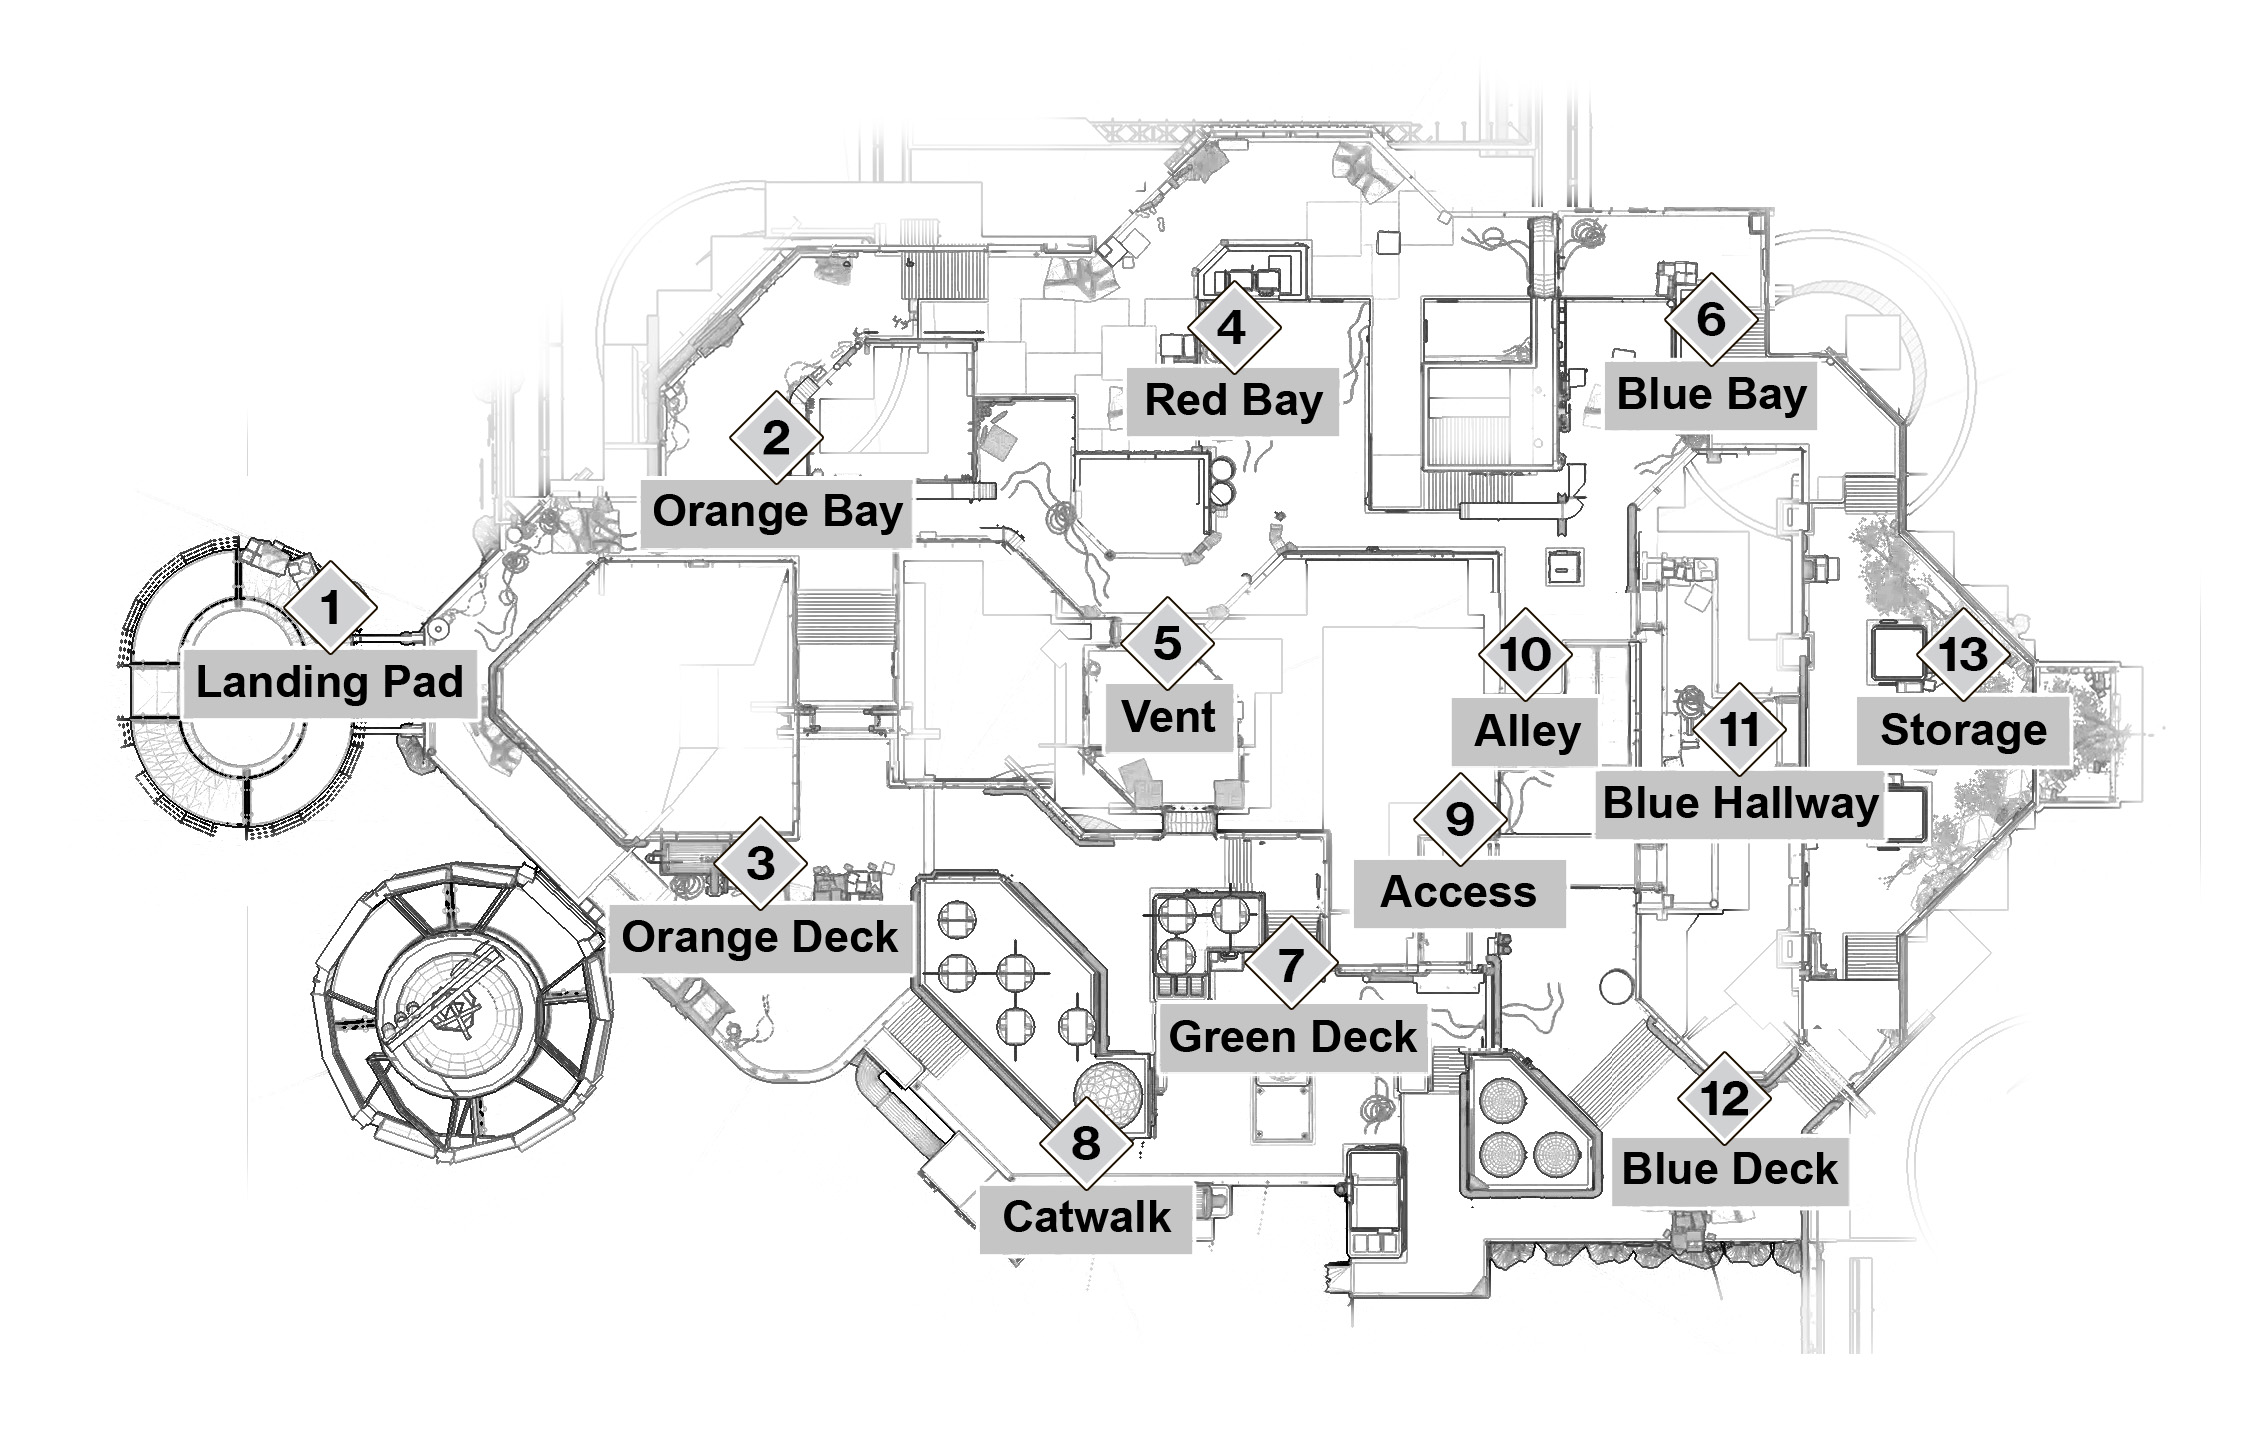
Pacifica Map Locations
Overview

Pacifica is set on an asymmetrical rig on Titan. The broken-up layout provides quick travel times to all areas. Most of the exterior area is hazardous, due to an increased risk of falling to a quick death.

Most engagements will be within shouting distance, and this may lead a lot of people to choose short-to-mid range weaponry. However, if you’re looking to play a supportive role, Pulse and Scout Rifles will be great tools in providing cover fire as your teammates advance. Ample cover will provide plenty of spaces to tuck back into, or let you flank around to assist your advancing teammates.

The areas of engagements are broken up with cover consisting of plentiful pillars, boxes, and walls. There’s a good element of verticality and quick alternate routes to break up stand offs. Listen in a crouch position for enemy footsteps. Surprises can be around any corner.
Match Types
 Quickly
- Clash
- Supremacy
- Control
 Competitive

- Countdown
Pacifica: Clash, Supremacy
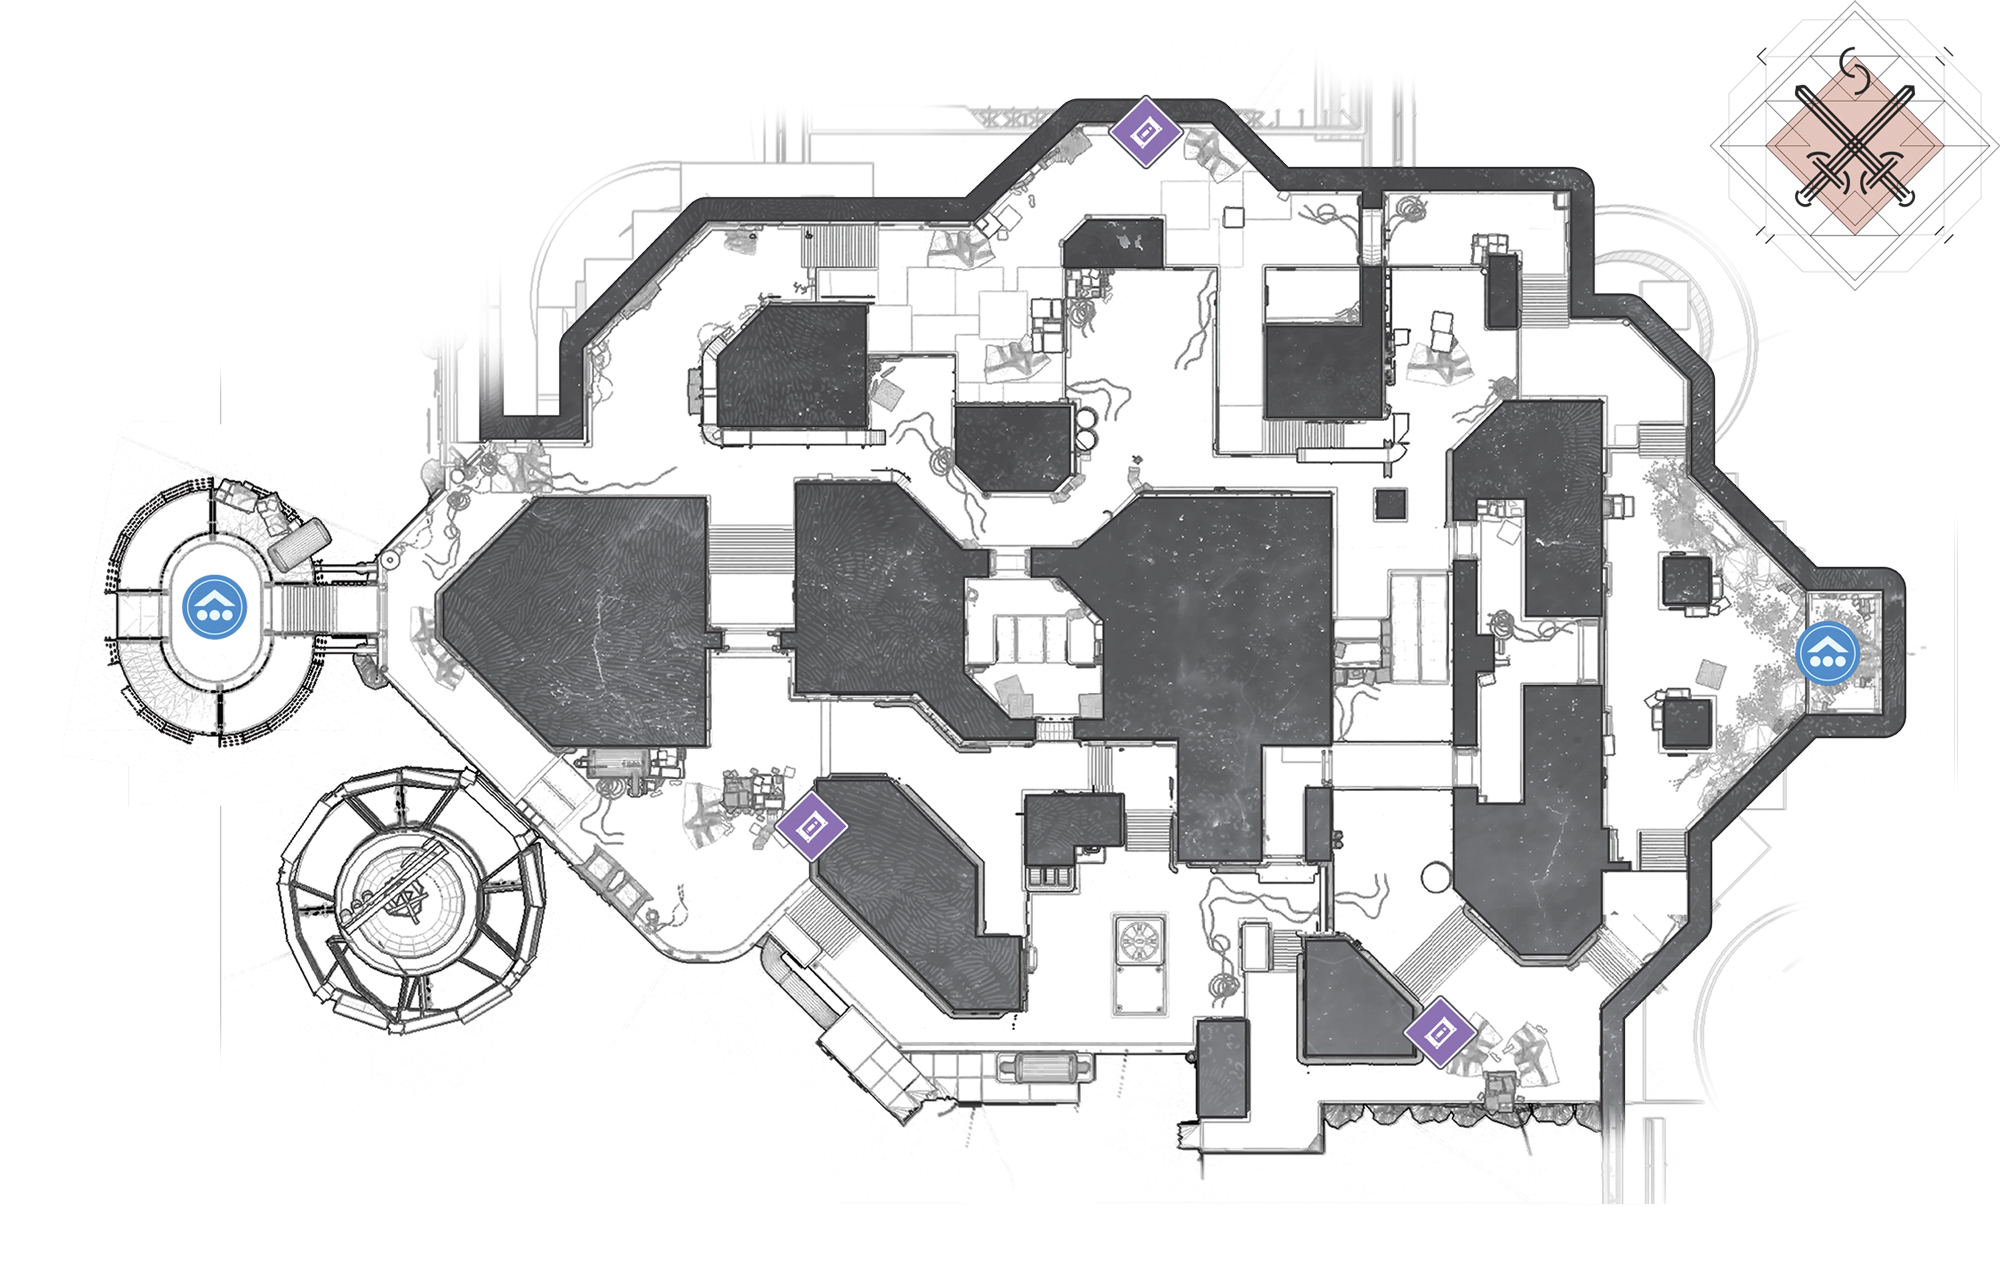
Pacifica: Control
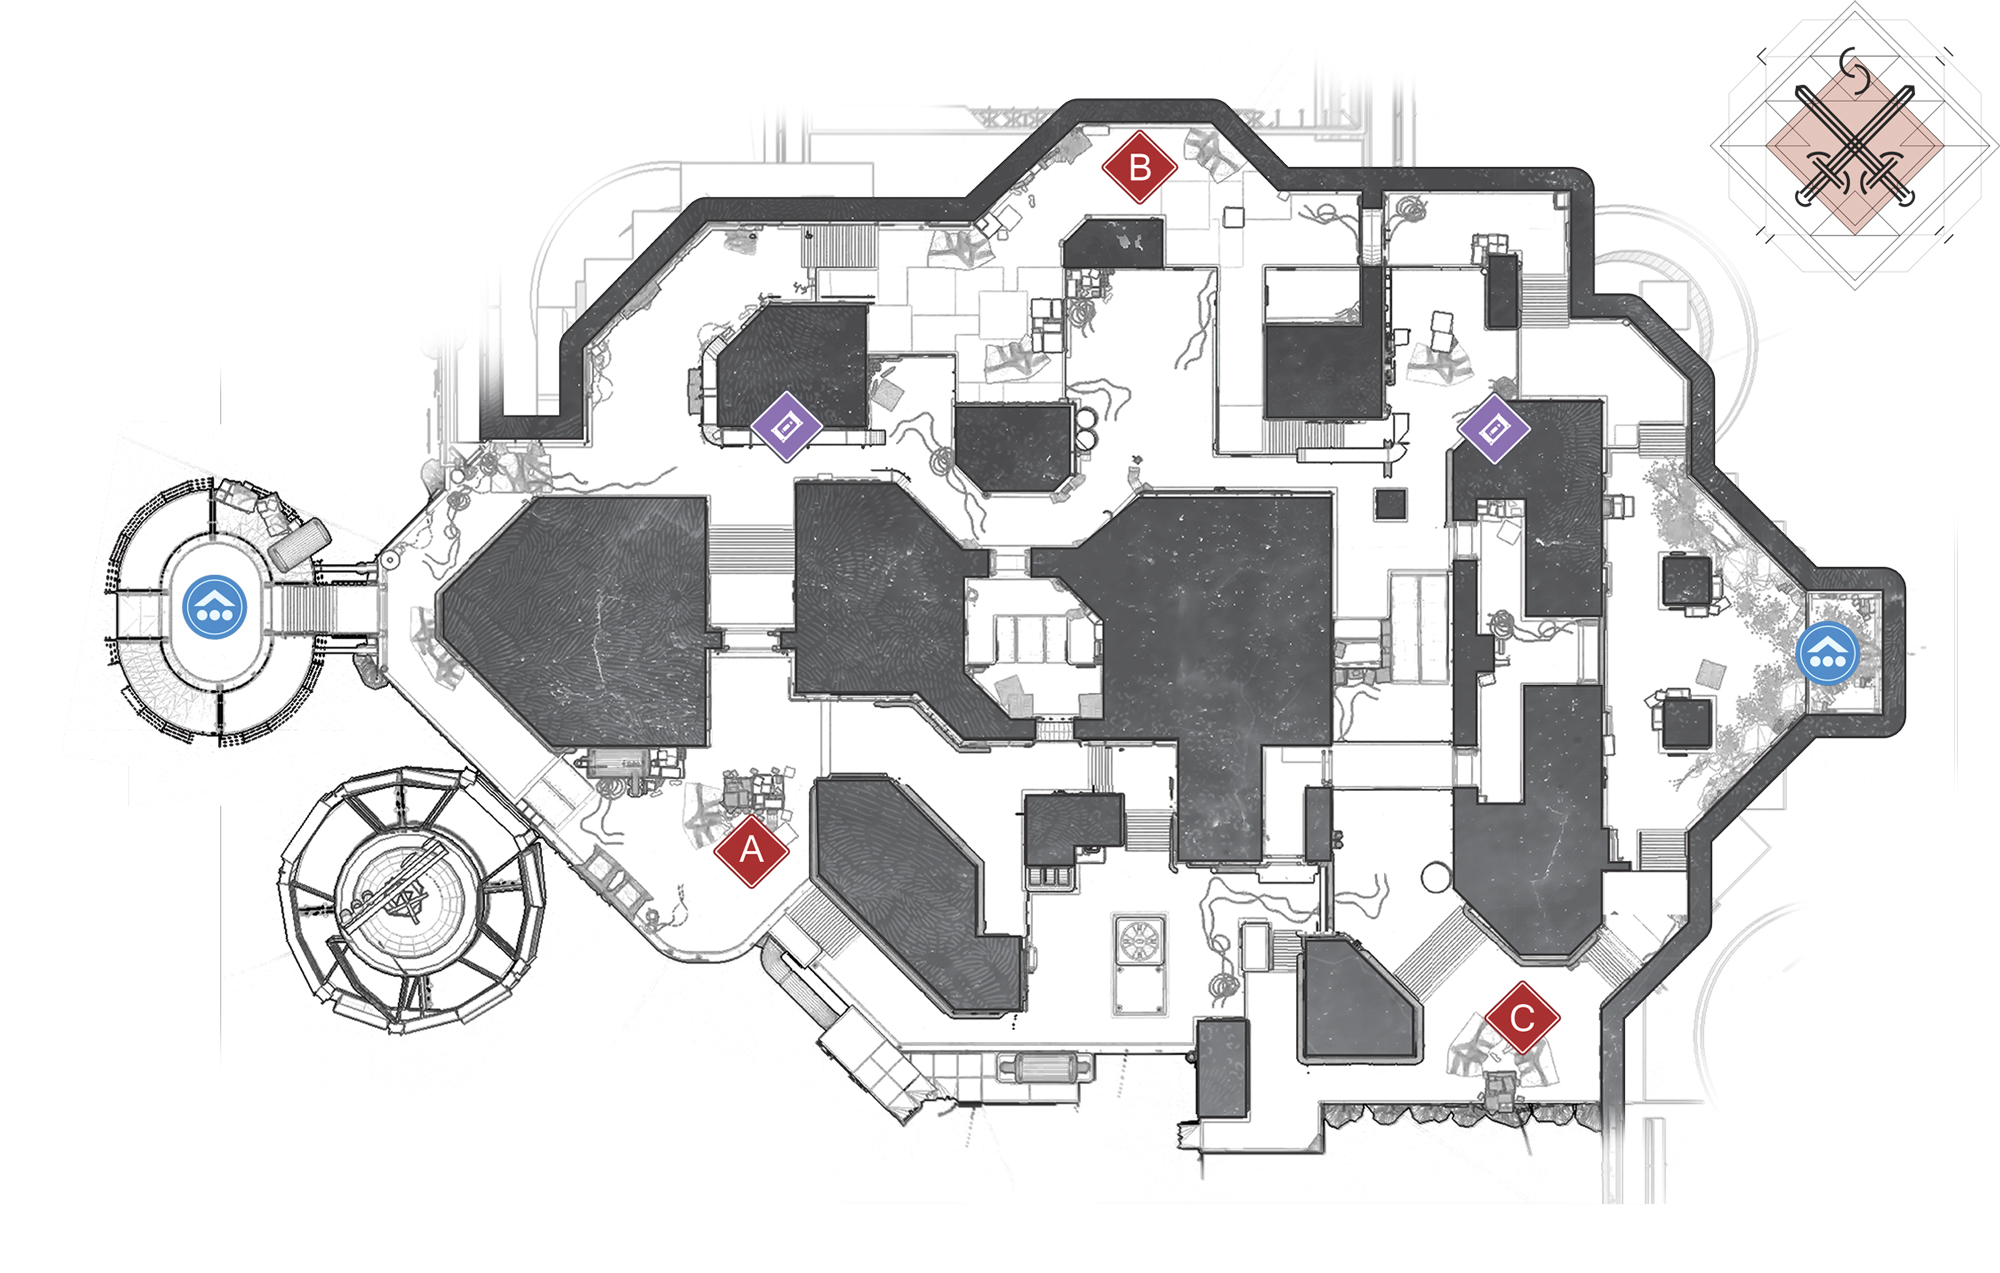
Pacifica: Countdown
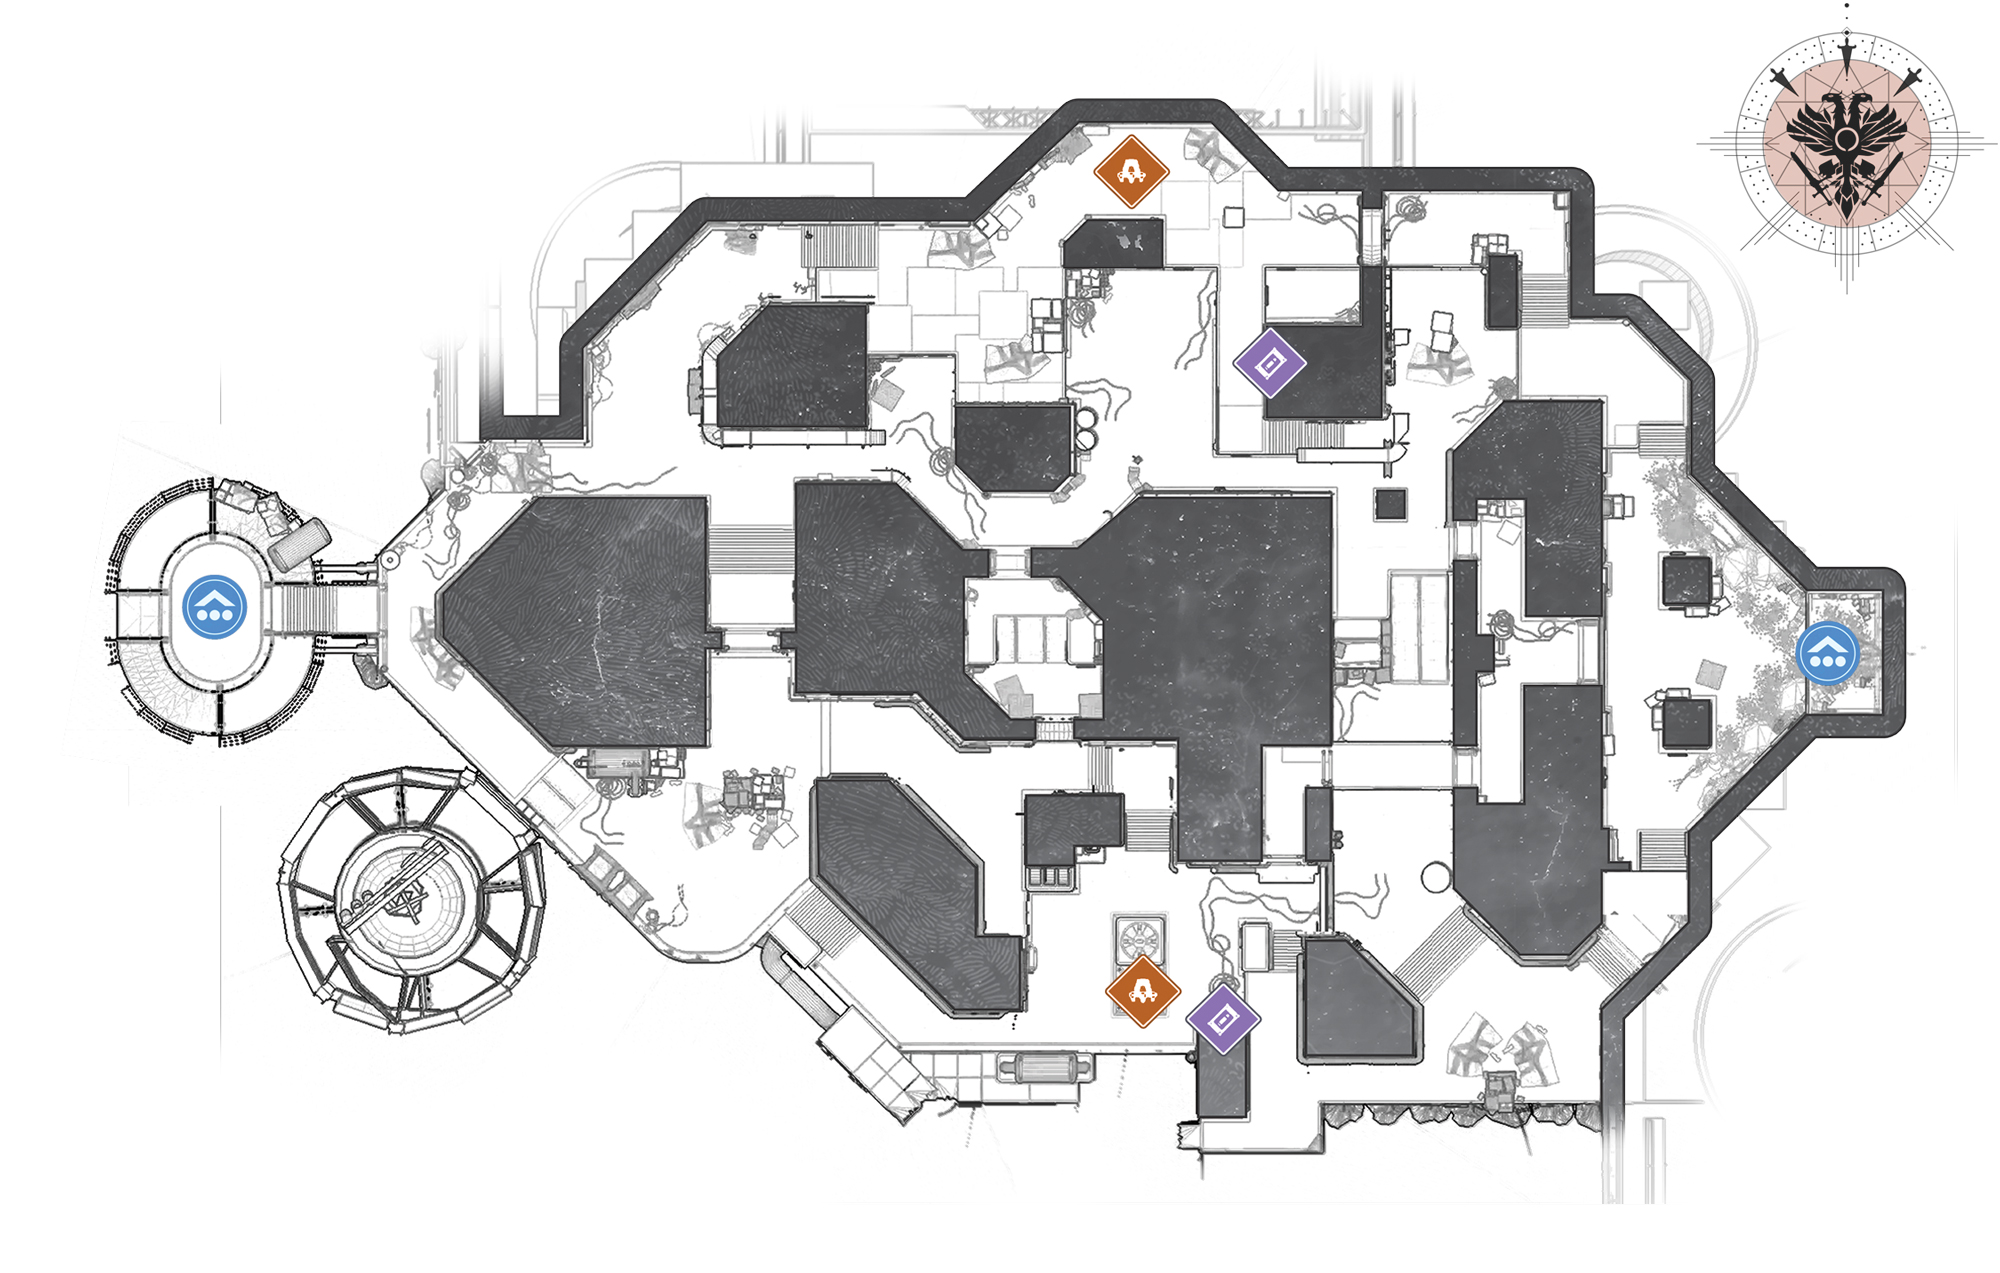
 Landing Pad

This is an initial landing zone for the beginning of a match. It may be best to avoid lingering on the pad itself due to how exposed anyone is standing on it. However, there may be a good sightline from the Landing Pad down to the A Control zone or toward the Orange Bay, but only if the enemy isn’t paying attention.
 Orange Bay

This area offers little in the way of cover. It’ll most-likely see some pitched hallway gun fights. Be careful poking your head up the stairs heading into the Red Bay. The longer nature of the halls here doesn’t make for great escapes if you are being closely hunted.
 Orange Deck
Key Location: Orange Deck

Since the Orange Deck is located at the edge of the rig, players can fly off into the methane sea if they're caught off guard or distracted while jumping. Stay low here and use cover because enemies often approach from the Orange Bay and the Green Deck. The staircase going up to Orange Bay can have a lot of traffic and catch Guardian’s unaware if they’re dealing with threats from the Green Deck. Always pull back toward the Landing Pad if you need to eliminate that the Orange Bay flank when dealing with the approaching threat from the Green Deck.
 Red Bay

Red Bay is a centrally-located interior area with long sightlines. Enemies can approach your position in this area quickly, and either from above or below. The Bomb planting point is here, along with Power ammo during Clash or Supremacy. There’s a good sightline from the Orange Bay and the Blue Bay. The Vent and Alley approaches allow enemies to quickly approach if you're otherwise distracted, making this a dangerous area, so don't linger.
Key Location: Red Bay
 Vent
Vent

Someone is probably passing through here, or hiding here in wait for people passing through. Block approaching enemies with Barriers. Don’t hang out in here unless you're looking for close comobat.
 Blue Bay

This area is much like the Orange Bay, but with more passing through. It does offer a nice protected sightline from the Blue Bay down toward the Blue Deck, making a good trap. The wall provides cover and the radar provides a warning for enemies approaching from the Red Bay or Storage.
 Green Deck
Key Location: Green Deck

Half of this area has plenty of walls to hug, with tight short passages for quick flanking. The other half is pretty exposed and probably easy to fall off, and you can get picked off during an ill-timed jump near the open edge.
 Catwalk

What are you doing on the Catwalk? That’s not very safe. The tank does provide some helpful cover and you may jump from here toward the Blue Deck for a flank or escape route.
 Access

A great flanking path ,and the door create a surprise opening, but the thing about doors is they’re always suspicious to those defending themselves. Open that door and fire down on foes when you know they’re preoccupied. You should probably keep an eye on that door if you’re on the Green Deck and see red on the radar in that direction.
 Alley
Alley

This is a solid lane of battle from the Blue Bay to Deck. Blue Hallway and access create a junction here. If there’s a battle in here use those flanks or go around through storage.
 Blue Hallway

The Blue Hallway serves as a good maneuvering path to move between Storage and the Alley. You most-likely will rer-oute through here in order to get an angle on enemies located within the Blue Deck, or if you're heading to the Red Bay. The Hallway connects to a bridge in the Alley that leads to Access.
 Blue Deck
Key Location: Blue Deck

Half of this area has plenty of walls to hug, with tight short passages for quick flanking. The other half is pretty exposed and probably easy to fall off or get picked off during an ill-timed jump near the open edge. Gun fights erupt here due to the C Control Zone and the Power Ammo. The relative safety of the walls provide good cover while you're firing down toward the Blue Bay, the Green Deck, and Storage. Here you are also given ample opportunities to check the radar for approaching enemies to out flank them or retreat.
 Storage

This is an area that serves as an initial spawn and maneuvering route. Located between two often-contended areas, Storage makes for a good path to approach enemies stealthily by using the provided cover or if approaching adjacent areas quickly. Covering from Storage is a good way to exert control over the C Control Zone on the Blue Deck.