
Destiny 2 Guide Strikes The Inverted Spire
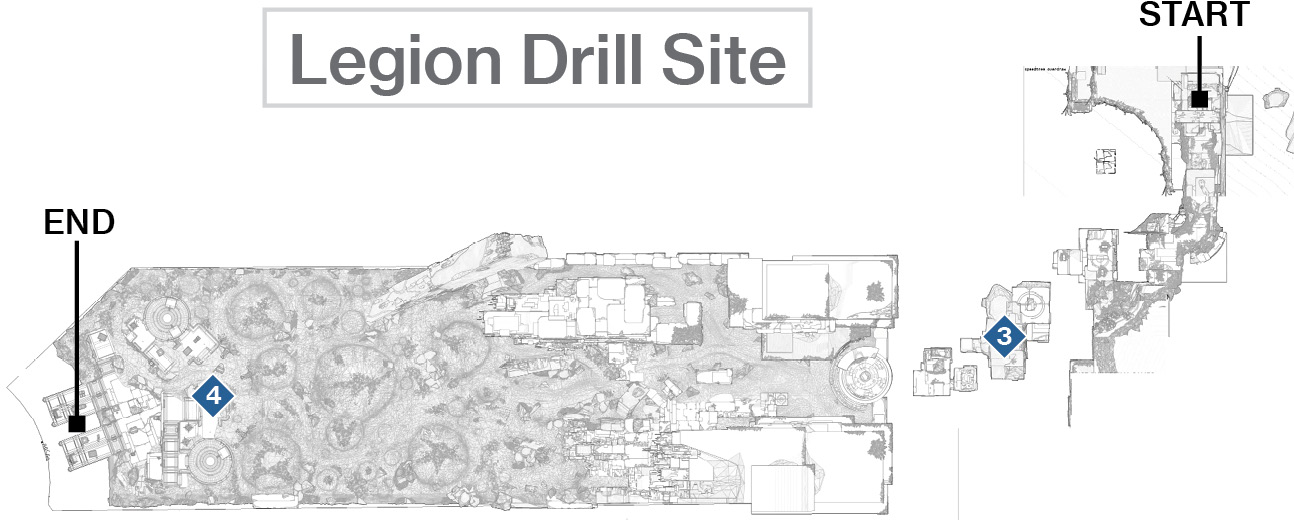
Legion Drill Site
Restricted Zone
Enemies Encountered
- Cabal: Psions, Gladiators, Legionaries, War Beasts, Phalanxes
- Sub-Boss: Blood Guard (Centurion), Centurions, Incendiors, Blood Guard (Incendior)
- Vex: Goblins
Objectives
- Press forward (continued).
- Approach the drilling site.
- Eliminate drill site security (2).
- Board the Cabal drill.
- Reorient the transit system.
- Repel all attackers.
- Cross to the dig site.
- Get clear of the drill.
- Investigate the dig site.
 Stepping Stones
Super: Recommended
Grenades: Optional
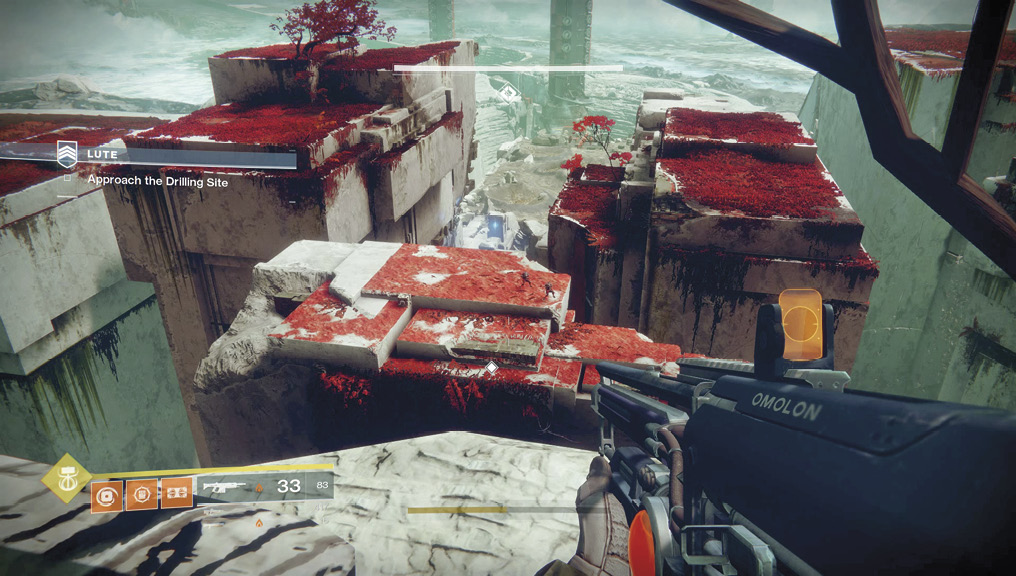
You appear high above a huge expanse of block architecture, with the strip mining of the Cabal visible in the far distance. Getting there is the first challenge. Stop at the edge of the large red moss-covered block towers, and snipe the Cabal Psions atop the nearest one before jumping onto it. To the right of the moss-covered block is an attached gray promontory with a small block section and a scarred circle carved into the stone. Land here, and expect to face at least two Cabal Gladiators. If you can land on the block section, you can use the slight height and cover to dodge the Gladiators as you slaughter them. Then, simply snipe a couple of Legionaries on your way down to the last stepping stone, then head to the Vex altar circle, where a group of Goblins must be quickly defeated. Immediately wind your way across any of the short Vex paths, and go into the crater zone.
 Cabal Mining Base
Super: Recommended
Grenades: Recommended
Variations: Vex forces between Sub-Bosses in the mining base.
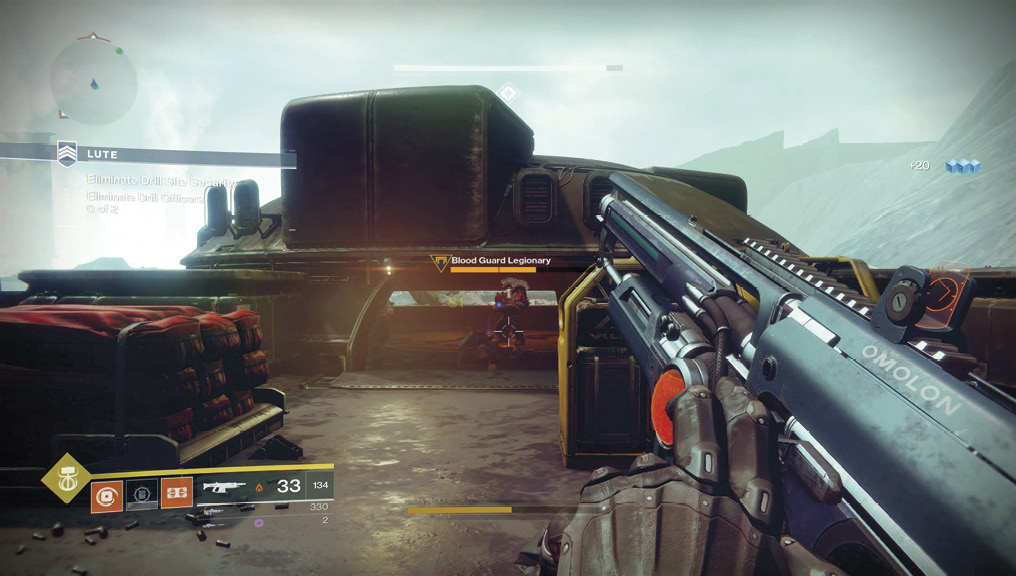
Rush (or drive) across the crater zone, ignoring any small skirmishes between Vex and Cabal forces (there’s no need to get involved); expect Goblins and War Beasts in this area. Slow down as you reach the edge of the mining base. You have two “drill officers” (Sub-Boss Legionaries) to tackle, as well as a host of Legionaries who have jet-packed into your view. Each Sub-Boss is situated (to begin with) inside one of the two low circular structures, which usually has a Psion sniper on the roof. Between these two structures is a mass of Cabal infantry: Phalanxes, Psions, and Legionaries, usually led by a Centurion with a rapid-fire cannon.
Sub-Bosses: There’s a lot to recommend if you first focus your firepower on this central cluster of forces from the crater zone. Start with any Psions atop either base building; drop them as your team arrives in the general area. Annihilate the Cabal between the two circular buildings (or Vex, if this is a Strike variation). Then, take each Legionary Sub-Boss one at a time. Since they tend to hide inside the circular building, you can have one player rake the entrance, removing Phalanxes and other infantry as well as hitting the Sub-Boss drill officer. Another teammate can fire through the open windows and lob in grenades. This can topple the foe in seconds. Repeat the process with the remaining Sub-Boss in the other building.
Your next task is to board the Cabal drill. At this point, venture down to the two ledges with the Cabal energy catapult (AKA “transit system”) on each of them. On the way, expect to deal with a couple of Centurions. With your team, predetermine which of the two catapults you want to activate. Have one member access the nearby switch to power it up while the other two tackle a Centurion each and any remaining Cabal stragglers. Remember that the energy catapult must be glowing orange before you jump into it, or you’ll simply fall to your death in a most embarrassing manner.
 Drill Rig
Super: Recommended
Grenades: Recommended
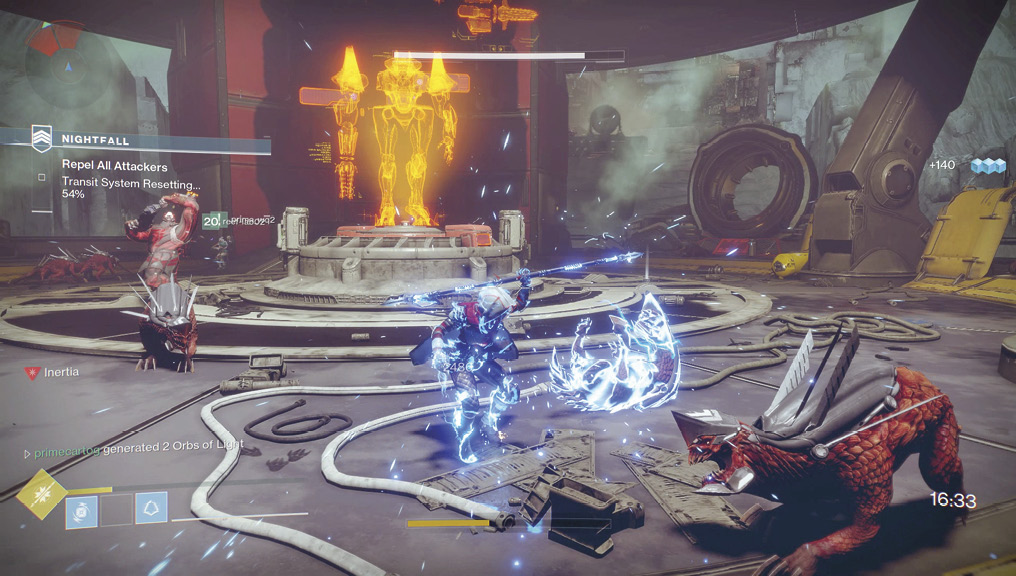
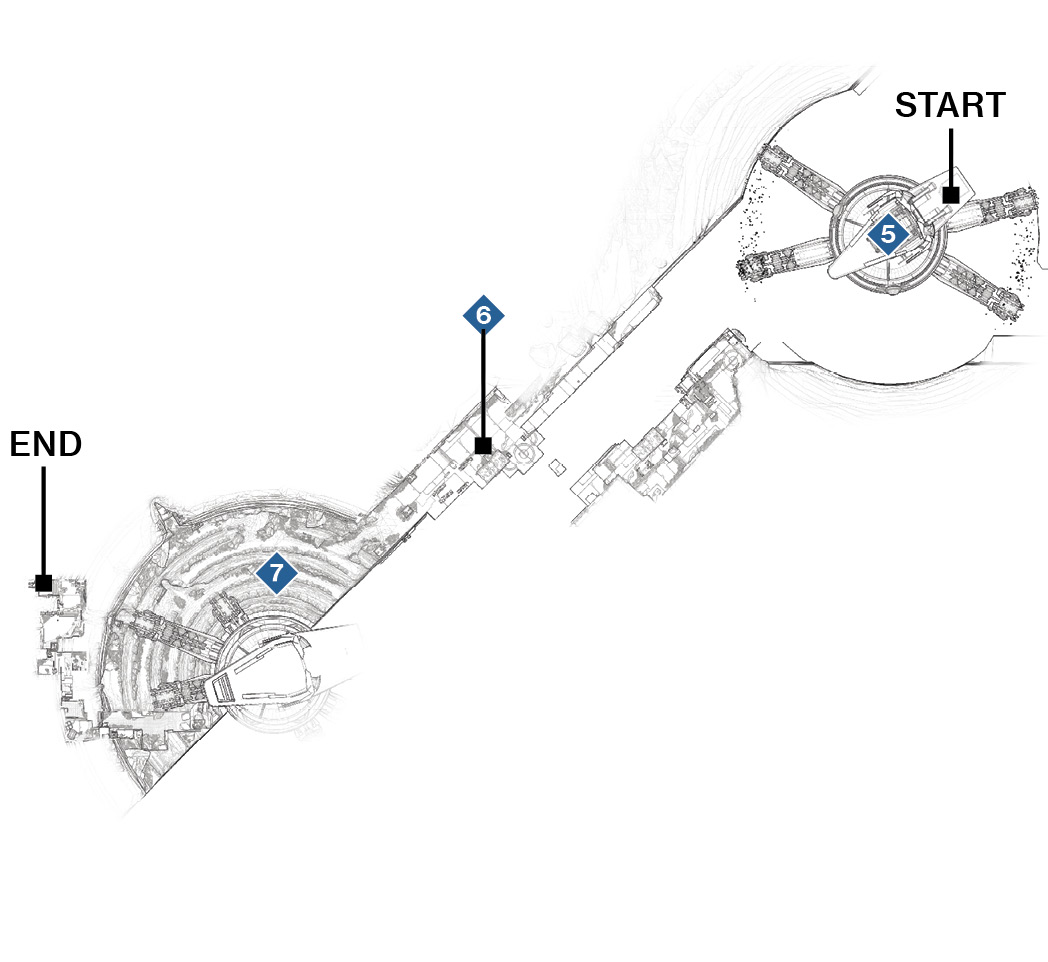
Ensure that the three of you are catapulted onto the Cabal drill rig in unison, as the battle to come is the most difficult you’ve encountered so far. As the first teammate lands on the platform above the drill rig’s circular control room, a door opens, and Cabal forces appear (Phalanxes and Legionaries). A quick, well-placed grenade damages all of them, after which you can mop up stragglers. Predetermine who’s going to throw the grenade, and ensure that all your teammates have Supers at the ready before you drop down into the rig’s control chamber.
The action commences immediately with a group of Gladiators to defeat. Have one teammate complete the objective as soon as possible. The “transit system” (a slowly rotating Cabal catapult) must be moved into position, and wasting time ignoring this objective simply means more time fighting a crazy number of foes. Pull the lever on the raised perimeter terminal, and watch the system reset count up. However, your main focus is on further Cabal incursions.
Expect a group of Legionaries and a couple of Gladiators to drop in. Priority targets are the Gladiators; keep moving around this compact circular chamber so they don’t strike and kill you. Launch a Super at this point. Then, have a teammate continue with their Super as a pack of War Beasts and a second wave of Legionaries and Gladiators appear. Lob grenades and basically expend all your weaponry to ensure that you survive this onslaught. But keep an eye on the objective; when the transit system has reoriented itself, you can leave, even if there are still Cabal in this control room.
 Vex Gorge and Cabal Quarry
Super: Recommended
Grenades: Optional
Variations: Vex forces on the tiered quarry area (Goblins and Hobgoblins).
Enter the Cabal catapult that’s glowing orange (not the one that isn’t in use), and fly across to a long gorge of probable Vex construction. Edge forward, and while one teammate tackles the Incendiors on the covered ledge you’re moving through, have two teammates snipe the Psions on the (inaccessible) lip of the gorge to your right, across the bottomless chasm.
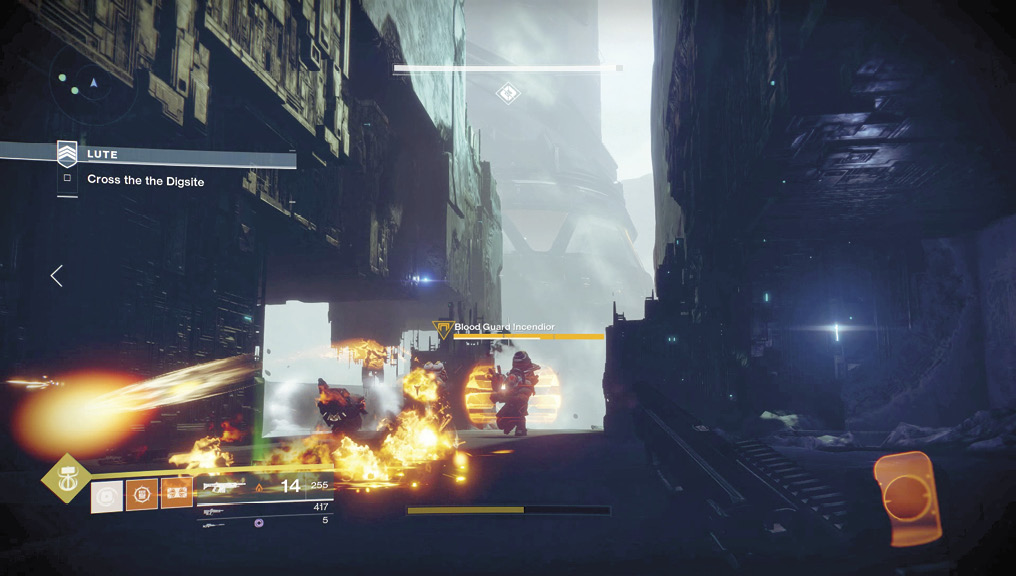
Otherwise, you’re picked off as you leap across the pillars to a lower section on the opposite side. Between you and the drill site is a group of Phalanxes, Incendiors, and a Sub-Boss Incendior. You have plenty of range and cover, along with an optimal opportunity to launch a Super or lob grenades to remove these threats.
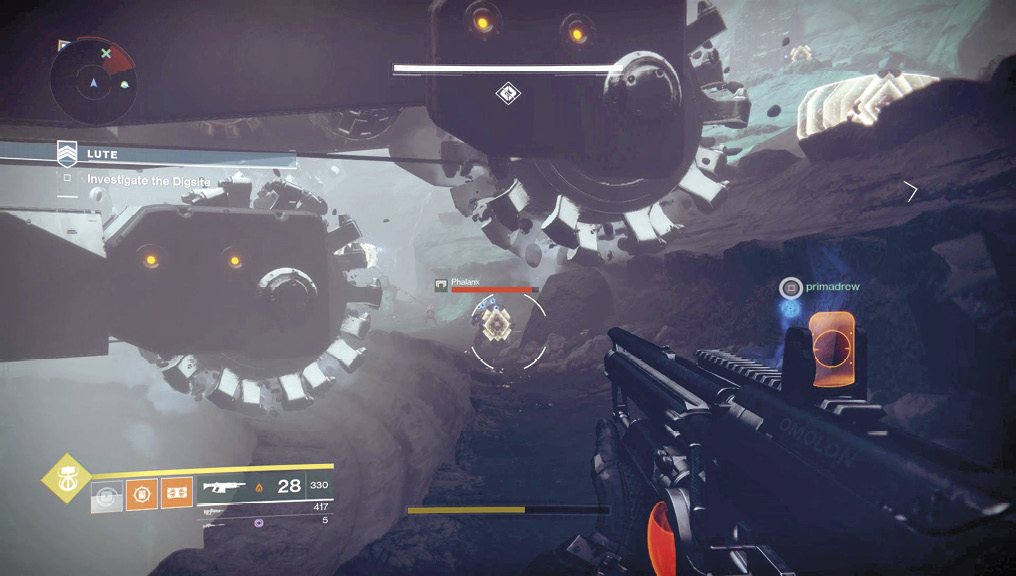
 Approach the quarry, with its massive and deadly rotating quarrying arm machines. There are multiple arms, and being struck by any of them kills you. The trick here is to drop down onto one of the tiered grooves and simply make a counterclockwise run around to the entrance into the Inverted Spire Sector. As long as you aren’t jumping, all of the quarry arms pass you by if you’re positioned on this tier. The “tier” in question is shown in the previous picture. There are actually three safe paths, the lowest two are equally safe. These walkable paths feature dark brown dirt, whereas the paths that the arms travel in are light, bare rocks.
Teammates can be struck by an arm, so bunch up and follow each other closely, without being hit. If this isn’t possible, look for alcoves along the route (always on the right-side), and step in to avoid the arms. The Phalanxes, Psions, and War Beasts are a secondary distraction. Soak up a bit of damage by remaining in the relative safety of the recommended tier, and remove these Cabal threats as you encounter them. Psions should be the priority targets.
With the quarry navigated, drop down into the initial safety of the drill site, but don’t investigate further until all three of you are in the entrance corridor to the Inverted Spire. This is where combat gets even crazier!