
Destiny 2 Guide Campaign Sacrilege
Terrabase Charon (2nd Mission)
Io
Enemies Encountered
- Taken: Psions, Thralls, Phalanxes
- Taken: Sub-Boss: Wizard Elite x3
- Taken: Boss: Centurion Boss
Objectives
- Seal the Taken portal.
Important Allies
- Asher Mir
 Cabal Depot: Portal Assault (Taken Wizards)
Super: Recommended
Grenades: Recommended
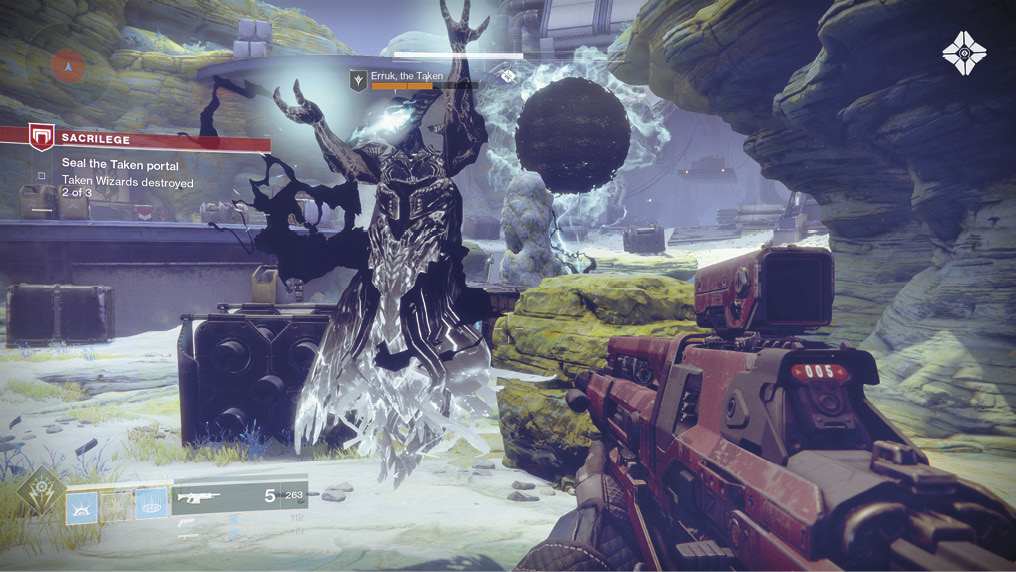
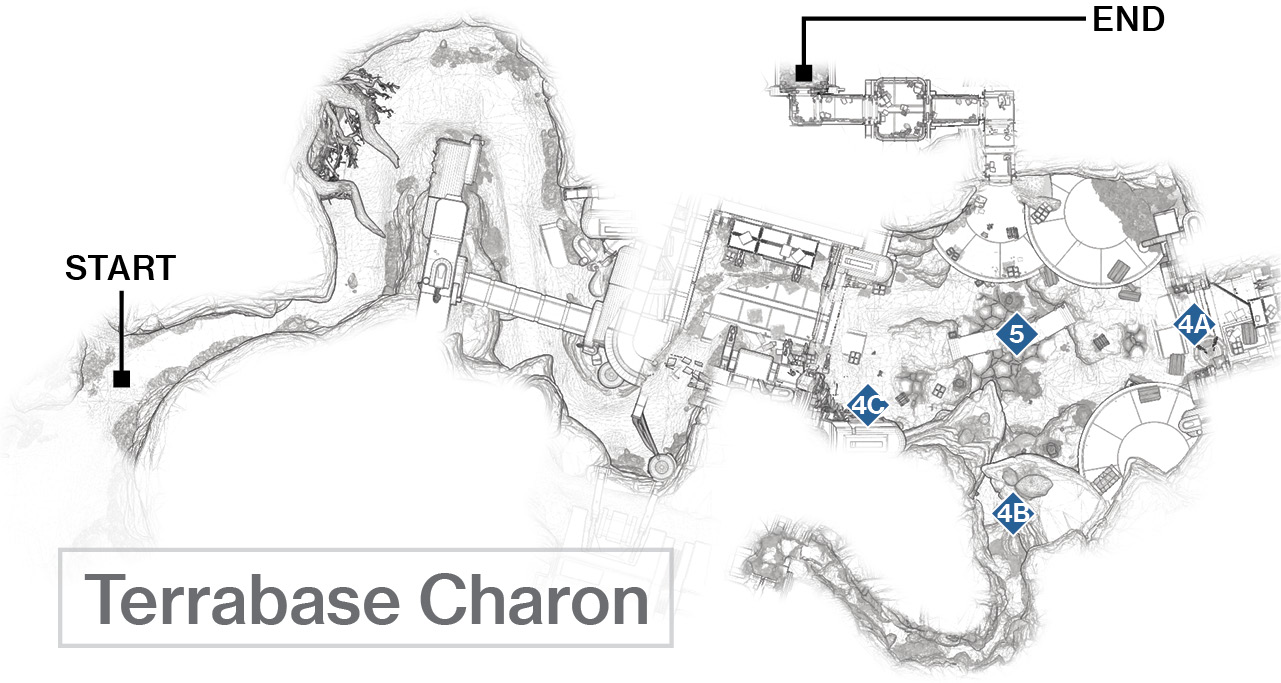
As you arrive back outside, you’re warned that the Taken are attempting to summon a portal, and the ritual has already started! This arena-like junction consists of three pathways: the platform you’re on, the main route back to Lost Oasis, and a large hangar area to your right. Make short work of the Taken Psions on the platform, and then remember the location of this ledge. Once you defeat the three Taken Wizards, it becomes very important to use the height and cover afforded by this location.
Sub-Bosses: But for now, you must concentrate on the masses of Taken in the vicinity. Equidistant around this depot area are three Taken Wizards. Swiftly defeating each one is paramount to continuing your progress, and this isn’t easy. Two Taken Phalanxes and around four Taken Psions guard each Taken Wizard. Additionally, the Taken Wizards can summon Taken Thralls to waylay you. It’s worth starting with the Taken Wizard immediately left of the platform, as it is nearest and you have the stack of large pipes and other crate-like scenery to use as cover. Remove the foe’s shield, and concentrate your firepower on its head.
You should take a few shots from other nearby foes in order to end the Taken Wizard’s life. Breaking off from combat causes the Taken Wizard’s shield to recharge, lengthening this dangerous combat considerably. After you’ve dispatched the Taken Wizard, remove the Phalanxes, Psions, and any other Taken foes in the immediate vicinity (in the first “third” of this arena). Another option is to battle the Taken Wizard’s minions first. There’s some tactical advantage of removing the Phalanxes before they can damage you with their shield attack.
You should be focusing your firepower on each subsequent Taken Wizard as often as possible. Don’t land near to the foe, and then start firing. Take aim at this foe from extreme range, causing damage as you close to remove it as quickly as possible.
A clockwise maneuver to the next Taken Wizard (who is floating among the rocky outcrops) is wise because it is closer than the final foe near the main road entrance. You can stand atop the rugged ledges and face few other hostiles, so with some nimble leaping, you can remove this threat with relative ease.
The last Taken Wizard in the large flat expanse near the road entrance is the most troublesome. Its contingent of Taken infantry can easily deplete your defenses, especially if you ignore cover and leap down from the platform. You may want to approach from the rock formation after slaying the previous Taken Wizard, since there are more cover opportunities and places to retreat to. The only reason to attack via the open road entrance is if you favor a Super or can quickly reach the cargo crates cover near the Taken Wizard.
It’s worth expending your Super to demolish the first Taken Wizard you encounter. Focus on hammering it with your attack. If you’re fast enough and your Super lasts long enough, continue it by quickly heading to the second Taken Wizard. Using your Super on the Taken infantry is wasting your powers. Remember, the crackling and gradually expanding portal in the sunken central part of the arena is perhaps the worst place to stand. The enemy has the height advantage, and even the available protection under the ramps is soon negated as you’re overrun by Taken Psions or Taken Thralls. Only head here to open the chests; otherwise, stay to the perimeter.
 Cabal Depot: Portal Assault Vortex Mind
Super: Recommended
Grenades: Recommended
The portal continues to open. It expands and the entire arena is encased in a black dome, effectively trapping you just within the perimeter and severely impeding your ability to stay around the edges of this location. Rifts appear, depositing Taken Psions. Stand atop the ramp near the three stacked cylinders and initial platform, and drop them as they head your way. Back up onto the platform, using the crates as cover until you’ve dealt with most of these foes and the final Taken entity appears.
Boss: This highly dangerous Taken Centurion is perhaps the most difficult foe you’ve faced. It can bombard you with a Projection Rifle that can kill you in three or four shots. It fires homing orbs of energy that find and explode, usually killing or badly damaging you. Additional Fallen Thralls and Psions appear throughout the fight. If you aren’t properly prepared, expect to die a good number of times when facing him!
First, the Vortex Mind seems to stay mainly in the sunken central part of the arena, which means you should remain as far away from the barrage of attacks he generates as possible. Stay around the upper perimeter, ideally on the platform. Use your Movement Mode to go across to the rock outcrop for a different view or if one of these two vantage points becomes choked with lesser foes.
Any lower location means you’re likely to be overwhelmed, first by the Vortex Mind firepower, and then by Taken Psions and Taken Thralls swarming your location. The only time you should think about heading into closer range is if you’re using a shotgun, a maneuver both dangerous and effective. Second, make a more vertical leap or step to the edge, and bombard the Boss with your favored weaponry. A low-recoil rifle is good. You need eyes in the side of your head to watch for foes outflanking you. Stand on the platform, and it’s slightly easier because lesser enemies can only reach you via the ramp and path to your left. Intersperse your gradual Boss wounding with quick rakes of attacks against Taken Psions and Taken Thralls checking the ramp to see any heading your way.
Third, deal with the Vortex Mind’s homing orbs by shooting them yourself, or stepping into cover so the orb hits that and not you. Shooting is the better tactical plan, as you can quickly switch back to blasting the Boss’s head. Don’t be overly impatient in this fight, which usually gets you killed. If this Taken deity decides to launch multiple homing orbs, shoot them from as far away as possible, then focus on his head.
When you remove a third and then two-thirds of the Boss’s health, additional lesser foes are summoned, though the attack pattern remains similar. Feel free to launch a grenade or Super as soon as they have recharged from your Taken Wizard battle.
As you must continuously move to avoid death, weave around the perimeter, using the rocks and crates for cover and resisting the temptation to head into the middle of the arena. Stay away from the edges of ledges, or you may be easily demolished by this enemy’s gunfire. And remain calm; this behemoth takes a while to drop!
Once you’ve defeated the Vortex Mind, the mission concludes.