
Mass Effect: Andromeda Collector's Edition Guide Secondary Ops
Taming a Desert/Making This Dust Bowl Livable
Mission Type: Heleus Assignment: Elaaden
Prerequisite: Land on Elaaden
Start Location: Elaaden
Unlocking: Approach one of three Remnant monoliths
Activate Elaaden’s Monoliths
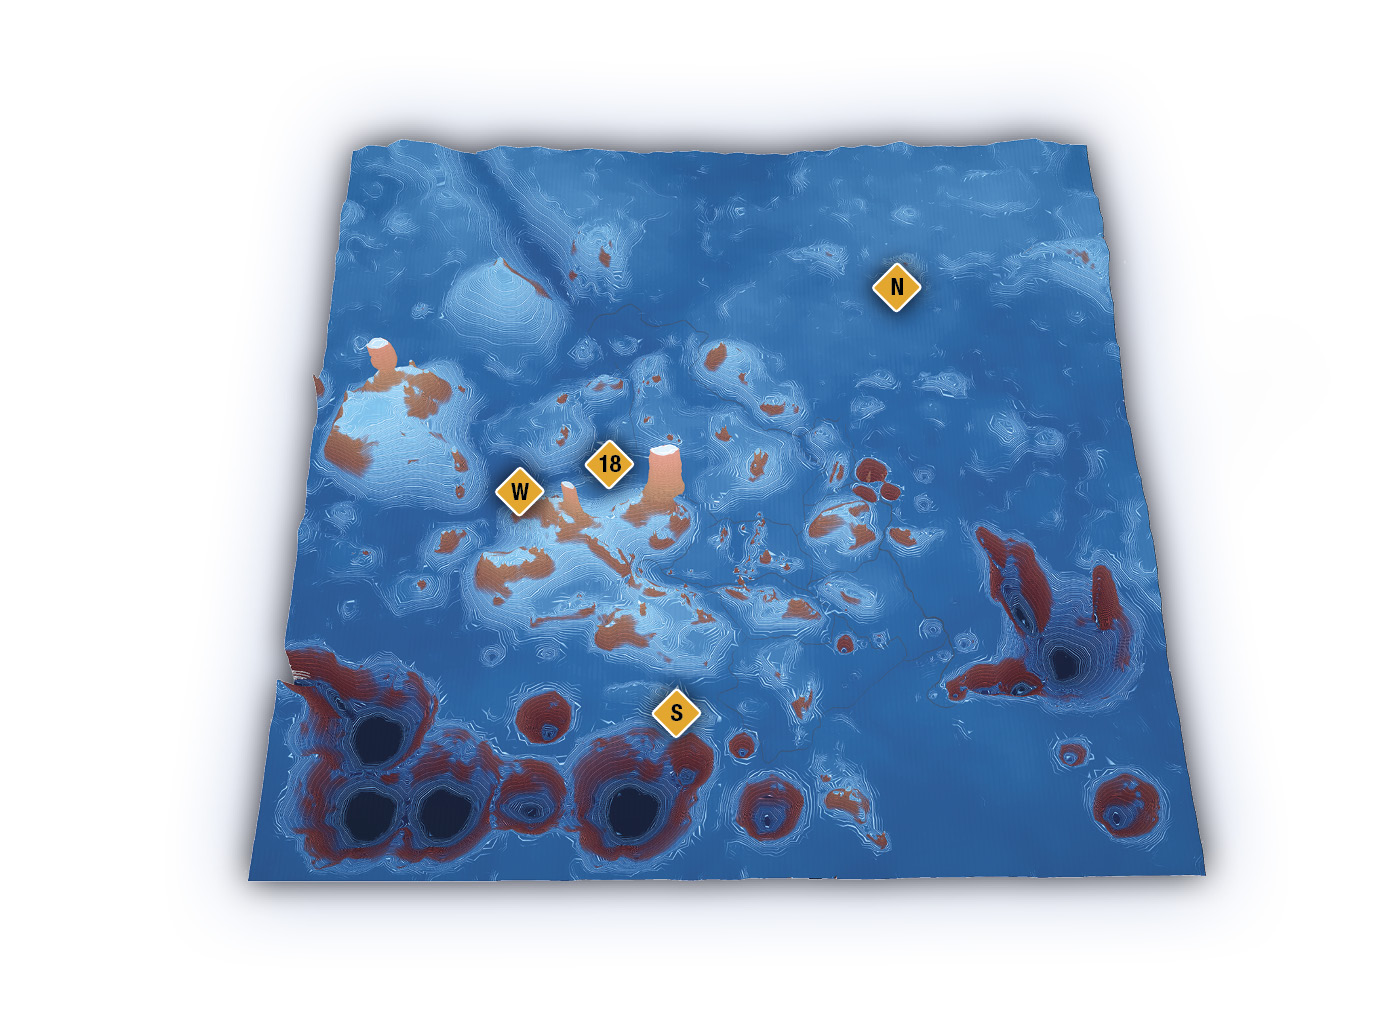
Elaaden
The search for Elaaden’s monoliths leads to another Remnant vault, which must be activated and reset to change Elaaden’s climatic conditions. Each monolith challenge appears in-game under the subtitle “Making This Dust Bowl Livable.” There are monoliths in the northern, western, and southern areas of Elaaden.
North Monolith

This monolith (N) is in the Sea of Ataraxia. Three glyphs are required to complete the Remnant puzzle. All three are easily accessible on the tops of the Remnant pillars. Simply use the rocky terrain as stepping stones to reach the top.
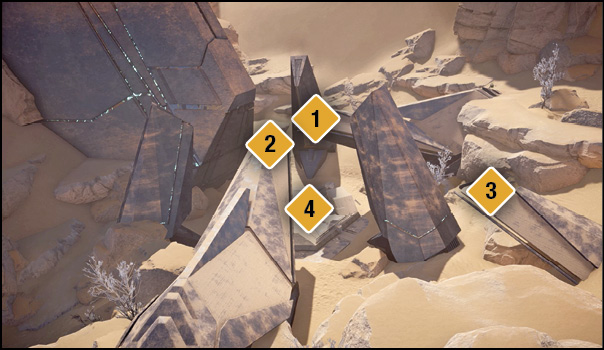
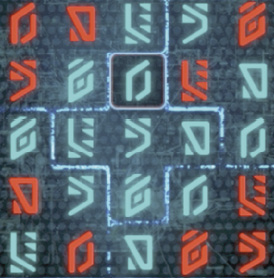
Scan the Accretion Glyph on top of a spire (1). Leap over from that spire to the top of the one adjacent (2) and scan the Hydrodynamic Glyph. Scan the Stratospheric Glyph on top of the lowest spire (3). Interface with the Remnant console (4) and solve the Remnant puzzle using our shot of the solution.
West Monolith
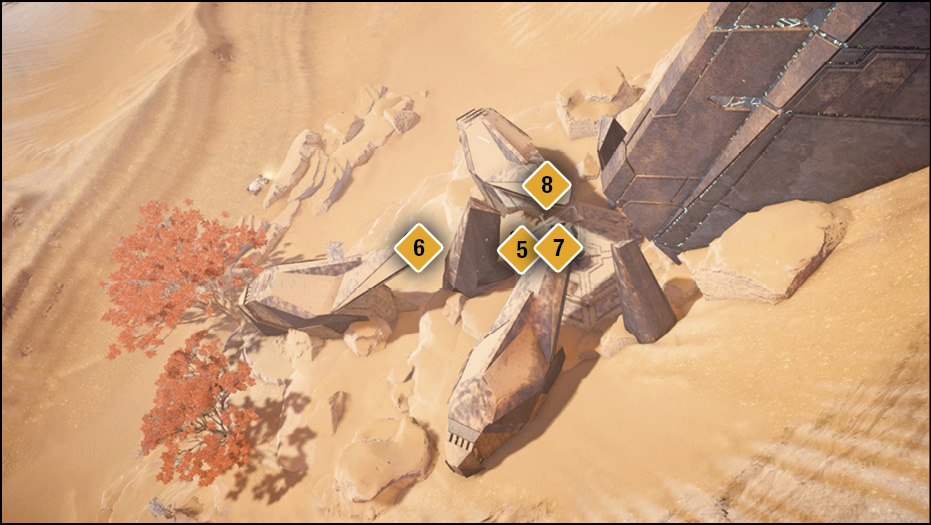
Find this monolith (W) east of the westernmost forward station. When you approach, look for a Remnant console (5) that triggers the rising of the pillars. These pillars allow you to jump to the top of one of the lowest and farthest pillars from the center platform. Scan the Verdurous Glyph at the top (6), then jump to the next-closest pillar on your right and scan the Nihility Glyph(7) at the top edge. Jump across to the nearby remaining pillar and scan the Magnitude Glyph(8). Once you have all the glyphs, interact with the Remnant console in the middle of the platform to activate the monolith—no Remnant puzzle here.

South Monolith

The southern monolith (S) is in Paradise Sands, west of a nearby forward station—if it’s been called down, use it for fast travel. This monolith platform contains three Remnant consoles you use to raise pillars for the jumping challenge.
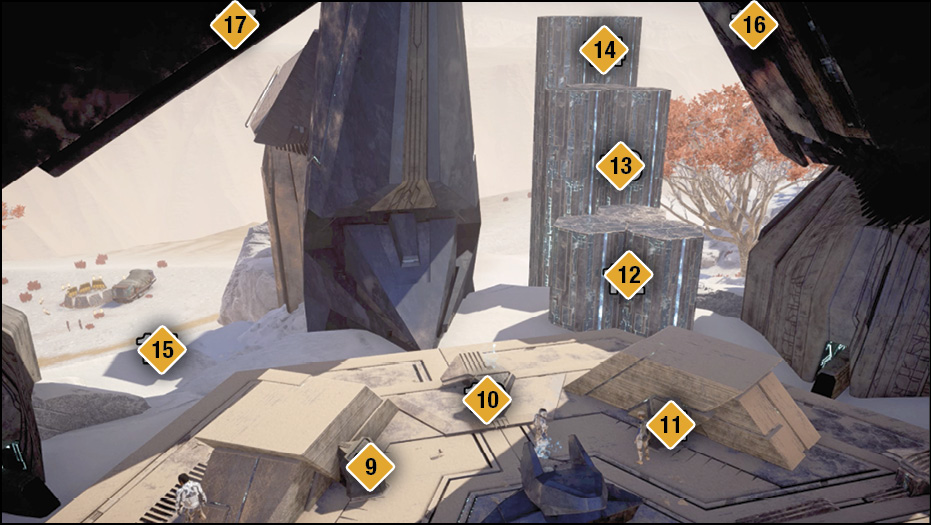
This challenge can be confusing, but we’ll keep it simple. Each console raises various-sized pillars on both the left and right sides of the monolith. You don’t need the pillars on the left (15) whatsoever. Raising all three pillar sizes on the right side (12)(13)(14) allows you to reach all three glyph towers above.
Don’t even look at the left side while using each console. Start with console (9). It’s important; it’s the only console that raises the highest pillars in the back (14).
Console (10) raises the lowest pillars (12). You may need to activate it a couple of times in a row.
Console (11) raises and lowers both the mid-sized pillars (13) and the lowest pillars (12); it’s one or the other, not both up or down at the same time. Work the balance out between consoles (10) and (11) to get all three pillar groups up at the same time.
Once all three pillar groups are up, jump to the middle one (13) to reach the top of the right monolith tower (16). Once you’re on top, scan the Semiosis Glyph.

From the top of the Semiosis Glyph tower, you can easily jump to the top of the rightmost tower (17) to scan the Synaptic Glyph.
Now jump back to the previous glyph tower (16), jump to the middle pillars (13), then up to the highest pillars (14). Jump to the top of the last and farthest tower to scan the Zero Glyph. There’s no Remnant puzzle at this monolith; this challenge should have satisfied your puzzle craving.
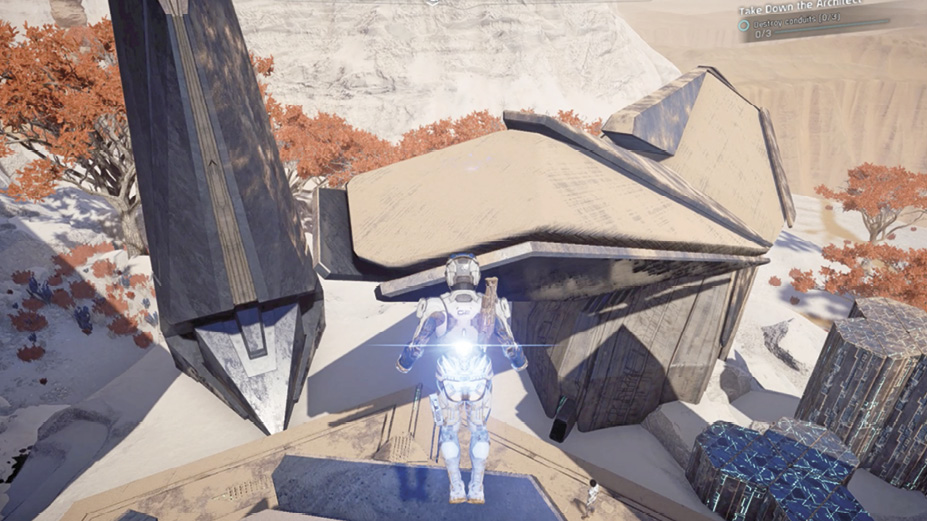

Investigate the Vault’s Entrance
Languish
The Languish Remnant vault (18) is in the center of Elaaden.

Activate Emergency Power
Five-Remnant Console Puzzle
At the entrance is a somewhat confusing puzzle, consisting of five Remnant consoles, all linked to a locked door. Each of the five longitudinally lined-up consoles toggle three of the five connections to the door. Your goal is to light up all five connections. To help alleviate the confusion, see the following diagram:
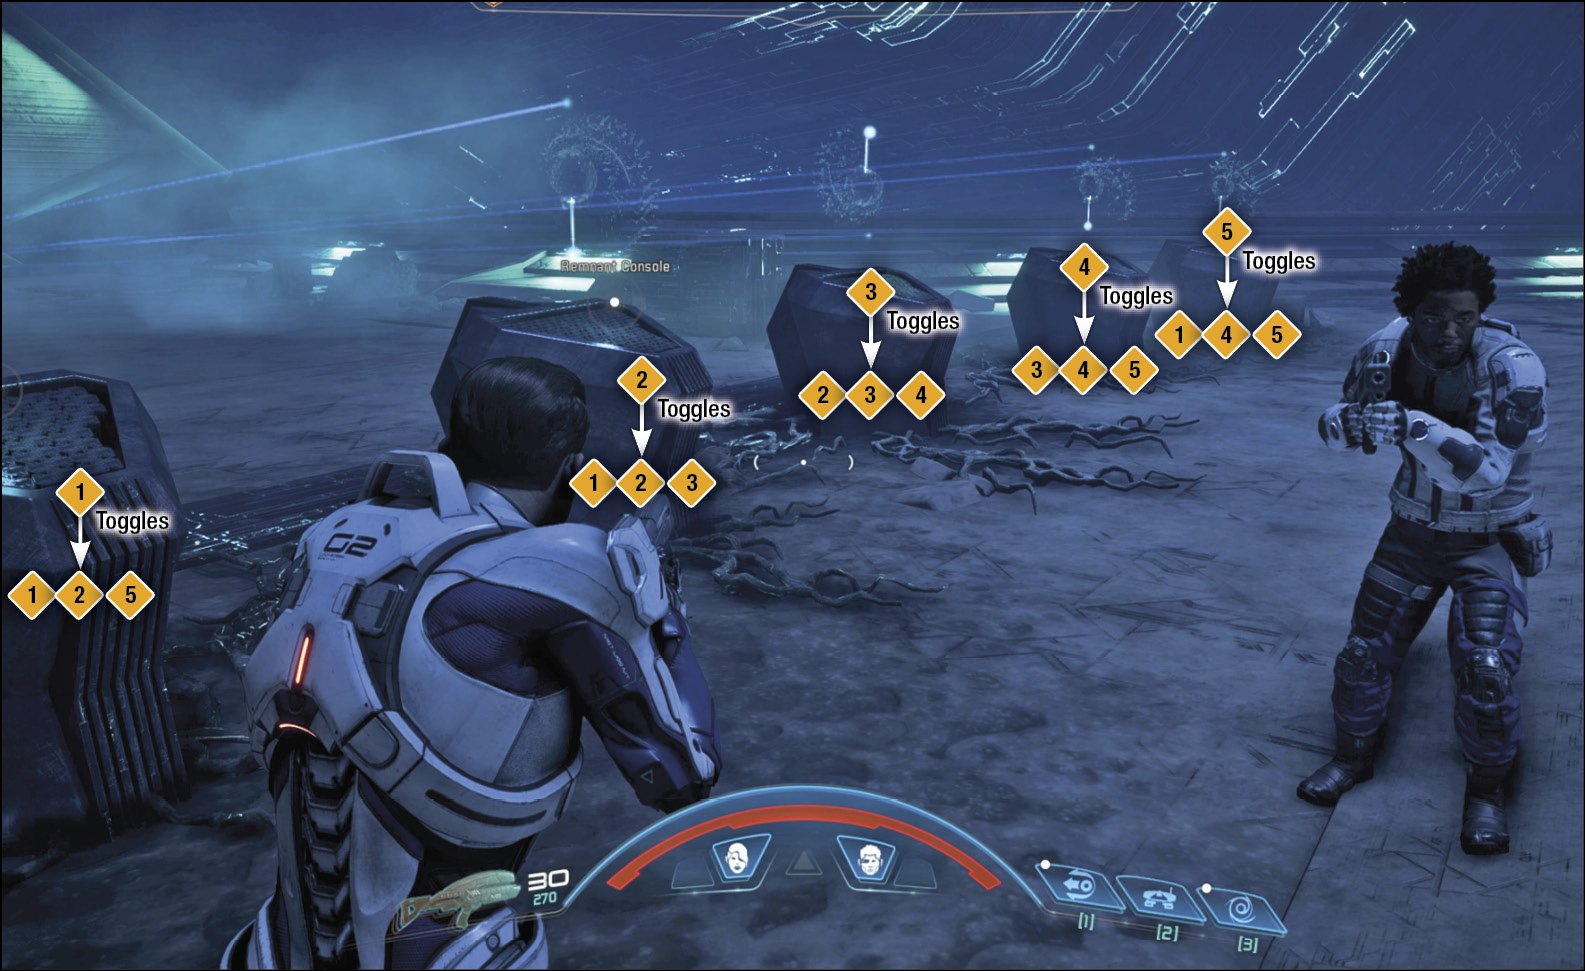
This may take time and a ton of trial and error. Knowing which console toggles which three connections makes the puzzle much easier, though. Aim to get two out of five connections lit up, then look up which console potentially toggles the non-lit connections. Once you’ve completed the puzzle, head south, then follow the west path from the intersection to the next “segment” of the vault to complete.
Segment 1: Open the Western Path
This puzzle is much simpler than the previous one. Activate the two Remnant consoles with connections leading up to platforms raised to the west, which can then be used to vault up to the higher platforms (which then have connections to a central console).
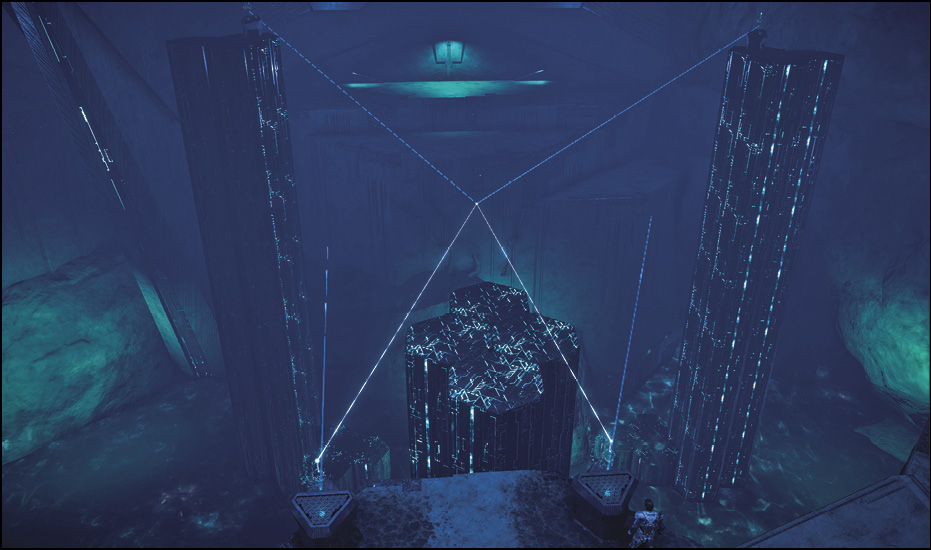
Activate the two high platform consoles, then return to re-toggle the two previous ones (again). This activates the central platform, which then opens the far-west door.
Go through the door to loop around the western area. Fight through the Remnant Assemblers, then re-enter the main area from the southwest door.
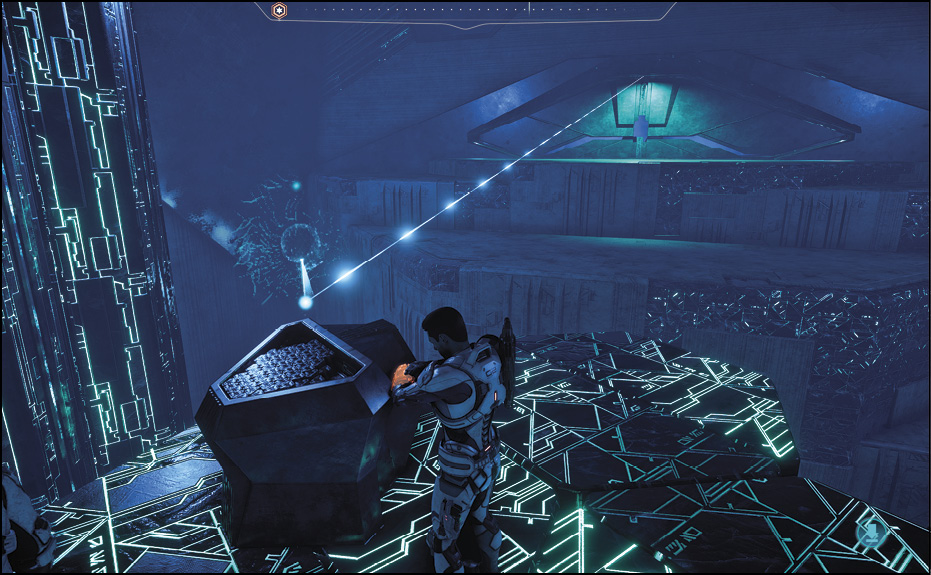
Remove the Vault’s Lockdown
Segment 2: Unlock the Door and Reveal the Bridge to the Purification Console
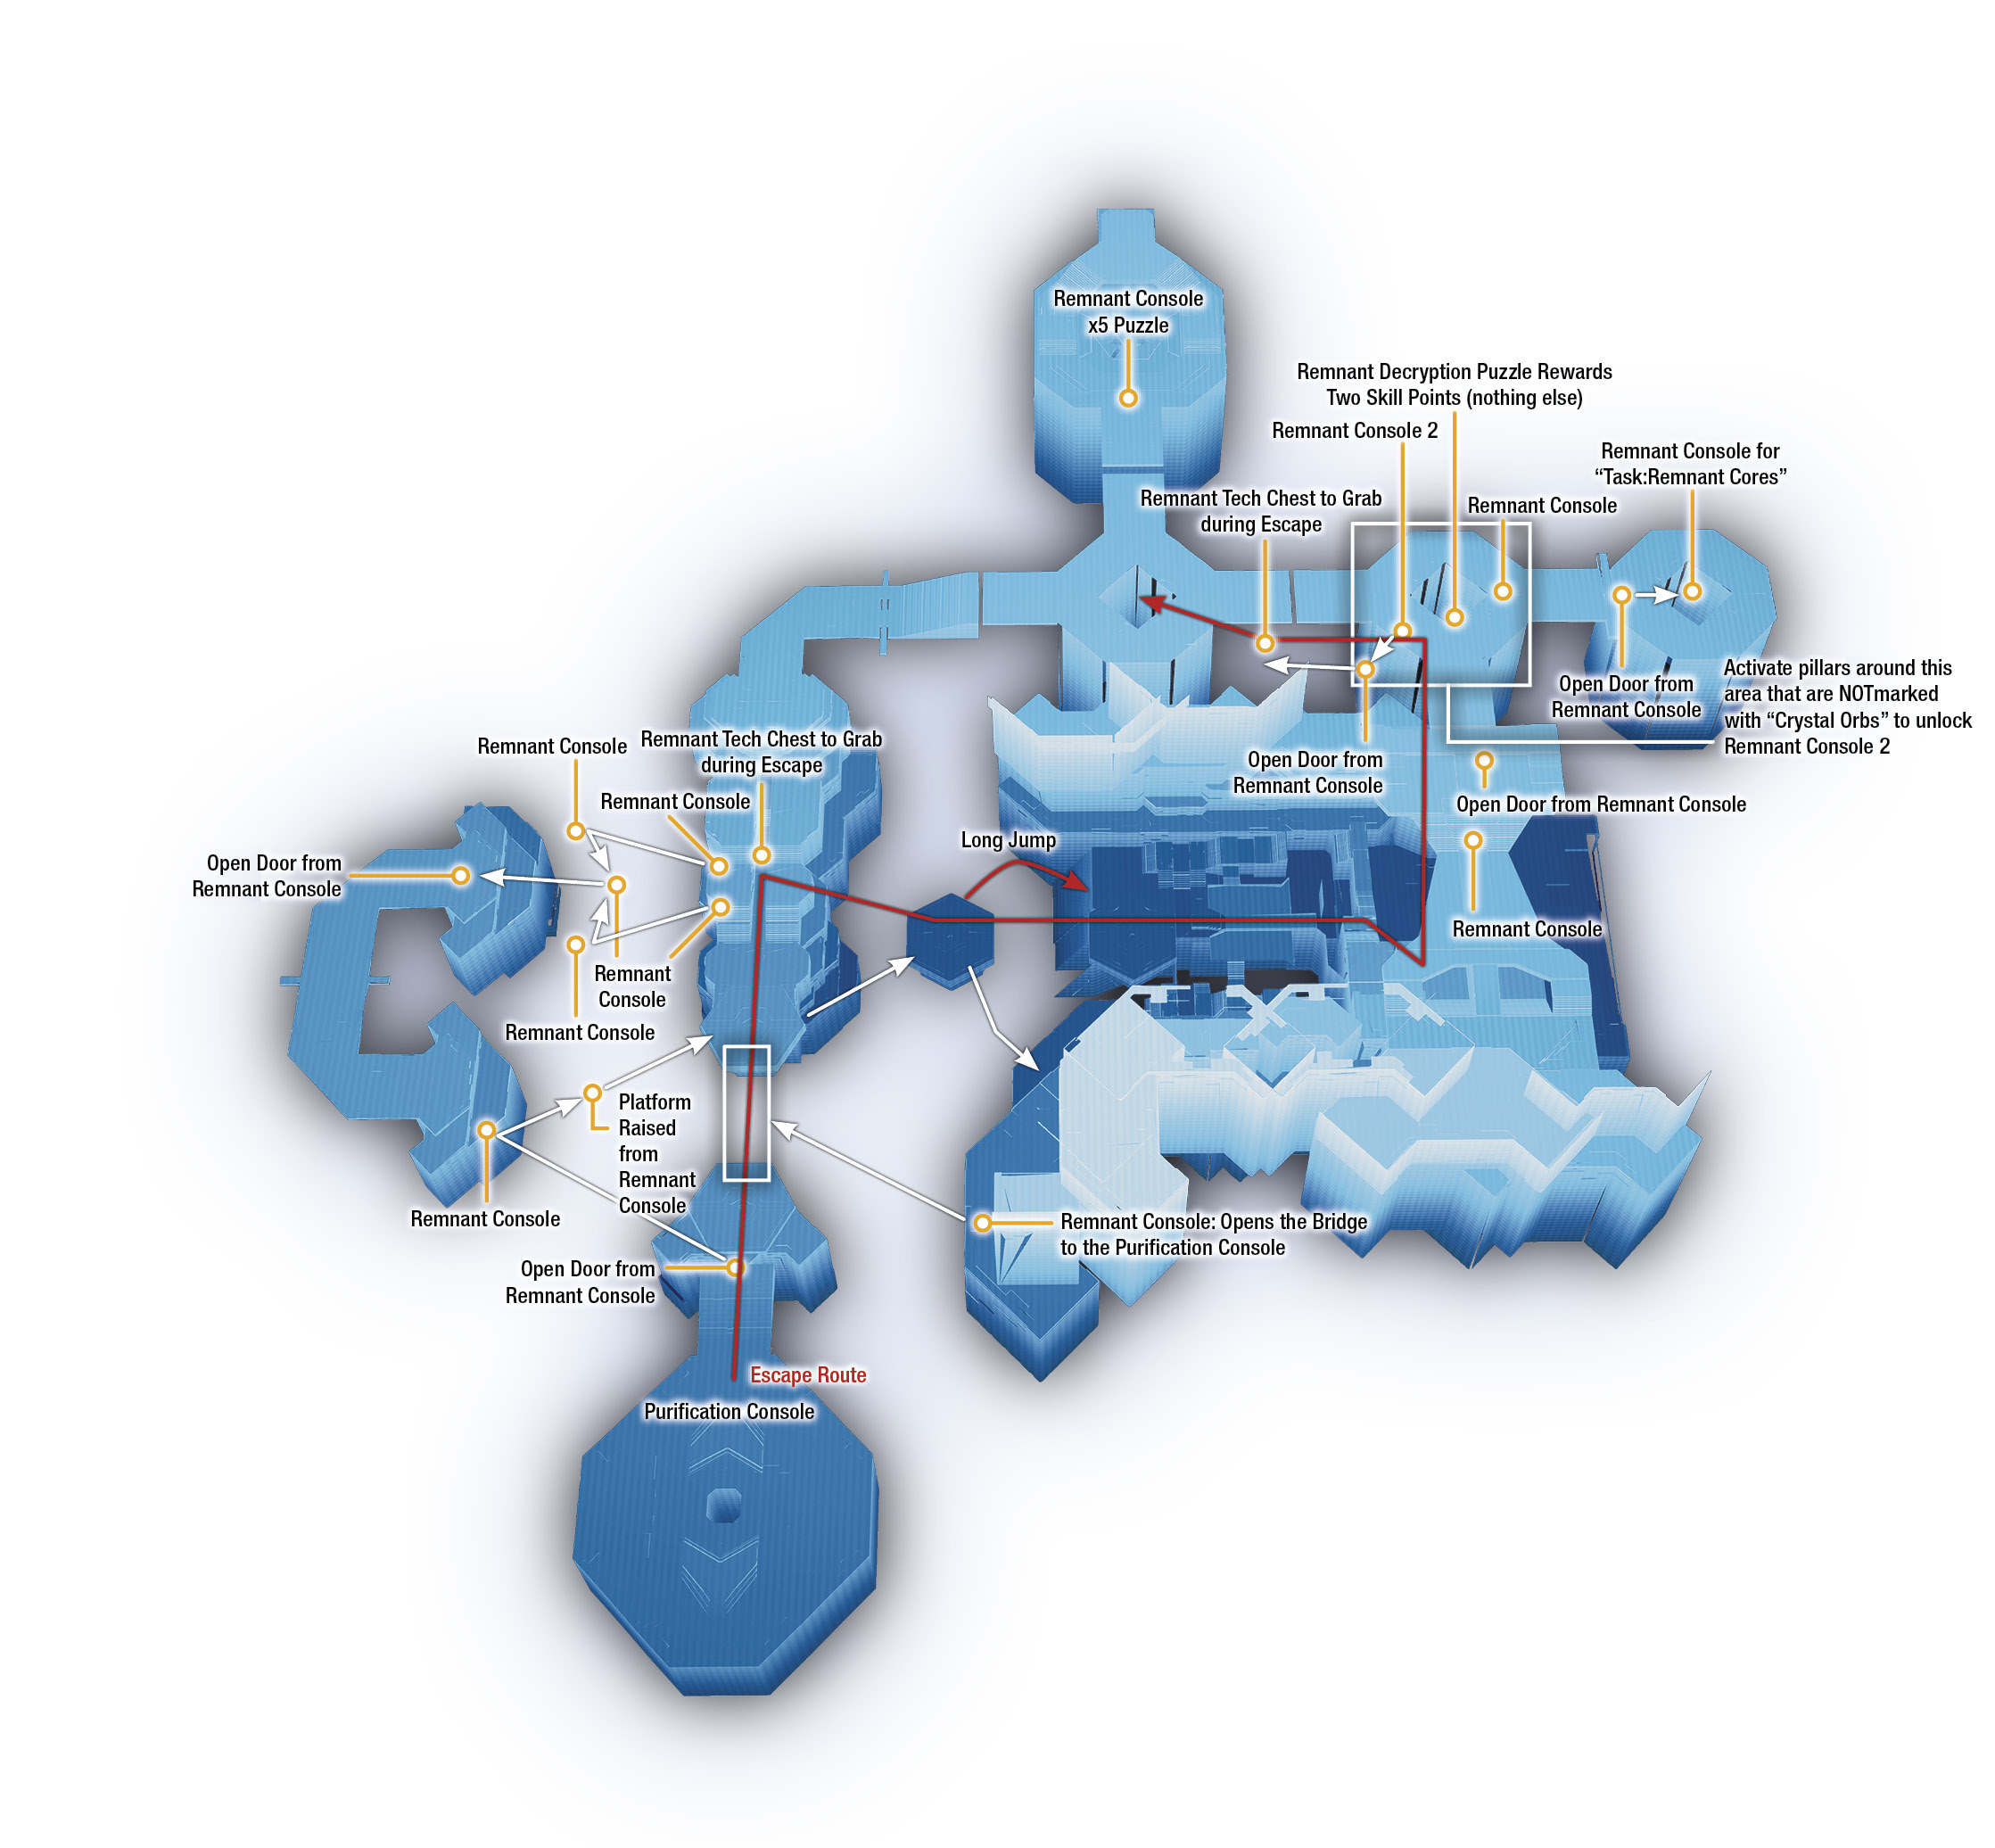
Here, there’s another Remnant console to interface with that opens the door to the purification console and raises a platform to the northeast you can use to get back to the central hub of the vault.
Vault onto the platform, returning to the center peninsula. From there, note the “rare”-type Remnant container protected by a force field. This is one of two chests that can be picked up during the purification escape phase. From that container, head southeast and look down (vertical-wise). Jump to walkways underneath, as well as a platform, to reach the southeast portion of the map (see the overall map provided to get your bearings).
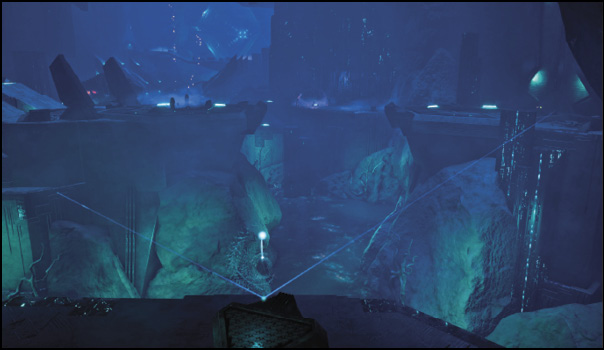
Toggle the Remnant console to the south to reveal the bridge to the purification console room. You can finish and activate the vault now, but there’s an entire optional area to explore to the northeast of the vault.
Segment 3: Optional Content and Rewards to the Northeast
There are several Remnant enemies on the way to the eastern half of the vault, consisting of Nullifiers, Assemblers, and a deadly Destroyer guarding the northeast door. Use the various consoles to raise and lower force fields to help you fight them, but keep in mind that only the consoles marked on the map provided are vital. Once you get to the console that controls the door, toggle it, then enter for another console puzzle.
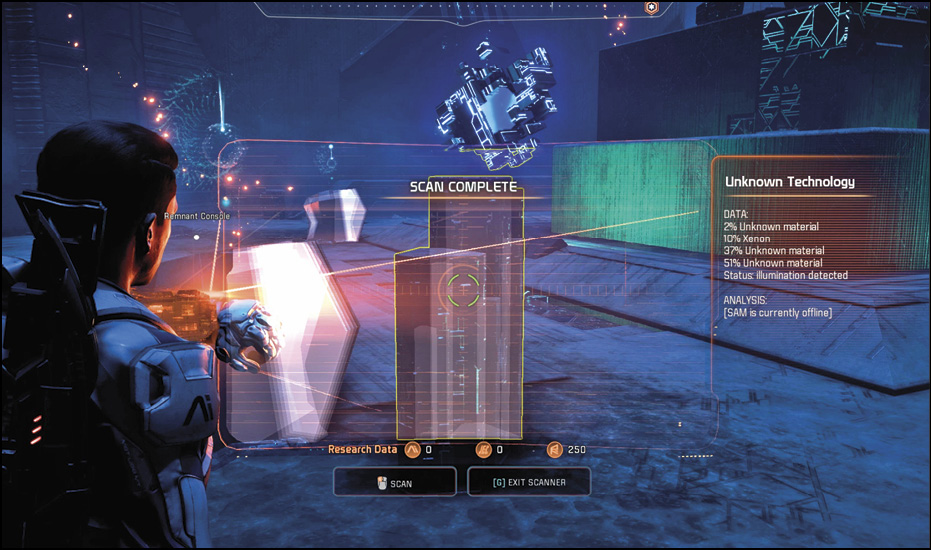
This puzzle is much more manageable than the initial entrance puzzle. Simply circle the room and activate any console that is not accompanied by a floating “Unknown Technology” orb.
After you’ve activated all five, a sixth console appears. Toggling this final console opens a door leading west (back to the vault entrance)—although blocked by a barrier. This barrier is raised during the escape phase, explained later. You’re not done here yet, though. In the center of the puzzle room is a central raised platform with a Remnant puzzle. Solve it to gain +2 skill points. Note that it can’t be overridden with a Remnant Decryption Key. For the solution, see Remnant Decryption Puzzles in the Game Mechanics Glossary.
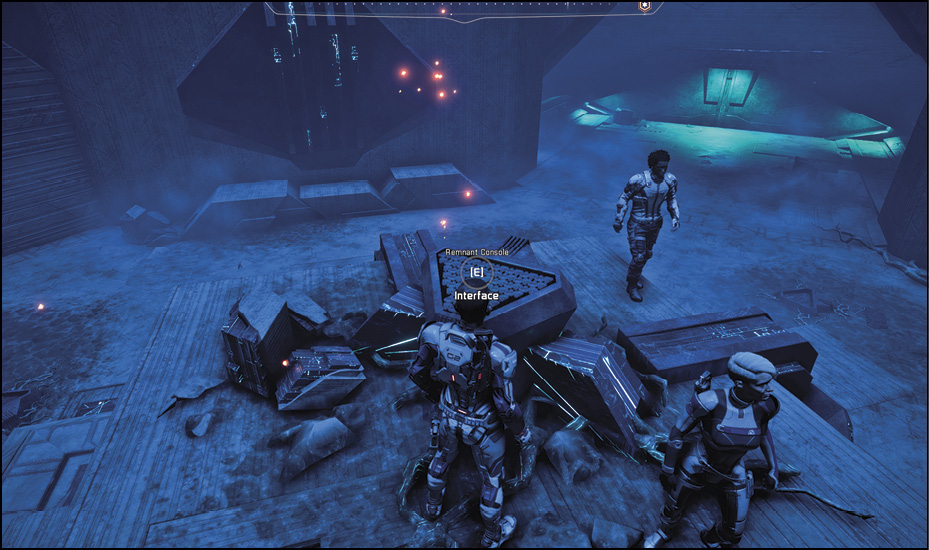
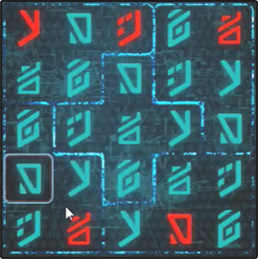
To the east of this room is another Remnant console. Interface with it to open up the door to the far east of the vault, which leads to one of the nine Remnant cores needed for “Task: Remnant Data Cores” (surrounded by several pieces of rem-tech to scan for Research Data).
Escape the Purification Field and Exit the Vault
Escape Route
Backtrack to the bridge leading to the purification console and cross it. Defeat the Remnant guarding the console and loot whatever you need to. Before you activate the console, note the correct path back to the vault entrance. See the provided map and use the red “Escape Route” path. It may seem unintuitive, but it’s the only way to obtain both containers.