
Mass Effect: Andromeda Collector's Edition Guide Multiplayer Multiplayer Enemies
Kett
The kett are composed of many different races that they’ve absorbed and genetically engineered.
Kett weaponry is generally plasma-burst-based. These weapons feature visible, often fast projectiles that differ from standard weapons.
Kett are weak against fire- and cryo-based attacks and gain effectiveness by attacking at close range.
Chosen
The core of the kett’s frontline troops. Provides shape to battles by forming a front and using the available terrain for protection.

Combat Behavior
The main goal for the Chosen is to deal as much damage as possible and keep the player pinned down while maintaining cover. When multiple Chosen circle you from their cover positions, a few may begin to close in, moving from cover to cover to close the distance and come within range to throw a grenade. The Chosen are vulnerable to close-range attacks and mostly attempt to run for better cover as you advance, which leaves them open to attack. Get in too close, and they use a melee combo that not only damages you, but can disrupt your shield, causing it to regenerate at a slower-than-usual rate.
Area-of-effect attacks work well against the Chosen, especially if you catch a group of them as they run for cover.
Special Behavior
Frag Grenade: Occasionally one of the Chosen tosses a grenade to deal damage and flush you out of cover, opening you for attack. Keep the Chosen pinned down and at a medium distance to prevent these foes from throwing grenades.
Fighting Tactics
If you can’t take down a Chosen before they take cover, keep them pinned down with suppressive fire while you or your teammate attacks from the flank. When larger enemies begin to spawn, take down the Chosen; if not, they will quickly begin to populate the area and attack from the safety of cover.
Wraith
Attack dogs of the kett. Causes disorder among their enemies, softening them up for a main assault or chasing down individuals.

Combat Behavior
The Wraith does its best to sneak up on your flank, leaping over cover and cloaking itself. Your best bet is to take the Wraith out at range so you’re not forced to abandon your cover to engage it.
Despite that the bone covering the Wraith’s head looks well-armored, the head is a weak point. After taking a good amount of damage, the bone breaks, briefly stunning the Wraith and leaving it open for attack without the risk of it leaping at you. Breaking through its weak point is the best way to stop it at close and medium range. Once the bone breaks, the Wraith can no longer cloak.
When in close proximity, the Wraith bites, scratches, and attacks with its tail.
Special Behavior
Camouflage: The Wraith becomes invisible while moving. It decloaks when attacking or upon taking a significant burst of damage.
Fighting Tactics
Don’t let the Wraith get in too close! Wraiths can perform sync attacks in close proximity, forcing you out of cover while attempting to fight them off. If you don’t have a close-quarters weapon, try using melee attacks to eliminate them. Also, keeping your back up against a wall can provide much-needed defense against Wraiths sneaking up from behind!
Anointed
The heavy-weapon counterpart to the Chosen, the Anointed carries a heavy plasma cannon and primarily relies on its squad for protection.

Combat Behavior
The Anointed uses heavy sustained fire to drive its target into cover and make openings for its teammate. The Anointed needs support, since it requires a long time to reload its gun between volleys. Its accuracy is decent versus stationary targets, but its trouble when turning makes it more effective at longer ranges, where it needs to turn less.
Exploit its limited ability to turn when firing; dodge left or right, away from its stream of fire, all while closing the distance. This tactic may not work as well if other enemies stand between you and the Anointed. Use it when there are few enemies remaining on the battlefield.
The Heavy Pulse cannon must warm up before firing, allowing you time to drop the shield and quickly drain the health of the Anointed.
Fighting Tactics
Anointed move slower than other units, allowing you to easily put distance between yourself and them. Try drawing them into a close-quarters fight in order to dodge their attacks.
Destined
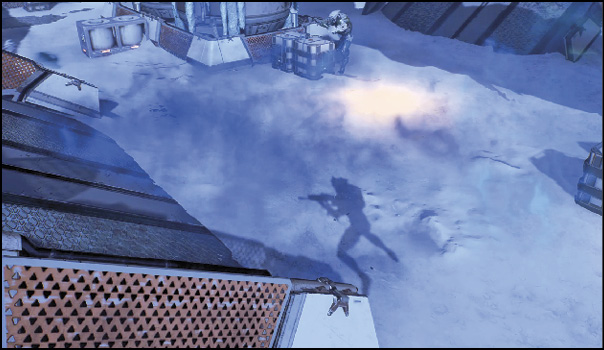
An Ancestral who leads troops from the front. A skilled battle commander who can assist its comrades while holding its own in battle. The Destined provides light shields to teammates, even those who don’t normally have them, and obscures the battlefield with smoke exuded from its pores.

Combat Behavior
The Destined is lightly armored with a small but powerful weapon, making it a high-value target in groups but not a large threat when found alone.
Once you’ve drained the Destined’s light shield, it can be thrown around with biotic attacks. Use this tactic to get it away from its allies and prevent it from cloaking them.
Special Behavior
While the Destined’s strong shotgun makes it a threat even without abilities, the smoke exuded from its back adds an extra layer of difficulty. The Destined’s purged smoke can cover a large area, cloaking any Chosen, Destined, or Anointed within its field.
Enemies within the cloak can still be killed, but attacks that can track enemies don’t lock on to them.
Fighting Tactics
Kill the Destined quickly to prevent them from deploying smoke from their backs. Keep your distance when attacking one to prevent it from unleashing large amounts of damage with its shotgun. The Destined doesn’t have a lot of health; it gains its true power from the smoke it emits. Its low health makes it a great target for snipers, allowing it to be killed with a single shot to the head once its shield drops!
Ascendant
Kett archetype. Proud master of the battlefield. The Ascendant stands tall, knowing its enemies should flee, and if they don’t, it will lay waste to them. Although roughly human-scale, this kett uses an anti-gravity ability to float up into the air, physically raising it above the fray and helping it get a good shot at its enemies.

Combat Behavior
The Ascendant constantly creeps toward you while pestering you with its standard orb attack, which flings high-damage balls of energy.
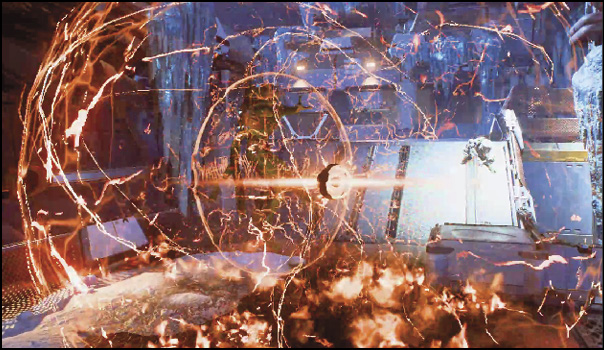
If given the time, the Ascendant empowers its attack, locking the Ascendant’s Orb in one place while it charges up an even stronger attack. This attack deals damage to a large area and leaves a trail of fire on the ground from the firing point to the point of contact, dealing damage over time if the player remains in the area.
The empowerment stage is a great time to deal damage to the Ascendant’s Orb since it’s locked in place. Don’t position yourself directly in front of the orb, as this will leave you in the line of fire if you fail to interrupt the charged attack.
To damage the Ascendant, first take down its shield by destroying the Ascendant’s Orb, which is the only point that can be damaged. You must damage the orb directly, meaning you cannot damage it when it’s on the opposite side of the shield. Once the orb is destroyed, the Ascendant can be attacked with biotics and is open to taking damage. The Ascendant doesn’t fully reel from force or knockback; instead it uses energy to quickly level itself out and begins regenerating the Ascendant’s Orb to restore its shields.
Special Behavior
Force Recovery: Ascendants can recover from force or knockback while in the air.
Sync Attack: If the Ascendant gets within close range, it locks you in and surrounds you with a ball of energy, slowly compacting you until it slams you into the ground.
Fiend
The Fiend is the kett sent in to disrupt and tear apart entrenched enemy positions. Angaran Resistance fighters tell stories about the squads shredded by this surprisingly devastating and chaotic creature.

Combat Behavior
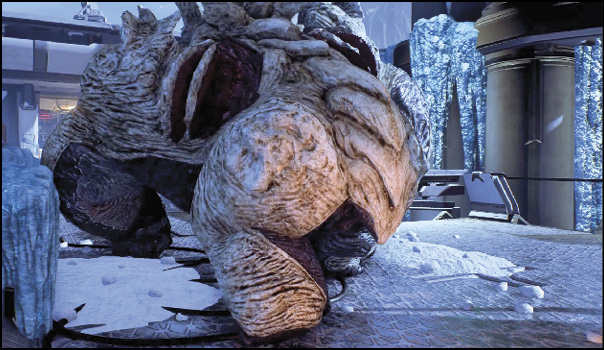
Large, monstrous, with a hard carapace for armor, the Fiend moves slowly between bursts of surprising speed and can quickly devastate entire fighting forces at close range. It features multiple weak points, notably its mouth (front) and gills (left and right sides).
When facing a Fiend by yourself, your best bet is to gain some distance and continuously attack its mouth as it approaches, relocating before it gets too close. If you find yourself cornered, dash to the side and sneak in an attack on its gills as you run away. Consistent damage to its weak points causes it to become stunned for a short time, allowing you to gain more distance or deal out more damage.
Fire-based abilities and ammunitions are good options for eating through its armor as you run. This way damage is constantly applied to the Fiend even when you aren’t actively engaging it, and it’s exposed to more overall damage.
The Fiend has no ranged attacks, so you’re safe if you keep your distance.
Special Behavior
Sync Attack: The Fiend picks you up and repeatedly slams you around. Keep your distance and use your movement abilities (jump/dodge) to avoid falling victim to this devastating attack.