
Mass Effect: Andromeda Collector's Edition Guide Secondary Ops
Restoring a World
Mission Type: Heleus Assignment: Voeld
Prerequisite: Mission 2, complete “Return to the Tempest” after Aya during “A Trail of Hope”
Start Location: Voeld
Unlocking: Solve a Remnant monolith glyph puzzle
Activate Three Monoliths
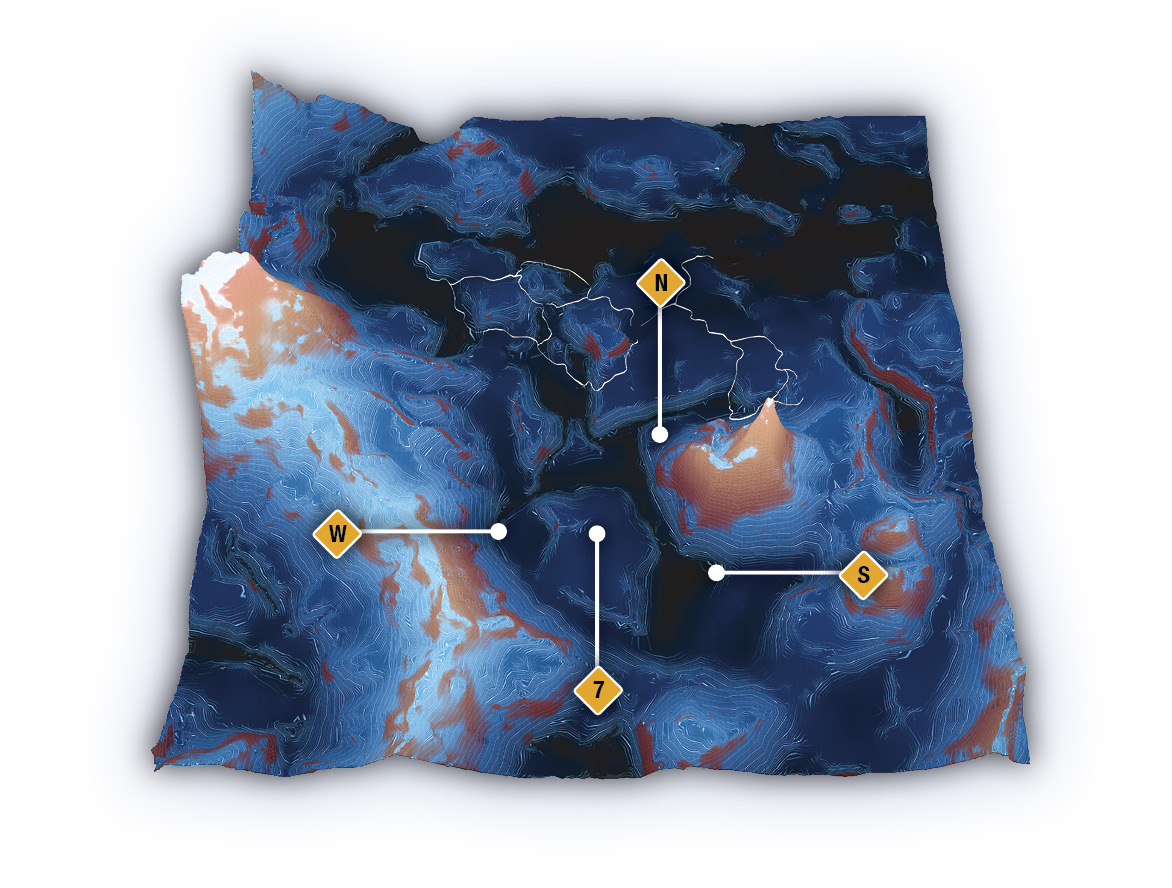
Voeld
The search to restore Voeld leads to another Remnant vault. To explore the vault and activate the system to set Voeld’s climate on the right track, you must first activate the three monoliths.
South Remnant Monolith
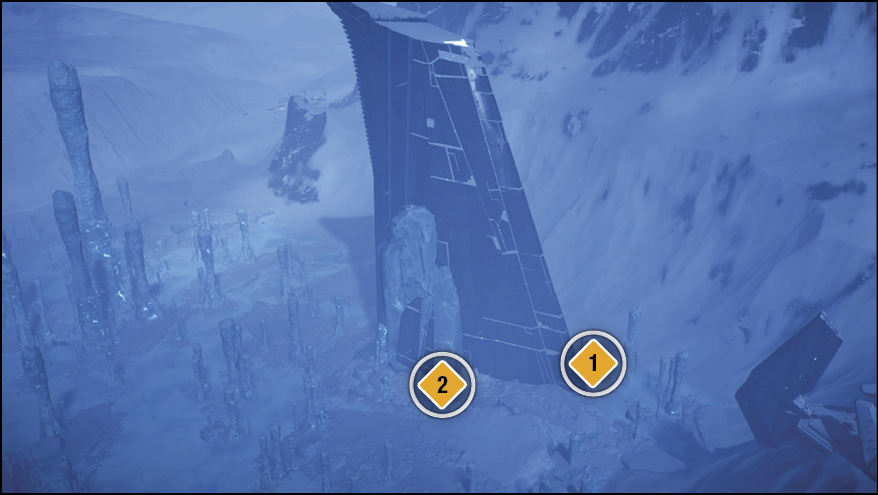
Before You Enter
Defeat the wildlife around the south monolith (S) as you make your way to the back (exterior) area. Look for the obvious black Remnant block among the spires of ice and snow boulders. Scan this block (1) to acquire the Synaptic Glyph for the puzzle.
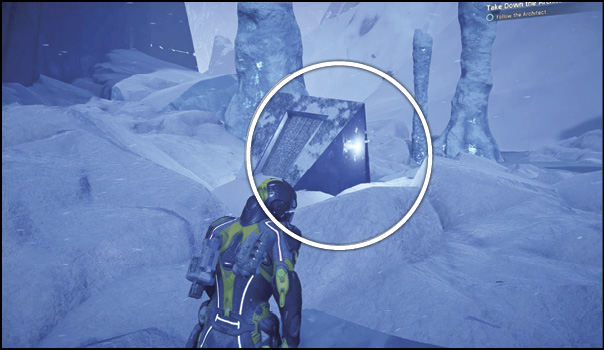
Don’t go anywhere; there’s another glyph on the same block. Move to the sloped end of the block and scan for the Semiosis Glyph.

South Monolith Tunnel Entrance
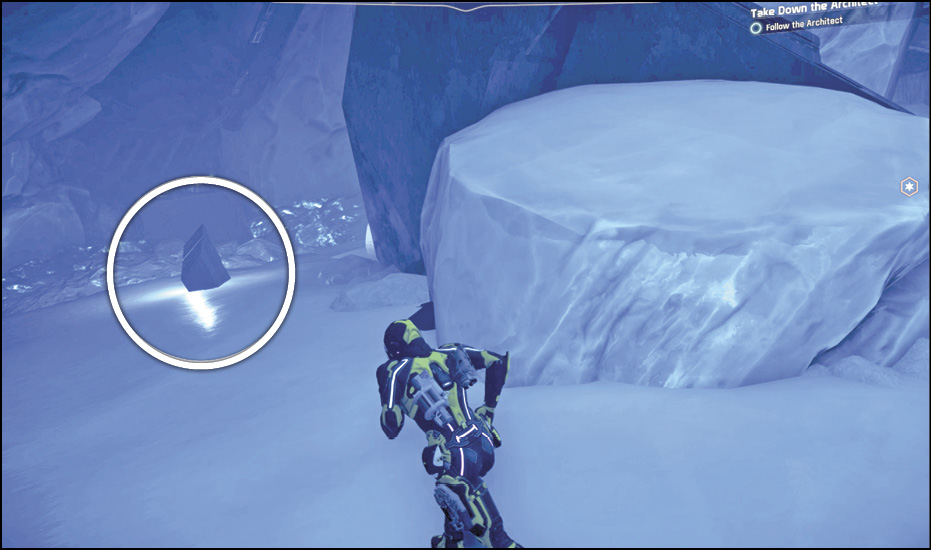
After scanning the exterior glyphs, travel to the west side of the tower and explore the large crevice (2) for a narrow tunnel entrance to the base of the monolith. Use your scanner as you enter to trace the conduit to the one remaining glyph. The Zero Glyph is on a small floor block in the back of the cave (straight back from the entrance).
Solve the Glyph Puzzle
You now have the two glyphs needed to solve the puzzle. Interact with the Remnant console in the middle of the base platform and enter the order of glyphs as indicated in our shot.

North Remnant Monolith
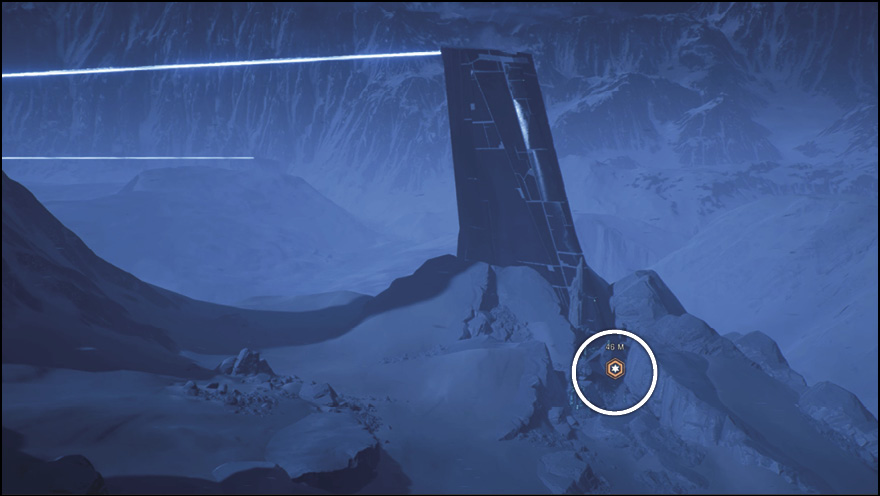
North Monolith Entrance
The north monolith’s base platform is exposed to the elements, located in a gorge, not a tunnel like the south monolith. Approach the monolith (N) from the north side to find the crevice entrance.
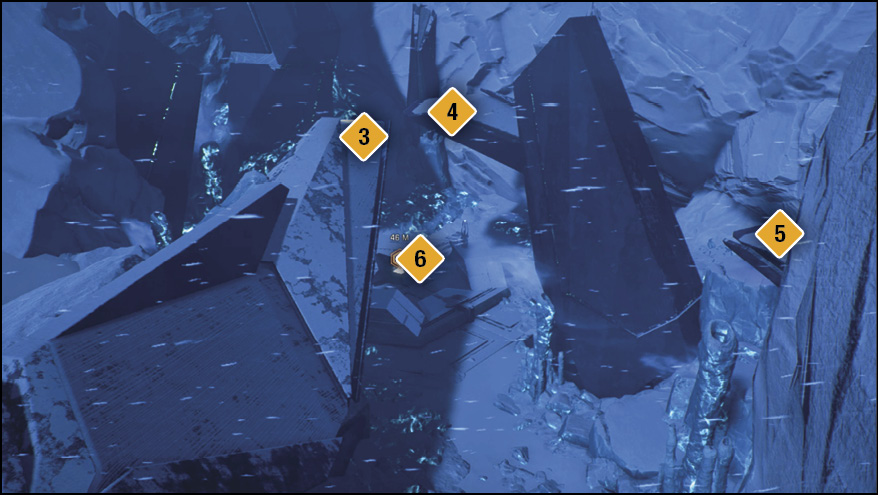
Scan as you approach the puzzle to find the nearest conduit running up into the pillar on your left (3). Jump onto this pillar and run to the end. Scan the top of it to find the Magnitude Glyph for the puzzle. Jump from the left pillar to the top of the right pillar (4) and scan the Adherence Glyph found there.
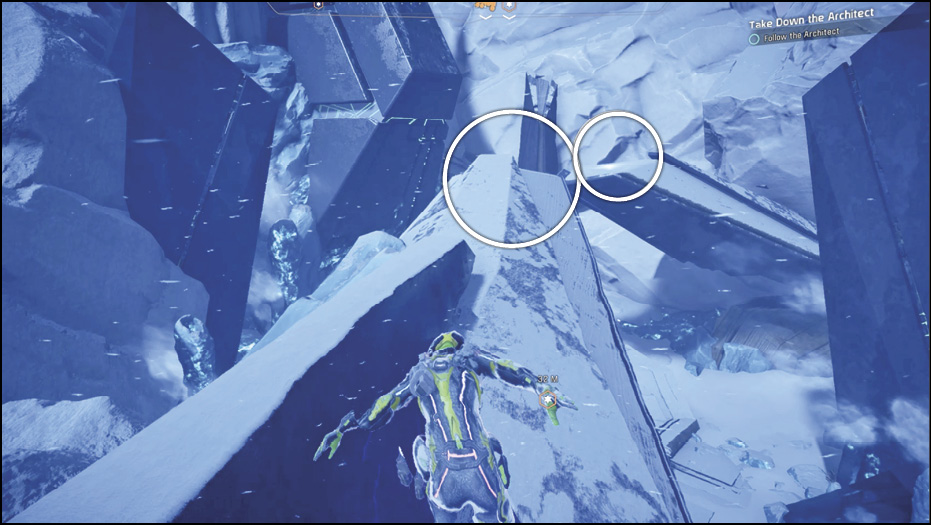
Scan the remaining pillar to find the conduit that leads to the last glyph, the Entropy Glyph, on a platform (5) that protrudes from the mountainside behind this last pillar. Now you have all the glyphs needed to solve the puzzle.
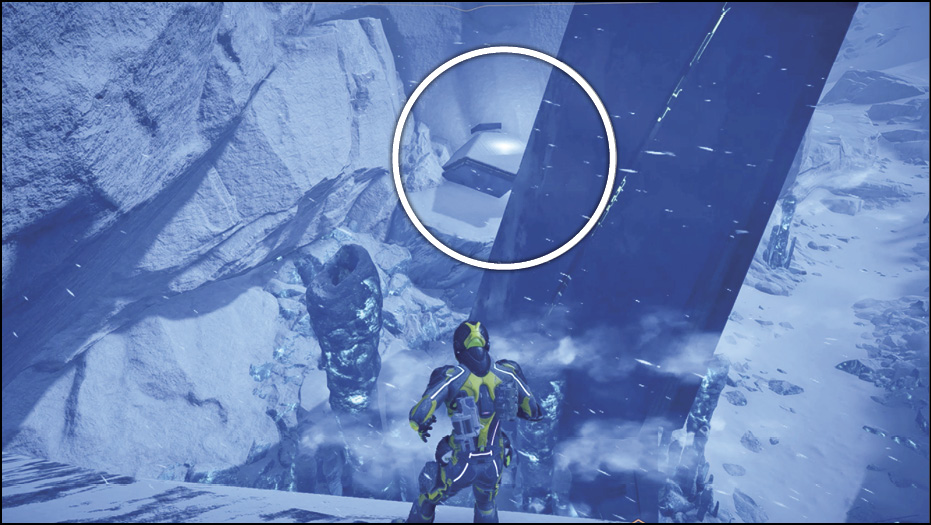
Solve the Glyph Puzzle
Interact with the Remnant console (6) in the middle of the base platform, and enter the order of glyphs as indicated in our shot.

West Remnant Monolith
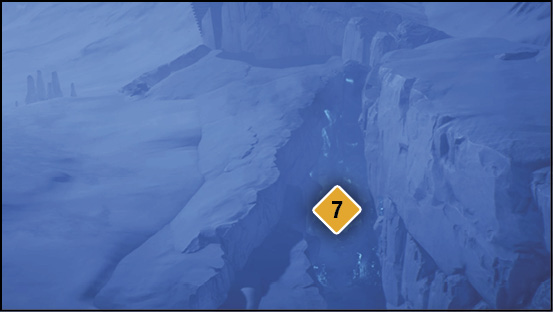
Entrance
Approach the west monolith (W) from the north to find a deep ravine that leads to the north tunnel entrance. This ravine is often filled with hostile wildlife; it might be best to speed past them in the Nomad and drive as deep into the tunnel as possible to avoid the battle—if you wish to do so. A few critters may follow you in, so prepare to battle when you exit the Nomad inside the cave.
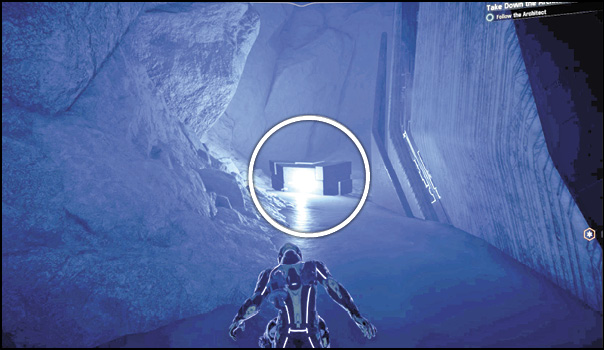
There are two glyphs needed to solve this monolith’s puzzle. Use your scanner to find the two conduits running from the Remnant console to the pillars where the glyphs are located. The Magnitude Glyph is on a block on the ground level next to the cave wall.

The Verdurous Glyph is at the top of one of the pillars, which requires you to climb to the top of some glowing green Remnant blocks before jumping to the top of the pillar to acquire the scan.
Solve the Glyph Puzzle
You now have the two glyphs needed to solve the puzzle. Interact with the Remnant console in the middle of the base platform, and enter the order of glyphs as indicated in our shot.

Investigate the Vault Entrance
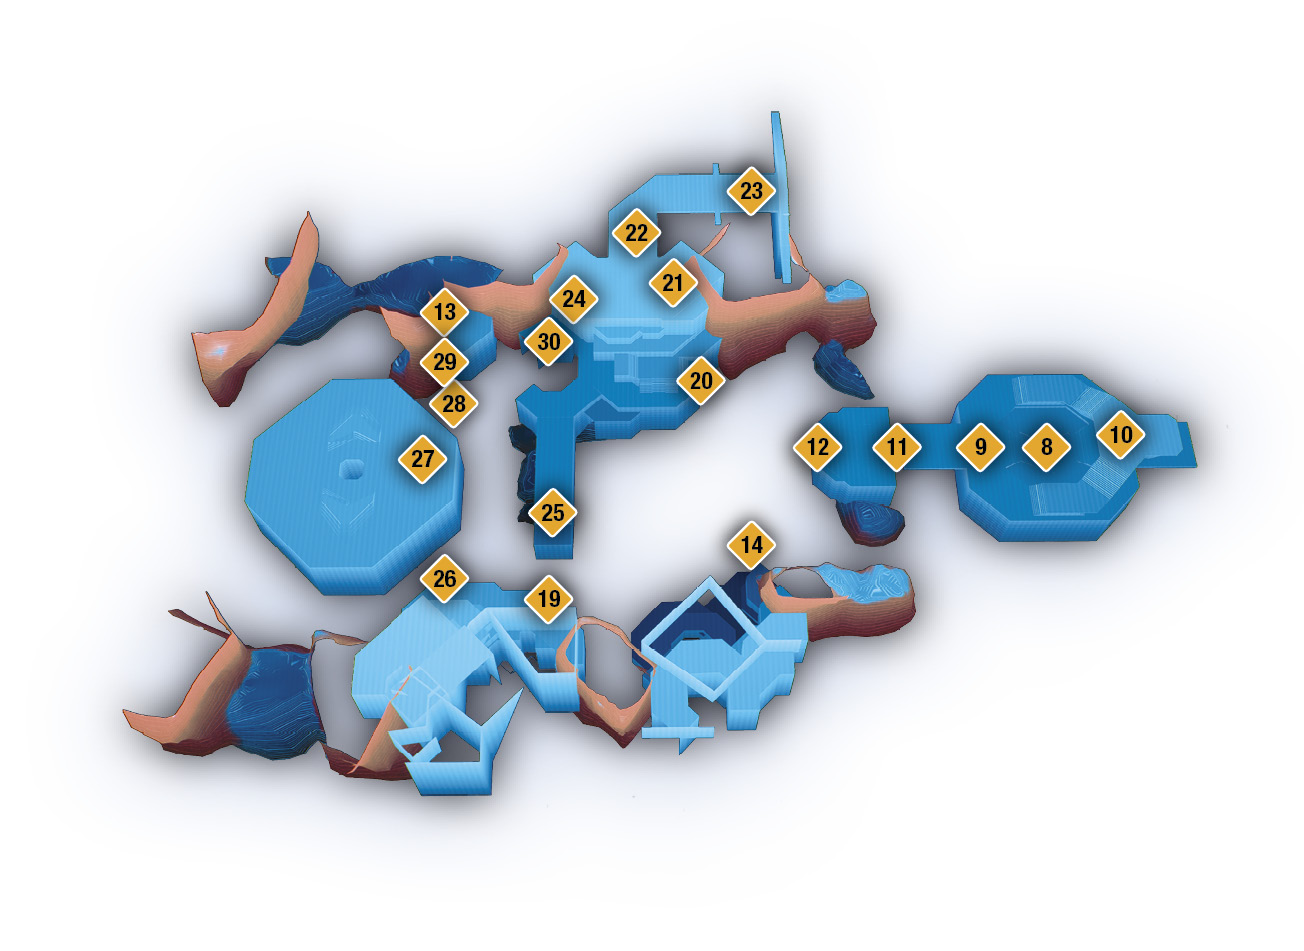
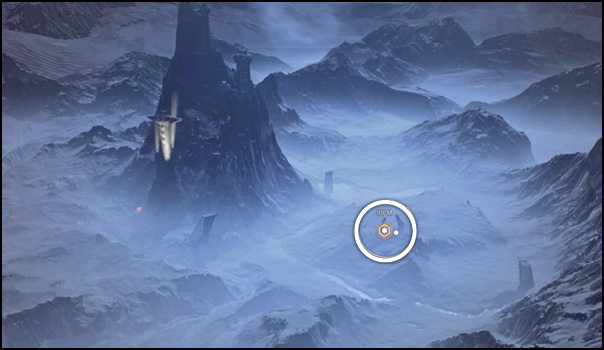
The Remnant vault (7) is in a central location between all three Remnant monoliths. Travel there and enter the vault. Use the Gravity Well to descend to the lower level (8).
Activate Emergency Power
Scan the Adaptive Remnant Core Device and Remnant shield charger in the Gravity Well chamber for some Remnant Research Data. Follow the navpoint (9) to the power console and interface with it to activate the emergency power.

Lift the Vault Lockdown
Interface with the Remnant console (10) on the high ledge facing the well. This unlocks the first door (11). Enter the main vault chamber and interface with the next Remnant console (12) at the ledge. Notice this console has a blue laser pointing to the ledges to the left and a white laser pointing to the ledges to the right. The left path leads to container opportunities, while the right path is the most direct route to activating the vault.
Optional: Left Route for Goodies
The only way to open the double-locked door to a container room (13) on the right side of the vault is to solve console puzzles on the left side.
Interact with the console (12) on the main ledge to raise pillars on the left that allow you to reach the left platforms (14).
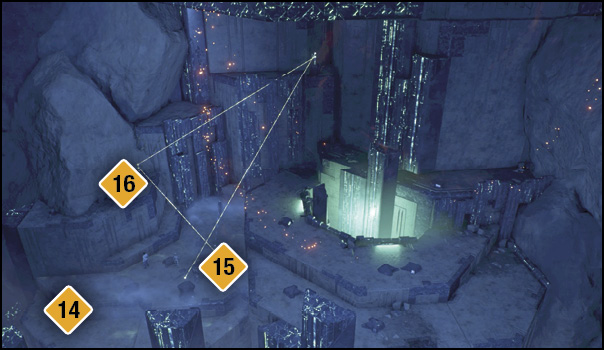
Your first move is to interact with the only active console (15) on the ground level, which switches the laser from the shield to the console (16) on a ledge above. Our shot shows what the laser pattern now looks like.
There are three goals to achieve on the left side of the vault. One: Scan a hidden Adaptive Remnant Core Device for the 100 points of Remnant Research Data earned. Two: Uncover a hidden container with a good random item inside. Three: Raise a special console (19) on the next platform over. Later, when this console is activated, it unlocks the solid doors covering the container room (13) on the right side of the vault.
1: Adaptive Remnant Core Device
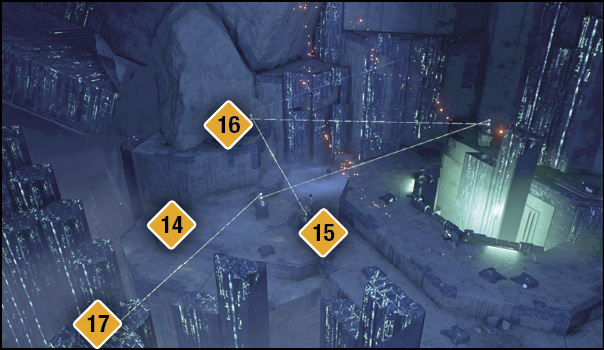
To raise the pillar holding the Adaptive Remnant Core Device (17), activate the Remnant consoles into this laser pattern (see our shot). Once you raise the pillar, scan it before you make it go away again by messing with more consoles.
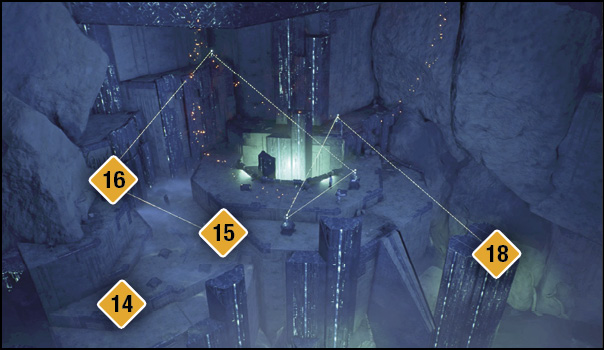
2: Hidden Container Pillar
To raise the pillar with the container(18) holding a random good-value item inside, manipulate the consoles to create this laser pattern (see our shot). Take the item before interacting with the consoles again.
3: Double-Locked Container Room Console
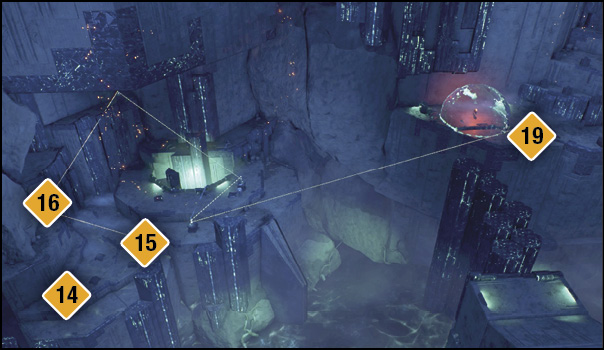
Raise the console (19) on the next platform that eventually—when interfaced—unlocks the first layer of security on the container room (13) on the other side of the vault. When you leave the left side of the vault, make sure this is the laser arrangement you leave behind (see our shot).
Priority Route to Lift the Lockdown
Retrace your pillar-jumps back to the original platform (12). Interface with the console to raise the right pillars, allowing access to the right side (20) of the vault. Defeat the Remnant Assemblers and use your jump-jets to reach the top platform and interface with the console (21) that opens a side passage (22).
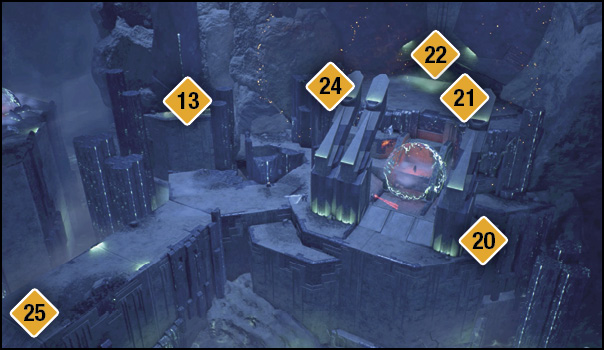
Inside this hallway are two Assemblers and a Destroyer. Take out the Assemblers first, and then direct your teammates to attack the Destroyer’s turrets to weaken it. Finish it off and pick up its remains. Interface with the console on the left wall (23). Solve the glyph puzzle using our shot.

You only have one chance to solve the Remnant decryption puzzle here. If you fail, you don’t get a second chance. If you solve the puzzle the reward is 2 skill points.
Once you’ve exited the tunnel and walked to the edge of the top platform, don’t interact with the console (24) there. Leave it alone to keep the correct escape route intact. Instead, follow the bridge to the left side of the vault. If you activated the console (19) earlier during the optional route described previously, interact with the console to open the first level of security on the container room (13). This opens the solid doors, revealing a force field that shuts down when you lift the lockdown on the vault.

Cross the pillars (26) to reach the purification field platform (27). You cannot interface with the console to activate the purification field until you destroy all the Remnant enemies on this platform. You face a few Assemblers and a couple of Nullifiers. Once they’ve been defeated, interface with the console.
Escape the Purification Field and Exit the Vault
Turn around and run for the left edge of the platform. Jump on the pillars (28) and (29) between your platform (27) and the container room ledge (13). Don’t use an air dash to try to reach the pillars; this causes a failed grip opportunity. You can clear all the gaps with running jumps.
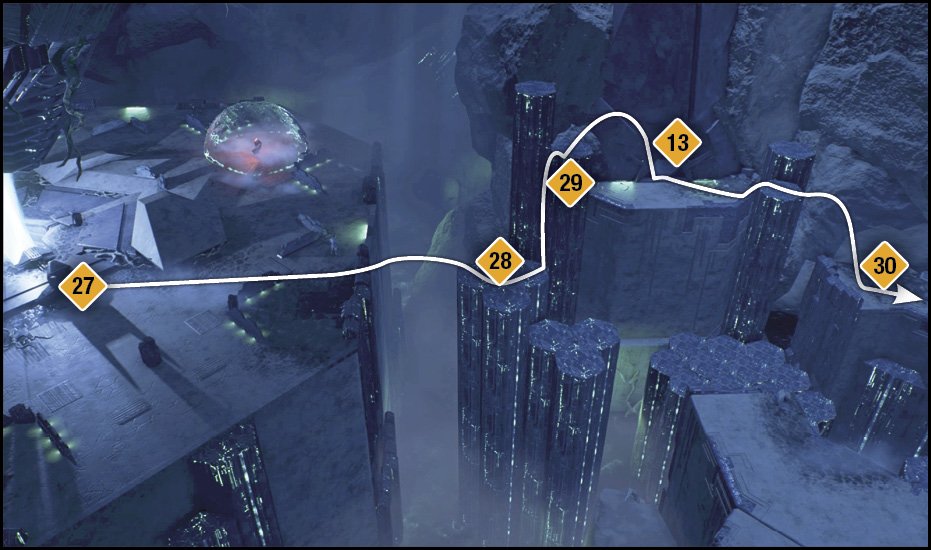
The force field protecting the container room from treasure hunters dropped when the purification field was activated. Dash in and raid the container for its rare treasure. Exit the room quickly, heading left over the pillars and onto the lower platform (30) on the right side of the vault. Follow this platform to the pillars leading to the original platform (12). Escape to the Gravity Well chamber and interface with the activation console (9) to seal the door and complete the mission. You acquire a large amount of and increase Voeld’s Viability by 40%. It’s now 13 degrees warmer outside, which makes hazardous areas more tolerable. Exit the vault through the Gravity Well.