
Mass Effect: Andromeda Collector's Edition Guide Game Mechanics Enemies
Remnant
Summary
“The Remnant” is the umbrella term for the technological remains of an advanced species that abandoned the Heleus Cluster about 600 years ago. Remnant sentry bots—ranging from small Observers to gigantic Architects—keep vigil over devices capable of altering entire planets, maintaining and zealously defending their creators’ work. Remnant tech is largely encountered across the surface of UNCs, in the underground vaults they protect, and the derelict ships that litter the cluster. Monoliths, defense systems, and other constructs exist on planetary surfaces, along with the occasional tech in the form of patrols and discarded spoils from breached vaults.
In many cases, Remnant are dormant (indicated by a blue marker on your compass). Once they’ve been provoked or deem you a threat (basically, if you get too close to them), they become hostile.
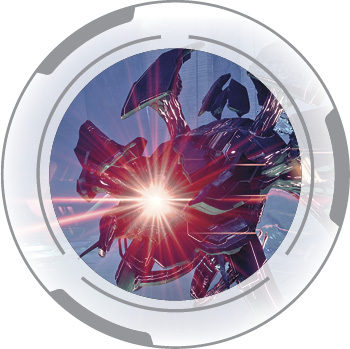
Observer
Vitals
SAM’s Analysis: The Observer is the Remnant suppressor unit. It flies and prefers to stay at mid-to-long range where it can most safely attack. Individual Observers can’t take much punishment, but they are frequently deployed in groups, making them dangerous, particularly when they focus on you or a squadmate.
Role: Suppressor
Weak Point: Central “eye”
Health & Resilience: Shielded, protected from most disabling effects while shields are up
Mobility Options: Highly mobile thanks to innate flight; can recover from biotic effects while airborne
Preferred Range: Medium to Long
Weapons/Attacks: Tracking Beam
Combat Behavior
Observers seek out targets to focus their moderately damaging tracking beam onto, acting as suppressors and forcing their targets to hide in cover.
Strategies
While Observers are limited in their combat capabilities, they can be a major nuisance depending on the situation and Remnant defense configurations. One or two Observers on their own aren’t too threatening. However, like the Anointed, they’re shielded and have a suppressing type of fire, forcing you into defensive positions. They also have excellent mobility thanks to flight, so they have no issues getting into position to pester you and your squadmates.
Observers should be taken care of promptly but safely. As the Remnant aren’t as strong at flushing their enemies out of cover as, say, the kett, you don’t have to be as mobile in the battlefield. Use Overload/Energy Drain or a well-placed sniper rifle shot to the “eye” to shut down Observers, affording you room to manuever.
On higher difficulty settings, however, damage from an Observer’s tracking beam is extremely dangerous—in this case, treat them like flying Anointed.
Assembler

Vitals
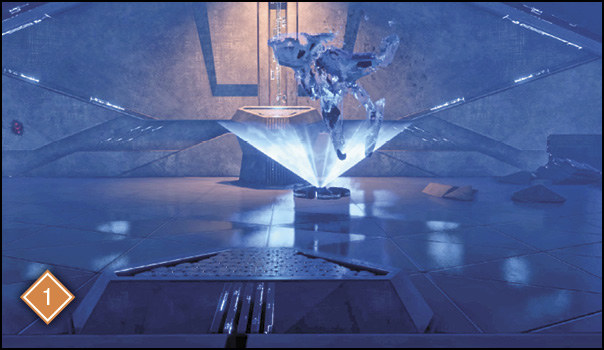
SAM’s Analysis: The Assembler prefers to remain at a distance and in cover. It can 3D-print and deploy Breachers on the spot, as well as hurl incomplete versions as explosives.
Role: Cover Taker, Cover Flusher (when Breachers are deployed)
Weak Point: Central “eye”
Health & Resilience: Normal, no immunities
Mobility Options: Standard speed; can walk, run, boost up and down ledges
Preferred Range: Medium to Long
Weapons/Attacks: Rifle-Type Laser, Evasive Caltrop Bombs, Breacher “Grenades,” Breacher 3D-Printing (1)
Combat Behavior
Assemblers behave similarly to conventional grunt soldiers, such as the Chosen, preferring cover and intelligent tactics. They use self-preservation tools when a close-range threat presents itself. Assemblers can also print (or “summon”) Breachers—flying Remnant close-range attackers.
Strategies
Assemblers should be relatively high on your target priority list because of their ability to spawn more Remnant. An Assembler can have one Breacher summoned at any given time, so make sure to destroy them as early as possible, preferably before they can deploy their first Breacher. Fortunately, they aren’t equipped with shields, so they can be tossed around with biotic powers and killed off quickly with sniper rifles. Otherwise, if you let them get started, they can send annoying Breachers after you, which behave similarly to the kett’s pet Wraith, flushing you out of cover.
On higher difficulty settings, an Assembler almost always gets to summon its Breacher because of its bonus health, so anticipate a much more difficult battle, especially if there are other Remnant around (like suppressing Observers).
Breacher
Vitals
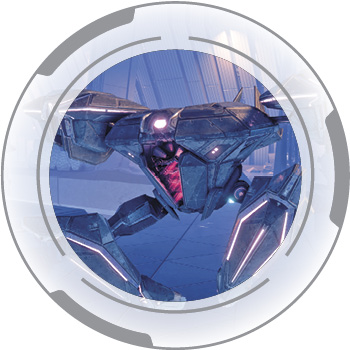
SAM’s Analysis: Relentless flying drone that bursts forward to attack. If its clutch is not broken, it discharged a moderate burst of damage.
Role: Cover Flusher
Weak Point: None
Health & Resilience: Normal, no immunities
Mobility Options: Hover/flight
Preferred Range: Close
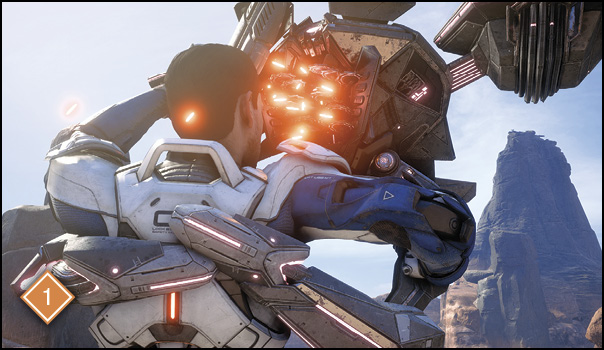
Weapons/Attacks: Melee, Grapple into “Bite” (breakable by mashing designated button) (1)
Combat Behavior
Breachers have a single-track mind, beelining toward their target to attack before striking with their extremities. The Breacher can also grapple its target, holding it in place before delivering a burst of damage.
Strategies
Breachers are easily killed but, like Wraiths, are a nuisance if they’re not dealt with immediately. Although you can break free from its grab attack, you’re practically incapacitated and vulnerable to other enemy attacks. Your strategy should be to prevent them from spawning in the first place, by defeating their Assemblers.
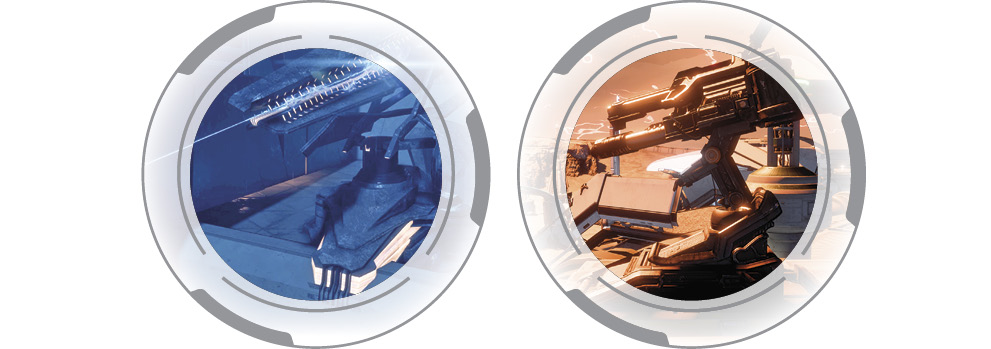
Turrets (Remnant/Kett/Outlaws)
Vitals
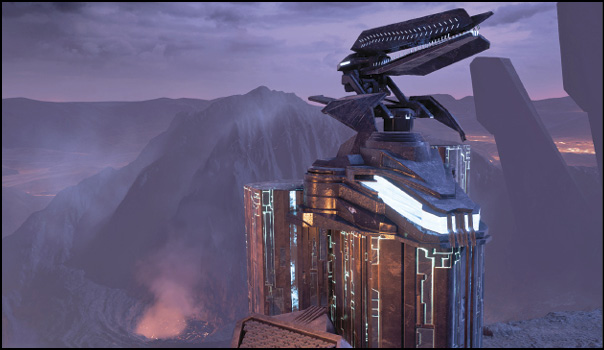
SAM’s Analysis: (Remnant) Remnant construct capable of firing blasts of plasma at long range. (Outlaws) Mounted gun turret capable of 360-degree rotation and long-range attacks.
Role: Defense, Suppressor
Weak Point: None
Health & Resilience: Normal, high health, immune to biotic displacement effects
Mobility Options: Immobile
Preferred Range: Long
Weapons/Attacks: High-damage, charged blasts
Combat Behavior
Aside from firing plasma beams at their targets, many Remnant turrents can be hacked by Ryder by interfacing with certain nearby consoles. Hacked turrents have their targeting systems reprogrammed to help Ryder’s team fight off enemies. Outlaw and kett turrets behave similarly, except with their own flavors of gunfire.
Strategies
Fighting a turret is straightforward: stay out of its line of sight or stay in cover. Turrets can be difficult to destroy quickly, but this is necessary because of their high accuracy and suppressing attacks. However, situation assessment is required, as you may have other immediate threats, like Breachers and Observers closing in on your position.
Nullifier

Vitals
SAM’s Analysis: The Nullifier anchors into the ground and launches energy projectiles that pass through solid objects. While anchored, the Nullifier is difficult to damage.
Role: Siege Unit, Cover Flusher
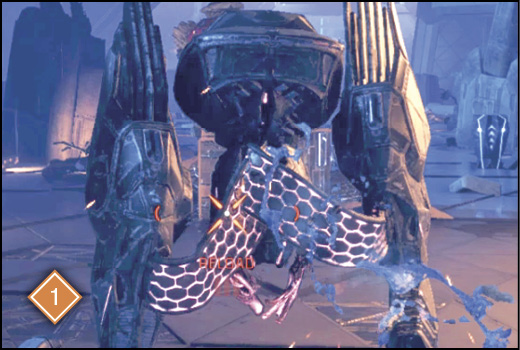
Weak Point: Ribbon cabling between legs (1)
Health & Resilience: Armor, immune to biotic displacement effects; can project impenetrable force field barrier
Mobility Options: Highly mobile thanks to innate flight; can recover from biotic effects while airborne
Preferred Range: Medium to Long
Weapons/Attacks: Energy Projectiles (penetrates solid cover and objects), Melee (foot stomp)
Combat Behavior
Nullifiers are slow-moving siege units. They have a powerful energy-emitting mortar weapon that penetrates through cover, forcing their targets out of cover safety. When in siege mode, Nullifiers plant themselves into the ground and gain access to a charged mortar attack with a telegraphed wind-up. When threatened at close range, they unsiege and can attack with a stomping melee strike.
Strategies
Nullifiers are robust enemies and difficult to fight at long range, thanks to their projection barriers and armored health. Their weak point is the connective ribbon cabling between their legs (which becomes fully protected in siege mode). Melee-centric builds are effective against Nullifiers, provided it’s safe to attack in the open. Getting into close range forces it out of siege mode, where it’s weakest, exposing its connective cabling. However, it still remains a threat, as it has a high amount of armor health, so consider using incendiary ammo or Incinerate to burn it down.
Destroyer

Vitals
SAM’s Analysis: This massive, ominous, menacing Remnant houses an arsenal that engages multiple targets at once.
Role: Heavy Siege Unit, Suppressor
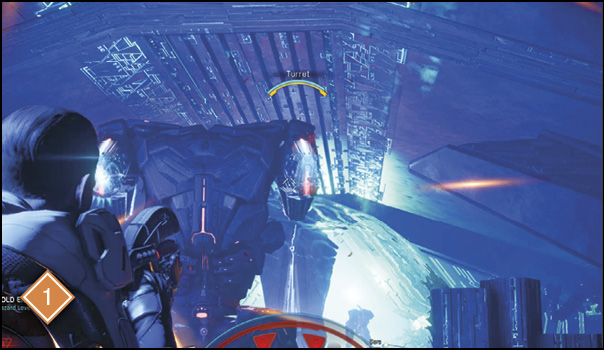
Weak Point: Turrets, central opening when firing main weapon
Health & Resilience: Shielded and armored, immune to disabling effects, extremely high health; its turrets have high shields, but low armor health (1)
Mobility Options: Low mobility; slow walk speed
Preferred Range: Any
Weapons/Attacks: Central Cannon, Close-Range Radial Energy Dome Discharge, Rapid-Fire Turrets
Combat Behavior
Destroyers are well-equipped with two targetable turrets, a central high-damage cannon attack, and a deadly close-range energy dome radial detonation attack. A Destroyer selects its method of attack depending on the range of its target. At close range, it defends itself with a high-damage blast. At medium range, it prefers to use its rapid-firing turrets, and at longer ranges, it fires explosive rounds from its central cannon.
Strategies
These heavy-duty Remnant units are extremely difficult to destroy. Not only do they deal massive damage, but their long- and medium-range attacks are difficult to avoid. Hiding in cover only protects you so much, as the area-of-effect explosions from their central cannons bypass cover defense.
When you’ve taken care of other immediate threats (it’s highly recommended that you save the Destroyer for last in most encounters), your goal is to destroy its targetable side turrets, located by its “shoulders.” These turrets have shields and armor health, but don’t have nearly as much shields as the Destroyer itself. You can decimate them with well-placed sniper shots (attacks on turrets count as critical hits), or with electrical tech and burn powers. Destroying a turrent reduces the Destroyer’s shields significantly. Eliminating both removes all of its shields.

If your combat specialties involve long-range attacks, stay on the move to avoid its cannon. Evade the blast, then retaliate with your own attacks. Once both turrets are down, the remaining Destroyer becomes vulnerable and can be dealt with without much trouble.
Close-quarters specialists may have a difficult time taking down a Destroyer. However, you can bait out its energy dome attack by closing the distance (with Charge), then evade away, leaving its turrets open to attack (with a shotgun, ideally).
Architect

Vitals
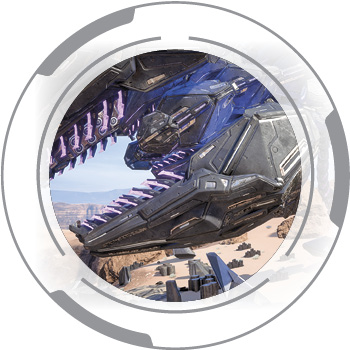
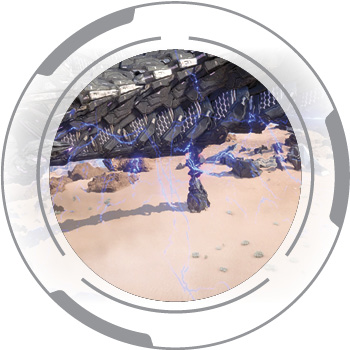
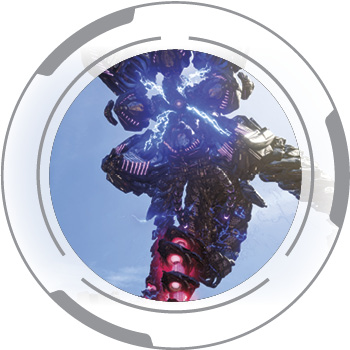
SAM’s Analysis: The largest Remnant construct, the Architect is indestructible. But once downed, it can be interfaced with and forced to abandon its directives.
Role: Architect
Weak Point: Power cores (conduits)
Weapons/Attacks: Electrical cage (between “legs”) to prevent any aggressors from attacking from beneath it
High-damage grenades used to flush its targets from cover, fired from a tentacle, dealing damage both upon impact and detonation
Rapid-fire “gatling”-gun turret from the other tentacle beneath its head
Power core energy blast, devastating anything it hits and leaving a persistent electrical field in the area
Combat Behavior
Architect battles contain several phases. During its “vulnerability” phase (when its leg or head conduits can be damaged), it cycles between three major attacks: a high-powered energy ball from its maw, cluster bombs thrown from one of its tentacles, and gatling-gun fire from the other tentacle. When its conduits are wounded, it summons waves of Remnant enemies to attack.
Strategies
The most dangerous aspect of an Architect fight is the “vulnerable conduit” phase. Although the Architect is damageable, it also has access to all three of its devastating attacks, outlined previously. This phase requires constant evasive movement while dealing damage to its open leg conduits. Additionally, if you take too long in crippling a leg conduit, the Architect switches to a “rage” mode and throws out a constant barrage of deadly energy spheres, then closes its leg conduits while summoning a wave of regular Remnant enemies.
Once its leg conduits are wounded enough, its head conduit is exposed. After taking enough damage to this conduit (around 20% of its total health), it summons a wave of Remnant enemies. Defeating the enemies advances the fight into the next phase (or if you wait long enough). When the leg conduits are completely destroyed, the Architect detonates an EMP, destroying all leftover Remnant (including your Remnant VI and Assault Turret) before flying off. This cycle must be completed two more times before its power cores are completely destroyed, allowing you to interface with the Architect and reprogram it into a passive state.
Each Architect drops a unique container after it’s interfaced with. These containers consist of a static Fusion Mod reward. For specific rewards, see Fusion Mods in the Game Mechanics Glossary.