
Mass Effect: Andromeda Collector's Edition Guide Multiplayer Multiplayer Enemies
Remnant
“The Remnant” is the umbrella term for the technological remains of an advanced species that abandoned the Heleus Cluster about 600 years ago. Remnant sentry bots—ranging from small Observers to gigantic Behemoths—keep vigil over devices capable of altering entire planets, maintaining and zealously defending their creators’ work.
The Remnant are not sentient and never will be. Unlike the geth, they are automatons left running when their creators left. The reasons for their creators’ departure, and whether they will return, remain a mystery.
All Remnant units take additional damage from electric attacks, and less damage from fire-based attacks. Cryo attacks slow Remnant and cause them to take additional damage from all sources.
Assembler
Gains its name from its ability to construct Breachers, which can swarm players. This makes the Assembler a priority target.

Combat Behavior
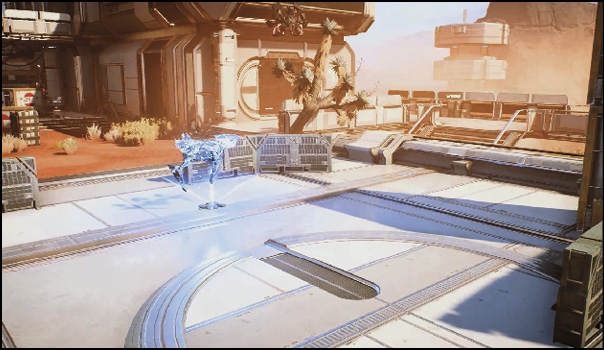
The Assembler prefers to fight from mid-range, briefly peeking up from cover to shoot and assemble Breachers. It fires its regular attack in small bursts before returning to cover. Quickly move in or use area-of-effect attacks to eliminate Assemblers behind their cover, preventing them from building a swarm of Breachers.
Special Behavior
Caltrops: At close range, the Assembler drops a cluster of small explosives at its feet and attempts to evade enemies. These explosives detonate after a short delay.
Breacher “Egg”: The Assembler throws a grenade that, on impact, constructs a Breacher. Each Assembler can only spawn one Breacher at a time. Unlike with standard grenades, the Assembler doesn’t attempt to land the egg on you. Instead, it aims to land the egg in front of you or on your flanks. This allows you to engage it before it invades your space.
Fighting Tactics
The red “eye” in the center of the Assembler’s head allows for one-shot kills by most heavy sniper rifles. It’s best to kill an Assembler as fast as possible to disable the remnant ability to produce their only melee/rusher type unit. This will allow you to safely stay behind cover without little worry about units sneaking up on you.
Breacher
Once assembled with the help of the Assembler, the Breacher is a relentless enemy with little regard for its own safety. It continues to advance even when heavily damaged—nothing can turn it from its objective of destroying the player.

Combat Behavior
The Breacher immediately rushes the closest player. Closing distance quickly, it seeks to flank. The Breacher can fly over cover, allowing it to rapidly close in from almost any angle. Once in range, the Breacher uses devastating melee attacks and is capable of a Sync Attack.
Special Behavior
Sync Attack: The Breacher uses its engine to burst forward, rushing at its target. While charging its engine for the attack, it can slowly turn, allowing it to make a last-second adjustment when aiming.
Self-Destruct: The Breacher can decide to self-destruct. A change in color signals this ability, followed by a charge at the nearest player. If the Breacher is killed during the charge, it unleashes an area-of-effect blast wherever it dies that deals damage to any player within that area. If it spends too much time in suicide mode, the Breacher detonates without any help from the player.
Fighting Tactics
If Assemblers are kept in check, the Breacher is a unit you will rarely encounter. If you find yourself pinned down by multiple units, the Assembler will likely create a few Breachers to remove you from cover. Breachers can be created anywhere, allowing them to quickly flank you from seemingly out of nowhere. Listen for the sound of them being created. This sound will play for a short time while the Breacher is manufactured from the small “grenade” that is deployed by the Assembler. Since Breachers do not have a ranged attack, any weapon will generally give you an advantage. Use shotguns at close range to take the tactical advantage.
Nullifier
A large Remnant unit that can flush the player out of cover. It moves quickly but needs to stop to fire its weapon.

Combat Behavior
In combat, the Nullifier quickly approaches to mid-range, then plants itself like a turret.
Once planted, the Nullifier cannot move, but it can fire its energy mortar, which flies through any form of cover until it hits the player. This attack takes a short time to charge, during which the Nullifier’s aiming lasers turn from blue to red. This gives you time to dodge the attack at the expense of leaving your cover for a moment.
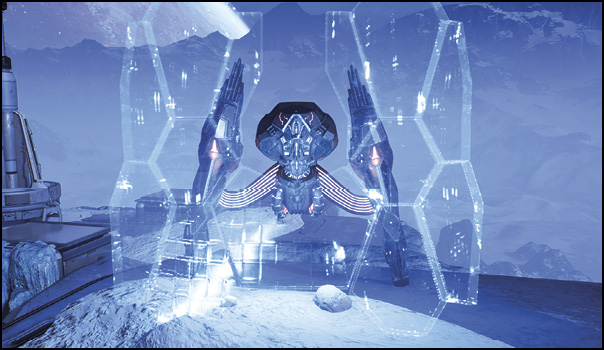
When the Nullifier enters siege mode, it projects a large shield in front of itself. The shield protects all but a small portion of its weak point and leaves its head open for attack. Thanks to its slow attack rate, you can engage a Nullifier from a medium distance without much risk; the distance allows you ample time to dodge attacks. However, this tactic leaves you open to attacks from other enemies, so only use it when the Nullifier is without support.
The Nullifier is also capable of a melee, during which it attacks close-proximity enemies with its legs.
Special Behavior
Siege Mode: When in siege mode, the Nullifier projects an invulnerable barrier protecting all but its head. Movement is impossible when it’s engaged in siege mode, allowing the player to evade and maneuver around the Nullifier with ease. The Nullifier can only use its ranged attack when in siege mode; it’s vulnerable to ranged attacks when on the move.
Observer
Remnant suppressor unit. Flies and prefers to stay at mid-to-long range, where it can most safely attack. Drives players into cover with its beam attack.

Combat Behavior
The Observer hangs back, preferring to stay at mid-to-long range. Observers are quick but don’t move much once they get into position. They’re fragile and can’t take much punishment.
Observers commonly appear on your flank. They make themselves known with a few robotic noises before unleashing their laser attacks.
Special Behavior
Air Force Recovery: Observers can recover from disabling biotic effects in midair.
Fighting Tactics
You will commonly find an Observer hovering over the battlefield, taking its time to select a target to pin down behind cover. The Observer may be fast, but it tends to stay behind other Remnant if the choice is given.
The Observer’s beam deals continuous damage as it fires its laser out of its weak point. When the Observer’s shield is down, you can temporarily ragdoll it with a concussive style or biotic attack. This allows you to quickly stop its beam while you finish it off before it has a chance to regenerate its shield.
Destroyer
Largest Remnant unit. Command-and-control unit capable of heavily suppressing the player with its twin turrets as it advances. Serves as a centerpiece for the Remnant forces.

Combat Behavior
The Destroyer is a mobile weapons platform. It slowly advances on its target, only stopping to fire its many guns. At melee range it can unleash an energy field that hits targets even behind cover. This monster of a machine features three guns—its main gun and two turrets, each of which is capable of zeroing in on a separate target. The guns only fire when the main gun picks a viable target, and when it attacks, all three guns fire.
Its main gun is indestructible and fires heavy beams, much like rockets, that deal high area-of-effect damage. Using its main gun exposes its core, allowing for critical hits to its weak point.
Special Behavior
Turrets: The Destroyer has two turrets that attack independently with rapid-fire laser blasts, enabling it to keep more than one target pinned down. Unlike the main gun, these turrets can be destroyed. Destroying the turrets deals heavy damage, but also changes the behavior of the Destroyer. Destroying one turret decreases the time the Destroyer takes between attacks. Destroying both turrets doubles the Destroyer’s movement speed, making it much harder to evade, and cover more difficult to maintain. It also allows the Destroyer more melee attacks.
Energy Dome: When in melee range, the Destroyer emits a burst of energy that hits targets all around, even through cover. This attack deals heavy damage, so keep your distance at all times when fighting this powerful foe.
Fighting Tactics
Each Destroyer turret has independent health and shield values from the main body. Taking out a Destroyer’s turrets deals a heavy amount of damage to the unit’s main body, making these great targets to focus on before unleashing your attack on its body.
The Destroyer’s shield sets this unit apart from the other heavy units. Once the shield is down, prime the Destroyer with some fire damage. Once primed, it will cause damage over time to the Destroyer. During this time, there’s no need to worry about the shield regenerating, allowing you to seek alternate cover or reload your arsenal.