
Mass Effect: Andromeda Collector's Edition Guide Game Mechanics
Basics
This chapter is devoted to the bare essentials of the game, clarifying surface-level aspects and controls. For in-depth information concerning the exploration-based aspects of Mass Effect: Andromeda, use the alphabetically categorized Game Mechanics Glossary to look up the subject you want to examine further. For combat topics, proceed to the Combat Concepts Expanded chapter.
Controls
Commands can be re-assigned through the > Settings Menu, Pause Menu > Game > Settings > Controls.
Gamepad controls are set through “Controller Configuration,” and keyboard/mouse controls are set through the “Key Bindings” in the controls menu.
Gamepad Defaults
| Action | PS4 Controls | Xbox One Controls | PC Controls |
|---|---|---|---|
| Movement | Left Analog Stick | Left Analog Stick | WASD |
| Look | Right Analog Stick | Right Analog Stick | Mouse |
| Tight Aim |  |
 |
Mouse 2 |
| Fire Weapon |  |
 |
Mouse 1 |
| Jump |  |
 |
Space |
| Evade |  |
 |
Mouse 3 |
| Vault/Mantle |  |
 |
L Ctrl |
| Power 1 |  |
 |
1 |
| Power 2 |  + +  |
 + +  |
2 |
| Power 3 |  |
 |
3 |
| Interact |  (Hold) (Hold) |
 (Hold) (Hold) |
E |
| Melee |  |
 |
F |
| Reload |  |
 |
R |
| Previous Weapon |  (Hold) (Hold) |
 (Hold) (Hold) |
Wheel Up |
| Next Weapon |  (Hold) (Hold) |
 (Hold) (Hold) |
Wheel Down |
| Sprint | L3 | L3 | Shift |
| Show Objective | L3 | L3 | Q |
| Camera Look /Swap Camera | R3 | R3 | L Alt |
| Weapon Wheel | Touchpad | View Button | Tab |
| Left Squadmate Orders |  |
 |
Z |
| Right Squadmate Orders |  |
 |
C |
| Both Squadmate Orders |  |
 |
X |
| Scanner |  |
 |
G |
| Skip Conversation |  |
 |
Space |
nomad controls
| Action | PS4 Controls | Xbox One Controls | PC Controls |
|---|---|---|---|
| Brake/Reverse |  |
 |
S |
| Accelerate |  |
 |
W |
| Steer | Left Analog Stick | Left Analog Stick | AD |
| Handbrake | L3 | L3 | F |
| Headlights |  |
 |
B |
| Mining Computer |  |
 |
R |
| Return to Tempest |  |
 |
T |
| Exit Vehicle |  |
 |
E |
| Jump |  |
 |
Space |
| Boost |  |
 |
Shift |
| Camera Look | Right Analog Stick | Right Analog Stick | L Alt |
| ATV Mode |  |
 |
Mouse 2 |
Keyboard and Mouse Defaults
Keyboard and mouse controls are fully supported and functional for the Windows version of the game. If you prefer aiming with a mouse, you may find it useful for sniping and aim-down-sights-based gameplay. Additionally, you can assign key bindings to sub-menus to bypass the added step of going through the pause menu. You can also use controllers with the Windows version of the game.
The essential commands for keyboard and mouse configurations are shown in the accompanying table. For a thorough list, see the in-game key bindings menu.
Player Actions
Ryder can perform various actions while on foot. There are two “modes”: one for non-combat areas, and one for combat-potential areas. While in non-combat areas (like a mission hub), you cannot draw your weapon, perform melee attacks, or use jump-jets.
Interact
The context-based Interact command is an all-purpose action used for performing various functions with objects. You will be prompted to use this action to open doors, use items, toggle switches, and so forth. It can also be used with a weapon drawn or holstered.
Jump-Jets
While exploring a planet or traversing potentially hostile territory, Ryder is equipped with jump-jets, enhancing mobility.
Jump: Hold the Jump button to use your jump-jets to jump as high as possible. Tap the button to perform a “low jump.”
Evade: While moving on the ground, press the Evade button to boost in the direction that you’re moving for a quick dash. It is important to note that evades can be modified and even replaced with improved “dash” types by equipping specific profiles. See Profiles in the Combat Concepts Expanded section for more information on this topic.
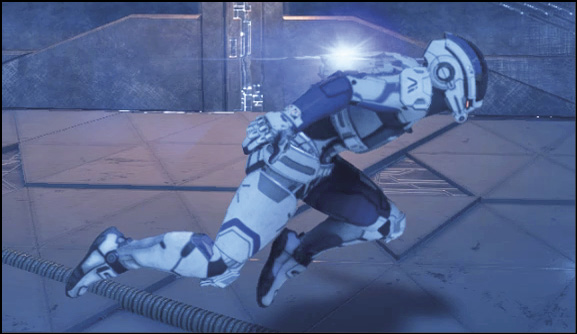
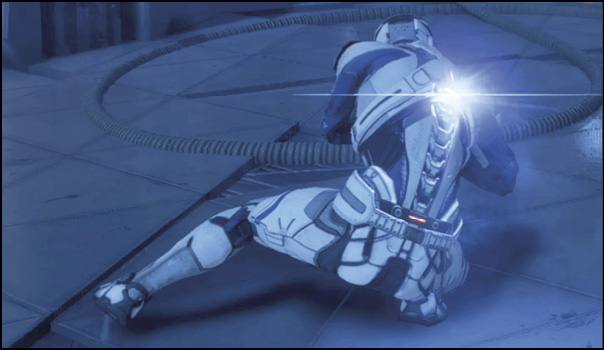
Air Evade: While airborne, press Evade to dash through the air. This is typically used to enhance total jump distance or to dodge enemy attacks.
Hover Fire: Press and hold the Tight Aim button to activate counter-gravity jump-jets, keeping you airborne and in an aiming position. This can be combined with aerial power usage.
Mantle: Hold the Jump button to boost up and over nearby ledges during a jump.
Omni-Tool Melee Attack: While airborne, press the Melee button to come down with an area-of-effect omni-tool attack, damaging nearby enemies.
Vault/Mantle
While grounded, you can vault over an obstruction or ledge (usually around waist height) by using the Mantle command (an icon appears where this is applicable). Performing a vault over a barrier while your weapon is drawn executes a combat roll.
Fire/Shoot Gun
Shoot from Hip: This is the default mode of firing a weapon. It’s not as accurate as firing while aiming, but this option doesn’t incur a movement-speed penalty.
Tight Aim: Hold the Tight Aim button to focus your aim. Firing from this mode is much more accurate, but your walk speed is decreased.
Cover
While your gun is drawn, you can take cover against any large, solid object once you move close enough (triggered automatically).
While in cover, a shield icon appears near the bottom of the HUD (between the squadmate icons). Cover not only protects you from enemy fire, but it also allows your shields to regenerate much more quickly.
Aimed Cover Fire: Hold the Tight Aim button (or key) to pop out from cover. Firing from this stance grants a large accuracy bonus but exposes you to enemy fire.
Blind Cover Fire: Without aiming, press Fire while behind cover to perform a blind-fire attack in the enemy’s general direction. Blind fire is generally ineffective against long-range foes. However, this technique can be used to stay safe while dishing out damage.
Reloading
Press the Reload button to manually reload your weapon. Smart reload timing is very beneficial in battle, so consider reloading while under the safety of cover before engaging in a fight. You may need every single projectile in your clip! Most actions performed during a reload cancel it. You can jump while reloading without canceling it.
Melee Attacks
Melee attacks are powerful close-range offensive options that deal excellent damage. Melee attacks are particularly handy when your gun clip is empty and you need to quickly deal damage to an enemy within range (instead of waiting for a reload to complete). Melee attacks do not use hard aim. Rather, they’re aim-assisted and directed at your closet target (if you have one).
Swap Camera View
You can swap the shoulder that the camera looks over while your weapon is drawn. Press the Swap Camera/Re-Center button (or key) to achieve this. Switching the shoulder camera can improve your view in certain situations.
Powers
Powers are special abilities used in combat. Most powers have a recharge time before they can be used again, while other powers consume a limited supply of power cells.
You can have up to three powers equipped, activated with their assigned buttons shown at the bottom right of your HUD. Certain powers have secondary functions, triggered by holding the command.
Reviving
When a squadmate is knocked unconscious, approach the downed ally and hold the Interact button to revive them. While you are reviving an ally, you’re vulnerable to attack, so assess the situation carefully before putting yourself in danger. Squadmates automatically revive when combat ends.
Head-Up Displays (HUD)
General (Non-Combat)
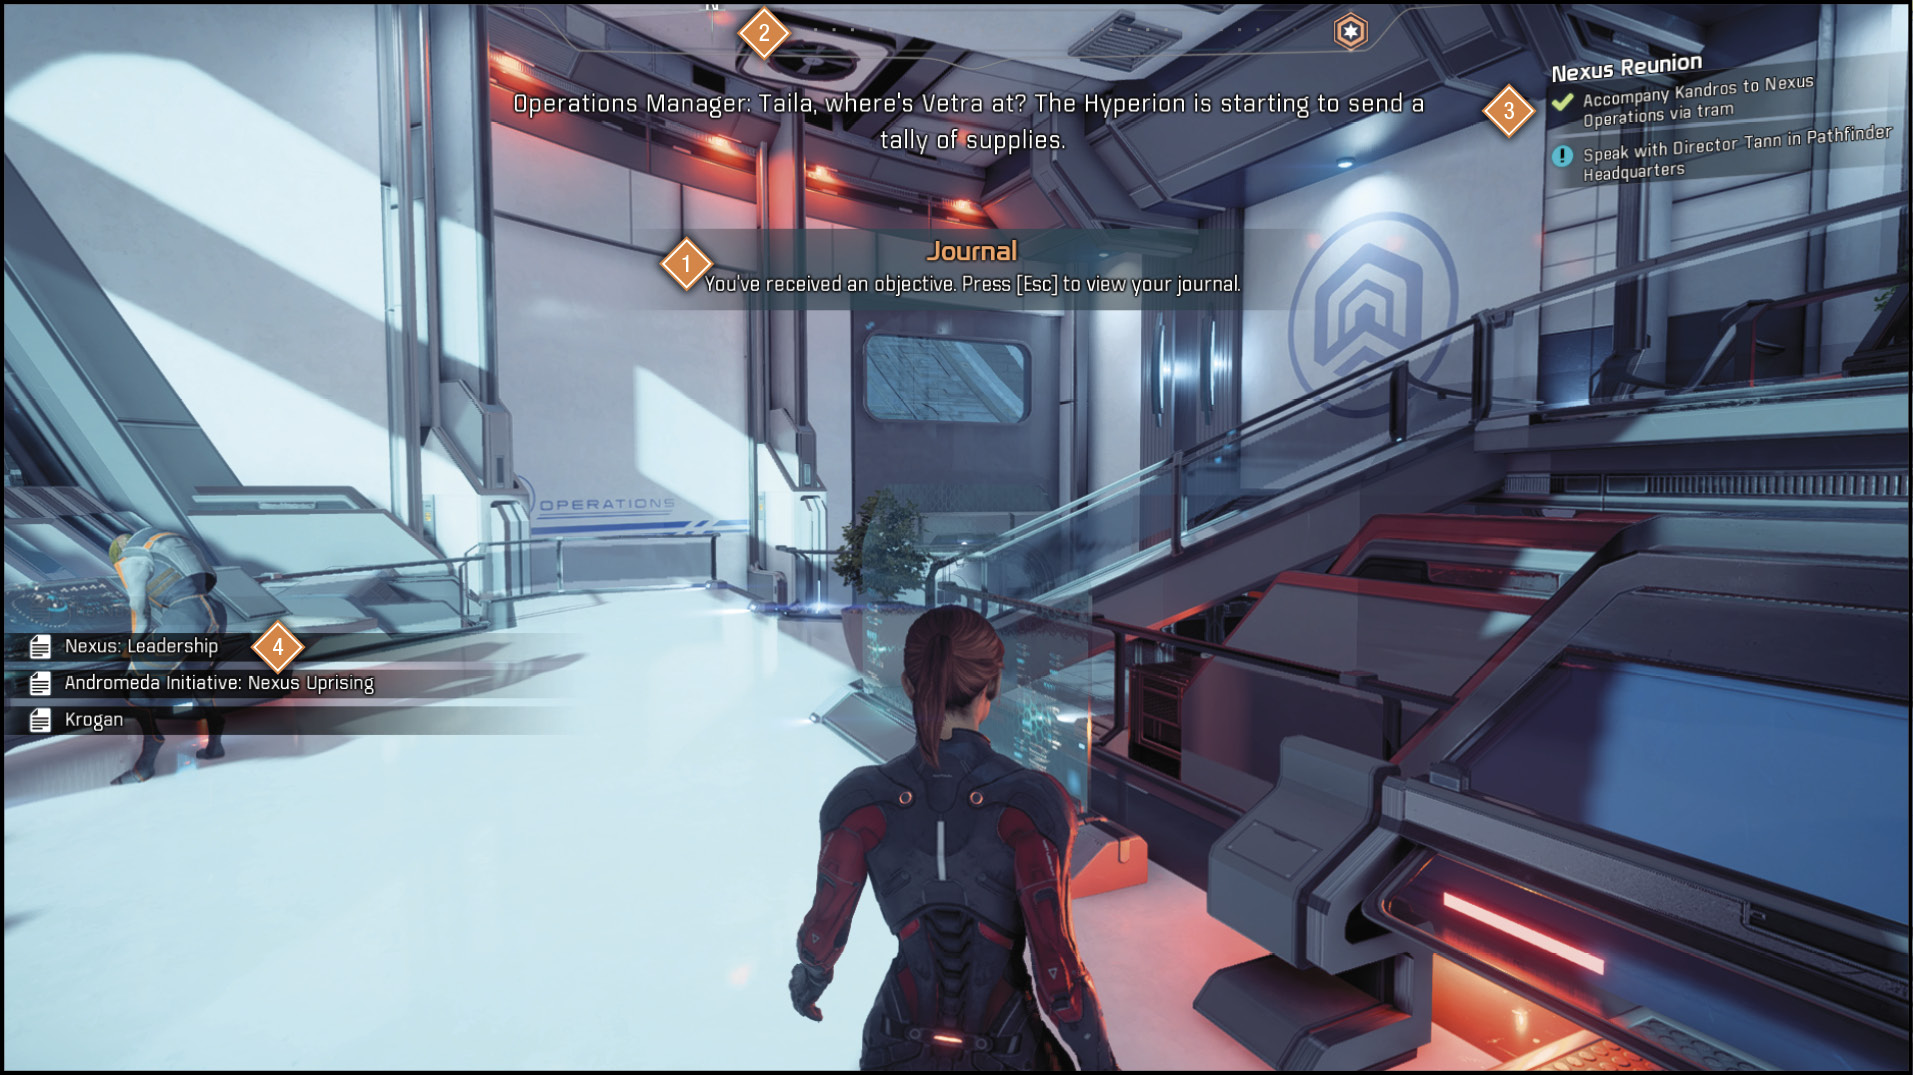
- Notifications: Pop-up notifications are displayed here. They can include tutorial text, Nexus threshold unlocks, and changes in Viability.
- Compass: The compass helps you navigate the area with cardinal-direction data to maintain your bearing. It places marker icons for almost everything relevant, such as the current active mission, your custom waypoint you’ve set through the map menu, and other points of interest that are marked on your world map. Sizes of the marker icons on the compass are scaled to their relative distance—the larger the icon, the closer the waypoint destination.
- Mission Tracker: The Mission Tracker window is set to the top right of the HUD and provides pertinent information concerning the currently active mission (which can be set through the map menu or through the Journal interface). It notifies you of important updates, such as the fulfillment of a mission objective or the acquiring of new missions.
- If missions other than the active one are updated, the Mission Tracker temporarily displays information for the recently updated mission instead.
- Codex Feed: Recent miscellaneous information such as new Codex entries, added items, and XP rewards are shown in a scrolling temporary feed to the left of the screen.
Conversations
Conversations provide opportunities for self-expression and making important decisions about story progression. A variety of choices and actions are available to you in conversations.
Story Choices
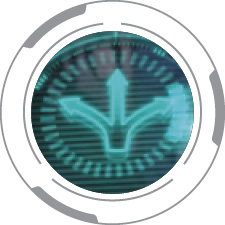
Story choices let you decide how the story unfolds through decisions both large and small. They are represented with a multiple-paths icon in the Dialog Options Wheel.
Tone Choices
Tone choices help define Ryder’s personality. Sometimes you have a choice between all four tones or a choice between two contrasting tones (emotional or logical, casual or professional).
Investigations
At times, you may want to ask questions and get more information from a character before making a decision. These options are represented by a question-mark icon inside the Dialog Options Wheel.

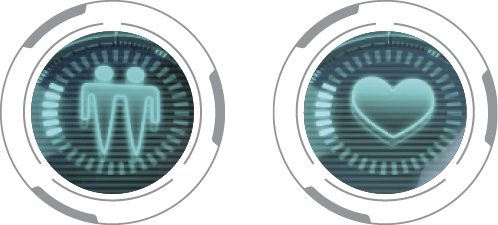
Friendship and Flirting: By choosing certain options, you can form close friendships with some characters or even pursue romances. (Some characters require you to earn their loyalty before progressing into a romantic relationship.)
Narrative Actions
Narrative Actions are prompts that can appear in the middle of a conversation. You have a limited window of time to decide if you want to perform the action displayed on-screen.
To intervene with an action, press the Tight Aim button before the on-screen timer ends.
Skipping
Most conversations and cutscenes can be skipped by using the assigned command.
Scanner HUD
Opening the scanner with the assigned button (or key) reveals an additional HUD overlay.
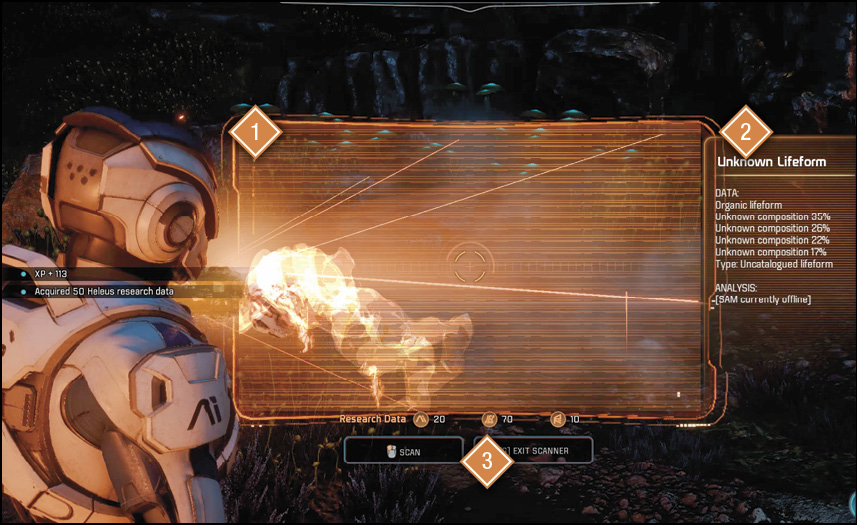
- Scanner Window: The scanner’s 3D beam projects a “window,” detecting scannable objects in range. Scannable objects that have not been examined are fully highlighted with a distinct orange, while scanned objects are only outlined.
- Scan Results: Details of the targeted, scanned object are to the right of the scanner window. If SAM is active, detailed and accurate information is shown, such as an object’s physical dimensions and its material makeup.
- Research Data: The three icons below the scanner window represent the amount of current Research Data. The left icon represents technology originating from the Milky Way, the center icon for all alien-related (Andromeda species) data, and the icon to the right represents data gathered on the Remnant.
Combat-Activated HUD
When your weapon is drawn, additional HUD elements appear, including a targeting reticle and squad status elements.
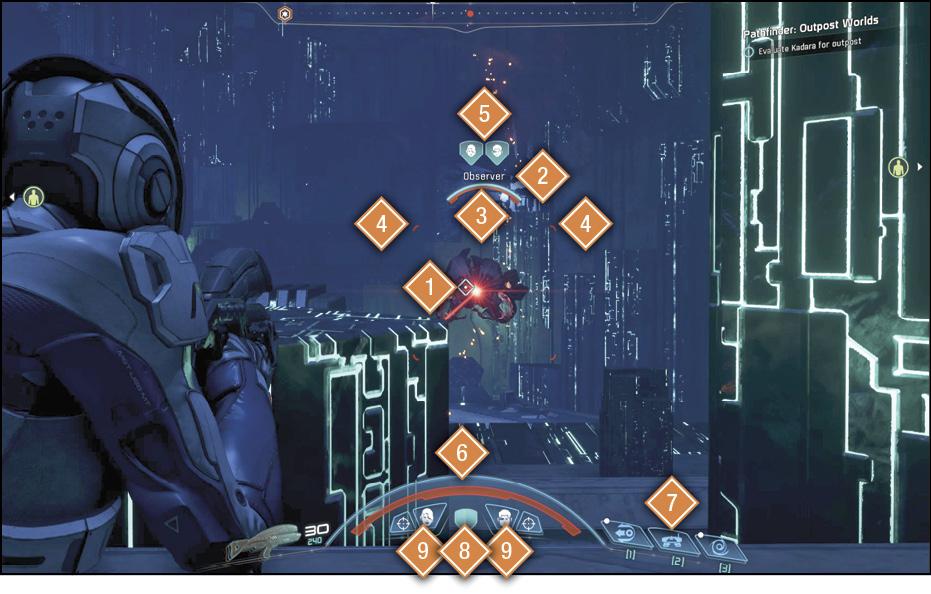
- Reticle: The HUD reticle (or “crosshair”) display system not only guides your weapon aim, but it also conveniently provides updated contextual information where your eyes are naturally focused. Reticle features include a hit marker, a reloading indicator, and target-locking functionality.
Normal Aim (Brackets) Reticle: The reticle’s bracket separation represents your weapon accuracy; the wider the bracket, the less accurate it is.
Tight Aim (Circle) Reticle: Holding the Tight Aim key brings up a weapon-contextual reticle, enhancing your accuracy. Reticle sizes and shapes depend on weapon type as well as weapon technology.
Scoped Reticle: While using a weapon equipped or modded with a scope (sniper rifles are all equipped with one), your zoom is amplified and your shots have pinpoint accuracy.Reload: While reloading, your crosshair is replaced with a reload animation.
Hit Marker: When your shots land, a cross-shaped hit marker is shown on your reticle. A white hit marker shows up for normal hits while an orange one is displayed for critical hits on weak points.
Target Eliminated: When the target you’re aiming at is killed, a large and distinct hit marker is displayed over the reticle. - Enemy Name: Enemy unit identification name. If unknown, this displays as “Unknown.”
- Health: Enemy health is displayed as a bar over the enemy’s name. Shields are represented by a blue bar above the normal health bar. Armor health is yellow and functions similarly to normal health, except armored enemies take less damage per hit and are immune to certain effects.
- Soft-Aim Target: Pointing your crosshair in the general direction of an enemy causes a soft-aim target lock, represented by a large bracketed rectangular reticle around the target. This secondary targeting system prioritizes the closest target to your cursor if there are multiple possible targets. Most damage-based powers (such as Charge and Overload) use the soft-aim target feature and do not require precise aim with your reticle, since these powers automatically seek out the enemy.
- Squadmate Target Icon: When ordering squadmates to attack an enemy, their profile icon is displayed above the enemy health bar.
- Shields and Health: The blue bar represents your regenerating shields, while the red bar shows your normal health. Health and shield regeneration begin after some time has lapsed since you were last damaged.
- Power Icons: Displays the status of the three active powers you have currently loaded. Recharge time of a power is represented by a vertical fill overlay. When the power is ready to use again, its icon blinks. See Powers in Combat Concepts Expanded.
- Cover Icon: Barriers, blast shields, and certain wall corners provide cover, protecting you from enemy fire. Whenever you’re in a cover state, a shield icon lights up beneath your health bar.
- Squadmates: Profile icons of your squadmates under your health bar provide information on their status and current actions.Status: When a squadmate takes damage, their profile icon lights up red. When they’ve been knocked unconscious, their icon is replaced with a red skull. Your field HUD marks your downed teammate accordingly.Action: An action icon next to the squadmate denotes their current action or power. A reticle means they’re attacking with their primary weapon, 7 means they’re en route to a location order, 3 means they’re regrouping with you, and specific power icons are displayed when in use.
The Weapon Wheel
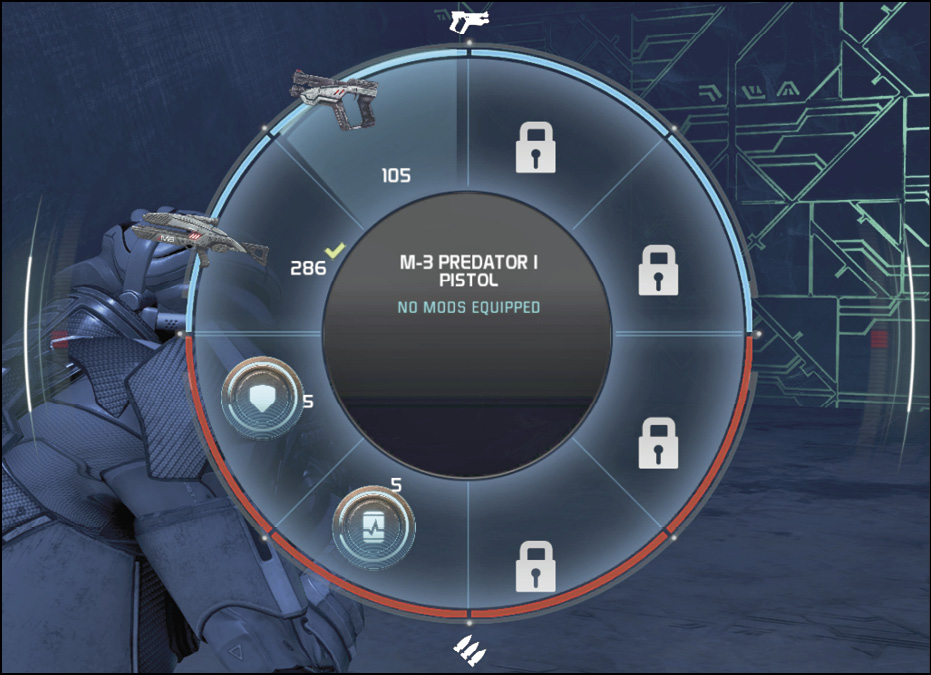
The Weapon Wheel Head-Up Display (HUD) can be pulled up to pause the game (even during combat). With this HUD active, you can activate consumables, swap weapons, or access the Favorites wheel.
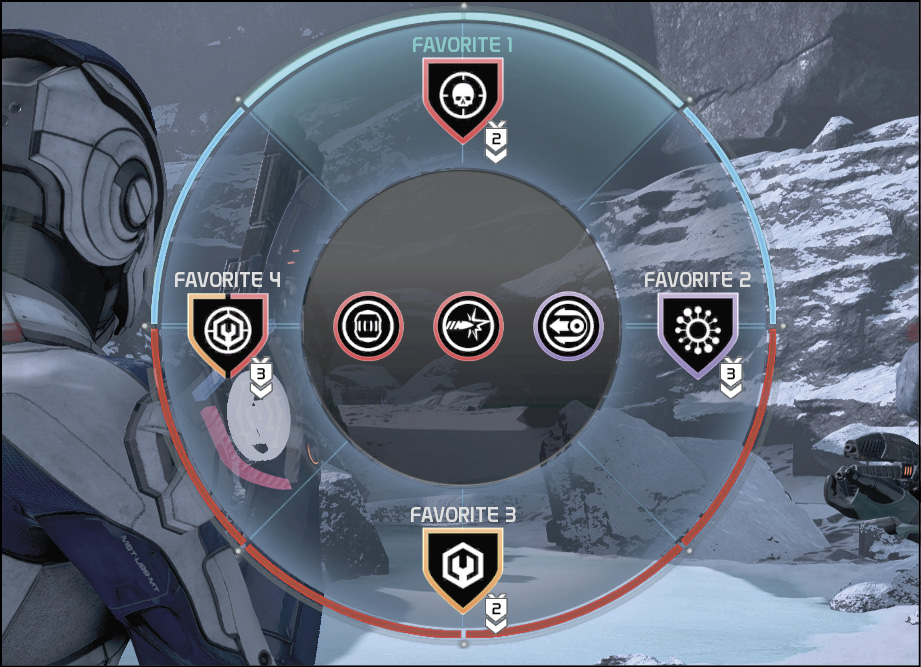
Favorites Wheel
The Favorites wheel lets you quickly swap between custom profile and power loadouts. Favorites can be assigned through the Skills and Profiles sub-menus using the assigned key to bring up its assignment interface.
Pause Menu
The pause menu displays your status, ranging from Ryder’s level, inventory capacity, available credits, Nexus Level, and mission details. You can also access various sub-menus using the radial wheel (or by clicking them if using a mouse). Within a sub-menu, you can navigate to other sub-menus indicated by a row of icons at the top of the screen. To see details regarding Level and Nexus Level, see the Game Mechanics Glossary.
Sub-Menus
Map Menu
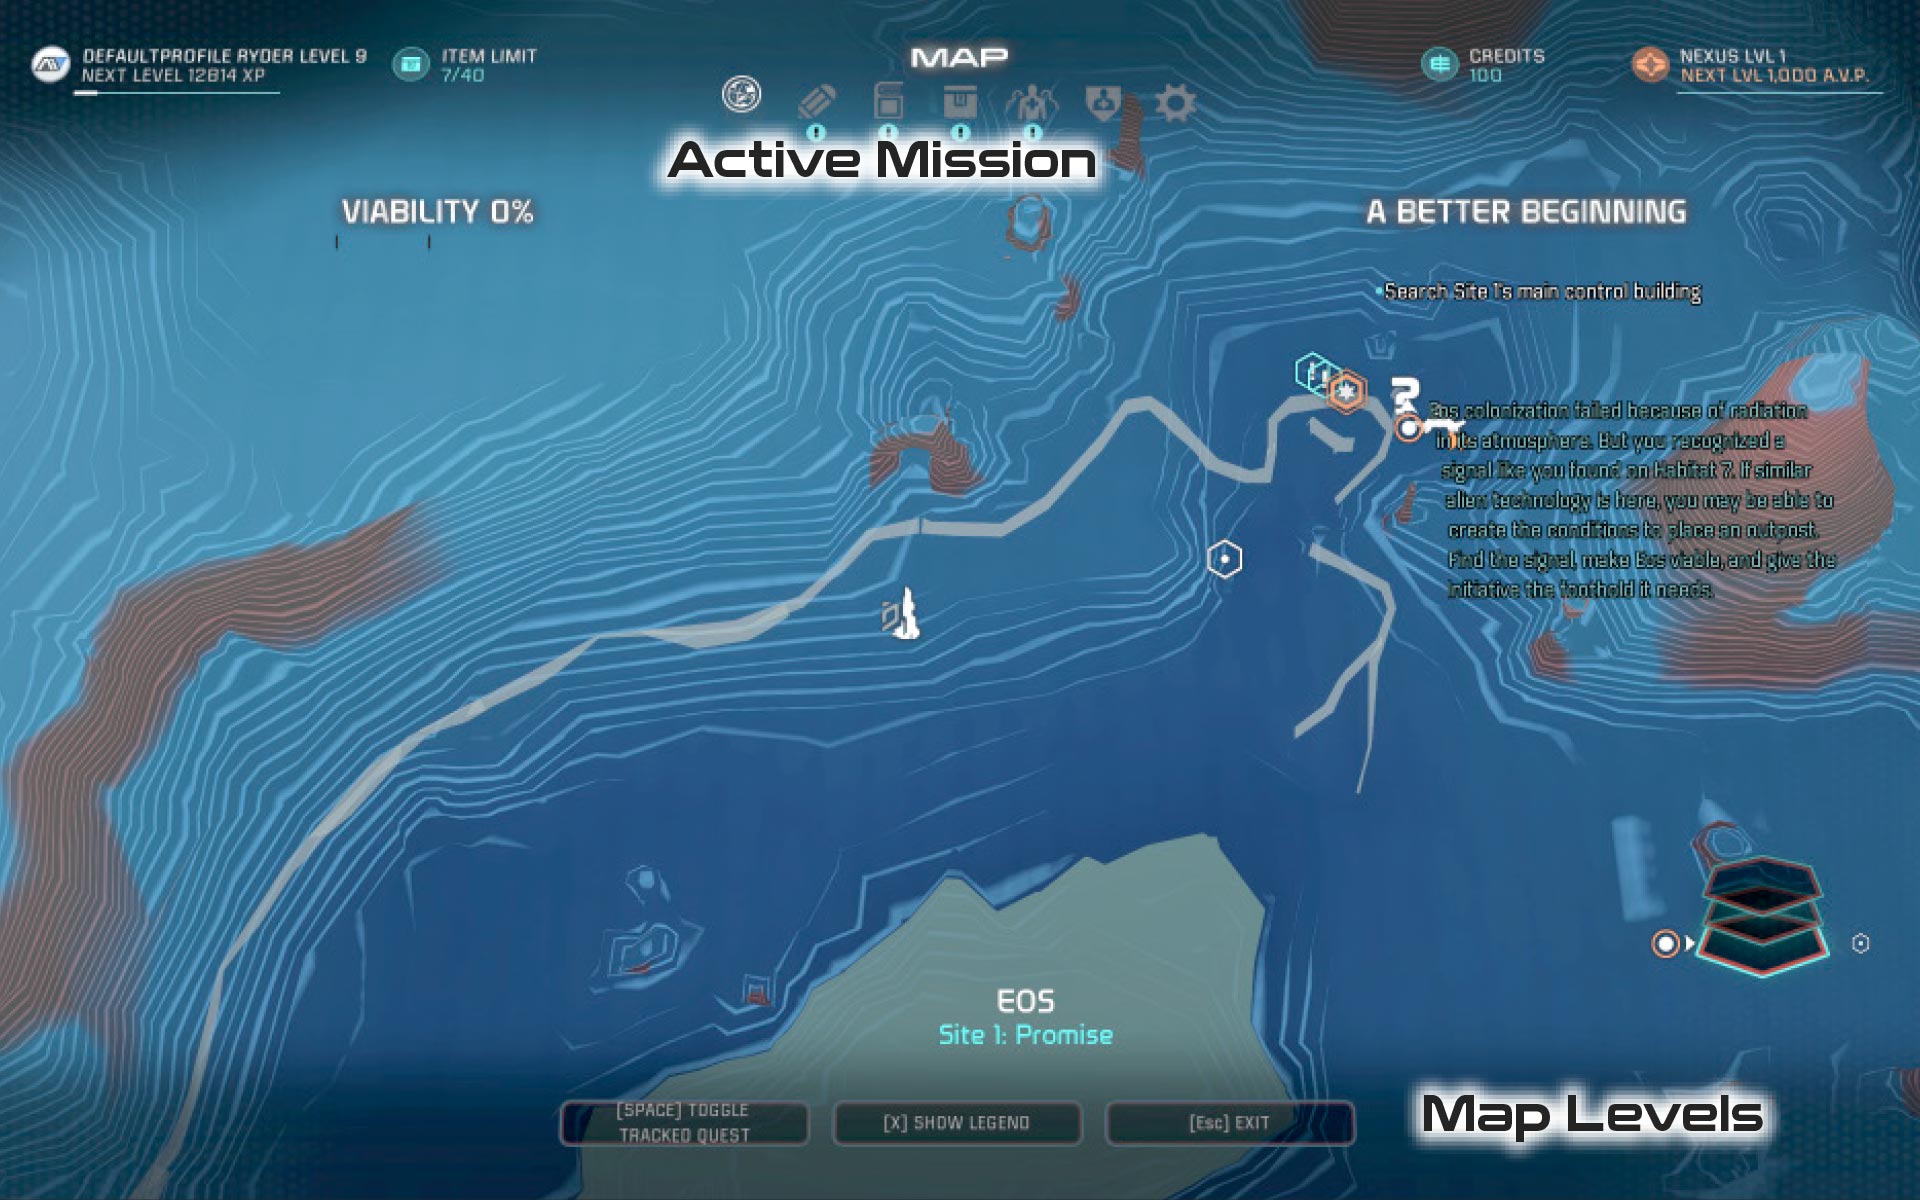
Zoom: Use 7 Right Analog Stick / 3 Right Analog Stick or Mouse Wheel UP/DOWN to control map zoom.
Set Waypoint: Use the assigned button displayed at the bottom of the screen while pointing at any part of the map (as long as it’s not a mission objective map marker) to place a custom waypoint (circle icon).
Set Active Mission: Identical to setting a waypoint but while a valid mission objective map marker is highlighted.
Switch Map Floor (or “Level”): See other floors of the current area by using 7 and 3 on the D-Pad (Xbox or PS4 controller). Using a mouse, click Mouse 1 on the floor navigation display at the bottom right of the interface.
Journal
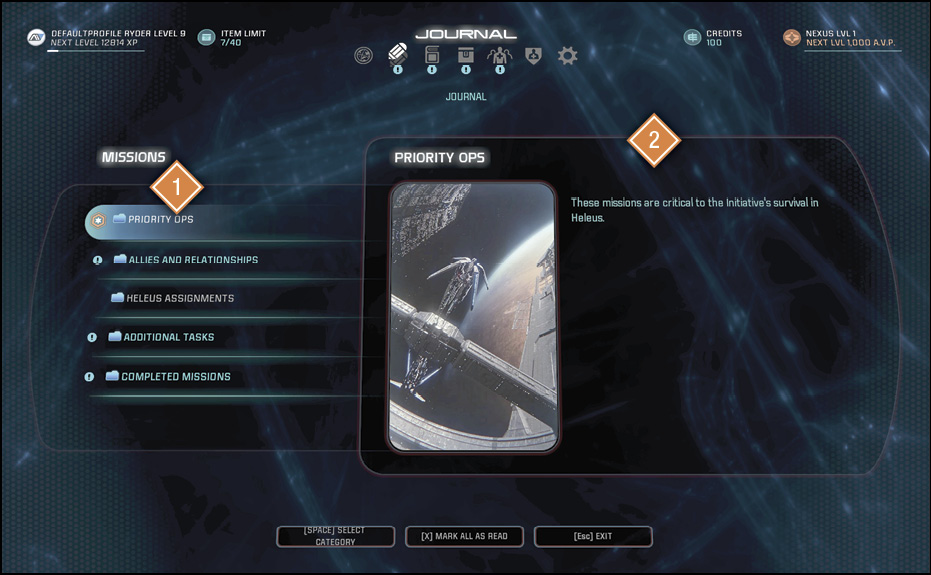
A mission is a catch-all term for a set of objectives to be completed. Most missions grant experience points when completed. The amount rewarded varies on a case-by-case basis.
- File Navigation Pane: The journal organizes missions into folders and is navigated as such, with some folders being further divided into subfolders. Use the assigned button (or key) shown at the bottom to track the selected mission.
- Description Pane: A description of a folder’s contents or details of a mission, including a checklist of its objectives.
Codex
The Codex is an information repository managed by SAM. Since it’s dynamically updated, it’s more like a pioneer’s personal journal than it is an encyclopedia. For details, see Codex in the Game Mechanics Glossary.
Inventory
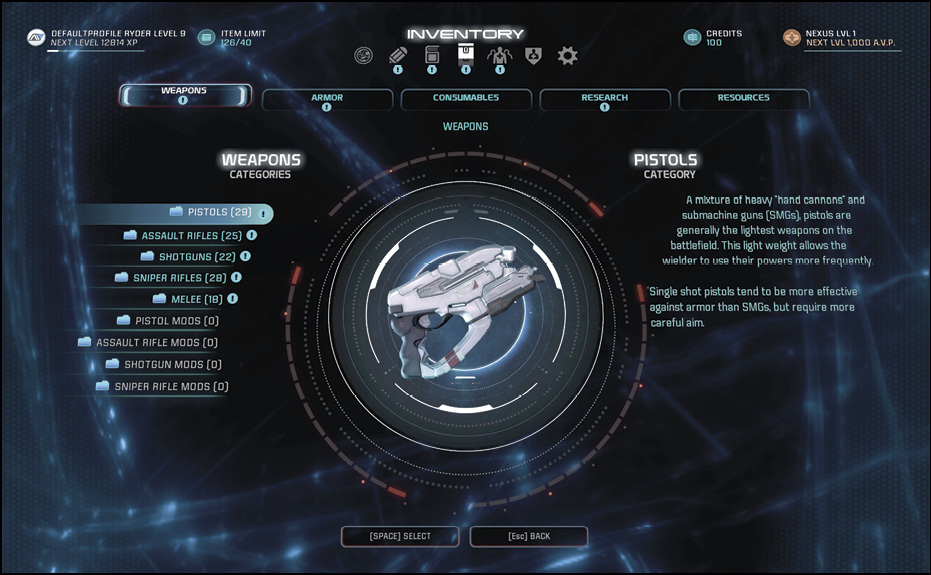
The Inventory interface is a comprehensive listing of all of your items, sorted by five labeled tabs near the top of the screen. You can navigate through item types by using 1 and 5 on the D-Pad on an Xbox/PS4 controller or click Mouse 1.
Item Limit: You can only hold a finite amount of items, but not all items affect your carry-capacity. Only weapons, armor, mods, and consumables contribute to your item total. Salvage, research blueprints, and materials do not count toward this total.
Deconstruction: Deconstruction is the process of breaking down or destroying an item in your inventory in order to free up item space.
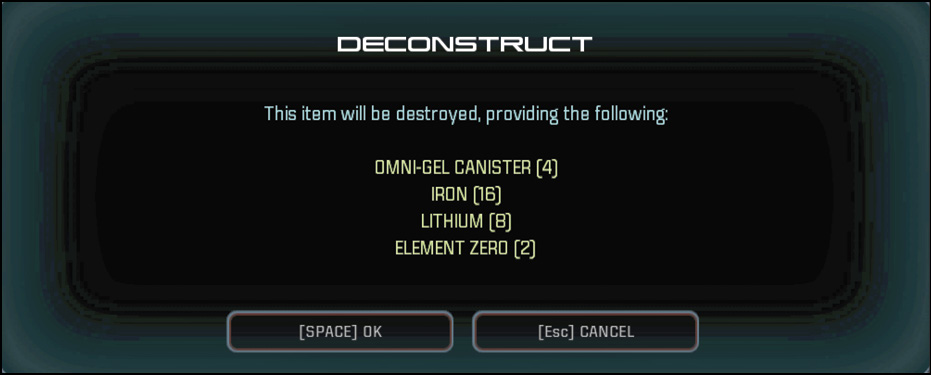
To deconstruct an item, select it in the Inventory menu and press the assigned Deconstruct button. A dialogue confirmation box appears with a list of materials recovered if you choose to complete the process. All weapons and armor grant materials when deconstructed. Other items are simply destroyed (equivalent to throwing them away or dropping them).
Skills
The skills menu is used to manage the squad’s abilities and powers. By spending skill points (earned from leveling up), you can unlock additional active and passive powers or upgrade existing ones. Additionally, this interface is used to assign powers to your powers loadout, as well as to access the Favorites configuration interface (see the bottom of the skills HUD for command and input assignments). For a comprehensive list of Ryder’s skill trees, see Skills in Combat Concepts Expanded.
Profiles
Profiles are special settings that augment your combat effectiveness. The Profiles interface is unlocked shortly after the prologue mission. See Profiles in Combat Concepts Expanded for details.
Game
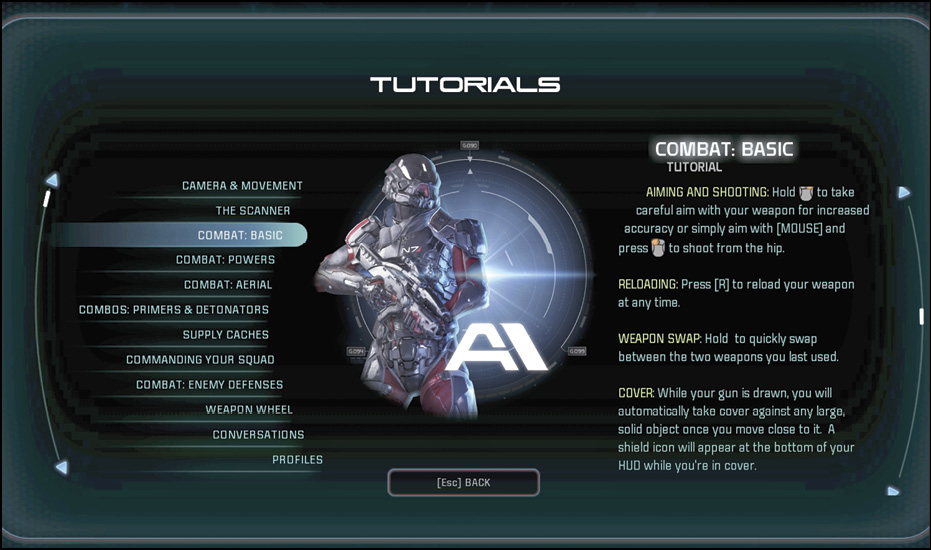
Use this sub-menu for miscellaneous options, including loading saved games, changing game settings, and accessing helpful in-game tutorials.
The Loadout Interface
The Loadout interface is introduced upon receiving the Tempest, shortly after the prologue mission. It’s used to swap squadmates, modify and manage equipment, and change Nomad customizations. It’s important to note that you cannot perform any of these functions otherwise.
The Loadout menu is launched whenever you deploy to a non-hub area (areas with potential combat encounters). All forward stations provide a Loadout terminal for convenience while exploring a UNC. The Tempest has a Loadout locker installed near the bridge.