
Mass Effect: Andromeda Collector's Edition Guide Multiplayer Multiplayer Enemies
Outlaws
The Outlaws consist of angara and Milky Way species who, for various reasons, have allied themselves against the Pathfinder and APEX teams. Some of them are members of the angaran Resistance, who want all other species out of the Heleus Cluster. Some are a splinter group from the arks who no longer have faith in their leaders. Most, however, are criminals and pirates looking for personal gain in the lawless Cluster.
With the help of the Sharpshooter, the Outlaws excel at maintaining suppressing fire at long distances. Take them down first to prevent the enemy from moving in and surrounding you.
As biological units, Outlaws are weak against cryo and take extra damage from fire-based attacks. Electrical attacks work well for taking down their shields.
Adhi
Fast-moving melee units that can quickly close the distance on their targets. These enemies can vault over low and medium cover. Their primary purpose is to flush the player into the open.

Combat Behavior
The Adhi rushes directly toward its target and attacks in melee, leaping if the path is clear, then swiping with it claws. Have a close-range weapon or power ready at all times as your key defense against the Adhi.
It’s possible to kill the Adhi with melee attacks, but use this tactic only as a last-ditch effort. It’s risky, since standing up to perform a melee attack exposes you to enemy fire, and the attack doesn’t complete the kill in itself. If you miss, you could get locked into the Adhi’s strong Sync Attack, which causes damage over time, made worse by any additional incoming enemy fire.
Special Behavior
Sync Attack: The Adhi latches on with its huge jaws, and the player must fight it off. This attack deals damage over time, so the faster the player ends the Sync Attack, the less damage taken.
Fighting Tactics
Much like other rush-type units, the Adhi will fearlessly attack your position. Prepare yourself with a shotgun or a backup plan! Assault rifles and submachine guns can be blind fired from behind cover when the Adhi get close, allowing you to quickly dispatch them.
If you fail to dispatch the threat with one clip, you may find yourself in a bad position with an Adhi closing in while attempting to reload. Try to defeat the weakened Adhi with a melee attack, or jump and hover to give yourself some extra time. Keep your back against a wall to prevent these units from sneaking up from behind, forcing them to come straight at you. This allows for the most amount of time to react and respond to their threat.
Raider
The Raider uses armor to protect itself, but it’s generally weak. Its weapons are effective at medium-to-long range, and its equipped grenades help push players out of cover. The Raider is substantially weaker at short-to-melee range, so unless Raiders are supported by stronger short-range enemies, your dominant strategy is to close in on them.

Combat Behavior
The Raider’s behavior is standard for Mass Effect: Andromeda—it stays behind cover, popping up to take shots at the player.
Special Behavior
If you take cover and don’t engage the Raider for a short time, it throws a grenade to flush you out.
Extra Info
Raiders come from different species, and while they all wear the same armor and thus look the same, one key variation differentiates between the species—the weapon.
| Species | Weapon |
|---|---|
| Human | Avenger |
| Angara | Sandstorm |
| Salarian | Sandstorm |
| Asari | Mattock |
| Turian | Revenant |
Fighting Tactics
Eliminate the Raiders as quickly as possible to avoid their deadly grenades. These grenades will flush you from cover and open you up to attack from other nearby enemies. A good sniper can make short work of a Raider with a well-placed headshot or body shots courtesy of the more powerful sniper rifles like the Isharay. Although a single Raider isn’t much of a threat, they can quickly stack up and begin throwing grenades if they are not eliminated right away.
Sharpshooter
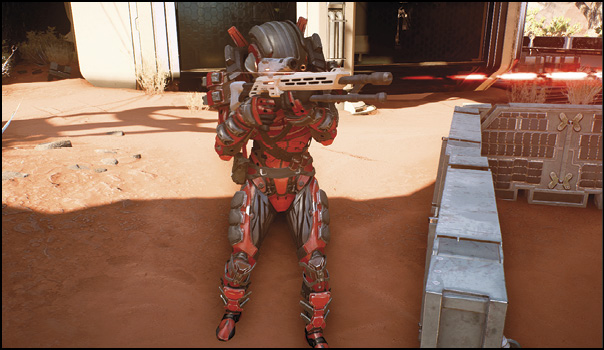
Highly mobile sniper, equipped with a sniper rifle. Its mobility comes from its jet pack, which it uses to evade the player. Sharpshooters are particularly good at attacking the Nomad because of their high damage, long range, and their evasive ability.

Combat Behavior
The Sharpshooter prefers to keep its distance. Be aware of cover along the edges of high ground, where they can get especially long lines of sight. All Sharpshooters are snipers.
Special Behavior
Air Force Recovery: The Sharpshooter can use its jet pack to recover from disabling biotic effects while in the air.
Laser Sight: Whenever the Sharpshooter attacks, it starts by aiming with a laser sight toward its target. The sight is active for a moment or two before it fires, which signals both the shot’s destination and origin.
Extra Info
While Sharpshooters all look the same on the outside, each species of Sharpshooter uses a different weapon.
| Species | Weapon |
|---|---|
| Human | Viper |
| Angara | Isharay |
| Salarian | Widow |
| Asari | Vanquisher |
| Turian | Raptor |
Fighting Tactics
Fight fire with fire! Use a sniper rifle to quickly take down enemy Sharpshooters. Critical hits to the head will deal a large amount of damage and momentarily stun them, allowing you to safely line up another shot. If your weapons and powers cannot effectively damage a Sharpshooter, move from one point of cover to another between the Sharpshooter’s shots, using your Dash ability to evade their aim until you are within striking distance.
Specialist
Species-specific characters within the Outlaw faction, each with special abilities and names. While the following characters are considered specialists, they’re referenced by the display names given below.
Specialists
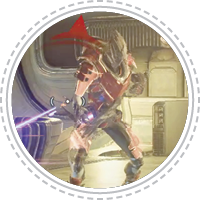
Anarchist
Display Name: Anarchist
Species: Turian
Description: The turians have developed a grenade that, once exploded, leaves a pool of fire on the ground, instantly abolishing the safety of your cover.
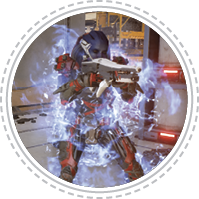
Pariah
Display Name: Pariah
Species: Asari
Description: Even without proper training, these asari have mastered a few biotic attacks.
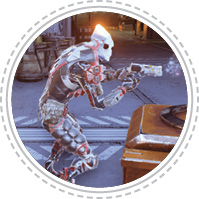
Agent
Display Name: Agent
Species: Salarian
Description: Salarians are master spies and have some of the best tech in the Milky Way. They prefer deception to straight-up fighting, so many bring holograms into battle.
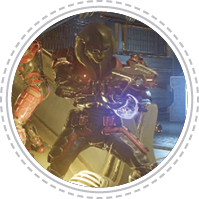
Saboteur
Display Name: Saboteur
Species: Angara
Description: All angara can manipulate electromagnetic energy, which makes them dangerous versus shields.

Combat Behavior
Specialists prefer mid-to-close range, sticking to cover. They attempt to get in close and attack with their pistols or shotguns.
| Name | Weapon | Type |
|---|---|---|
| Anarchist | M-23 Katana | Shotgun |
| Pariah | Disciple | Shotgun |
| Agent | Sidewinder | Heavy pistol |
| Saboteur | Ushior | Heavy pistol |
While specialists fight in a similar manner to the Raiders, your best bet is to engage them at medium-to-long ranges to prevent their close-range weapons from giving them the advantage.
Special Behavior
Each specialist possesses one special ability that sets it apart from the others.
| Name | Ability | Description |
|---|---|---|
| Anarchist | Inferno Grenade | An Inferno grenade that leaves a large burning area on the ground after impact, forcing you to evacuate your area or take continuous damage. |
| Pariah | Backlash | Creates a shield that reflects ammo back onto the attacker. Once activated, the Pariah leaves cover and attempts to flank the player. Wait for the shield to drop before attacking to avoid damaging yourself. |
| Agent | Hologram | The hologram moves and animates, but does no damage and shoots no actual projectiles. The hologram has a VFX scanning effect like an old television that distinguishes it from salarians, as well as much lower health. |
| Saboteur | Electromagnetic Drain | The Saboteur drains its target’s energy, stealing shields and adding to its own via a beam. |
Hydra
By buying illegal (and quite hazardous) materials off the black market, the Outlaws have cobbled together large mecha-suits.

Combat Behavior
The Hydra walks slowly toward its target, using its basic attack—a chain gun—to keep the target pinned while raining down rockets. Once in range, it engages its boosters to leap at its target and engage in melee, massive arms swinging in wide arcs.
Take advantage of the Hydra’s slow speed to avoid and flank it. The Hydra has a weak point on its back; destroy it to stagger the Hydra.
Special Behaviors
Mortar Volley: At medium range, the Hydra marks the target with a laser sight, then stops and lobs rockets. Keep moving or get behind a large piece of cover to dodge the rockets. If you’re willing to take the risk, this is a great opportunity to attack the Hydra’s weak points.
Leap Attack: A short-range rocket-assisted leap attack with an impact around it. This deals high damage but also features a short recovery period, allowing you a window to attack its weak points freely. If the leap attack connects within close proximity to you, it transitions into a Sync Attack.
Melee Attacks: The Hydra swings its arms in wide arcs, dealing heavy damage. Much like the leap attack, a small recovery window allows you to maneuver and deal damage to its weak points.
Extra Info
Destroying the front weak point, the targeting lasers, disables the Hydra’s ability to lock on and fire its rockets accurately. This doesn’t stop it from using its rockets. The Hydra attempts to lock on to a target before failing and firing its rockets into the sky. This allows you ample time to attack its other weak point or evade to get into a better position.
Fighting Tactics
Both weak points of the Hydra can be attacked from the front. A high-powered sniper rifle can make short work of each weak point. The targeting system (or “eyes”) can only be hit from the front, while the rear weak point can be targeted from either side. The rear weak point offers a higher damage multiplier than the front until it is destroyed. Destroying this weak point will stagger the Hydra and deal a large amount of damage.
Use fire and abilities to apply damage over time while also keeping your distance from the Hydra. Although this only deals a small amount of damage, it will add up over time. When primed with Ice, the Hydra will take bonus damage but will not completely freeze.
Berserker
The krogan Berserker typically does not make use of cover. Instead it prefers to stand out in the thick of battle equipped with heavy armor and a flak cannon. Berserkers’ main role in combat is to find targets in cover and flush them out with blasts from their flak cannons.

Combat Behavior
The Berserker lobs a projectile in an arc toward its target that explodes overhead and rains down smaller projectiles. The smaller projectiles do less damage, which allows you to stay in cover and fight until the Berserker is in close range.
Special Behavior
Krogan Charge: If the player is within four to five meters and the Berserker has a clear path, it initiates a charge, dealing damage upon arrival.
Krogan Melee/Headbutt: Once within melee range, the Berserker begins hitting its target with its weapon. Alternatively, the Berserker may attack with a headbutt, dealing heavy damage.
Blood Rage: When the Berserker takes a set amount of damage or is hit with incendiary, cryo, or electric powers, it becomes enraged. By charging up its rage, it gains a small amount of health and rushes, attempting to kill the player with melee attacks. Shots that hit anything other than its weak point (head) deal less damage, while shots to its weak point maintain their damage value.
Fighting Tactics
The Berserker’s flak cannon allows them to engage you from a greater distance than their shotgun. The flak cannon can also cause a large amount of damage if you take a direct hit. After the initial shot from the cannon impacts a target, it explodes into small fragments dealing AoE damage in a small area. The flak cannon shot can stun you, shutting down channeled/continuous attacks like the Flamethrower or Cryobeam.
Once the Berserker enters its blood rage state at low health, it will cease to use the flak cannon. This allows you to use close-range attacks in an attempt to kill them before they reach you.