
Elder Scrolls V: Skyrim Special Edition Guide The Atlas Solstheim: Southern Ash Lands
[S.S12] Ashfallow Citadel
[S.S12] Ashfallow Citadel
Related Quests
- Solstheim Side Quest: Served Cold
- Solstheim Side Quest: The Great Solstheim Strongbox Hunt*
Recommended Level: 25
Dungeon: Military Fort
- Mirri Severin
- Morag Tong
- Tilisu Severin
- Vendil Severin
Crafting
- Alchemy Lab
- Arcane Enchanter
Dangers
- Bear Trap (5)
- Swinging Wall Trap (3)
- Spear Trap (2)
Collectibles
- East Empire Strongbox [DB30/33]
Miscellaneous
- Area is locked
- Chest
- Potions
- Loose gear
Exterior
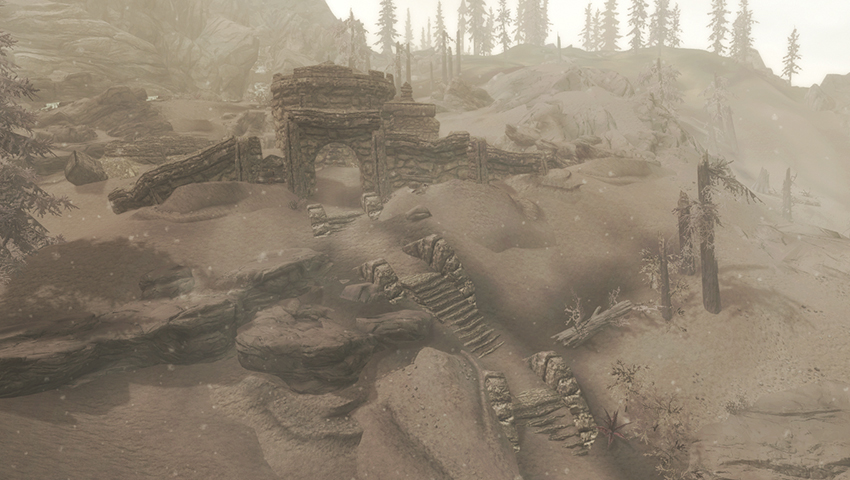
An old Imperial fort now controlled by the Morag Tong (an ancient assassins guild from Morrowind who pray to Mephala), Ashfallow Citadel is an unassuming ruin from the outside. The fort is half buried in ash, and enemies prowl only the stone battlements if Solstheim Side Quest: Served Cold is active. Stone piles stained with blood and bone dissuade you from exploration, but aside from the steep ground, there’s little to threaten you here (until you enter).
- Morag Tong
- Heart Stone Deposit (2)
Interior
 Door to Solstheim
 Tower Room
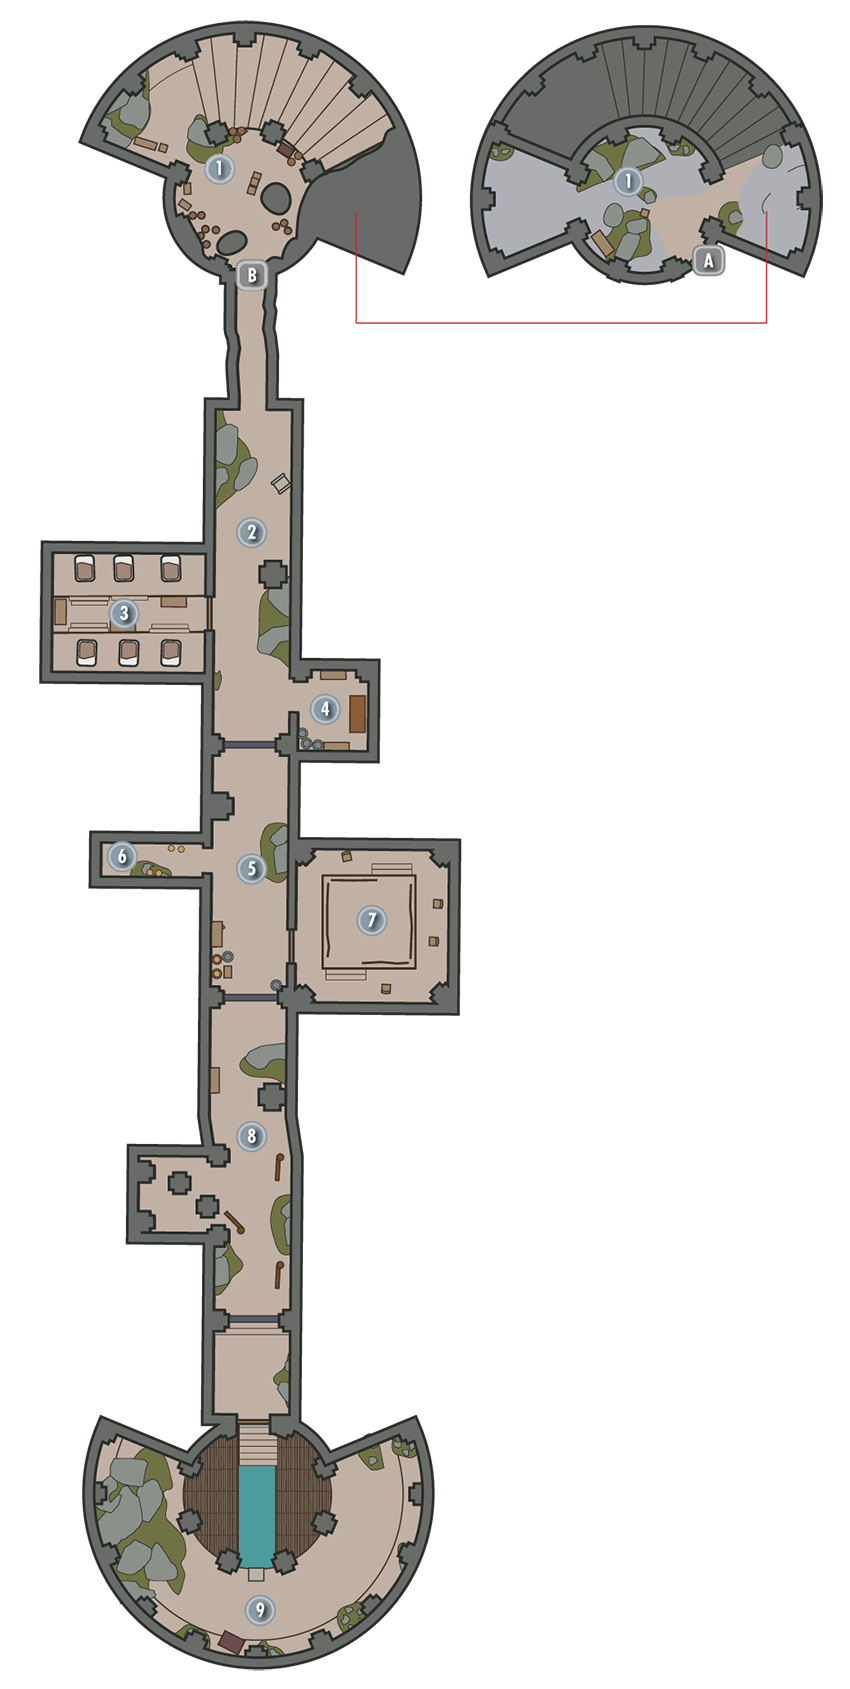
Check the bookshelf to your left (west), where an East Empire Strongbox [Expert] sits on the middle shelf. There’s a skeleton to loot and steps down to the north. These lead to a storage room with a chest and a narrow tunnel, which is sealed unless Solstheim Side Quest: Served Cold is active. Morag Tong appears only during this quest.
- Morag Tong
- East Empire Strongbox [Expert] [DB30/33]
- East Empire Pendant
- Chest
 Rock Wall Entrance
There are no levers or chains to pull; this rock wall only recedes during Solstheim Side Quest: Served Cold.
 Dungeon Corridor (Part 1)
This corridor is filled with pull chains to remove the numerous iron bars preventing your progress. Ahead is an open door to your right (west) and a bookcase of books.
 Assassins’ Dormitory
Clear this dormitory of assassins and any other foes you find. Grab any books, chitin, or Morag Tong armor you wish, then head back to the main corridor.
- Loose gear
- Safe [Adept]
 Magic Preparation Nook
Locate a small chamber with an Alchemy Lab, Arcane Enchanter, books, potions, and a pull chain by the entrance. Yank the chain to remove the bars.
- Morag Tong
- Crafting: Alchemy Lab, Arcane Enchanter
- Potions
- Loose gear
 Dungeon Corridor (Part 2)
Note the three Morag Tong assassins you must kill. Don’t pull the chain on the left wall (it raises the bars behind you). Farther down the corridor is another barred area and a bookcase.
- Morag Tong
- Book: Ahzidal’s Descent
 Bear Trap Passage
Watch out for bear traps before you reach another chain. Pull that, which removes the first set of bars farther down the corridor.
- Danger! Bear Trap (5)
 Training Room.
Outside this door is a third chain, which opens the next part of the corridor. Inside is a training ring and some loose gear. If you didn’t kill Mirri Severin back in Raven Rock, she will confront you here.
- Mirri Severin
- Morag Tong
- Loose gear
 Dungeon Corridor (Part 3)
In the next part of the corridor are eight pressure plates linked to three separate swinging wall traps and two wall spear traps, so take extreme care as you tread forward. The safest way to reach the two pull chains in the alcove to your right (west) is to look down and avoid all pressure plates; maneuver past the alcove, turn right, and edge between the left wall of the alcove and a swinging trap. Watch for more plates as you look for two pull chains, both on the pillars in this alcove. They open the two remaining bars.
- Danger! Swinging Wall Trap (3)
- Danger! Spear Trap (2)
 Vendil Severin’s Quarters
Ignore the pull chain to your right, just before the final arched entrance, as this simply raises the bars directly behind you, cutting off your only retreating route. You must slay Vendil Severin, along with his fellow assassins, including Tilisu, if she still lives. When Vendil finally yields, check his corpse for the key to his manor in Raven Rock.
- Tilisu Severin
- Vendil Severin
- Severin Manor Key
- Morag Tong
- Chest