
Elder Scrolls V: Skyrim Special Edition Guide Training Training Part 3: Adventuring Across Skyrim
Dungeon Exploration
Dungeon Exploration
Finding Your Way
Whether you’re assaulting a ruined fortress filled with bandits or stealthily creeping through some long-forgotten crypt, dungeons are at the heart of your adventuring experience. Although they may appear confusing at first, the winding tunnels and twisting corridors generally lead to a final chamber, where you must defeat a powerful foe to claim your reward. In Skyrim, many dungeons also have a secret exit or shortcut—a hidden passage, barred door, elevated tunnel, or dwarven elevator that leads back to the entrance. This allows you to exit a dungeon without having to backtrack.
Lighting Your Way
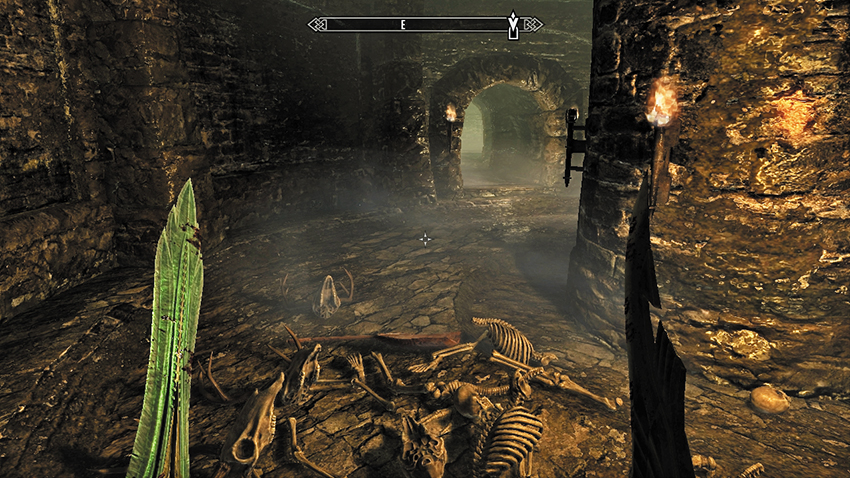
Carrying a torch or employing a staff or spell to light your way makes the frightening darkness of dungeons a little less intimidating. Be sure to have a light source tagged as a Favorite so you can quickly switch between it and your combat weapons as needed.
Khajiit and vampires can call on their Nighteye power to see in the dark, allowing them to more easily slip through the darkness undetected.
Also note the positions of lanterns, torches, and braziers inside dungeons, as they are almost always visual cues that point you in the correct direction. If you’re lost, look for these light sources to guide you.
Dungeon Puzzles
Many dungeons were sealed for a reason—they contain the dormant (and often undead) remains of a once-powerful entity. To protect these tombs from grave robbers and brigands, the ancient Nords concocted many puzzles to flummox and foil the unwary. The same is true inside Dwarven Ruins, but on a far grander scale. Here is what you can expect:
Switches, Levers, Chains, and Handles
If you’re stuck in a chamber, look for any of these devices to open the doors, gates, and portcullises that prevent your progress. Chains are usually the most difficult to spot, hanging on a gloomy wall. Sometimes, these must be triggered in a specific order to open the path forward.
Nordic Puzzle Door
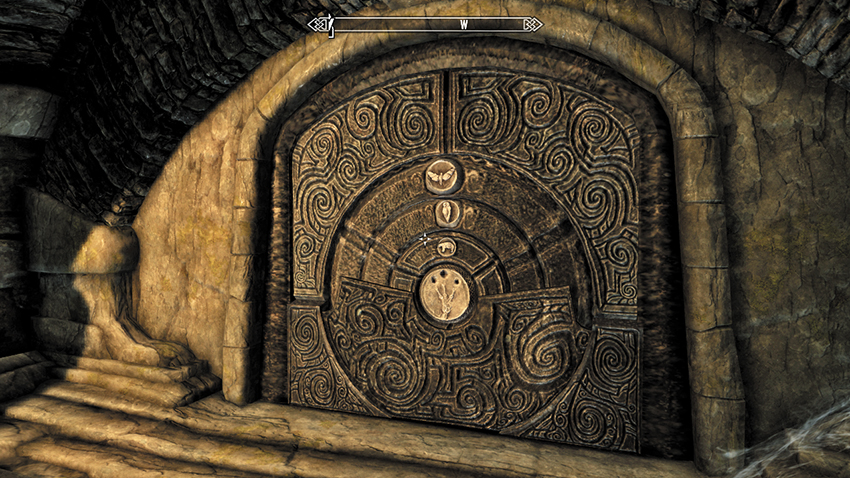
A series of concentric metal rings are embedded in an impenetrable door, each embossed with three animal glyphs. Explore the dungeon to find the Dragon Claw associated with the door—a precious artifact that holds the key to this puzzle. In your inventory, inspect the palm of the claw to find the solution to the door. Line up the three animals glyphs in the correct order, then activate the central “keyhole” with the Dragon Claw to unlock the door.
Nordic Puzzle Pillars and Petroglyphs
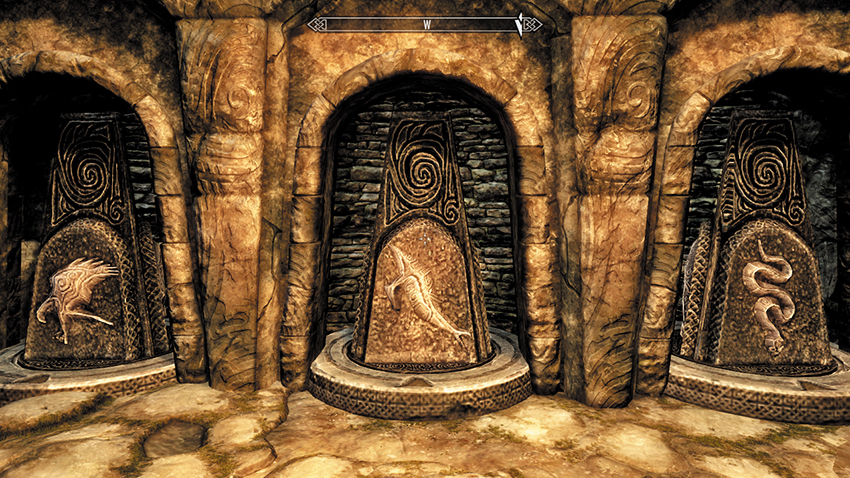
Many chambers require you to rotate two or more stone pillars to face the correct direction in order to open a path forward. These pillars have been inscribed with a set of animal petroglyphs, which correspond to another set of glyphs somewhere in the surrounding chamber. Match the two sets of animal carvings to solve the puzzle.
Rotating Walls
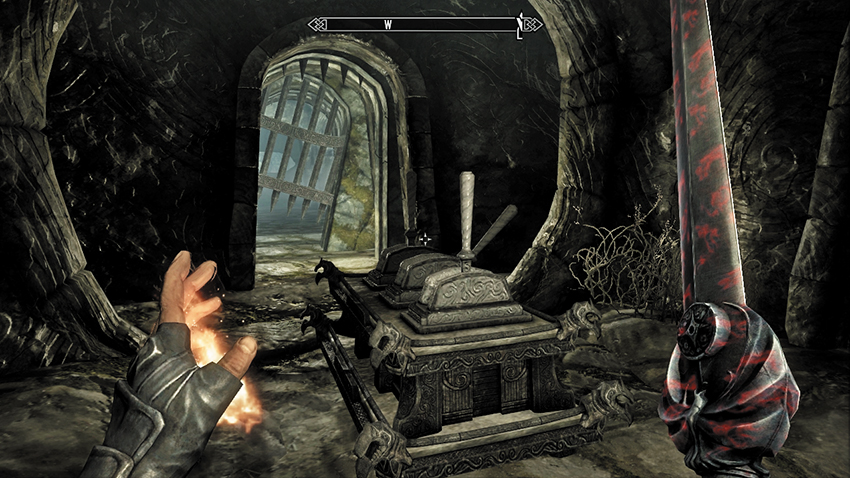
Stone walls controlled by a hidden mechanism can rotate to open or close paths in a dungeon. When you encounter them, look for a set of Nordic Puzzle Pillars or a lever, chain, or switch you can use to open the way forward.
Dwarven Puzzles
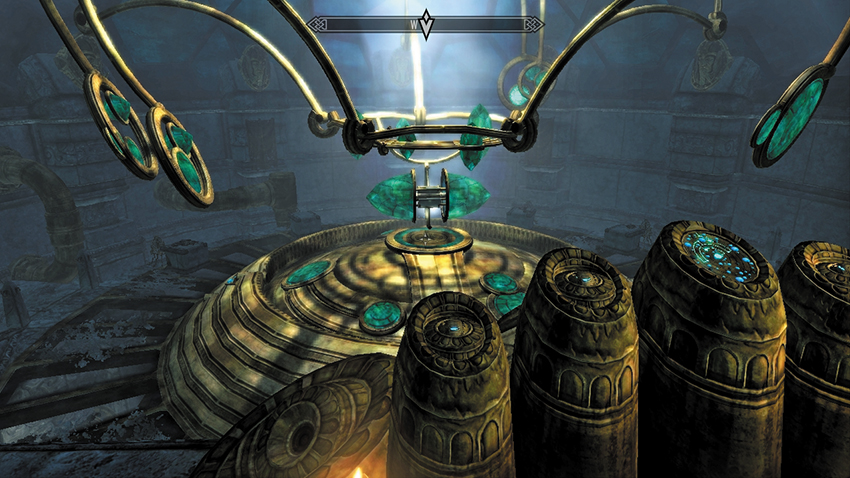
Long ago, the ancient dwarves constructed immense clockwork mechanisms and complex steamworks. The ruins of this long-lost race still yield a variety of intricate and unique puzzles, from trying to stop the flow of poisonous gas into a chamber, to carefully aligning a system of mirrors in an Oculory, to inserting an otherworldly key into a strange slot. In some cases, you may need to find the “key” object beforehand, or your progress will be limited at best.
Other Puzzles
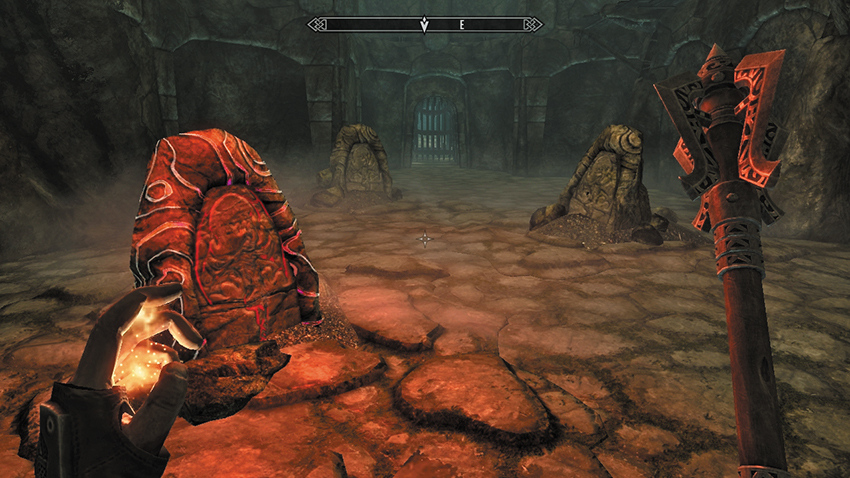
There are occasionally other puzzles that are more complicated, requiring a Shout or other technique to solve. These are duly noted.
Traps and Triggers
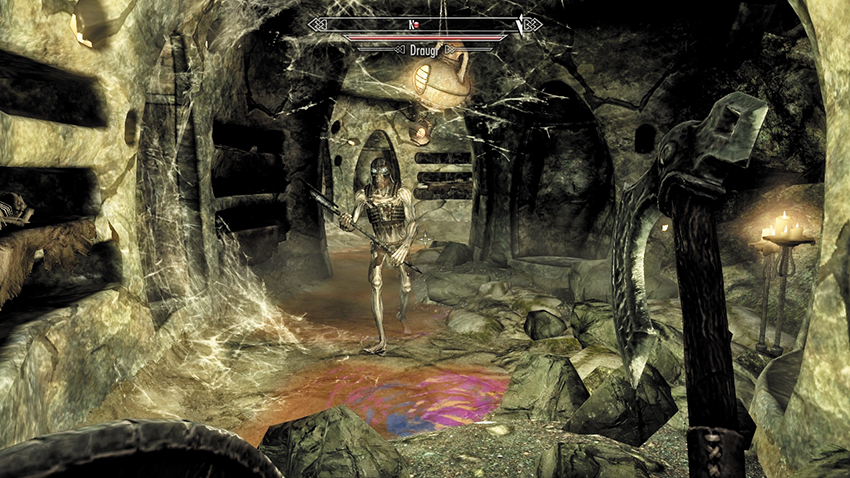
Dungeon exploration would be nowhere near as terrifying without the uncertainty of possibly stumbling over a tripwire and being pincushioned by a dozen rusty darts! Throughout your adventure, expect to run into, step on, or trigger any of 30 different traps. The following chart lists every major type of trap and trigger, along with advice on how best to avoid them.
Note that most traps have a small chance of infecting you with a random disease. It might be worth keeping around a Cure Disease potion just in case...
| Trap | Damage | Threat Level | Most Common In… | Tips |
|---|---|---|---|---|
| Apocrypha Tentacles | Average | Average | Apocrypha | Yet another reason to avoid the water. As you explore Apocrypha, tentacles will frequently rise up from the inky depths to lash out at you, doing damage and possibly afflicting you with disease. You can often avoid them entirely by hugging the walls and keeping well away from the edge of the platforms. |
| Apocrypha Water | Low | Average | Apocrypha | The roiling black waters of Apocrypha are lethal to mortals, although “dying” will merely return your spirit to Tamriel. Avoid the water at all costs, and be careful that your foes don’t knock you into it. |
| Bear Trap | Average | Nuisance | Bandit Camps, Outdoors | Watch where you step! Bear Traps are often hidden in the bushes or under low grass, ready to snap if you aren't careful. You can often lure enemies into stepping on them. Interacting with the trap will also allow you to close or open them. |
| Battering Ram Trap | High | High | Nordic Ruins | Talk about a headache! Battering Ram traps cover a long arc, and at higher levels, can kill you or your foes in a single hit. Look out for the triggers that set them off, and keep an eye on the ceiling for them. Lure enemies into them to take them out in one shot. |
| Bone Alarm Trap | None | Nuisance | Bandit Camps, Forsworn Redoubts | Bone Alarm traps don't do any damage, but alert enemies to your presence. If you aren't sneaking anyway, they won't make much difference. If you are, watch your step and try to avoid them if you can. Shooting them with a bow will draw unaware enemies to them, allowing you to set up an ambush. |
| Crossbow Trap | Average | Average | Dawnguard/Vigilant Bases | Crossbow Traps fire fast and hit hard, like any other crossbow. However, they fire only a single shot and are relatively easy to disarm. Avoid their trigger mechanism, approach the crossbow, and activate it to pick it up. You can also place a standard crossbow and steel bolt into the mechanism if you want to use it against your foes. |
| Dart Trap | Average | Average | Nordic Ruins, Dwarven Ruins | The most common kind of trap, dart traps are also among the most avoidable. Even if you trigger them by accident, you can often just jump out of the way to minimize the damage you take. They deal a small amount of poison damage. |
| Dwarven Ballista Trap | High | Low | Dwarven Ruins | Dwarven Ballistas shoot a large bolt that explodes on impact, doing massive damage to anything in the blast radius. Functional ballistas are extremely rare, and often something you can turn to your advantage-- look for a valve or lever you can use to turn the trap on your enemies. |
| Dwarven Fire Pillar Trap | Average | Average | Dwarven Ruins | Initially resembling a pressure plate, Dwarven Fire Pillars rise from the ground and rotate, spewing gouts of flame. Spotting these traps in advance is key to avoiding them. |
| Dwarven Piston Trap | None | Nuisance | Dwarven Ruins | Dwarven Pistons shove anything in front of them away. They don't do any damage, but they hit hard, and have a habit of pushing you (or your enemies) into something nasty. |
| Dwarven Thresher | Average | High | Dwarven Ruins | Dwarven Threshers are a pair of whirling blades that rise from the floor, sometimes remaining in place and sometimes moving along a track built into the ground. Often appearing in narrow corridors, they are highly dangerous, capable of killing you, your followers, or your enemies with a few solid hits. If you see one, get out of the way! |
| Explosive Gas Trap | Average | Low | Nordic Ruins, Caves | See that ripple in the air? It might be a cloud of flammable, explosive gas. Put away your torch, keep your Flames spell in check, and you shouldn't have any problems with them. Explosive Gas is extremely rare. |
| Flail Trap | High | Average | Bandit Camps | Also fairly rare, Flail traps tend to be located on the ceiling, ready to drop a large, spiked sphere into your head. If you see it coming, back away-- once the trap has come to a full and complete stop, it's harmless. |
| Flamethrower Trap | Average | Average | Any Dungeon | Often built into the mouths of Nordic dragon statues or set into pressure plates, flamethrower traps are a threat most adventurers will see from time to time. Because their flame travels in a narrow, focused beam, your best bet is to quickly step out of the way and let the trap subside. |
| Infected Spike Trap | Average | Nuisance | Vampire Lairs | These hanging ropes are strung with bloody caltrops that pierce the skin and inflict you with disease. If you’re careful, you can usually avoid them entirely or even lure enemies through them. |
| Magic Caster Trap | Varies | Varies | Any Dungeon | Magic Casters consist of a runed pedestal powered by a Soul Gem. When triggered, the Soul Gem casts a preset spell, which could be anything from Flames to Ice Storm. If you can't avoid the trap altogether, you can disarm it by removing the Soul Gem-- taking it directly works, but you can also hit it with an arrow from a safe distance, or grab it with Telekinesis. |
| Mammoth Skull Trap | High | Low | Any Dungeon | When triggered, this huge mammoth skull swings forward on its support ropes, slamming into anything in front of it with lethal force. This trap tends to be easy to spot-- you can't exactly overlook a giant mammoth skull-- so it's rarely much of a threat to you, though you can lure your enemies into it. |
| Oil Lamp Trap | Low | Low | Nordic Ruins | The oil lamp itself isn't usually a problem. It's the pool of oil that often sits under the lamp that you should keep an eye on, and lure your enemies into if possible. Then hit or shoot down the lamp to set the oil ablaze. They are often triggered by tripwires, but shooting or attacking them will also cause the lamp to drop. |
| Oil Pool Trap | Average | Low | Any Dungeon | Oil Pools are easily turned against your foes-- just lure them into the oil and light it with any fire source. Oil Lamp traps are often conveniently nearby, but lacking one of those a Flames Spell, or Fire Atronach will work just as well. |
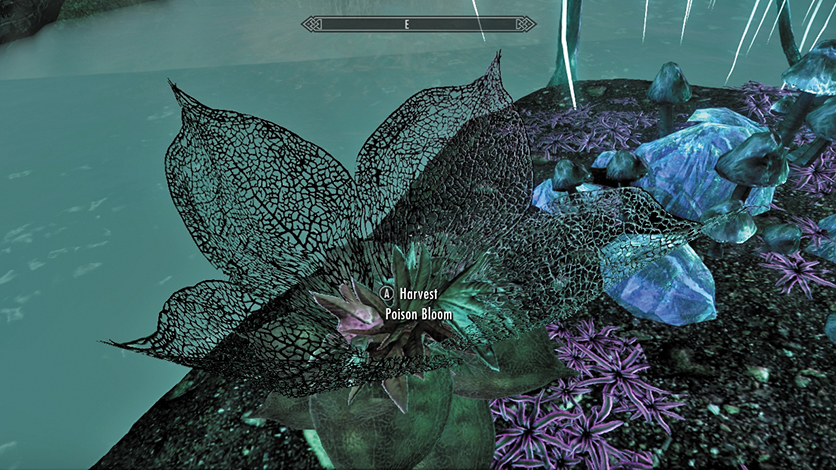
| Poison Blooms | None | Varies | Falmer Hives | Poison Blooms are easy to identify by their large, white, lattice-like petals. When you approach them, they begin to shudder. Quickly activate them to pluck the bloom, or they will open, spewing a cloud of poison gas. |
| Poison Gas Trap | Average | Average | Dwarven Ruins | Poison Gas does steady damage over time if you stand in it. When you find a patch of poison gas, look around for a way to turn it off. Failing that, make a run for it, using a Healing spell or potions to keep your health up. The Clear Skies Shout can also be used to disipate the gas. |
| Rockfall Trap | Average | Average | Bandit Camps, Nordic Ruins, Mines, Caves | Rockfall traps are fairly rare, but the sheer number of rocks they contain can make them a threat if you're standing in the wrong place. If you see one, your best bet is to get out of the way. |
| Rune Trap | Average | High | Any Dungeon | Rune Traps look much like the Fire, Frost, and Shock Runes that you can place with the Destruction spells of the same name. And like those spells, these traps pack a quite a punch, exploding automatically if you get close enough. Your best bet is to lure an enemy to run across them and set them off. Failing that, you can shoot them with a spell to set them off, but keep your distance. |
| Spear Trap | Average | High | Any Dungeon | A single spear trap is no threat… but spear traps tend to come in groups of five or more, lashing out unexpectedly from the floor or walls. Your best bet is to look for the ports from which they emerge and try to avoid setting them off in the first place. |
| Swinging Blade Trap | Average | Average | Nordic Ruins | Blade traps often appear in sets in long, narrow hallways. They're usually easy enough for you to dodge, although enemies (and your followers) have a harder time, making them a great kill zone. When you're ready to go through, tell your follower to stay behind, time your run carefully, and look for a lever on the far side to disable them. |
| Swinging Wall Trap | High | High | Any Dungeon | Swinging wall traps come in a variety of shapes and sizes, from the heavy spiked-iron walls in forts to the netting and tusk traps of Riekling dens. But all are fast, lethal, and difficult to distinguish from other wood or metal beams in a dungeon. If you notice a freestanding beam that doesn’t quite reach the ceiling, be careful. Try to snare an enemy with it if possible—few things are as satisfying as watching a foe get hurled into the wall by this trap. |
| Hinge Trigger | None | Varies | Any Dungeon | Find a suspicous-looking chest or door? Then look for this little metal hinge and wire on the side. Carefully activate it, and you can pick its lock to safely disable it before opening the object it was attached to. You can also hit it with an attack from a distance to break it and set off the trap in (relative) safety. |
| Pressure Pedestal | None | Varies | Nordic Ruins | If you see a flat-topped pedestal with a tantilizing item on it, be careful-- it could be a pressure pedestal trap. If the pedestal isn't weighted down, a trap will be set off. Grab the item from a distance (Telekenesis is great for this), or drop something else on the pedestal to keep it weighed down. Or just grab the item and run for it. |
| Pressure Plate | None | Varies | Any Dungeon | By far the most common trap-triggering mechanism, Pressure Plates can be found in almost any dungeon-- just look for suspicious raised stones and avoid them. Or take the Sneak Skill's Light Foot Perk to avoid setting these off altogether. |
| Tripwire | None | Varies | Any Dungeon | See a low-lying white wire? That's a tripwire. Leap over it or skirt around it to avoid setting it off. Or edge forward very carefully to see what happens when it breaks. You can also interact with the tripwire to disarm it. Tripwire-triggered traps only fire once. |