
Elder Scrolls V: Skyrim Special Edition Guide The Atlas Hold 5: The Reach
[5.06] Bthardamz
[5.06] Bthardamz
Related Quests
Daedric Quest: The Only Cure
Recommended Level: 16
Dungeon: Dwarven City
Dwarven Sphere
Dwarven Spider
Orchendor
Dangers
Dwarven Thresher (pressure plate/levers)
Swinging Blade Trap (lever)
Collectibles
Skill Book [Speech]: Biography of the Wolf Queen
Unique Item: Spellbreaker [55/112]
Chests
Potions
Loose gear
Mineable ore (Gold, Quicksilver)
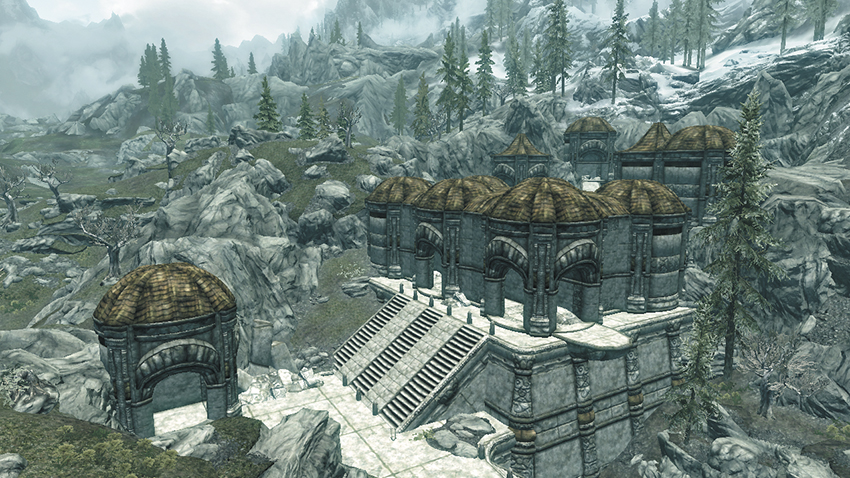
This massive dwarven city stands among the Reach’s western mountains and serves as the main adventuring site for a Daedric Quest.
Exterior
Navigate the city’s sprawling yet simple Exterior, descending a long set of stairs and pulling the farther of two levers to open the way into the Bthardamz Upper District. The other lever activates a dangerous trap and is best left alone. Continue exploring the Exterior ruins before heading inside, venturing upstairs to discover a pair of chests tucked away near the first tower at the top. Backtrack down and enter the Upper District to begin your exploration of the city’s interior.
- Danger! Dwarven Thresher (lever)
- Chests (2)
 Exit to Skyrim
 Entry Chamber
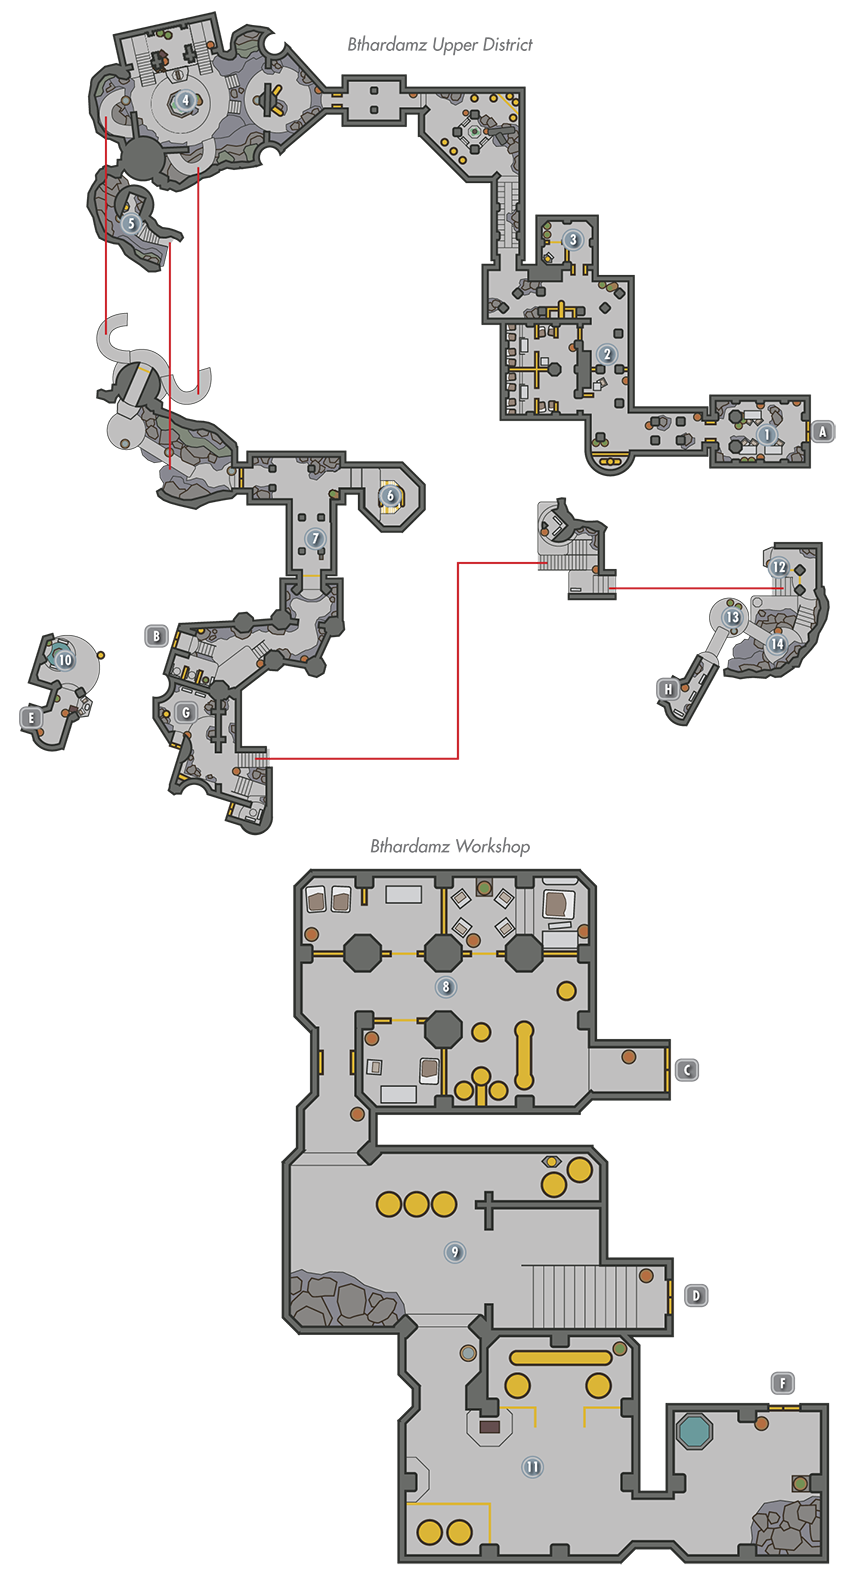
Find a bit of plunder atop the tables in the Upper District’s first room.
- Chest
- Potion
- Loose gear
 Two Routes
Pick a Novice-level gate to slip through this passage without incident. If you can’t pick the lock, you must navigate an Afflicted-filled sleeping area in order to circumvent the gate instead.
- Potion
 Storage
Pick an Adept-level gate in this small room to access a potion and chest.
- Chest
- Potion
 Public Square
Kill or avoid a group of Afflicted on your way to this cavernous area, where many more Afflicted are gathered. Scale some stairs to locate a chest on the north balcony, then pull the nearby lever to lower the far south gate. Sprint up a winding ramp on your way to [5].
- Chest
 Sloping Passage
Descend a sloping ramp that leads toward a metal door, but double back before going through, and loot a hidden chest at the end of the lower trail.
- Chest
 Treasure Chamber
Sneak as you make for this room’s far chest; otherwise you risk alerting a pair of Dwarven Spheres here.
- Chest
 Spinning Blade Slope
Avoid a pressure plate as you descend a ramp here, which leads to the door to the Bthardamz Workshop.
- Danger! Dwarven Thresher (pressure plate/lever)
- Potion
 Door to Bthardamz Workshop
 Door to Bthardamz Upper District
 Worker’s Quarters
More Afflicted lurk within the Bthardamz Workshop. Read the note on the southwest table to learn where your quest-related quarry might have gone.
 Spider Pit
Beware of alerting dangerous Dwarven Spiders in this chamber—you can be quickly overwhelmed. Loot the chest in the northeast corner, then scale the east stairs to return to the Upper District.
- Chest
 Door to Bthardamz Upper District
 Door to Bthardamz Workshop
 Balcony
Duck out of the Bthardamz Workshop just for a moment to raid a chest on this balcony, then head back inside.
- Chest
- Potion
 Steam Room
Raid one last chest from this steamy area of the Bthardamz Workshop before taking the southeast door back to the Upper District.
- Chest
 Door to Bthardamz Upper District
 Door to Bthardamz Workshop
 Lower District Access
At last, you’ve reached the Upper District’s southern end. Before scaling the first set of stone stairs, leap up the rocks to the right (south) and keep going to reach a rooftop, where you discover a hidden chest. Go back down and return to the stairs—again, don’t climb them. Explore the north alley to find another chest, then scale the stairs and open a door to visit a dwelling.
- Chests
 Bthardamz Dwelling
Make a quick stop here to raid a chest that’s guarded by a few Afflicted. If possible, unlock an Apprentice-level gate to access another chest and a Skill Book. If you don’t alert the Afflicted here, you can overhear one of them explaining how she wants to leave this place.
- Skill Book [Speech]: Biography of the Wolf Queen
- Chests (2)
 Stairs and Balconies
Explore this network of stairs and walkways thoroughly to locate a vein of valuable Gold Ore on a rocky ledge and a chest tucked away near a tower’s high balcony to the north. Scale some ramps to reach the tallest tower afterward and proceed through the south door to the Bthardamz Lower District.
- Chest
- Mineable ore (Gold)
 Door to Bthardamz Lower District
 Door to Bthardamz Upper District
 Lower District Entry
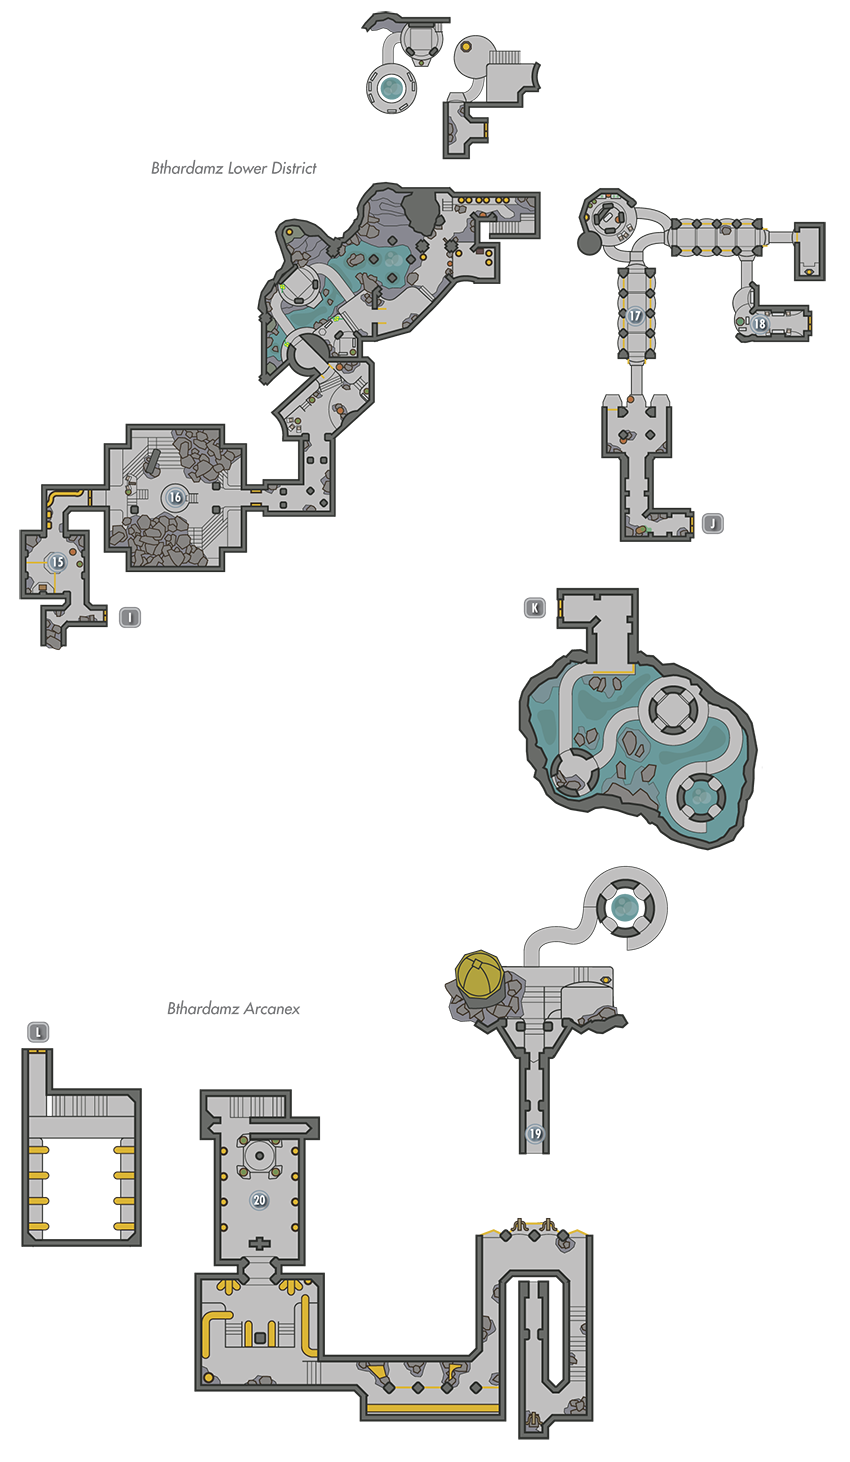
Open an unlocked gate in the Lower District’s first area to raid a chest before sneaking through the passage that follows to avoid alerting Dwarven Spiders.
- Chest
 Amphitheater
Pull the lever on the balcony as you enter this wide cavern to slice up the unwary Afflicted below. Eliminate any stragglers so you may safely descend and raid the central chest.
- Danger! Dwarven Thresher (lever)
- Chest
 Grand Cavern
A river rushes through the middle of this massive cavern, where a network of stairs and walkways connect several towers. Stealth tactics help you avoid the patrolling Afflicted and various Dwarven sentries. Raid a wooden chest in a downstairs room, then head upstairs and check behind the north tower to find a small dwarven chest stashed near a skeleton. Backtrack a bit and scale the east stairs to reach walkways that lead to the Bthardamz Study.
- Danger! Swinging Blade Trap (pressure plate/lever)
- Chests (2)
- Minable ore (Gold)
 Bthardamz Study
Open a gate in the Study’s first room to locate a chest, then avoid a pressure plate before scaling a long ramp. Beware of the Sphere Centurion that comes out of the pipe at the ramp’s top. Open another gate at the top and pillage a chest. Head through the door that follows to exit back out to the Grand Cavern’s highest walkways.
- Danger! Dwarven Thresher (pressure plate)
- Chests (2)
Grand Cavern Revisited (Upper Walkways)
Before crossing the first sloping walkway, turn right and cross the nearby east roof to discover a hidden chest. Cross the sloping walkway afterward and open the east gate to loot another chest in a small room. Venture west afterward and scale the winding ramps to find a third chest affixed to the northwest wall—this one’s guarded by several Afflicted. Either clear them out or forgo the chest and loop around, taking the long southern passage to the Bthardamz Arcanex.
- Chests (3)
 Door to Bthardamz Arcanex
 Door to Bthardamz Lower District
 Arcanex Grand Cavern
If Bthardamz’s beauty has escaped you up to this point, you’ll certainly appreciate it when you enter this huge, sunlit cavern. Continue to sneak through here, or risk alerting a host of Dwarven Spiders and Spheres. Scale a winding ramp to climb a tower, then cross a curved walkway and find a chest that lies just east of some stone stairs. Climb the stairs and check to the east again to discover a Quicksilver Ore vein, but beware of alerting the formidable Dwarven Centurion and host of Dwarven Spiders that lurk in the south passage. Ignore the south passage’s ballistae—you can’t interact with them.
- Chest
- Mineable ore (Quicksilver)
 Orchendor Showdown
Do your best to avoid the patrolling Dwarven Spheres on your way to this final chamber, where you must slay a powerful mage named Orchendor as part of Daedric Quest: The Only Cure. Obtain a useful key from Orchendor’s corpse after the deed is done and use it to quickly exit Bthardamz via the upstairs elevator.
- Key to Bthardamz Elevator (Orchendor)
 Exit to Skyrim