
Elder Scrolls V: Skyrim Special Edition Guide The Atlas Hold 7: Eastmarch
[7.25] Mzulft
[7.25] Mzulft
Related Quests
- College of Winterhold Quest: Revealing the Unseen
Recommended Level: 16
Dungeon: Dwarven City
Crafting
- Alchemy Lab
Dangers
- Dwarven Piston Traps (pressure plate)
- Rockfall Trap (trip wire)
- Spear Trap (pressure plate)
Collectibles
- Skill Book [Alteration]: The Lunar Lorkhan
Special Objects
- Dwarven Armillary
- Mineable ore (Moonstone) Ore
- Area Is Locked (quest required)
- Chests
- Potions aplenty
- Loose gear
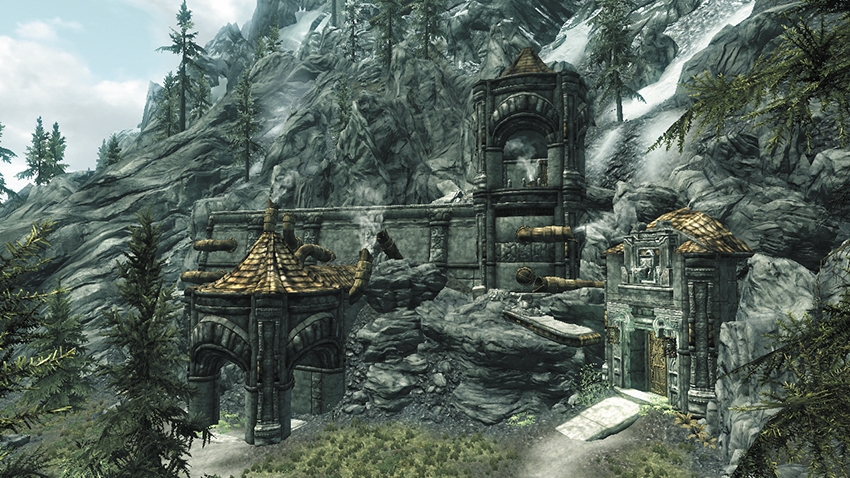
This massive network of dwarven engineering has been carved into Eastmarch’s eastern mountains. Its door remains securely locked until you acquire College of Winterhold Quest: Revealing the Unseen.
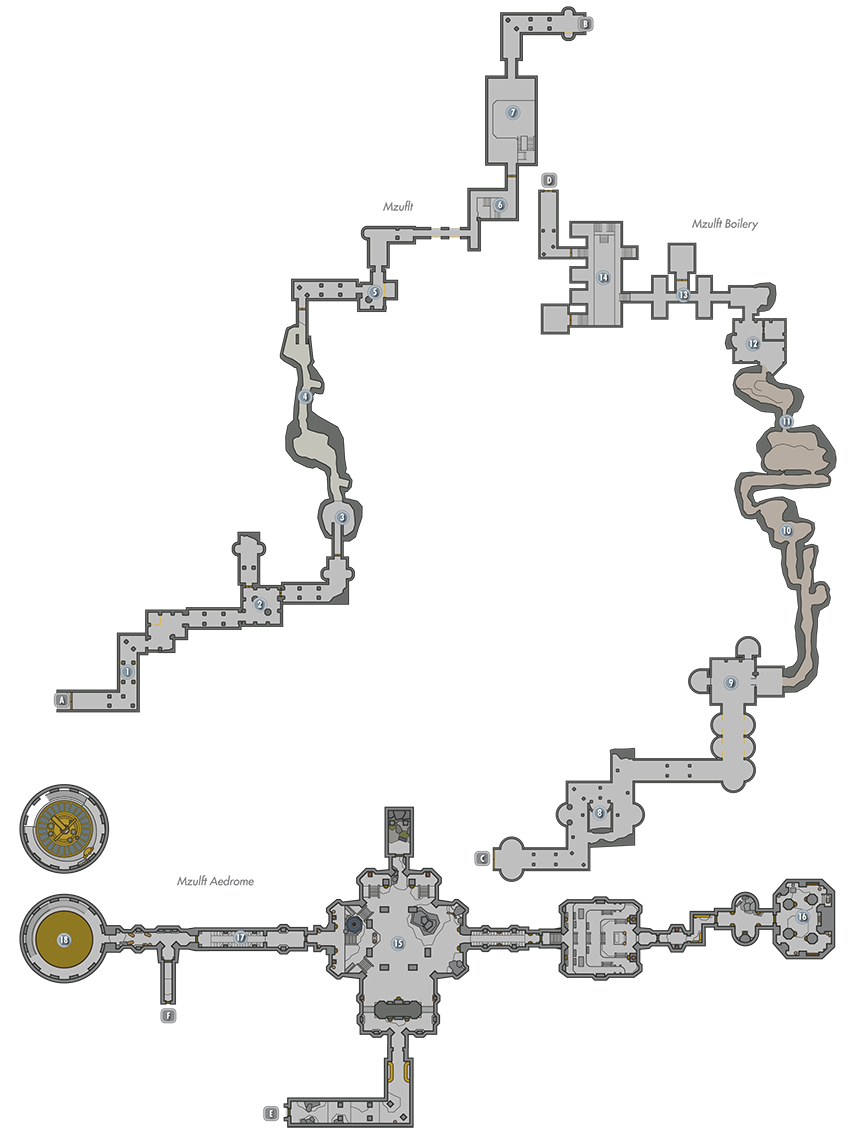
 Exit to Skyrim
 Entry Corridor
There’s little of note in this corridor, but beware of a dangerous trap that’s triggered by a pressure plate. Dwarven Spiders lurk farther down the passage.
- Danger! Spear Trap (pressure plate)
- Potions
 Treasure Room 1
Defeat more Dwarven Spiders, then pick an Adept-level door lock to access a northern treasure room that’s guarded by a Dwarven Sphere.
- Chest
- Potion
 Sunlit Cavern
Spy a valuable item that’s hidden in a corner of this softly lit chamber. Mine some Moonstone Ore from the vein here if you’ve brought a pickaxe.
- Loose gear
- Mineable ore (Moonstone)
 Chaurus Chambers
Dangerous creatures called Chaurus lurk in these two small caverns. Beware the trip-wire trap in the hall that connects them. Mine more Moonstone Ore here if you’re feeling crafty.
- Danger! Rockfall Trap (trip wire)
- Knapsack
- Mineable ore (Moonstone)
 Storeroom 1
Multiple Dwarven Spheres guard this small chamber, which sports an ornate gate and storeroom. Pick the gate’s lock to access some minor items within the storeroom.
 Treasure Room 2
Fight your way downstairs and pick an Adept-level lock to open a gate and access a chest in this odd chamber.
- Crafting: Alchemy Lab
- Chest (Locked: Adept)
- Potions
 Spider Chamber
Use caution when creeping along this wide chamber’s left ledge—pressure plates trigger dwarven pistons that can knock you into the central, spider-filled pit.
- Danger! Dwarven Piston Trap (pressure plates)
 Door to Mzulft Boilery
 Door to Mzulft
 Boilery Entry
Slay a nimble Falmer in this wide hallway, which holds little of interest.
 Storeroom 2
Fight your way through a few more Falmer on your way to this chamber. Don’t trouble with unlocking the Expert-level west gate; there’s nothing but Dwemer scrap metal in the storeroom beyond.
- Potions
- Loose gear
 Earthen Passage
Don’t overlook the odd-looking chests as you navigate this cavernous passage.
- Chests (2)
- Potion
- Loose gear
 Iridescent Cavern
Harvest the many glowing mushrooms that lend an eerie light to these two caverns. Chaurus Eggs can be obtained by inspecting the various egg sacs as well.
- Chest
- Loose gear
 Treasure Room 3
Pick the Expert-level door lock in this area to obtain an important key, along with treasure from a chest and a Skill Book.
- Skill Book [Alteration]: The Lunar Lorkhan
- Mzulft Room Key
- Chest
 Treasure Room 4
Pick the Adept-level lock on the ornate door here to access a treasure room that’s guarded by a Chaurus.
- Chest (Locked: Apprentice)
- Loose gear
 Treasure Room 5
Beware: this large chamber’s worthy treasures are guarded by multiple Falmer. Pick the Expert-level door in the southwest corner to access a small treasure room.
- Chest
- Chest (Locked: Novice)
- Potions aplenty
 Door to Mzulft Aedrome
 Door to Mzulft Boilery
 Great Hall
This massive foyer is crawling with Falmer. Fight hard to secure the area, then pick the north door’s Expert-level lock to access a treasure niche. The west door cannot be opened without the key you find inside a chest located in the eastern Cog Chamber. A Falmer Gloomlurker is carrying a Focusing Crystal, which is needed for location [18].
- Focusing Crystal
- Chests (3)
 Cog Chamber
A lone Dwarven Sphere guards this far chamber. Open the chest and retrieve the Mzulft Observatory Key.
- Mzulft Observatory Key
- Chest
- Potions
- Loose gear
 Locked Hall
You cannot access this hall without the Mzulft Observatory Key. The far door to [18] is locked as well—Paratus Deimius opens it when you retrieve the Focusing Crystal for him. The ruins’ exit door is found here, accessed only after you complete the puzzle inside location [18]..
- Knapsack
 Armillary Chamber
This large chamber houses a giant and mysterious dwarven mechanism. Paratus Decimius, and your knowledge of flame and frost spells, are the keys to solving this puzzle. Consult College of Winterhold Quest: Revealing the Unseen for the answers.
- Dwarven Armillary
 Exit to Skyrim
 [DG.16] Mzulft: Dwarven Storeroom
Hold: Eastmarch
Related Quests
- Side Quest: Lost to the Ages
Recommended Level: 16
Faction: Dwarven City
- Katria
Miscellaneous
- Loose gear
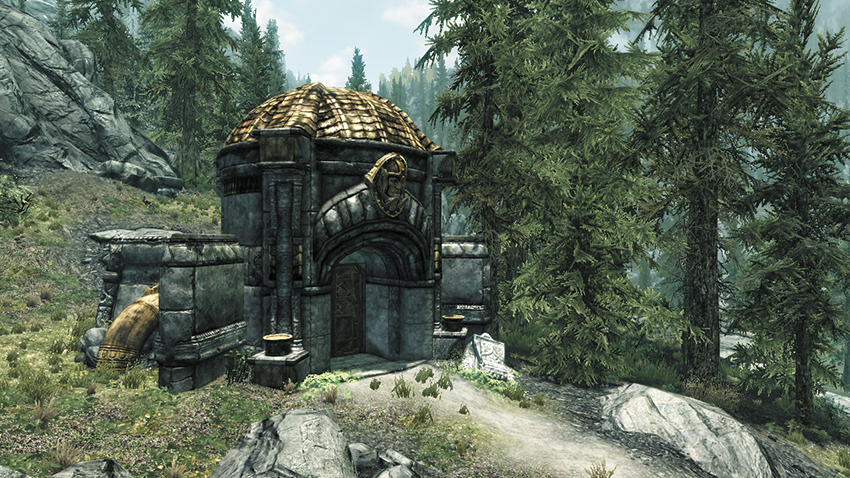
Search the nearby grounds for the Dwarven Storeroom and open the door. If you are on Side Quest: Lost to the Ages, Katria is waiting for you inside, wondering how best to break through the locked door. Otherwise, this is simply a small storage area.
You can unlock the gate [Expert] or locate the metal door to the right of it [Apprentice]. Open that and the second door [Apprentice] in the storage area beyond. Both allow you to reach the inner storeroom, which has a Glowing Crystal Shard (which you identify as an Aetherium Shard if you’re on the quest). You can also claim a variety of dwarven items and scrap from this location, as well as several Dwarven Metal Ingots.
- Aetherium Shard [4/4]
- Loose gear