
Elder Scrolls V: Skyrim Special Edition Guide Training Training Part 2: Combat, Development, and Crafting
Smithing
Smithing
Forging Ahead: An Overview
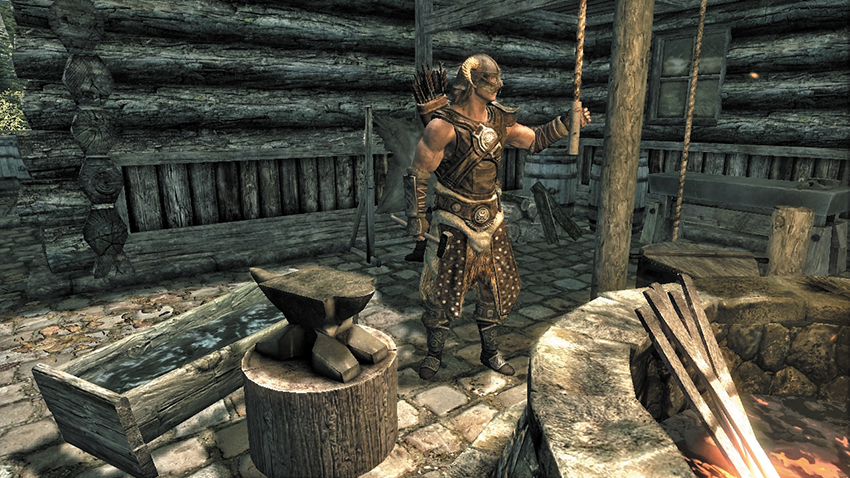
A noble Nord profession, a trade of gruff artisans occurring across the realm.
Smithing is the art of creating and improving weapons and armor, accomplished through a series of progressive improvements. Smithing is straightforward, fast, and reliable. Unlike alchemy and enchanting, there are no complicated choices or arcane experiments to perform: You know precisely what is needed to construct or improve an item, and what the end result of your sweat and toil will be. In short, smithing involves forging and progressively improving items.
Forging
The Forging Process
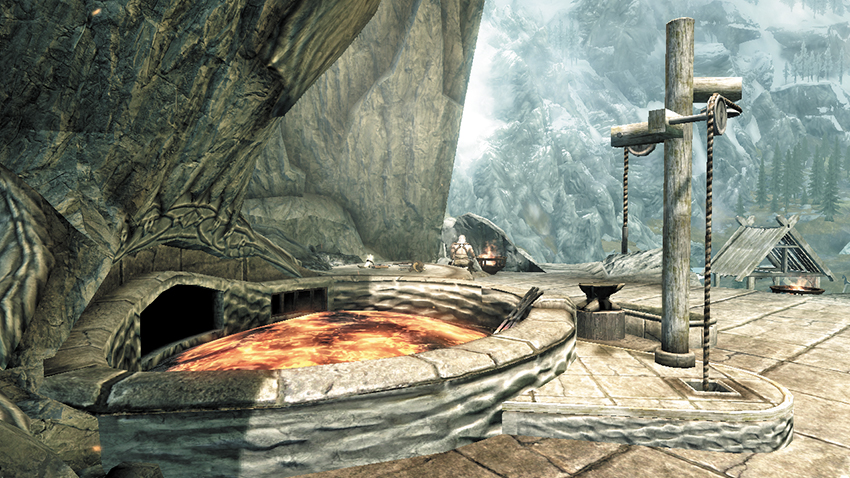
The Blacksmith’s Forge: Mold raw materials into fabled weapons and armor.
The first step in smithing is to locate a Blacksmith’s Forge or Anvil, where the process of making new weapons and armor first begins. When you interact with a forge, a complete list of the items you can create, and the components you need to make them is shown. This list expands dramatically as you take perks in your Smithing skill. If you have the necessary materials, simply choose the item you wish to craft, and it is hammered out on the forge. Simple!
As your adventure begins, your Smithing skill is low, meaning you can only work with a few kinds of basic materials, such as iron, hide, and leather. However, as your Smithing skill increases and you begin to choose perks in the Smithing constellation, you gradually unlock the ability to forge more and more varieties of materials into weapons and armor. At the highest levels, this includes the fabled Daedric, Dragonplate, and Dragonscale gear!
Forging Materials
Forging usually requires components like metal ingots, leather, and leather strips. However, the highest-quality items may also require more or expensive materials, such as quicksilver, dragon scales, or Daedra hearts. Knowing what is needed to forge your next level of gear is imperative so you can keep an eye out for it on your travels.
Purchasing materials: The easiest way to acquire materials is simply to purchase them. In towns (such as Riverwood), you’ll almost always find a Blacksmith working the forge. These craftsmen and women typically have ingots, ore, leather, and leather strips for sale. As your level increases, smiths begin to carry higher-level materials too. However, you will always have to search for the rarest of components.
The purist smithy: The purist won’t settle for purchasing materials when they’re free for the taking in the wild! Instead, they seek out mines (or ore veins dotted throughout the wilderness) to mine your own ore with a trusty pickaxe and use the smelter to smelt your own ingots. Hunt wild animals, gather their pelts, and use Tanning Racks to turn their hides into the leather and leather strips you require. You’re free to live off the land, not fill some Blacksmith’s sweaty pockets!
In short, purchasing materials is far faster and easier. Finding your own materials takes time but allows you to turn a better profit.
The Economics of Forging
Unless you’re aggressively focusing your Smithing skill, you can often find or purchase gear of a particular type before you’re able to forge it yourself. Forging is still great for completing a set of armor (e.g., hammering out a Dwarven Helmet to go with your Dwarven Armor), so you can qualify for the Matching Set (Heavy Armor Perk) or Custom Fit (Light Armor Perk) bonuses.
The very best weapons and armor (Ebony, Daedric, Dragonscale, and Dragonplate) can never be bought in shops, so you must either find them in dungeons or forge them yourself. Smithing really pays off here. While it’s still challenging to forge a complete set of Daedric or Dragonplate gear, it’s far easier than scrounging through dungeon after dungeon in the hope of finding just the right piece to complete a set. Smithing is also excellent for creating nonenchanted items you’re planning to enchant later using your Enchanting skill.
While you can make money by forging your own items and then selling them, you need to be careful in how you go about it. Purchasing materials from a merchant, taking them to a forge to create an item, and then returning to sell the item back to the merchant may help you improve your Smithing skill, but financially, it’s always a losing proposition. If you want to use Smithing to make money, it’s always better to gather materials from the wild, although that can be time-consuming.
If you decide to focus on smithing, you’ll occasionally find you require certain materials before they’re commonly available from merchants. Once again, this is when foraging in the wilderness or swinging a pickaxe at an ore vein is your best option. Check the “Mining” section for locations where you can find rare ore.
Improving Items
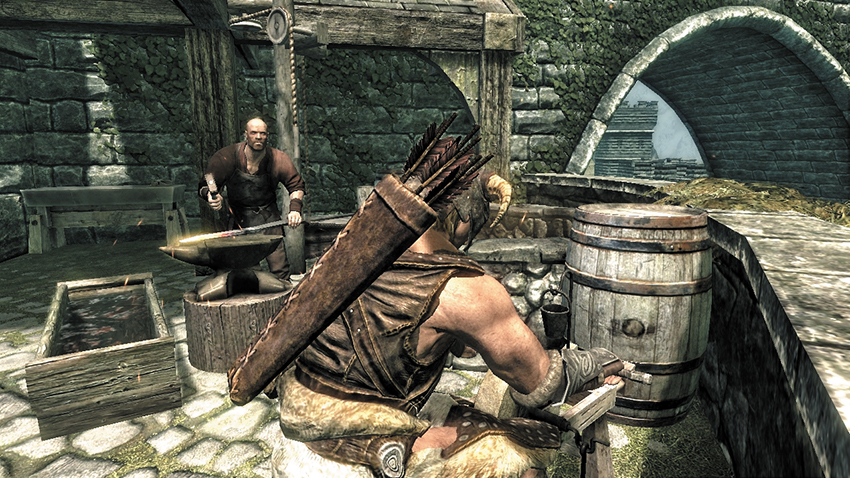
The Grindstone: Sharpen a blade to improve its damage and value.
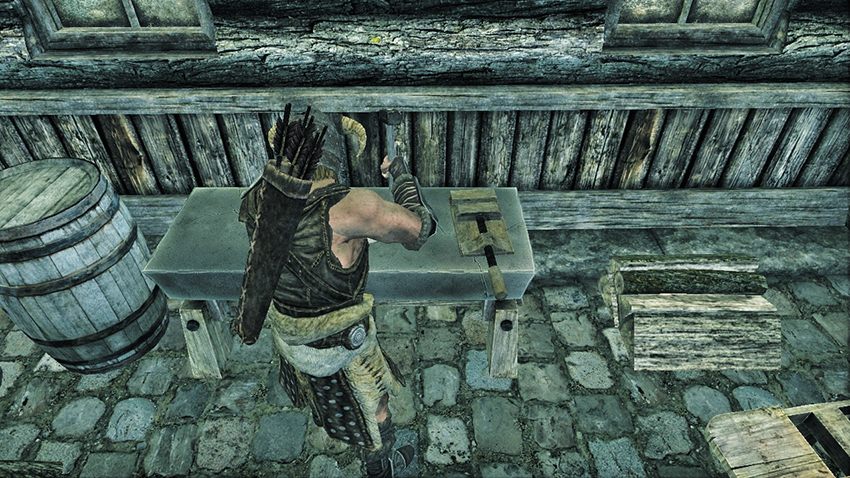
The Workbench: Temper armor into defensive and wearable works of art.
Contrary to what you might believe, the heart of smithing lies not in crafting items but in improving them. As with forging, these improvements are simple and result in equally straightforward bonuses to your attack (weapons) and defense (armor) that can significantly improve your combat effectiveness. As you might expect, arms and armor improved in this way also command a premium when sold to merchants.
The grindstone: You improve weapons by sharpening them at a grindstone.
The workbench: You improve armor by tempering it at a workbench.
When interacting with either of these crafting stations, you are given a complete list of the items you have (whether they were found, bought, stolen, or made by you) that can be improved, along with the materials you need to improve each of them. Improving a weapon or piece of armor always requires one piece of that item’s primary material, so sharpening an iron sword requires one Iron Ingot, while tempering a Dragonscale Cuirass requires one Dragon Scale. The clue is in the name!
In exchange for using this material, you receive a bonus to your weapon’s damage or armor’s defense rating based on your Smithing skill and perks. As your Smithing skill improves, you’re able to return to a grindstone or workbench and improve the same item again (at the cost of one material each time), to increase that bonus still further, if you wish.
Rules to Remember
Bonuses are not cumulative: Having sharpened an iron sword with a Smithing skill of 25 (using an Iron Ingot), you return to the grindstone with a Smithing skill of 50 (and expend another Iron Ingot) to receive a better bonus. However, if you’d waited and brought the sword to the grindstone for the first time at Skill 50, the bonus would be the same.
Bonuses stack with enchantments: However, if you’re a skilled craftsman in the arts of smithing and enchanting, you can forge an item, then both improve and enchant it for maximum damage. Note that you need the Arcane Blacksmith perk in order to improve enchanted weapons and armor, so if you don’t have it, make sure to sharpen or temper the item before you enchant it! Otherwise, the order doesn’t matter.
Nomenclature: When you improve an item, it receives a modifier that indicates the amount of improvement you’ve made to the weapon. This modifier is based on your Smithing skill and perks. After you’ve improved an item, you can only improve it again once your Smithing skill and perks will allow you to raise it to the next modifier rank. For example:
- If you have a Smithing skill of 39 and the Steel Smithing perk, and you improve a steel sword at a grindstone, the sword will receive the “Superior” modifier and a [+3] damage bonus.
- Return with a Smithing skill of 40, and your skill has reached the next threshold, allowing you to improve the sword again. This gives it the “Exquisite” modifier and a better bonus, [+5].
- If you come back with a Smithing skill of 55, your skill has not yet reached the next threshold, so you can’t improve that sword again. If you have a different steel sword you want to improve, it will also receive the “Exquisite” modifier and a [+5] bonus.
The Economics of Improvements
Improving the items you find (and those you forge) is simple, quick, and relatively inexpensive, making this an excellent way to both increase your Smithing skill and earn some extra gold. Simply collect weapons and armor throughout your travels, then improve them before selling them for a profit.
At lower levels, this yields dividends, as you’re constantly using your skill and may even make your money back (especially if you mine, smelt, or tan your own materials). At higher levels, with good smithing (and Speech skills for bartering), you can easily rake in hundreds or even thousands of additional gold for each haul of loot.
General Advice
Improve and sharpen everything. As discussed above, this is one of the fastest and easiest ways to make money, especially later in the game, with high Smithing and Speech skills.
Stop overpaying for materials. Smithing can be an expensive hobby if you have to buy all your components from local merchants. If you’re tired of paying a premium on leather or ingots, and you have some time to spare, make them yourself!
Delve into Dwarven Ruins. One of the easiest ways to level your Smithing skill is to clear out a Dwarven Ruin, then go back and make a second trip to haul out all of the scrap metal you can carry. Smelt it down into Dwarven Metal Ingots, and you’ll have more materials than you know what do to with.
Save those Daedra Hearts. These are among the rarest ingredients, but they’re essential for forging Daedric weapons and armor. If you find any early in your adventure, save them until you’re ready for them. Otherwise, you’ll have to make them yourself with an equally rare ingredient (in College of Winterhold Radiant Quest: The Atronach Forge) or track down the one merchant who sells them (Enthir, also at the College of Winterhold) and pay an outrageous premium.
Dawnguard: Smithing
Arrow Crafting
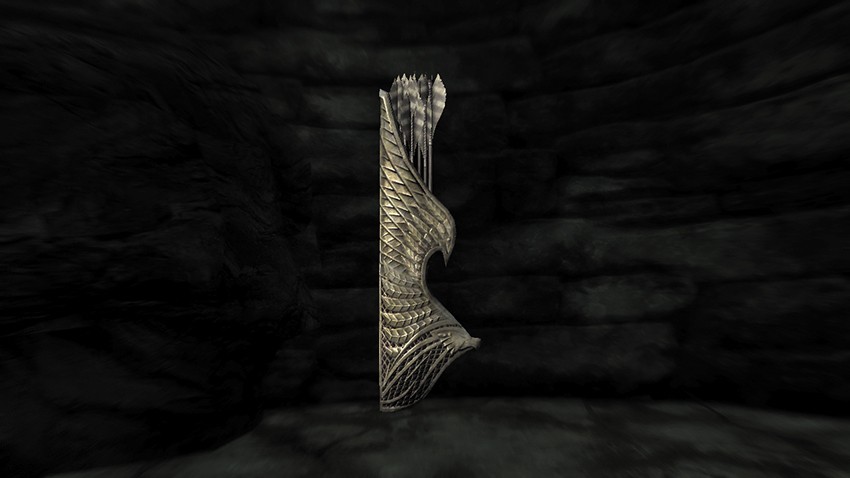
You can now construct arrows at any forge, meaning you no longer have to search for or buy them if you don’t wish to. However, for arrows of a particular type (such as Orcish or Glass Arrows, as shown), you need to have the appropriate Smithing Perk (such as Orcish Smithing or Glass Smithing).
Dragonbone Weapons
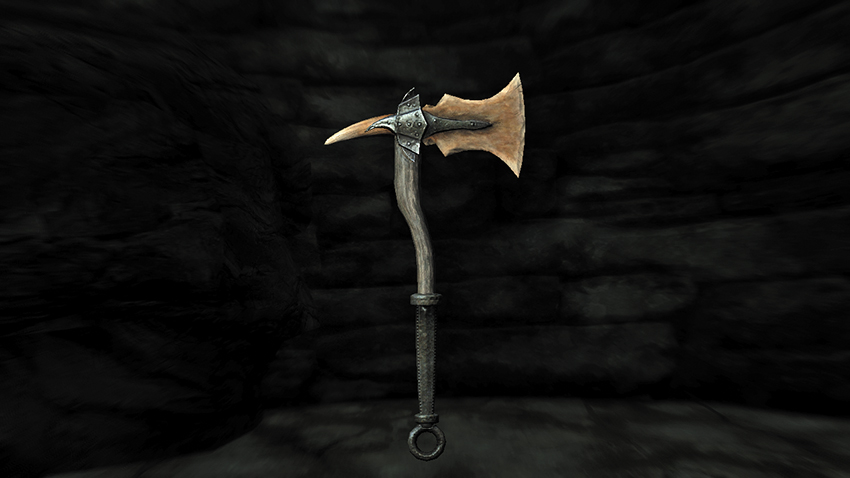
You are now able to construct Dragonbone weapons at any forge, as long as you have the Dragon Armor Perk. Dragonbone weapons (such as the one shown above) inflict more damage than Daedric weapons, although they are (very slightly) heavier. Dragonbone weapons are extremely rare; they are almost never found as loot, so smithing them is by far the easiest and most reliable method for master Blacksmiths to acquire them.
Crossbows and Crossbow Bolts
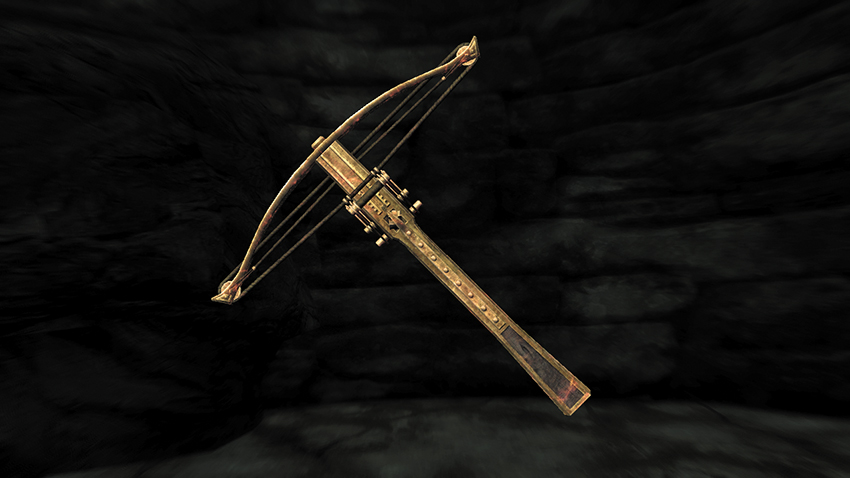
Provided you meet several requirements, you are now able to construct Crossbows and Crossbow Bolts. For this to occur, you must first complete Dawnguard Main Quest: A New Order. As only adventurers allied with the Dawnguard can finish this quest, only Dawnguard-allied players can forge these weapons. However, anyone can loot them from Dawnguard agents or occasionally purchase bolts from some vendors.
Once you complete this quest, speak to Sorine Jurard in Fort Dawnguard about making a Crossbow; this unlocks the ability to forge the basic Crossbow and Steel Bolts. Then, through repeated completion of Dawnguard Faction Quest: Ancient Technology, you and Sorine can unlock “recipes” (schematics) for a variety of improved weapons and bolts, including Dwarven Crossbows, Dwarven Bolts, Enhanced Crossbows, and Exploding Bolts (inflicting Fire, Frost, or Shock damage).
You still need to have the correct tools for making these weapons and bolts: Although you can forge basic Steel Bolts and (once learned) Dwarven Bolts at any forge, you can construct only Crossbows and the explosive advanced bolts at Gunmar’s Forge inside Fort Dawnguard. In addition, you need the Steel Smithing Perk to fashion basic Crossbow and Steel Bolts (they are found in the “Steel” Smithing Menu). Similarly, you need the Dwarven Smithing Perk to make the Dwarven Crossbow and Dwarven Bolts (they are found in the “Dwarven” Smithing menu).
Miscellaneous and Jewelry Recipes
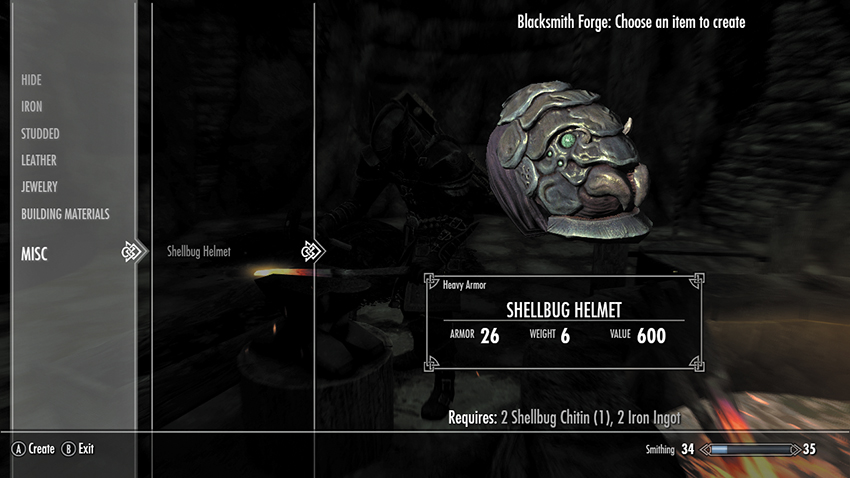
There are also two Miscellaneous Recipes that you can craft—the Shellbug Helmet (shown) and Bone Hawk Amulet.
Aetherium Items
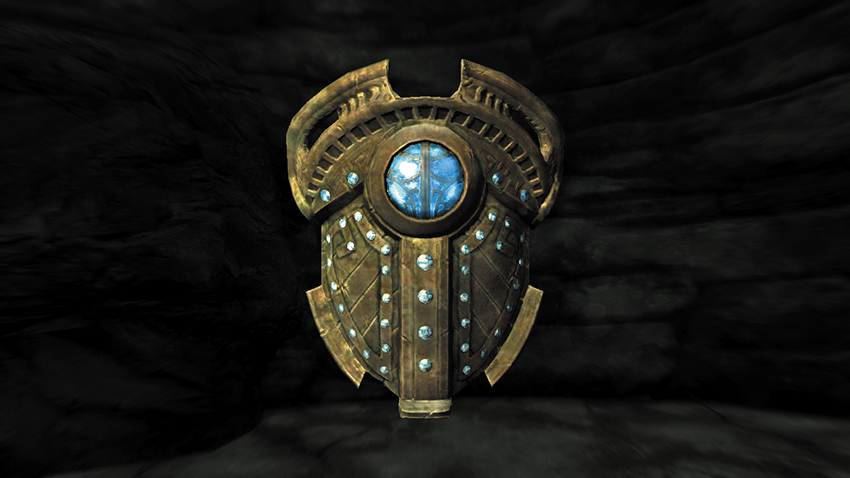
At the end of Side Quest: Lost to the Ages, your reward is the crafting of one of three unique Aetherium items at the Aetherium Forge, located deep below the Ruins of Bthalft in the Rift. Aetherium is an incredibly rare material, so much so that only one item—the Aetherial Crown, Shield, or Staff—can be made. A Smithing skill isn’t necessary for this creation.
Hearthfire: Smithing
Building Materials
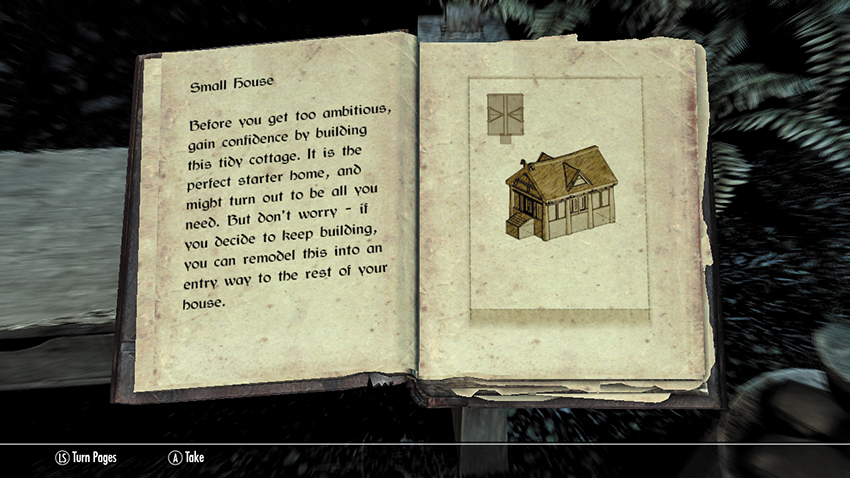
Hearthfire adds Building Materials to your Smithing menu list. These are small items needed in the construction of a house, such as nails, fittings, hinges, and locks. Most require Iron Ingots to make (and locks require Corundum). None of these items require any Smithing Perk prerequisites, so you can forge them even without a prior knowledge of Smithing.
Dragonborn: Smithing
Dragonborn adds four new sets of recipes: Bonemold, Chitin, Nordic, and Stalhrim.
Bonemold Smithing
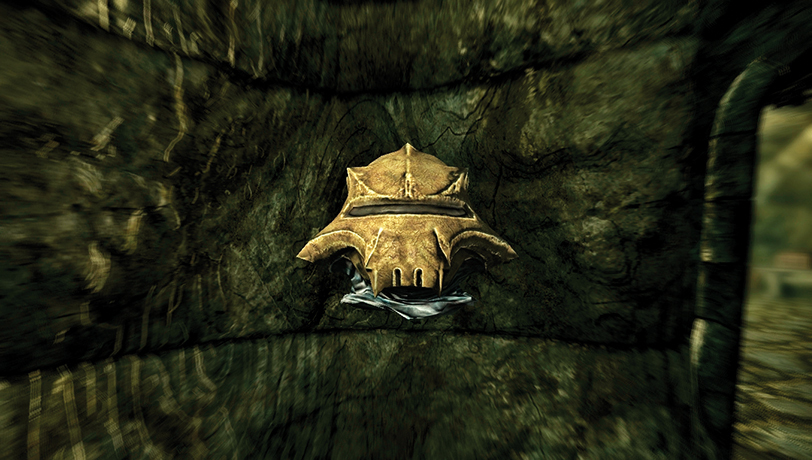
Bonemold items require the Steel Smithing perk to create. Basic Bonemold items have no special prerequisites, but improved Bonemold items, a variant with better statistics, can be crafted only after you complete both Thieves Guild Quest: Meet the Family and Solstheim Regional Activity: Thievery and the Karstaag Connection*. The ability to craft these items is part of your reward for the quest. The armor has a rating similar to Steel armor but is lighter.
Chitin Smithing
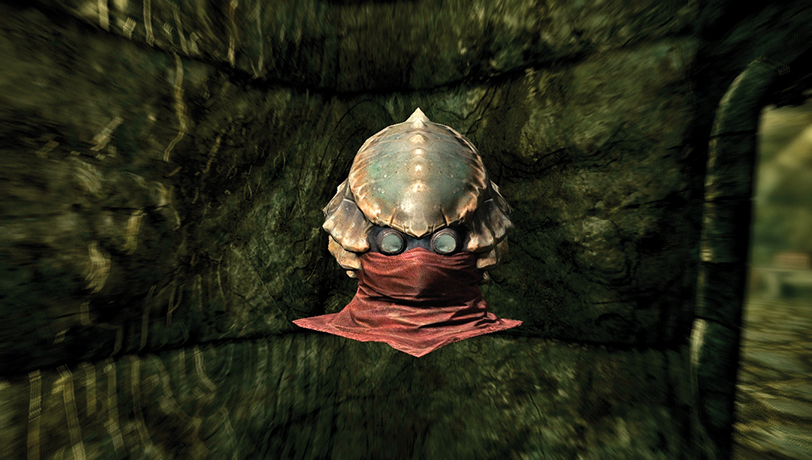
Chitin items require the Elven Smithing perk to create. They have no special prerequisites. The armor has a rating similar to Steel armor but it weighs less. There is also a rare variant—Morag Tong Armor—worn by the infamous clan of Dunmeri assassins.
Nordic Smithing
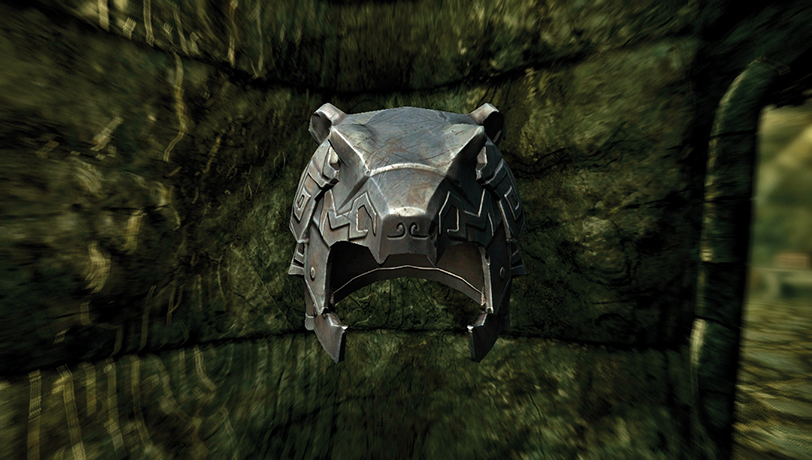
Nordic Carved items require the Advanced Armors perk to create. They have no special prerequisites. Note that these items are distinct from Ancient Nord (Draugr) items, which can’t be crafted, and from Nord Hero items, which are a reward for completing the Companions Quest: Glory of the Dead. It has a similar rating to Ebony and Orcish armor but is lighter.
Stalhrim Smithing
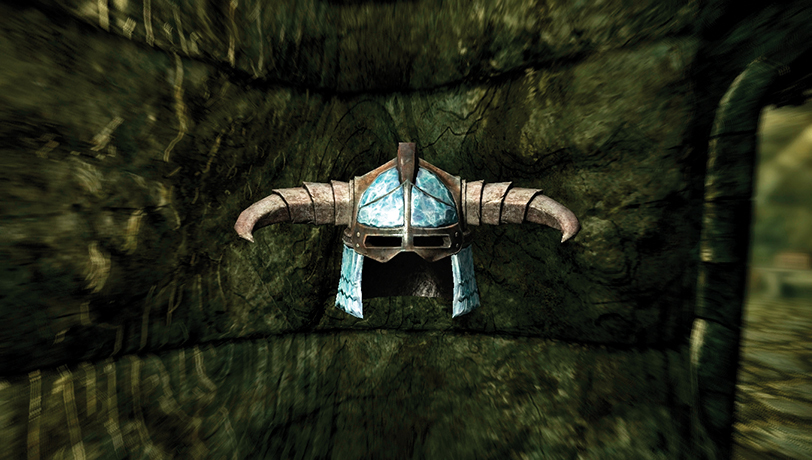
Stalhrim items require the Ebony Smithing perk to create. You must also complete Solstheim Side Quest: A New Source of Stalhrim to unlock the ability to craft them. Stalhrim items require Stalhrim Ore, a rare material found only on Solstheim. Think of Stalhrim armor as being like Dragonplate Armor but lighter.
Note that these recipes require ore, not ingots. Stalhrim, a type of elemental ice, can’t be smelted into ingots. You can buy Stalhrim from Halbarn (the blacksmith in Skaal village) or mine it yourself (see below). All Stalhrim items have an innate property: any Frost enchantments placed on them (e.g., frost damage for weapons, frost resistance for armor) are 10% stronger than normal.
Smithing Recipes
Smithing Improvement Modifiers
| Name | Skill (with perks) |
|---|---|
| Fine | 0–19 |
| Superior | 20–39 |
| Exquisite | 40–59 |
| Flawless | 60–79 |
| Epic | 80–99 |
| Legendary | 100 |
Hide
| Ingredients | Name | Dmg/Amr | Weight | Value |
|---|---|---|---|---|
| 3 Leather Strips, 4 Leather | Hide Armor | 20 | 5 | 50 |
| 2 Leather Strips, 2 Leather | Hide Boots | 5 | 1 | 10 |
| 2 Leather Strips, 1 Leather | Hide Bracers | 5 | 1 | 10 |
| 1 Leather Strips, 2 Leather | Hide Helmet | 10 | 2 | 25 |
| 2 Leather Strips, 4 Leather | Hide Shield | 15 | 4 | 25 |
Iron
| Ingredients | Name | Dmg/Amr | Weight | Value |
|---|---|---|---|---|
| 3 Leather Strips, 5 Iron Ingot, Corundum Ingot | Banded Iron Armor | 28 | 35 | 200 |
| 1 Leather Strip, 4 Iron Ingot, Corundum Ingot | Banded Iron Shield | 22 | 12 | 100 |
| 3 Leather Strips, 5 Iron Ingot | Iron Armor | 25 | 30 | 125 |
| 2 Leather Strips, 4 Iron Ingot | Iron Battleaxe | 16 | 20 | 55 |
| 2 Leather Strips, 3 Iron Ingot | Iron Boots | 10 | 6 | 25 |
| 1 Leather Strip, 1 Iron Ingot | Iron Dagger | 4 | 2 | 10 |
| 2 Leather Strips, 2 Iron Ingot | Iron Gauntlets | 10 | 5 | 25 |
| 2 Leather Strips, 4 Iron Ingot | Iron Greatsword | 15 | 16 | 50 |
| 2 Leather Strips, 3 Iron Ingot | Iron Helmet | 15 | 5 | 60 |
| 2 Leather Strips, 3 Iron Ingot | Iron Mace | 9 | 13 | 35 |
| 1 Leather Strip 4 Iron Ingot | Iron Shield | 20 | 12 | 60 |
| 1 Leather Strip, 2 Iron Ingot | Iron Sword | 7 | 9 | 25 |
| 2 Leather Strips, 2 Iron Ingot | Iron War Axe | 8 | 11 | 30 |
| 3 Leather Strips, 4 Iron Ingot | Iron Warhammer | 18 | 24 | 60 |
Studded
| Ingredients | Name | Dmg/Amr | Weight | Value |
|---|---|---|---|---|
| 3 Leather Strips, 4 Leather, 1 Iron Ingot | Studded Armor | 23 | 6 | 75 |
Imperial
| Ingredients | Name | Dmg/Amr | Weight | Value |
|---|---|---|---|---|
| 3 Leather Strips, 2 Leather, 4 Steel Ingot | Imperial Armor | 25 | 35 | 100 |
| 2 Leather Strips, 1 Leather, 2 Steel Ingot | Imperial Boots | 10 | 8 | 20 |
| 2 Leather Strips, 1 Leather, 2 Steel Ingot | Imperial Bracers | 10 | 4 | 15 |
| 1 Leather Strip, 1 Leather, 2 Steel Ingot | Imperial Helmet | 15 | 5 | 50 |
| 2 Leather Strips, 4 Steel Ingot | Imperial Shield | 20 | 12 | 50 |
Steel
| Ingredients | Name | Dmg/Amr | Weight | Value |
|---|---|---|---|---|
| 3 Leather Strips, 2 Leather, 3 Steel Ingot, 2 Corundum Ingot | Scaled Armor | 32 | 6 | 350 |
| 2 Leather Strips, 1 Leather, 2 Steel Ingot, 1 Corundum Ingot | Scaled Boots | 9 | 2 | 70 |
| 2 Leather Strips, 1 Leather, 1 Steel Ingot, 1 Corundum Ingot | Scaled Bracers | 9 | 2 | 70 |
| 1 Leather Strip, 1 Leather, 2 Steel Ingot, 1 Corundum Ingot | Scaled Helmet | 14 | 2 | 175 |
| 3 Leather Strips, 4 Steel Ingot, 1 Iron Ingot | Steel Armor | 31 | 35 | 275 |
| 2 Leather Strips, 4 Steel Ingot, 1 Iron Ingot | Steel Battleaxe | 18 | 21 | 100 |
| 2 Leather Strips, 3 Steel Ingot, 1 Iron Ingot | Steel Cuffed Boots | 12 | 8 | 55 |
| 1 Leather Strip, 1 Steel Ingot, 1 Iron Ingot | Steel Dagger | 5 | 2.5 | 18 |
| 3 Leather Strips, 4 Steel Ingot, 2 Iron Ingot | Steel Greatsword | 17 | 17 | 90 |
| 2 Leather Strips, 2 Steel Ingot, 1 Iron Ingot | Steel Helmet | 17 | 5 | 125 |
| 2 Leather Strips, 2 Steel Ingot, 1 Iron Ingot | Steel Horned Helmet | 17 | 5 | 125 |
| 2 Leather Strips, 2 Steel Ingot, 1 Iron Ingot | Steel Imperial Gauntlets | 12 | 4 | 55 |
| 1 Leather Strip, 3 Steel Ingot, 1 Iron Ingot | Steel Mace | 10 | 14 | 65 |
| 2 Leather Strips, 2 Steel Ingot, 1 Iron Ingot | Steel Nordic Gauntlets | 12 | 4 | 55 |
| 3 Leather Strips, 3 Steel Ingot, 1 Iron Ingot, 1 Corundum Ingot | Steel Plate Armor | 40 | 38 | 625 |
| 2 Leather Strips, 2 Steel Ingot, 1 Iron Ingot, 1 Corundum Ingot | Steel Plate Boots | 14 | 9 | 125 |
| 2 Leather Strips, 2 Steel Ingot, 1 Iron Ingot, 1 Corundum Ingot | Steel Plate Gauntlets | 14 | 6 | 125 |
| 2 Leather Strips, 2 Steel Ingot, 1 Iron Ingot, 1 Corundum Ingot | Steel Plate Helmet | 19 | 6 | 300 |
| 1 Leather Strips, 3 Steel Ingot, 1 Iron Ingot | Steel Shield | 24 | 12 | 150 |
| 2 Leather Strips, 3 Steel Ingot, 1 Iron Ingot | Steel Shin Boots | 12 | 8 | 55 |
| 1 Leather Strip, 2 Steel Ingot, 1 Iron Ingot | Steel Sword | 8 | 10 | 45 |
| 2 Leather Strips, 2 Steel Ingot, 1 Iron Ingot | Steel War Axe | 9 | 12 | 55 |
| 3 Leather Strips, 4 Steel Ingot, 1 Iron Ingot | Steel Warhammer | 20 | 25 | 110 |
Leather
| Ingredients | Name | Dmg/Amr | Weight | Value |
|---|---|---|---|---|
| 3 Leather Strips, 4 Leather | Leather Armor | 26 | 6 | 125 |
| 2 Leather Strips, 2 Leather | Leather Boots | 7 | 2 | 25 |
| 2 Leather Strips, 1 Leather | Leather Bracers | 7 | 2 | 25 |
| 1 Leather Strip, 2 Leather | Leather Helmet | 12 | 2 | 60 |
Dwarven
| Ingredients | Name | Dmg/Amr | Weight | Value |
|---|---|---|---|---|
| 3 Leather Strips, 3 Dwarven Metal Ingot, 1 Iron Ingot, 1 Steel Ingot | Dwarven Armor | 34 | 45 | 400 |
| 2 Leather Strips, 2 Dwarven Metal Ingot, 1 Iron Ingot, 2 Steel Ingot | Dwarven Battleaxe | 20 | 23 | 300 |
| 2 Leather Strips, 2 Dwarven Metal Ingot, 1 Iron Ingot, 1 Steel Ingot | Dwarven Boots | 13 | 10 | 85 |
| 2 Dwarven Metal Ingot, 1 Iron Ingot | Dwarven Bow | 12 | 10 | 270 |
| 1 Leather Strip, 1 Dwarven Metal Ingot, 1 Iron Ingot, 1 Steel Ingot | Dwarven Dagger | 7 | 3.5 | 55 |
| 2 Leather Strips, 1 Dwarven Metal Ingot, 1 Iron Ingot, 1 Steel Ingot | Dwarven Gauntlets | 13 | 8 | 85 |
| 3 Leather Strips, 2 Dwarven Metal Ingot, 2 Iron Ingot, 2 Steel Ingot | Dwarven Greatsword | 19 | 19 | 270 |
| 2 Leather Strips, 2 Dwarven Metal Ingot, 1 Iron Ingot, 1 Steel Ingot | Dwarven Helmet | 18 | 12 | 200 |
| 1 Leather Strip, 2 Dwarven Metal Ingot, 1 Iron Ingot, 1 Steel Ingot | Dwarven Mace | 12 | 16 | 190 |
| 1 Leather Strip, 2 Dwarven Metal Ingot, 1 Iron Ingot, 1 Steel Ingot | Dwarven Shield | 26 | 12 | 225 |
| 1 Leather Strip, 1 Dwarven Metal Ingot, 1 Iron Ingot, 1 Steel Ingot | Dwarven Sword | 10 | 12 | 135 |
| 2 Leather Strips, 1 Dwarven Metal Ingot, 1 Iron Ingot, 1 Steel Ingot | Dwarven War Axe | 11 | 14 | 165 |
| 3 Leather Strips, 2 Dwarven Metal Ingot, 1 Iron Ingot, 2 Steel Ingot | Dwarven Warhammer | 22 | 27 | 325 |
Elven
| Ingredients | Name | Dmg/Amr | Weight | Value |
|---|---|---|---|---|
| 3 Leather Strips, 1 Leather, 4 Refined Moonstone, 1 Iron Ingot | Elven Armor | 29 | 4 | 225 |
| 2 Leather Strips, 2 Refined Moonstone, 2 Iron Ingot, 1 Quicksilver Ingot | Elven Battleaxe | 21 | 24 | 520 |
| 2 Leather Strips, 1 Leather, 2 Refined Moonstone, 1 Iron Ingot | Elven Boots | 8 | 1 | 45 |
| 2 Refined Moonstone, 1 Quicksilver Ingot | Elven Bow | 13 | 12 | 470 |
| 1 Leather Strips, 1 Refined Moonstone, 1 Iron Ingot, 1 Quicksilver Ingot | Elven Dagger | 8 | 4 | 95 |
| 2 Leather Strips, 1 Leather, 1 Refined Moonstone, 1 Iron Ingot | Elven Gauntlets | 8 | 1 | 45 |
| 3 Leather Strips, 4 Refined Moonstone, 1 Iron Ingot, 1 Quicksilver Ingot | Elven Gilded Armor | 35 | 4 | 550 |
| 3 Leather Strips, 2 Refined Moonstone, 2 Iron Ingot, 1 Quicksilver Ingot | Elven Greatsword | 20 | 20 | 470 |
| 1 Leather Strips, 1 Leather, 2 Refined Moonstone, 1 Iron Ingot | Elven Helmet | 13 | 1 | 110 |
| 1 Leather Strips, 2 Refined Moonstone, 1 Iron Ingot, 1 Quicksilver Ingot | Elven Mace | 13 | 17 | 330 |
| 2 Leather Strips, 4 Refined Moonstone, 1 Iron Ingot | Elven Shield | 21 | 4 | 115 |
| 1 Leather Strips, 1 Refined Moonstone, 1 Iron Ingot, 1 Quicksilver Ingot | Elven Sword | 11 | 13 | 235 |
| 2 Leather Strips, 1 Refined Moonstone, 1 Iron Ingot, 1 Quicksilver Ingot | Elven War Axe | 12 | 15 | 280 |
| 3 Leather Strips, 2 Refined Moonstone, 2 Iron Ingot, 1 Quicksilver Ingot | Elven Warhammer | 23 | 28 | 565 |
Orcish
| Ingredients | Name | Dmg/Amr | Weight | Value |
|---|---|---|---|---|
| 3 Leather Strips, 4 Orichalcum Ingot, 1 Iron Ingot | Orcish Armor | 40 | 35 | 1000 |
| 2 Leather Strips, 4 Orichalcum Ingot, 1 Iron Ingot | Orcish Battleaxe | 19 | 25 | 165 |
| 2 Leather Strips, 3 Orichalcum Ingot, 1 Iron Ingot | Orcish Boots | 15 | 7 | 200 |
| 2 Orichalcum Ingot, 1 Iron Ingot | Orcish Bow | 10 | 9 | 150 |
| 1 Leather Strips, 1 Orichalcum Ingot, 1 Iron Ingot | Orcish Dagger | 6 | 3 | 30 |
| 2 Leather Strips, 2 Orichalcum Ingot, 1 Iron Ingot | Orcish Gauntlets | 15 | 7 | 200 |
| 3 Leather Strips, 4 Orichalcum Ingot, 2 Iron Ingot | Orcish Greatsword | 18 | 18 | 75 |
| 2 Leather Strips, 2 Orichalcum Ingot, 1 Iron Ingot | Orcish Helmet | 20 | 8 | 500 |
| 1 Leather Strip, 3 Orichalcum Ingot, 1 Iron Ingot | Orcish Mace | 11 | 15 | 105 |
| 1 Leather Strip, 3 Orichalcum Ingot, 1 Iron Ingot | Orcish Shield | 30 | 14 | 500 |
| 1 Leather Strip, 2 Orichalcum Ingot, 1 Iron Ingot | Orcish Sword | 9 | 11 | 75 |
| 2 Leather Strips, 2 Orichalcum Ingot, 1 Iron Ingot | Orcish War Axe | 10 | 13 | 90 |
| 3 Leather Strips, 4 Orichalcum Ingot, 1 Iron Ingot | Orcish Warhammer | 21 | 26 | 180 |
Ebony
| Ingredients | Name | Dmg/Amr | Weight | Value |
|---|---|---|---|---|
| 3 Leather Strips, 5 Ebony Ingot | Ebony Armor | 43 | 38 | 1,500 |
| 2 Leather Strips, 5 Ebony Ingot | Ebony Battleaxe | 23 | 26 | 1,585 |
| 2 Leather Strips, 3 Ebony Ingot | Ebony Boots | 16 | 7 | 275 |
| 3 Ebony Ingot | Ebony Bow | 17 | 16 | 1,440 |
| 1 Leather Strip, 1 Ebony Ingot | Ebony Dagger | 10 | 5 | 290 |
| 2 Leather Strips, 2 Ebony Ingot | Ebony Gauntlets | 16 | 7 | 275 |
| 3 Leather Strips, 5 Ebony Ingot | Ebony Greatsword | 22 | 22 | 1,440 |
| 2 Leather Strips, 3 Ebony Ingot | Ebony Helmet | 21 | 10 | 750 |
| 1 Leather Strip, 3 Ebony Ingot | Ebony Mace | 16 | 19 | 1,000 |
| 1 Leather Strips, 4 Ebony Ingot | Ebony Shield | 32 | 14 | 750 |
| 1 Leather Strip, 2 Ebony Ingot | Ebony Sword | 13 | 15 | 720 |
| 2 Leather Strips, 2 Ebony Ingot | Ebony War Axe | 15 | 17 | 865 |
| 3 Leather Strips, 5 Ebony Ingot | Ebony Warhammer | 25 | 30 | 1,725 |
Glass
| Ingredients | Name | Dmg/Amr | Weight | Value |
|---|---|---|---|---|
| 3 Leather Strips, 1 Leather, 4 Refined Malachite, 2 Refined Moonstone | Glass Armor | 38 | 7 | 900 |
| 2 Leather Strips, 2 Refined Malachite, 2 Refined Moonstone | Glass Arrow | 18 | 0 | 6 |
| 2 Leather Strips, 1 Leather, 2 Refined Malachite, 1 Refined Moonstone | Glass Battleaxe | 22 | 25 | 900 |
| 2 Refined Malachite, 1 Refined Moonstone | Glass Boots | 11 | 2 | 190 |
| 1 Leather Strip, 1 Refined Malachite, 1 Refined Moonstone | Glass Bow | 15 | 14 | 820 |
| 2 Leather Strips, 1 Leather, 1 Refined Malachite, 1 Refined Moonstone | Glass Dagger | 9 | 4.5 | 165 |
| 3 Leather Strips, 2 Refined Malachite, 2 Refined Moonstone | Glass Gauntlets | 11 | 2 | 190 |
| 1 Leather Strip, 1 Leather, 2 Refined Malachite, 1 Refined Moonstone | Glass Greatsword | 21 | 22 | 820 |
| 3 Leather Strips, 2 Refined Malachite, 1 Refined Moonstone | Glass Helmet | 16 | 2 | 450 |
| 1 Leather Strip, 2 Refined Malachite, 1 Refined Moonstone | Glass Mace | 14 | 18 | 575 |
| 2 Leather Strips, 4 Refined Malachite, 1 Refined Moonstone | Glass Shield | 27 | 6 | 450 |
| 1 Leather Strip, 1 Refined Malachite, 1 Refined Moonstone | Glass Sword | 12 | 14 | 410 |
| 2 Leather Strips, 1 Refined Malachite, 1 Refined Moonstone | Glass War Axe | 13 | 16 | 490 |
| 3 Leather Strips, 3 Refined Malachite, 2 Refined Moonstone | Glass Warhammer | 24 | 29 | 985 |
Dragon
| Ingredients | Name | Dmg/Amr | Weight | Value |
|---|---|---|---|---|
| 3 Leather Strips, 3 Dragon Scales, 2 Dragon Bone | Dragonplate Armor | 46 | 40 | 2,125 |
| 2 Leather Strips, 3 Dragon Scales, 1 Dragon Bone | Dragonplate Boots | 17 | 8 | 425 |
| 2 Leather Strips, 2 Dragon Scales, 1 Dragon Bone | Dragonplate Gauntlets | 17 | 8 | 425 |
| 2 Leather Strips, 2 Dragon Scales, 1 Dragon Bone | Dragonplate Helmet | 22 | 8 | 1,050 |
| 1 Leather Strip, 3 Dragon Scales, 1 Dragon Bone | Dragonplate Shield | 34 | 15 | 1,050 |
| 3 Leather Strips, 1 Leather, 4 Dragon Scales, 2 Iron Ingot | Dragonscale Armor | 41 | 10 | 1,500 |
| 2 Leather Strips, 1 Leather, 2 Dragon Scales, 1 Iron Ingot | Dragonscale Boots | 12 | 3 | 300 |
| 2 Leather Strips, 1 Leather, 2 Dragon Scales, 1 Iron Ingot | Dragonscale Gauntlets | 12 | 3 | 300 |
| 1 Leather Strip, 1 Leather, 2 Dragon Scales, 1 Iron Ingot | Dragonscale Helmet | 17 | 4 | 750 |
| 2 Leather Strips, 4 Dragon Scales, 2 Iron Ingot | Dragonscale Shield | 29 | 6 | 750 |
Daedric
| Ingredients | Name | Dmg/Amr | Weight | Value |
|---|---|---|---|---|
| 3 Leather Strips, 5 Ebony Ingot, 1 Daedra Heart | Daedric Armor | 49 | 50 | 3,200 |
| 2 Leather Strips, 5 Ebony Ingot, 1 Daedra Heart | Daedric Battleaxe | 25 | 27 | 2750 |
| 2 Leather Strips, 3 Ebony Ingot, 1 Daedra Heart | Daedric Boots | 18 | 10 | 625 |
| 3 Ebony Ingot, 1 Daedra Heart | Daedric Bow | 19 | 18 | 2,500 |
| 1 Leather Strip, 1 Ebony Ingot, 1 Daedra Heart | Daedric Dagger | 11 | 6 | 500 |
| 2 Leather Strips, 2 Ebony Ingot, 1 Daedra Heart | Daedric Gauntlets | 18 | 6 | 625 |
| 3 Leather Strips, 5 Ebony Ingot, 1 Daedra Heart | Daedric Greatsword | 24 | 23 | 2,500 |
| 2 Leather Strips, 3 Ebony Ingot, 1 Daedra Heart | Daedric Helmet | 23 | 15 | 1,600 |
| 1 Leather Strip, 3 Ebony Ingot, 1 Daedra Heart | Daedric Mace | 16 | 20 | 1,750 |
| 1 Leather Strip, 4 Ebony Ingot, 1 Daedra Heart | Daedric Shield | 36 | 15 | 1,600 |
| 1 Leather Strip, 2 Ebony Ingot, 1 Daedra Heart | Daedric Sword | 14 | 16 | 1,250 |
| 2 Leather Strips, 2 Ebony Ingot, 1 Daedra Heart | Daedric War Axe | 15 | 18 | 1,500 |
| 3 Leather Strips, 5 Ebony Ingot, 1 Daedra Heart | Daedric Warhammer | 27 | 31 | 4,000 |
Jewelry
| Ingredients | Name | Dmg/Amr | Weight | Value |
|---|---|---|---|---|
| 1 Flawless Diamond, 1 Gold Ingot | Gold Diamond Necklace | 0 | 0.5 | 1,200 |
| 1 Diamond, 1 Gold Ingot | Gold Diamond Ring | 0 | 0.25 | 900 |
| 1 Emerald, 1 Gold Ingot | Gold Emerald Ring | 0 | 0.25 | 700 |
| 2 Flawless Amethyst, 1 Gold Ingot | Gold Jeweled Necklace | 0 | 0.5 | 485 |
| 1 Gold Ingot | Gold Necklace | 0 | 0.5 | 120 |
| 1 Gold Ingot | 2 Gold Ring | 0 | 0.25 | 75 |
| 1 Flawless Ruby, 1 Gold Ingot | Gold Ruby Necklace | 0 | 0.5 | 550 |
| 1 Sapphire, 1 Gold Ingot | Gold Sapphire Ring | 0 | 0.25 | 500 |
| 1 Amethyst, 1 Silver Ingot | Silver Amethyst Ring | 0 | 0.25 | 180 |
| 1 Flawless Emerald, 1 Silver Ingot | Silver Emerald Necklace | 0 | 0.5 | 830 |
| 1 Garnet, 1 Silver Ingot | Silver Garnet Ring | 0 | 0.25 | 160 |
| 1 Flawless Garnet, 1 Silver Ingot | Silver Jeweled Necklace | 0 | 0.5 | 380 |
| 1 Silver Ingot | Silver Necklace | 0 | 0.5 | 60 |
| 1 Silver Ingot | 2 Silver Ring | 0 | 0.25 | 30 |
| 1 Ruby, 1 Silver Ingot | Silver Ruby Ring | 0 | 0.25 | 260 |
| 1 Flawless Sapphire, 1 Silver Ingot | Silver Sapphire Necklace | 0 | 0.5 | 580 |
Draugr (Skyforge Only, after Glory of the Dead)
| Ingredients | Name | Dmg/Amr | Weight | Value |
|---|---|---|---|---|
| 3 Leather Strips, 3 Steel Ingot, 1 Ancient Nord Battleaxe | Nord Hero Battleaxe | 32 | 20 | 239 |
| 3 Leather Strips, 3 Steel Ingot, 1 Ancient Nord Greatsword | Nord Hero Greatsword | 30 | 16 | 199 |
| 2 Leather Strips, 2 Steel Ingot, 1 Ancient Sword | Nord Hero Sword | 30 | 9 | 107 |
| 2 Leather Strips, 2 Steel Ingot, 1 Ancient Nord War Axe | Nord Hero War Axe | 32 | 11 | 131 |
| 4 Leather Strips, 2 Leather, 2 Iron Ingot, 5 Steel Ingot | Ancient Nord Armor | 25 | 28 | 125 |
| 3 Leather Strips, 2 Leather, 2 Iron Ingot, 4 Steel Ingot | Ancient Nord Boots | 10 | 5 | 25 |
| 3 Leather Strips, 2 Leather, 2 Iron Ingot, 3 Steel Ingot | Ancient Nord Gauntlets | 10 | 4 | 25 |
| 3 Leather Strips, 2 Leather, 2 Iron Ingot, 3 Steel Ingot | Ancient Nord Helmet | 15 | 4 | 60 |
 Dawnguard Smithing Recipes
This table lists the recipes for forging the new items available in Dawnguard.
Arrows
| Ingredients | Name | Dmg/Amr | Weight | Value |
|---|---|---|---|---|
| 1 Firewood, 1 Iron Ingot | Iron Arrow (24) | 8 | 0 | 1 |
| 1 Firewood, 1 Steel Ingot | Steel Arrow (24) | 10 | 0 | 2 |
| 1 Firewood, 1 Dwarven Metal Ingot | Dwarven Arrow (24) | 14 | 0 | 4 |
| 1 Firewood, 1 Refined Moonstone | Elven Arrow (24) | 16 | 0 | 5 |
| 1 Firewood, 1 Orichalcum Ingot | Orcish Arrow (24) | 12 | 0 | 3 |
| 1 Firewood, 1 Ebony Ingot | Ebony Arrow (24) | 20 | 0 | 7 |
| 1 Firewood, 1 Malachite Ingot | Glass Arrow (24) | 18 | 0 | 6 |
| 1 Firewood, 1 Ebony Ingot, 1 Daedra Heart | Daedric Arrow (24) | 24 | 0 | 8 |
| 1 Firewood, 1 Dragon Bone | Dragonbone Arrow (24) | 25 | 0 | 9 |
Dragon
| Ingredients | Name | Dmg/Amr | Weight | Value |
|---|---|---|---|---|
| 2 Leather Strips, 2 Ebony Ingot, 3 Dragon Bone | Dragonbone Battleaxee | 26 | 30 | 3,000 |
| 1 Ebony Ingot, 2 Dragon Bone | Dragonbone Bow | 20 | 20 | 2,725 |
| 1 Leather Strip, 1 Dragon Bone | Dragonbone Dagger | 12 | 6.5 | 600 |
| 3 Leather Strips, 1 Ebony Ingot, 4 Dragon Bone | Dragonbone Greatsword | 25 | 27 | 2,725 |
| 1 Leather Strip, 1 Ebony Ingot, 2 Dragon Bone | Dragonbone Mace | 17 | 22 | 2,000 |
| 1 Leather Strips, 1 Ebony Ingot, 1 Dragon Bone | Dragonbone Sword | 15 | 19 | 1,500 |
| 2 Leather Strips, 1 Ebony Ingot, 1 Dragon Bone | Dragonbone War Axe | 16 | 21 | 1,700 |
| 3 Leather Strips, 2 Ebony Ingots, 3 Dragon Bones | Dragonbone Warhammer | 28 | 33 | 4275 |
Miscellaneous
| Ingredients | Name | Dmg/Amr | Weight | Value |
|---|---|---|---|---|
| 2 Leather Strips, 1 Bone Hawk Skull, 6 Bone Hawk Feathers | Bone Hawk Amulet | 0 | 1 | 100 |
| 2 Shellbug Chitin, 2 Iron Ingot | Shellbug Helmet | 22 | 6 | 600 |
Crossbows and Bolts
| Ingredients | Name | Dmg/Amr | Weight | Value |
|---|---|---|---|---|
| 3 Firewood, 3 Steel Ingot | Crossbow | 19 | 14 | 120 |
| 1 Steel Crossbow, 2 Corundum Ingots | Enhanced Crossbow | 19 | 15 | 200 |
| 5 Dwarven Ingots | Dwarven Crossbow | 22 | 20 | 350 |
| Dwarven Crossbow, 2 Quicksilver Ingots | Enhanced Dwarven Crossbow | 22 | 21 | 550 |
| 1 Firewood, 1 Steel Ingot | Steel Bolt (10) | 10 | 0 | 1 |
| 10 Steel Bolts, 1 Fire Salts | Exploding Steel Bolt of Fire (10) | 10 | 0 | 5 |
| Explodes for 10 points of fire damage. | ||||
| 10 Steel Bolts, 1 Frost Salts | Exploding Steel Bolt of Ice (10) | 10 | 0 | 5 |
| Explodes for 10 points of frost damage to Health and Stamina. | ||||
| 10 Steel Bolts, 1 Void Salts | Exploding Steel Bolt of Shock (10) | 10 | 0 | 5 |
| Explodes for 10 points of shock damage to Health and half that to Magicka. | ||||
| 1 Firewood, 1 Dwarven Ingot | Dwarven Bolt (10) | 14 | 0 | 3 |
| 1 Dwarven Bolt, 1 Fire Salts | Exploding Dwarven Bolt of Fire (10) | 14 | 0 | 15 |
| Explodes for 10 points of fire damage. | ||||
| 1 Dwarven Bolt, 1 Frost Salts | Exploding Dwarven Bolt of Ice (10) | 14 | 0 | 15 |
| Explodes for 10 points of frost damage to Health and Stamina. | ||||
| 1 Dwarven Bolt, 1 Void Salts | Exploding Dwarven Bolt of Shock (10) | 14 | 0 | 15 |
| Explodes for 10 points of shock damage to Health and half that to Magicka. |
Aetherium (Aetherium Forge only)
| Ingredients | Name | Dmg/Amr | Weight | Value |
|---|---|---|---|---|
| 1 Aetherium Crest, 2 Flawless Sapphires, 2 Dwarven Ingots, 2 Gold Ingots | Aetherial Crown | 0 | 2 | 2250 |
| 1 Aetherium Crest, 4 Dwarven Ingots, 2 Malachite Ingots | Aetherial Shield | 26 | 12 | 2000 |
| 1 Aetherium Crest, 2 Dwarven Ingots, 2 Ebony Ingots, 1 Gold Ingot | Aetherial Staff | 0 | 8 | 1970 |
Hearthfire Smithing Recipes
Building Materials (Hearthfire only)
| Ingredients | Name | Dmg/Amr | Weight | Value |
|---|---|---|---|---|
| 1 Iron Ingot | Iron Fittings | 1 | 4 | |
| 1 Iron Ingot | Hinge (2) | 0.5 | 4 | |
| 1 Iron Ingot | Nails (10) | 0.1 | 1 | |
| 1 Iron Ingot, 1 Corundum Ingot | Lock | 0.5 | 10 |
 Dragonborn Smithing Recipes
This table lists the additional recipes for forging the new items available in Dragonborn. You should also reference the previous Smithing recipes for a complete list.
Bonemold
| Ingredients | Name | Dmg/Amr | Weight | Value |
|---|---|---|---|---|
| 2 Netch Leather, 10 Bone Meal, 1 Iron Ingot | Bonemold Armor | 32 | 34 | 290 |
| 1 Netch Leather, 1 Iron Ingot, 6 Bone Meal | Bonemold Boots | 12 | 7 | 60 |
| 1 Netch Leather, 4 Bone Meal, 1 Iron Ingot | Bonemold Gauntlets | 12 | 3.5 | 60 |
| 1 Netch Leather, 6 Bone Meal, 1 Iron Ingot | Bonemold Helmet | 17 | 4.5 | 135 |
| 1 Netch Leather, 8 Bone Meal, 1 Iron Ingot | Bonemold Shield | 22 | 8 | 95 |
| 2 Netch Leather, 10 Bone Meal, 1 Iron Ingot, 1 Void Salts, 1 Stalhrim Ore, 1 Netch Jelly | Improved Bonemold Armor | 35 | 43 | 290 |
| 1 Netch Leather, 6 Bone Meal, 1 Iron Ingot, 1 Void Salts, 1 Stalhrim Ore, 1 Netch Jelly | Improved Bonemold Boots | 13 | 9 | 60 |
| 1 Netch Leather, 4 Bone Meal, 1 Iron Ingot, 1 Void Salts, 1 Stalhrim Ore, 1 Netch Jelly | Improved Bonemold Gauntlets | 13 | 7 | 60 |
| 1 Netch Leather, 6 Bone Meal, 1 Iron Ingot, 1 Void Salts, 1 Stalhrim Ore, 1 Netch Jelly | Improved Bonemold Helmet | 18 | 11 | 135 |
| 1 Netch Leather, 8 Bone Meal, 1 Iron Ingot, 1 Void Salts, 1 Stalhrim Ore, 1 Netch Jelly | Improved Bonemold Shield | 26 | 11 | 95 |
Chitin
| Ingredients | Name | Dmg/Amr | Weight | Value |
|---|---|---|---|---|
| 2 Netch Leather, 5 Chitin Plate, 1 Iron Ingot | Chitin Armor | 30 | 4 | 240 |
| 1 Netch Leather, 3 Chitin Plate, 1 Iron Ingot | Chitin Boots | 9 | 1 | 50 |
| 1 Netch Leather, 2 Chitin Plate, 1 Iron Ingot | Chitin Bracers | 9 | 2 | 50 |
| 2 Netch Leather, 6 Chitin Plate, 1 Corundum Ingot | Chitin Heavy Armor | 40 | 35 | 650 |
| 1 Netch Leather, 4 Chitin Plate, 1 Corundum Ingot | Chitin Heavy Boots | 14 | 6 | 135 |
| 1 Netch Leather, 3 Chitin Plate, 1 Corundum Ingot | Chitin Heavy Gauntlets | 14 | 5 | 135 |
| 1 Netch Leather, 4 Chitin Plate, 1 Corundum Ingot | Chitin Heavy Helmet | 19 | 5 | 135 |
| 1 Netch Leather, 3 Chitin Plate, 1 Iron Ingot | Chitin Helmet | 14 | 1 | 125 |
| 1 Netch Leather, 4 Chitin Plate, 1 Iron Ingot | Chitin Shield | 25 | 8 | 215 |
Nordic
| Ingredients | Name | Dmg/Amr | Weight | Value |
|---|---|---|---|---|
| 1 Firewood, 1 Steel Ingot, 1 Quicksilver Ingot | Nordic Arrow (24) | 12 | 0 | 3 |
| 5 Steel Ingot, 2 Leather Strips, 1 Quicksilver Ingot | Nordic Battleaxe | 21 | 23 | 650 |
| 3 Steel Ingot, 1 Quicksilver Ingot | Nordic Bow | 13 | 11 | 580 |
| 3 Leather Strips, 6 Steel Ingot, 1 Ebony Ingot, 1 Quicksilver Ingot | Nordic Carved Armor | 43 | 37 | 1600 |
| 2 Leather Strips, 4 Steel Ingot, 1 Ebony Ingot, 1 Quicksilver Ingot | Nordic Carved Boots | 15 | 6 | 220 |
| 2 Leather Strips, 3 Steel Ingot, 1 Ebony Ingot, 1 Quicksilver Ingot | Nordic Carved Gauntlets | 15 | 6 | 220 |
| 2 Leather Strips, 4 Steel Ingot, 1 Ebony Ingot, 1 Quicksilver Ingot | Nordic Carved Helmet | 20 | 7 | 550 |
| 1 Steel Ingot, 1 Leather Strips, 1 Quicksilver Ingot | Nordic Dagger | 8 | 3.5 | 115 |
| 5 Steel Ingot, 3 Leather Strips, 1 Quicksilver Ingot | Nordic Greatsword | 20 | 19 | 585 |
| 1 Leather Strips, 1 Steel Ingot, 1 Quicksilver Ingot | Nordic Mace | 13 | 16 | 410 |
| 1 Leather Strips, 4 Steel Ingot, 1 Quicksilver Ingot | Nordic Shield | 27 | 10 | 335 |
| 2 Steel Ingot, 1 Leather Strips, 1 Quicksilver Ingot | Nordic Sword | 11 | 12 | 290 |
| 2 Steel Ingot, 2 Leather Strips, 1 Quicksilver Ingot | Nordic War Axe | 12 | 14 | 350 |
| 5 Steel Ingot, 3 Leather Strips, 1 Quicksilver Ingot | Nordic Warhammer | 23 | 27 | 700 |
Stalhrim
| Ingredients | Name | Dmg/Amr | Weight | Value |
|---|---|---|---|---|
| 3 Leather Strips, 6 Stalhrim Ore, 1 Quicksilver Ingot | Stalhrim Armor | 46 | 38 | 2200 |
| 1 Firewood, 1 Stalhrim Ore | Stalhrim Arrow (24) | 20 | 0 | 7 |
| 5 Stalhrim Ore, 2 Leather Strips | Stalhrim Battleaxe | 24 | 25 | 2150 |
| 2 Leather Strips, 1 Quicksilver Ingot, 4 Stalhrim Ore | Stalhrim Boots | 17 | 7 | 450 |
| 3 Stalhrim Ore | Stalhrim Bow | 17 | 15 | 1800 |
| 1 Stalhrim Ore, 1 Leather Strips | Stalhrim Dagger | 10 | 4.5 | 395 |
| 2 Leather Strips, 3 Stalhrim Ore, 1 Quicksilver Ingot | Stalhrim Gauntlets | 17 | 7 | 450 |
| 5 Stalhrim Ore, 3 Leather Strips | Stalhrim Greatsword | 23 | 21 | 1970 |
| 2 Leather Strips, 4 Stalhrim Ore, 1 Quicksilver Ingot | Stalhrim Helmet | 22 | 7 | 1135 |
| 3 Leather Strips, 5 Stalhrim Ore, 1 Steel Ingot | Stalhrim Light Armor | 39 | 7 | 925 |
| 2 Leather Strips, 1 Steel Ingot, 3 Stalhrim Ore | Stalhrim Light Boots | 12 | 2 | 215 |
| 2 Leather Strips, 2 Stalhrim Ore, 1 Steel Ingot | Stalhrim Light Gauntlets | 12 | 2 | 215 |
| 2 Leather Strips, 3 Stalhrim Ore, 1 Steel Ingot | Stalhrim Light Helmet | 17 | 2 | 465 |
| 3 Stalhrim Ore, 1 Leather Strips | Stalhrim Mace | 16 | 18 | 1375 |
| 1 Leather Strips, 4 Stalhrim Ore, 1 Steel Ingot | Stalhrim Shield | 30 | 10 | 600 |
| 2 Stalhrim Ore, 1 Leather Strips | Stalhrim Sword | 13 | 14 | 985 |
| 2 Stalhrim Ore, 2 Leather Strips | Stalhrim Waraxe | 15 | 16 | 1180 |
| 5 Stalhrim Ore, 3 Leather Strips | Stalhrim Warhammer | 26 | 29 | 2850 |