
Elder Scrolls V: Skyrim Special Edition Guide The Atlas Solstheim: Northern Mountains
[S.N16] Benkongerike
[S.N16] Benkongerike
Related Quests
- Solstheim Side Quest: Black Book: Untold Legends
- Solstheim Side Quest: The Great Skyrim Strongbox Hunt*
Recommended Level: 6
Dungeon: Draugr Crypt (Riekling Camp)
- Bristleback
- Mounted Riekling
- Riekling
Collectibles
- East Empire Strongbox [DB5/33]
Special Area
- Black Book: Untold Legends
- Word Wall: Cyclone [DB1/3]
Dangers
- Swinging Wall Trap (3)
Puzzle
- Nordic Puzzle Pillars
Miscellaneous
- Chest
- Potions
- Loose Gear
Exterior
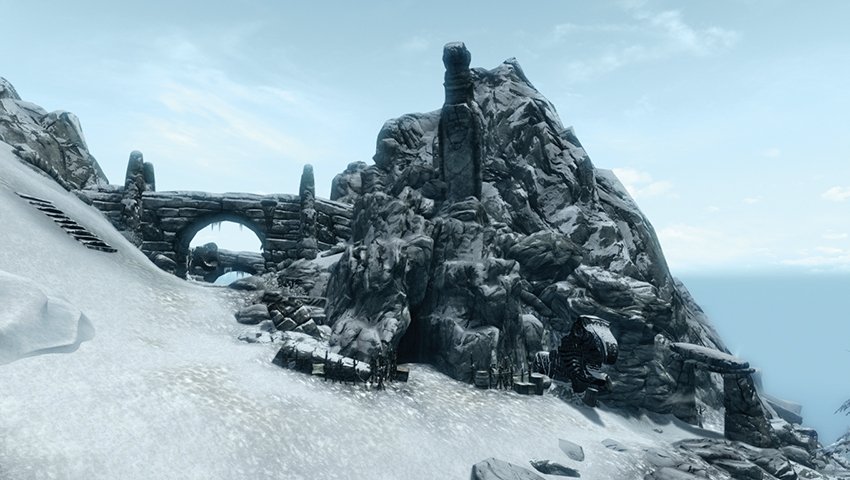
A vast and icy cave system that intrudes into an ancient Nord crypt, Benkongerike is one of the largest locations in the upper mountains that you can explore. The entrance is along a narrow bluff southeast of Saering’s Watch. Claim the chest before you enter.
- Chest [Novice]
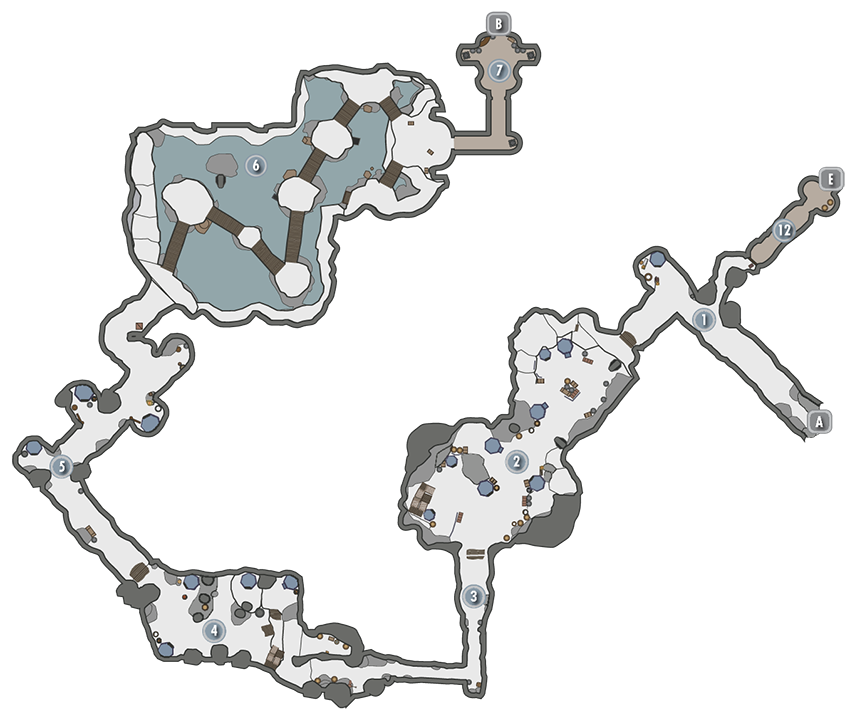
Interior: Benkongerike
 Exit to Solstheim
 Entrance Tunnel
The stone here shows signs of workmanship, unlike the naturally occurring ice tunnels. There’s a very narrow side tunnel to your right (north), leading to a chest; this is the exit from Location [12].
- Chest [Novice]
 Stone Pillars Riekling Camp
There are four or five Rieklings and a Bristleback in this long chamber of a half-dozen huts, with fallen Nord pillars helping to steady the crumbling roof. The camps have a variety of detritus but nothing of high value.
- Riekling
- Bristleback
 Ice Tunnel
Meander down here, watching for a couple of foes as you emerge overlooking the ice cavern camp. There’s a small, dead-end ice tunnel with a chest to inspect.
- Chest
- Riekling
 Ice Cavern Riekling Camp
Aside from two or three foes, there’s little to worry about here; in fact, one of the huts has a flawless sapphire to grab. Continue deeper into these tunnels.
- Flawless Sapphire
- Riekling
 Trap Tunnel
Carefully tread down this narrow ice tunnel, as there are three ambushes and two tripwires (trigger them then back up to avoid the swinging wall) before you reach the small hut to your right (east) with the statue of Dibella. Turn left (northwest) and avoid another tripwire and ambush as you exit this tunnel.
- Danger! Swinging wall trap (3)
- Loose gear
- Potions
- Statue of Dibella
- Riekling
 Cavern of Bridges
The Rieklings have been busy constructing bridges across this large cavern; there are six foes to avoid or remove as you head across, pausing just before the exit to cross over a bridge to the southwest. Spin back around the ledge just below the exit, to a pair of silver ore veins. Optionally, drop into the ankle-deep water below: there is a chest to the northeast [Novice] and two silver ore veins to the north.
- Chest [Novice]
- Silver Ore Vein (4)
- Riekling
 Antechamber
 Door to Benkongerike Great Hall
Three Rieklings explode from their hiding spots on either side of this door.
- Potions
- Riekling
 Exit Tunnel
Escape from Hermaeus Mora’s chamber down a narrow tunnel to a pull chain; this allows access to the narrow tunnel in Location [1].
Interior: Benkongerike Great Hall
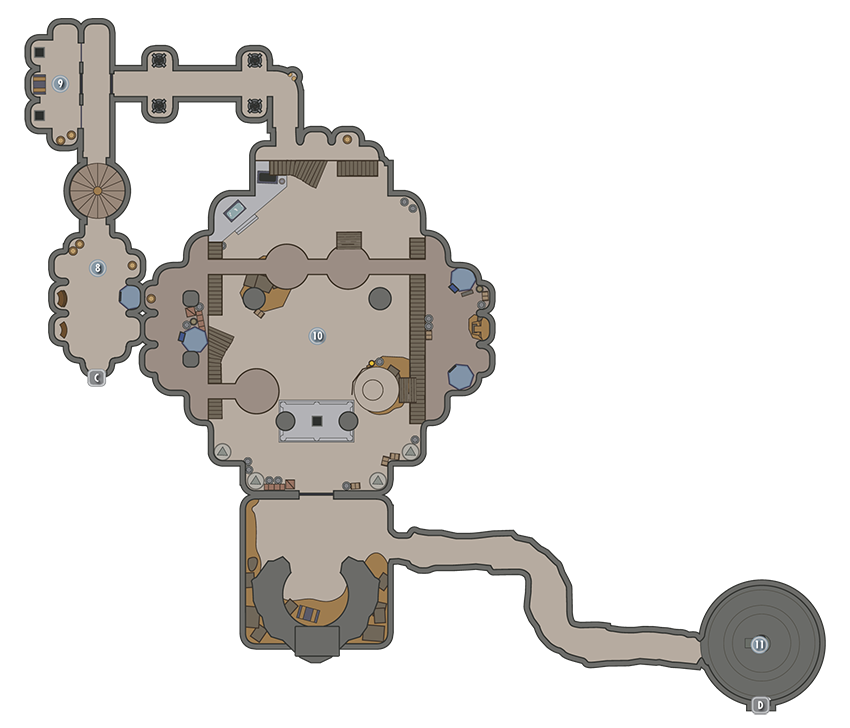
 Door to Benkongerike
 Entrance and Spiral Steps
Someone has been hoarding copies of The Lusty Argonian Maid in this tent. You can also find a Spell Tome here.
- Spell Tome: Telekinesis
 Caged Pedestals
Across from the corridor to Location [10] are two barred arches with a door [Expert] leading to pedestals and a chest. If you can cast the Telekinesis spell, pull the key through the bars toward you and use it to open the door. You can also just pick the lock, but the key is useless to you if you do.
- Chest
- Benkongerike Key
 Great Hall and Word Wall
A Bristleback-mounted Riekling and a half-dozen infantry foes present a temporary problem. After you slay anything with blue skin, head south to inspect the Nordic Puzzle.
Puzzle Solution: Ignore the pedestal with the handle (it’s a dart trap), and instead search the walls for petroglyphs corresponding to the moveable cylinders below. The correct order from left to right is Hawk, Whale, Whale, and Serpent. The second petroglyph clue is missing; find it as part of the tent decoration on this chamber’s eastern upper ledge. Check the chest by the Word Wall, then absorb the Cyclone Word of Power.
- Danger! Dart Trap
- Mounted Riekling
- Riekling
- Stalhrim Deposit
- Chest
- East Empire Strongbox [Expert] [DB5/33]
- Word Wall: Cyclone [DB1/3]
 Hermaeus Mora’s Chamber.
Head east down the narrow tunnel and into a circular chamber where a Black Book awaits. This begins Solstheim Side Quest: Black Book: Untold Legends.
- Black Book: Untold Legends