
Elder Scrolls V: Skyrim Special Edition Guide Quests Side Quests
Side Quests: Forbidden Legend
Forbidden Legend
This quest can be started in any number of ways. There’s no “optimal” way to begin, and no one to speak to about it. You’re most likely to just stumble across it somewhere as a part of your adventure. Here are some of the possibilities:
- When exploring any of the locations for this quest, such as Saarthal (in College of Winterhold Quests: Under Saarthal), you may find a cryptic note on the boss that begins this quest. These all point you to copies of the book Lost Legends of Skyrim.
- Or, you may find the book first. Copies of Lost Legends are all over the world, and reading any of them, such as the one in Farengar’s library in Dragonsreach, will give you some background and direct you to Folgunthur.
- Or, you may simply enter Folgunthur on your own and find the body of Daynas Valen. His notes provide the clues that guide the rest of your journey.
Do Not Disturb
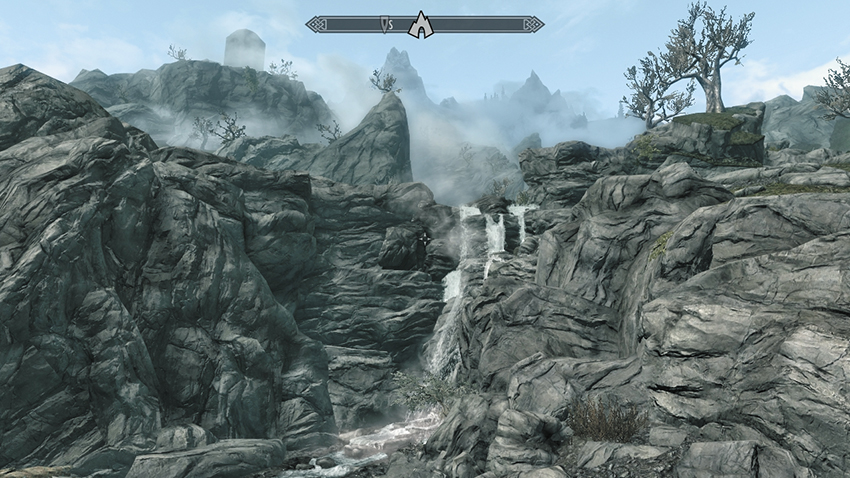
Deep in the Reach, the southern road follows the river as it winds through the canyons toward Markarth. At one point, the road crosses a bridge with a large waterfall to the south. Head up the rocky slope, onto a dirt path that leads to the rushing stream, and follow the streambed through the falls. Hidden behind is the entrance to Reachwater Rock. The “Rock” in question is inside the cavern: a natural stone island with a single gnarled tree, above a gloomy lake. A dead adventurer lies against the tree, and a pedestal stands nearby. There are two items of interest on the pedestal:
- Ancient Edict
- Emerald Dragon Claw
The Edict is particularly worrying; it tells you to leave this place, as whatever was sealed in here was done at a great price. Take the Claw as well, and once you choose to ignore the warning, this quest continues!
If you haven’t already, check the adventurer’s body. In addition to some potions, he also has a copy of the book Lost Legends of Skyrim, which tells the tale of the Arch-Mage Gauldur and his three sons, all murdered in ages past. Could this sealed tomb be connected to the legend? The book doesn’t say, but it does mention one place that is: Folgunthur, near the foot of Solitude, far to the north.
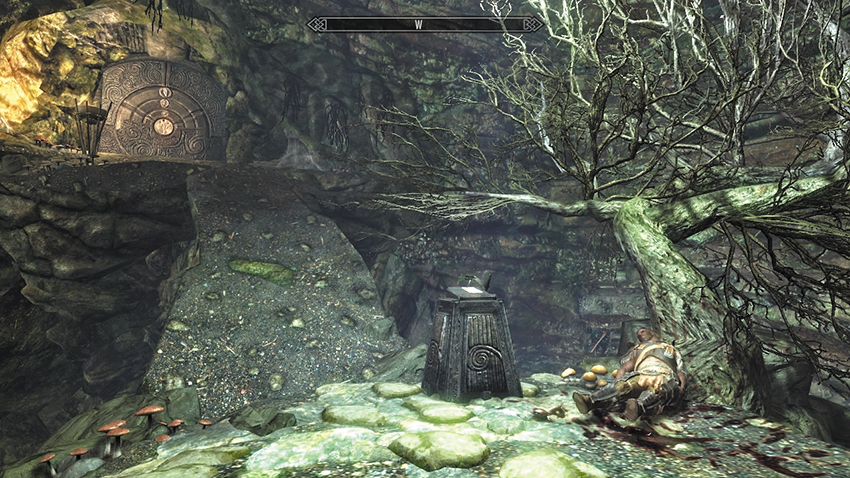
Although the objective is out of the cave, you can see a Nordic Puzzle Door set into the rock wall above the pedestal.
Puzzle Solution: The door consists of three “rings” that rotate when you activate them. Each has three animals plated into the stonework, and the central keyhole is unlocked using the Emerald Dragon Claw; the puzzle is inaccessible without it. The puzzle solution is actually on the palm of the Claw; rotate it in your inventory to see the three circular petroglyph carvings on the Claw’s palm. Move the rings so the Bear, Whale, and Snake appear on the outer, middle, and inner rings, respectively. Then insert the Emerald Dragon Claw into the keyhole.
Through the door, a long hallway greets you, along with three additional doors that grind open one after the other. They lead to a second (and completely sealed) Nordic Puzzle Door. This features different petroglyphs, and your Emerald Dragon Claw doesn’t fit the keyhole. You return here at the zenith of this quest.
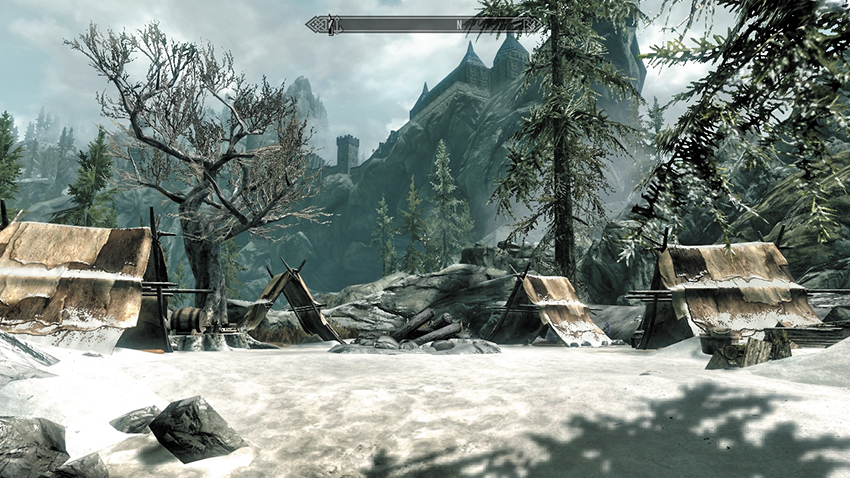
Travel to Folgunthur, just southeast of Solitude in the marshes, and inspect the long-abandoned campground outside the barrow. Inside one of the snow-dusted tents is Daynas Valen’s Journal. Read and stow it; the book speaks of his obsession with the Gauldur legend, which he, too, has traced to Folgunthur.
- Daynas Valen’s Journal
Be Bound Here, Mikrul: Murderer, Betrayer
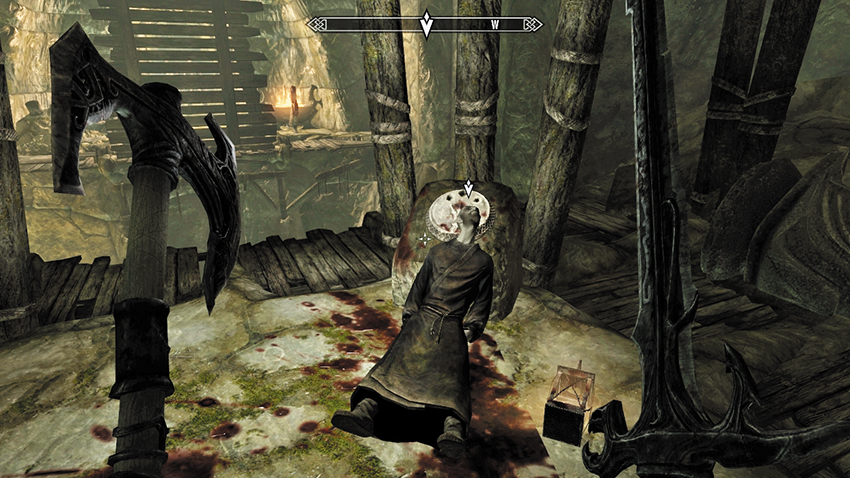
Open the ominous Iron Doors of Folgunthur, watching for a trigger plate in the initial tunnel; you don’t want to be skewered by the spikes shooting from the dragon busts on either side of you. Note the corpses of the adventurers and Draugr strewn across the passage; you’re far from the first to venture into this tomb. At the bottom of the tunnel steps is a claw keyhole, which seems to have already been opened, and requires the Ivory Claw (which Daynas has, according to his journal).
Inside the entrance room is a Nordic Puzzle. It, too, has already been solved. The exit opposite leads to a pressure plate and fire trap and the first live Draugr in the tomb. The passage continues into an expansive subterranean banquet hall, with Draugr literally peeling away from the walls and oily floors and lamps to roast them with.
Enter the passage on the banquet hall’s far side, where a floor grate drops away as you step near. You are fortunate that the drop onto spikes is filled with water. Carefully step around the grating or use the wall lever to close it and lift you out of the pit; then ascend the spiral steps. This leads to a balcony overlooking the banquet hall and the bloody remains of Daynas Valen, cut down close to another claw keyhole. Search his corpse for two important items:
- Daynas Valen’s Notes
- Ivory Dragon Claw
Grab the items, and leaf through the notes. Daynas’s obsession and years of painstaking research finally led him to the surprising truth about Gauldur and his sons and the powerful amulet that bound the brothers together. It is obviously powerful. But is it worth the danger involved in assembling the pieces? Yes, of course it is!
Insert the Ivory Dragon Claw into the keyhole by Daynas’s corpse. This lowers the bridge, forcing you into combat with the Draugr beyond. Battle through, into a small crypt (watch for a floor trigger and spear trap in the chamber to your left) and around to a Nordic Lever Puzzle.
Puzzle Solution: There are four levers, each moving a particular set of the four portcullises that block your path. Pull the right-front and left-rear levers to open your path.
Head down the steep stairs, watching for a rock-fall trap. Open the wooden door into a guardian chamber with two Draugr near their thrones and a large central grating. Currently, if you pull on the wall chain, you’re pierced by darts. There is a trick to opening this grating:
Puzzle Solution: There are two levers, one by each throne. Both of them rotate walls that block the nearby doors, allowing you to enter the chambers beyond. The right one currently allows you to access a semicircular chamber adjacent to the throne and lever. Battle the Draugr before inspecting the three large stone heads, each with an animal petroglyph in their maws. Working counterclockwise from the first petroglyph you see, the order is Snake, Whale, and Hawk. Return to the grating chamber, and pull the lever by the left throne until the rock wall shifts to open into a second, almost identical chamber. The difference is that there are three pillars. Rotate them so that the Snake faces out from the first pillar (facing the doorway), the Whale faces out from the second, and the Hawk faces from the third, mimicking the petroglyphs in the mirrored room you just came from. Now when you pull the chain, the grate opens.
Wind your way down the long spiral steps to a waterlogged tunnel with Frostbite Spiders to tackle. The open doors at the far end lead to a long hall, flanked with coffins. As you enter the hall, the doors slam shut behind you and the lights go out. Crypts to either side of the room open, and Draugr begin to emerge in the darkness. Quickly use a Nighteye spell or power if you can, then battle the guardians. When the foes are vanquished, the lights come back on. Step up to another Nordic Puzzle Door.
Puzzle Solution: Move the rings so the Hawk, Hawk, and Dragon appear on the outer, middle, and inner rings, respectively. Then insert the Ivory Dragon Claw into the keyhole. Venture forward, and open the doors leading into Folgunthur Crypt.
Brother Battle: Mikrul Gauldurson
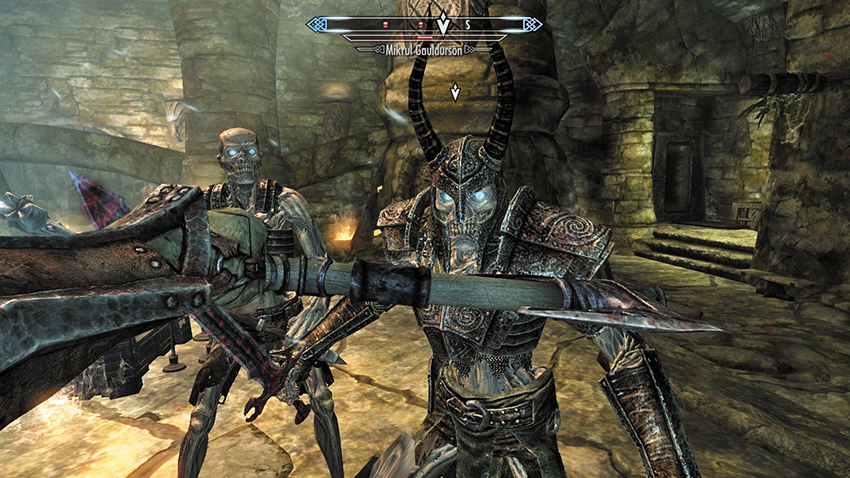
The crypt is a massive chamber, flanked with coffins and a main tomb at the far (southeast) end. When you’re about halfway across the crypt, the sarcophagus bursts open, and out clambers the fearsome Mikrul Gauldurson, now a Draugr of considerable power! Aside from his inherent toughness, he also wields the Gauldur Blackblade, a powerful sword with an Absorb Health enchantment. He is accompanied by Draugr Thralls: weak, unarmed Draugr that do little damage but crowd the space, making it hard for you to flee from Mikrul’s reach.
Especially at low levels, you may find it harrowing to fight Mikrul in melee combat, as every blow he delivers rapidly refills his health. Followers and summoned creatures are best left behind, since Mikrul can drain their health just as easily. The safest bet is to refrain from being hit at all. Back away as best you can, dodge his blows, and use a bow or spells to whittle down his health. If desperate measures are called for, you can jump across the sarcophagi along the sides of the room to flee and regroup.
Once Mikrul falls, any surviving thralls also die. Be sure you pry Mikrul’s bony fingers off his vampiric blade, which is an exceptional one-handed weapon. There are two other items of interest, too:
- Gauldur Blackblade
- Gauldur Amulet Fragment
- Writ of Sealing
Don’t be fooled by the “fragment” part: Mikrul’s amulet fragment is a full amulet in its own right and has a solid Fortify Health enchantment. The Writ has a curse against the Gauldurson brother written upon it. To exit the chamber, move to the far (southeast) end and insert the Ivory Dragon Claw into the right-side keyhole (the left leads to a rockfall). This removes the spear bars and allows access to the treasure chamber, which also contains a Word Wall. Now leave Folgunthur out of the southeast Iron Door, push out a sarcophagus lid for a shortcut into the banquet hall crypt, and retrace your steps back out. On your way, use the Ivory Claw in the first puzzle room to open a secret door with a chest.
- Word of Power: Frost Breath
Be Bound Here, Sigdis: Murderer, Betrayer
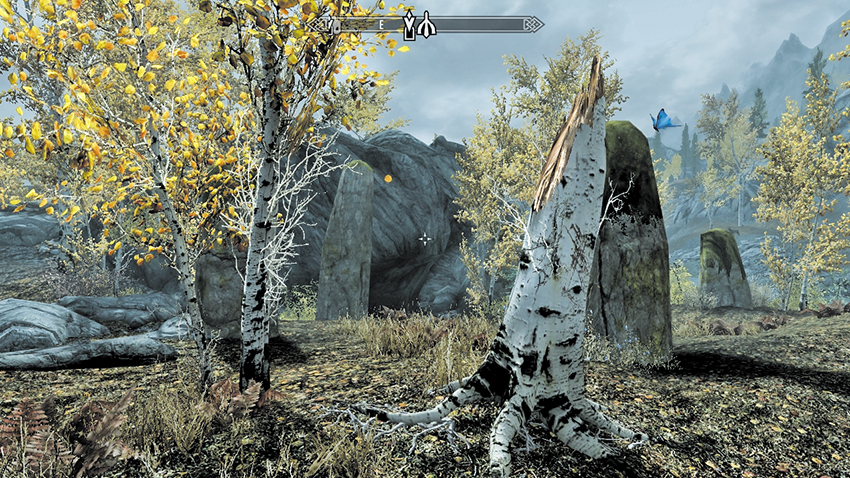
Travel to Geirmund’s Hall, east of Ivarstead in the hilly forest close to Lake Geir. Enter the cave and crush the two Skeever; then peer down the massive sinkhole in the center of the room. Drop into the water below. Aside from the submerged crypt passage leading to a chest and a dead end, there are steps up to an Iron Door. Slash your way through Frostbite Spiders, watch for a trigger plate that launches darts, and head down into a waterlogged crypt. Aside from Draugr, there are Nordic puzzle pillars to inspect.
Puzzle Solution: Stand atop the steps and face down into the waterlogged crypt. On the left (south) wall are two small petroglyph plaques showing a Hawk and a Whale. On the right (north) wall, there are plaques showing a Whale and a Snake. Continue along the crypt’s left side, and spin the two pillars to show the Hawk and the Whale. Backtrack, and continue along the crypt’s right side, and spin the two pillars to show the Whale and the Snake (the first of these already shows the Whale and so doesn’t need to be moved). Then pull the lever to open the portcullis doorway.
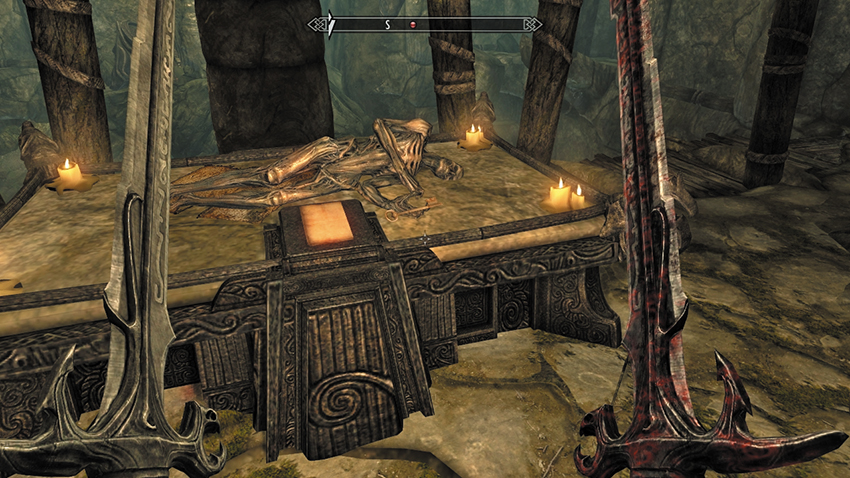
Head into the ruined hub chamber with a fallen bridge and steps up to an altar. You’ll return here later, so simply check the corpse on the altar for a key and epitaph, where Lord Geirmund keeps his eternal vigil. To open the Iron Door behind the altar (Adept), use the key or pick it. Pass the Arcane Enchanter and turn left (west), as the direct route to Sigdis Gauldurson’s sarcophagus is blocked. Climb the steps, kill the Draugr on the balcony overlooking the hub room, and ignore the easily spotted lever (unless you want spears in your sides). Instead, pull the hidden one just behind you to the right (southwest). This lowers the bridge.
Fight the Draugr as you cross (you can jump to the right and open a locked door [Expert] to reach a small treasure room, then retrace your steps). Use another lever on the middle “island” to lower the second bridge, and fight through into a small passage. Watch the floor trigger, or face swinging axes around the corner. Quickly step to the wall lanterns between the blades to avoid them.
- Lord Geirmund’s Key
- Geirmund’s Epitaph
Brother Battle: Sigdis Gauldurson
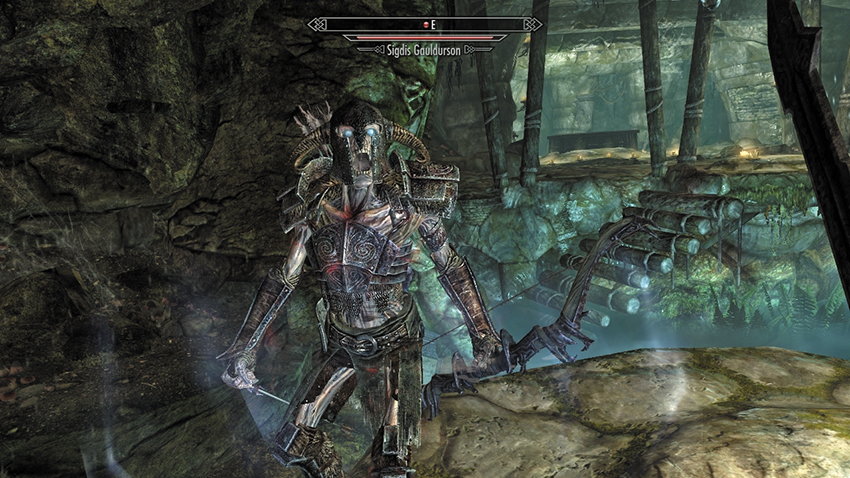
Follow the passage around and into the tomb of Sigdis Gauldurson. The moment he steps from his sarcophagus, he teleports away, and you suddenly have more than one Sigdis to deal with! His Illusory Duplicates spell means that two of these entities are magical doppelgangers. During the frenzy of combat, it may be difficult to tell, but Sigdis’s duplicates have a few subtle differences:
- The Gauldur Blackbow Signis uses dishes out significantly more damage and drains your Magicka.
- The dopplegangers are wreathed in a slight blue glow.
- The doppelgangers’ helmets don’t have horns, while Sigdis’s helmet does.
The three foes fire from their platforms, forcing you to strike them using your favored weaponry. Sigdis teleports around and summons duplicates again periodically, speeding up if you destroy both duplicates or as his health falls.
Focus your attention on Sigdis, as he’s the only one taking damage. After you kill him, any illusions are dispersed, and an exit doorway behind his coffin slides open once. Be sure you pry Sigdis’s twitching fingers off his bow, which drains Magicka from targets. There are two other items of interest, too.
- Gauldur Blackbow
- Gauldur Amulet Fragment
- Writ of Sealing
Once again, Sigdis’s amulet fragment is a real amulet, this time with a Fortify Stamina enchantment. The Writ has a curse against the Gauldurson brother written upon it. Exit via the newly opened corridor, leading to a large chest and a lever that opens a section of wall, leading you back into the initial chamber with the pit.
Be Bound Here, Jyrik: Murderer, Betrayer
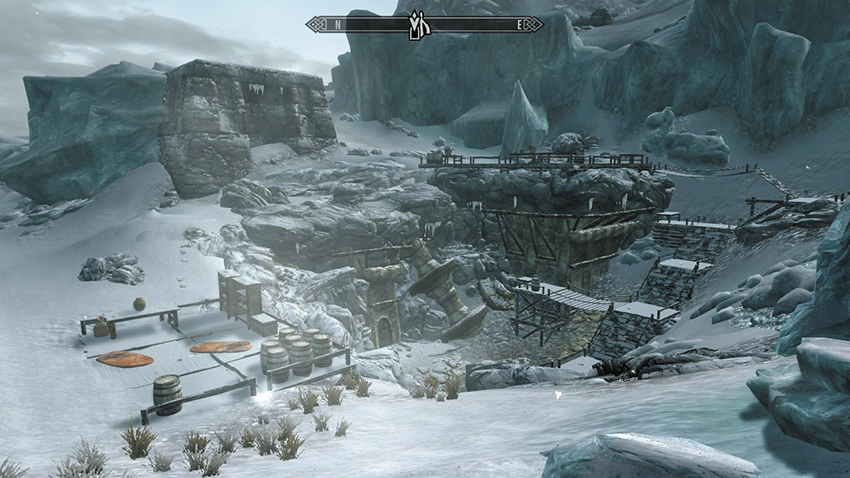
At this point, or whenever you wish to explore Saarthal and face Jyrik Gauldurson, you must visit the College of Winterhold and begin the College of Winterhold questline. Consult the College of Winterhold Quests for all pertinent information. Here’s what you need to do:
- Complete College of Winterhold Quests: First Lessons, proving your magical aptitude and gaining admittance to the College, where you’ll train with Tolfdir.
- Begin College of Winterhold Quests: Under Saarthal, and explore the excavation. The route to take, and the Nordic Puzzle solutions, are detailed in that quest. This culminates in the discovery of a giant glowing orb that floats in a bubble of writhing magic, at the opposite end of the room. It is pulsing and made of some strange, unknown material. Tolfdir is transfixed by this but averts his gaze when a ferocious-looking Draugr rises from his eternal throne chair. You’re about to face the third brother, Jyrik Gauldurson!
Brother Battle: Jyrik Gauldurson
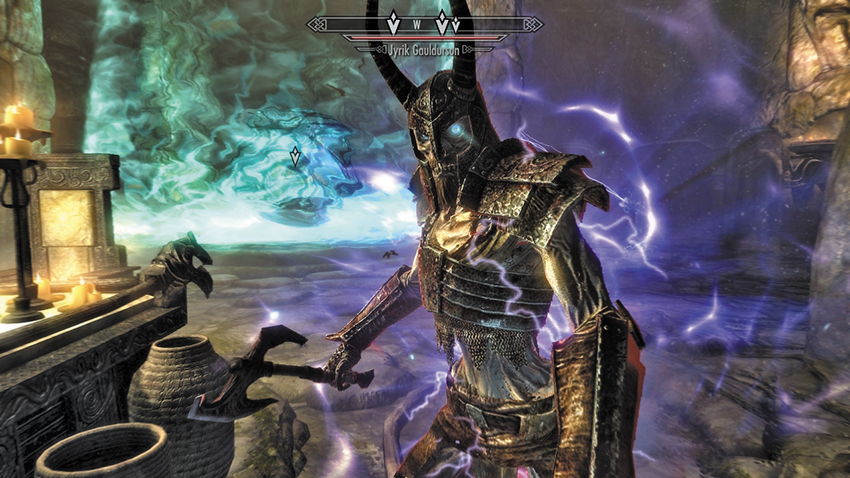
Jyrik Gauldurson is coursing with evil magic, and for the first ten seconds of the battle, he is utterly impervious to any attacks. Use this time to step behind cover or let any summoned creatures you may have conjured or Followers bear the brunt of his attacks. Eventually, Tolfdir realizes that all your combined offensive capabilities aren’t having an effect, so he turns to the Eye and focuses his attacks on the crackling globe. A few seconds later, he yells that Jyrik is vulnerable. Attack!
To further complicate matters, Jyrik is bathed in an elemental shield that cycles through the different elements and is impervious to attacks from the same element. So, if he’s bathed in fire, then any Flame-based spells have no effect on him. Use attacks from any other element instead. If you have only one type of elemental magic (i.e., only Fire), wait a few seconds until Jyric’s shielding changes elements, and then strike!
With Jyrik Gauldurson gurgling his last curse, turn your attention to his unique weapon, although not one he wields in the battle with you: the Staff of Jyrik Gauldurson, which lies on the altar in front of his throne. Grab it, and the other items of interest on his corpse:
- Gauldur Amulet Fragment
- Staff of Jyrik Gauldurson
- Writ of Sealing
As you might expect, his amulet fragment has a Fortify Magicka enchantment, while the Writ has a curse against him written upon it. Now use the Iron Door behind the orb to exit the chamber, which leads to a fern-filled grotto and an ancient Word Wall. Absorb the power before you exit back into the excavation site, releasing the portcullis with a wall handle and exiting Saarthal.
- Word of Power: Ice Form
Be Defeated Here, Gauldurson Brothers!
With the three Amulet Fragments in your possession, all that remains is to return to Reachwater Rock and enter the long hall that was sealed when you first visited this tomb. (If this is your first visit, see above for directions to the cave.)
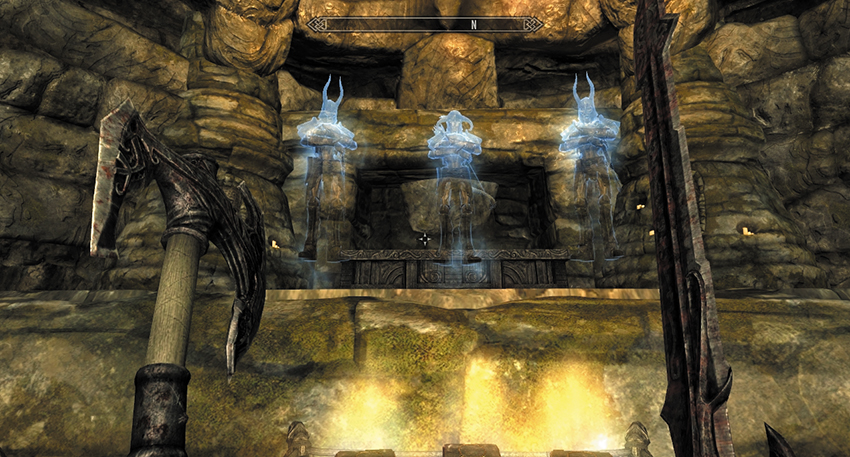
Puzzle Solution: Move the rings so the Hawk, Hawk, and Dragon appear on the outer, middle, and inner rings, respectively. Then take the Ivory Dragon Claw you found on Daynas Valen’s corpse in Folgunthur, and insert it into the keyhole. Continue down the steps beyond and enter the Arch-Mage Gauldur’s tomb. Approach the altar at the far (northwest) end of the elaborately constructed room. Here you’ll find three Amulet Pedestals.
As you set the final Amulet Fragment down on the pedestal, three spectral forms congeal from the ether on an inaccessible balcony above you. The power of the Gauldurson Brothers is strong enough to defy death—twice! Now you must face Mikrul, Sigdis, and Jyrik again, only this time they attack one after the other!
Mikrul is the first to step forward, teleporting to the room’s far end as sarcophagi burst open around him. His thralls are back, stronger than before and now fully armed. This time, your best bet is to avoid Mikrul and go after the thralls first; you don’t want to be surrounded by weapon-swinging Draugr. Once you slay them, Mikrul should be easier to defeat. Again, you may be better off attacking him from range: That strategy is even more effective here, since you can leap across the gaps in the platforms, but he must walk around them. When Mikrul falls, he returns to the upper platform and drops to a knee.
Sigdis steps forward next, this time joined by three ghostly duplicates. Again, their helmets are a telltale clue: The real Sigdis has curled horns on his helmet, while the duplicates have vertical horns. Ignore the duplicates and crush Sigdis as quickly as you can.
Finally, Jyrik steps forward. He is not invincible here, but he’s still a powerful sorcerer. At several points in the battle, he teleports away to regain a little composure before attacking again. Use the same strategies as before to target his elemental weaknesses and bring him down.
After you deliver the final blow to Jyrik, the three brothers regroup at the altar. Suddenly, the sarcophagus behind them opens. The brothers turn, Sigdis lets out a shout, and a brilliant blast of light wipes them from existence. When the dust settles, a spectral figure (could this be Gauldur?) appears and grants you what you seek: In a flash of light, the Amulet Fragments combine!
Quest Conclusion
Claim the reforged amulet and wear it proudly—you’ve earned it. While you may never wield its unique abilities as the brothers once did, the amulet is still immensely powerful, fortifying your Health, Magicka, and Stamina all in one.
- Gauldur Amulet
Postquest Activities
After claiming the amulet, jump up to the high platform and inspect the newly opened sarcophagus. Search Gauldur’s skeleton, and you can find a sizable gold reward as well.