
Elder Scrolls V: Skyrim Special Edition Guide The Atlas Apocrypha
[S.A07] Apocrypha: Waking Dreams of a Starless Sky
[S.A07] Apocrypha: Waking Dreams of a Starless Sky
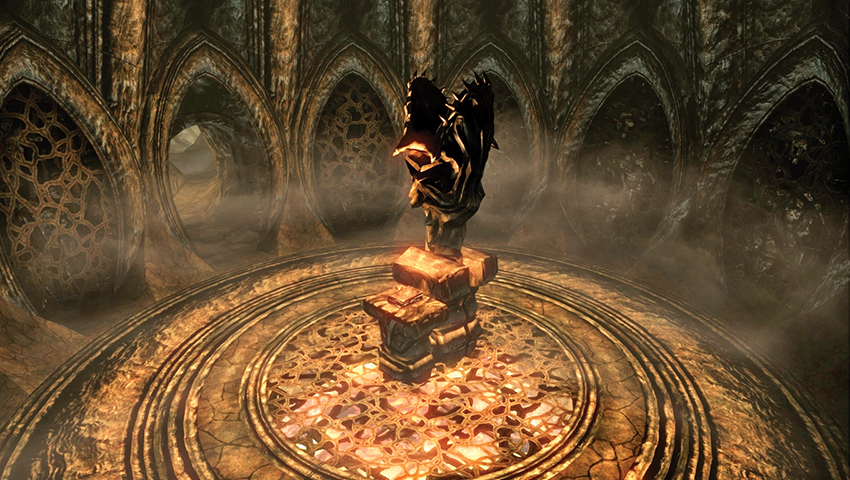
Related Quests
- Dragonborn Main Quest: The Temple of Miraak
- Dragonborn Main Quest: At the Summit of Apocrypha
Recommended Level: 35
Dungeon: Apocrypha
- Kruziikrel
- Lurker
- Miraak
- Relonikiv
- Sahrotaar
- Seeker
Special Area
- Black Book: Waking Dreams of a Starless Sky
- Word of Power: Dragon Aspect [DB3/3]
Collectibles
- Unique Weapon: Miraak’s Staff [DB10/11]
- Unique Weapon: Miraak’s Sword [DB11/11]
- Unique Item: Miraak’s Boots [DB1/31]
- Unique Item: Miraak’s Gloves [DB2/31]
- Unique Item: Miraak’s Mask [DB3/31]
- Unique Item: Miraak’s Robes [DB4/31]
Miscellaneous
- Area is locked
- Chest
Black Book: Waking Dreams of a Starless Sky
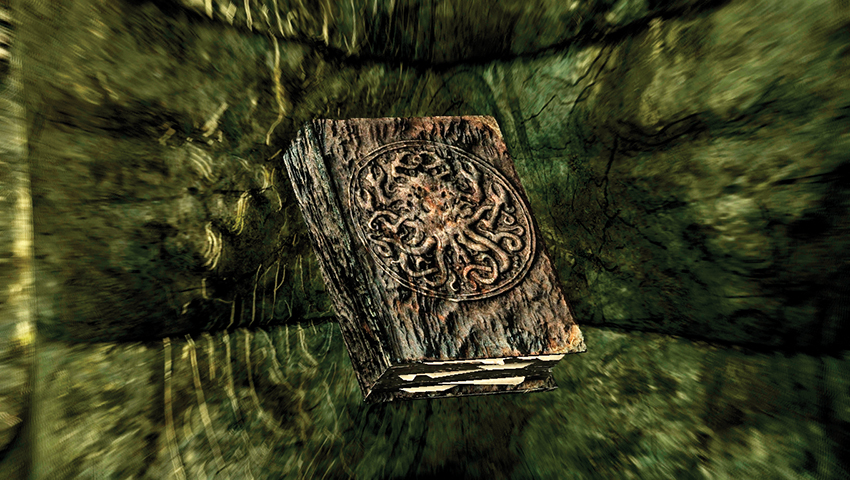
This book rests on a pedestal deep within the Temple of Miraak [S.N24], which you will find during Dragonborn Main Quest: The Temple of Miraak. After slaying the Gatekeeper, traverse the large stepped chamber and pass a statue of Hermaeus Mora before scrambling down a winding tunnel to a circular chamber. Take the Black Book and read it. You are transported to Apocrypha. You read it again at the start of Dragonborn Main Quest: At the Summit of Apocrypha.
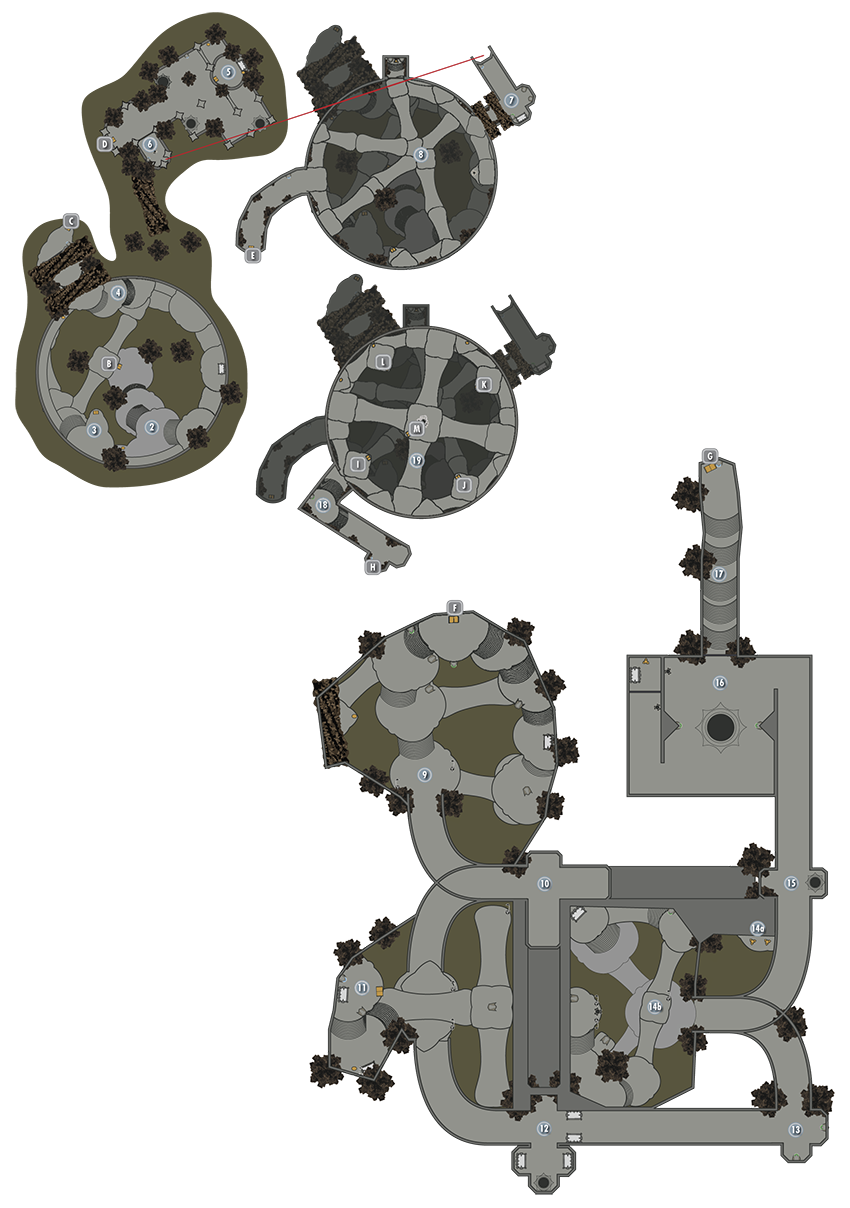
Interior: Apocrypha
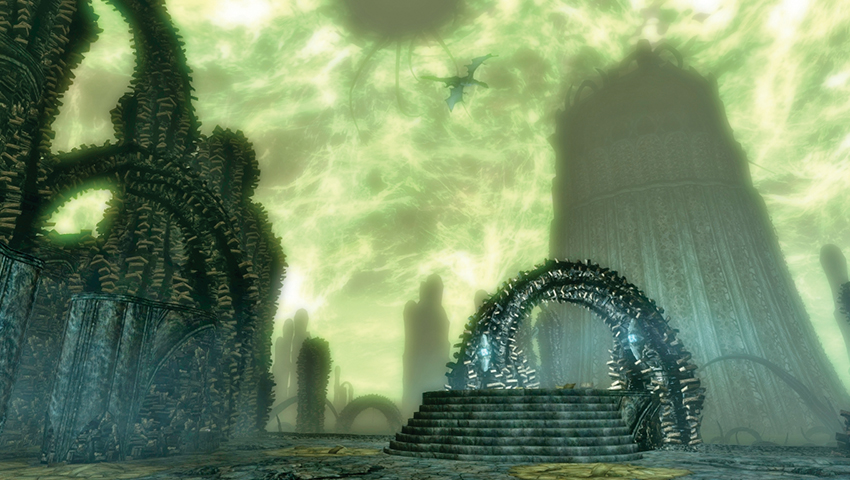
 Chapter I: Plateau on the Stinking Sea
Check the table to the south for a trio of books. There is also a pod to open along the left and right (east and west) walls. Scan a second table for a Soul Gem, and then head north, passing two Magicka fonts and open Chapter II.
- Font of Magicka (2)
- Pod (2)
 Book to Chapter II
 Book to Chapter I
 Chapter II: Miraak’s Tower: Entrance Steps
Climb the first set of stone steps, watching Seekers. Check the nearby table for a book before ascending farther and heading left (north) around the edge of this large, cylindrical chamber: Miraak’s Tower. Pass the table with Heavy Armor Forging (a Smithing Skill Book) and around to a small bridge to your left (south). There are some steps not yet elongated into a staircase position.
- Skill Book: Heavy Armor Forging (Smithing)
 Chapter II: Miraak’s Tower: Entrance Bridges
Cross the bridge, go up the steps, and head around to the plinth that holds a cracked and ancient book called Boneless Limbs.
- On Apocrypha: Boneless Limbs [1/4]
 Chapter II: Miraak’s Tower: Archway Doors
The gathering of this book elongates the steps at the initial side of the bridge, so cross over, head up the steps to the north, and go out of the open archway doors to view a vast ocean of filth. Turn right (northeast) and open Chapter III.
 Book to Chapter III
 Book to Chapter II
 Chapter III: Corridors of Books
Enter the tunnel that leads roughly northeast, passing a door to your right that you can’t open yet. The corridor splits to the left and right, with two or three Seekers and a couple of pools with whipping tentacles to dodge. There are two Magicka fonts if you need them. Both corridors merge at some steps up to a platform and a table with Song of the Alchemists (an Alchemy Skill Book). Turn around, and on a stone plinth lies another ancient book called Delving Pincers. Gather the book to open the door you passed earlier.
- Seeker
- Font of Magicka (2)
- Skill Book: Song of the Alchemists (Alchemy)
- On Apocrypha: Delving Pincers [2/4]
 Chapter III: Elongating Corridor
Retrace your steps along the corridor (southwest), as the previously closed door opened when you took the ancient book. Step inside and activate the Scrye. This stretches out the corridor ahead of you.
 Chapter III: Corridor Junction
Head past a Magicka font, then another, stopping at the junction to inspect a table with Catalogue of Weapon Enchantments (an Enchanting Skill Book) and other books on it. Pass a Stamina font and head right (southwest), back into Miraak’s tower chamber.
- Font of Magicka
- Font of Stamina
- Skill Book: Catalogue of Weapon Enchantments (Enchanting)
 Chapter III: Miraak’s Tower: Crisscrossing Platforms
Head left (south), opening a pod and activating a nearby Scrye, which opens a door to the northwest (leading to a small alcove with a vessel you can search for items). Now head south along the main bridge platform, then go right, passing a pod to a plinth with a Magicka font and another ancient tome, Prying Orbs. Taking the book opens a gate on the western part of the chamber, allowing further progress. After a Magicka and Stamina font, you reach Chapter IV.
- Font of Magicka (2)
- Font of Stamina
- Pod (2)
- Vessel
- On Apocrypha: Prying Orbs [3/4]
- Seeker
 Book to Chapter IV
 Book to Chapter III
 Chapter IV: Stepped Courtyard
From your high position above a multitude of steps and shifting tunnel walls, turn right (west) and head down the steps, pausing to grab at the Stamina font above you. Directly ahead is a low balcony fence below which is a second Stamina font; access that from the top of the steps, then descend on either side, facing down two or three Seekers as you go. Don’t forget a pod on a southwest platform.
- Font of Stamina (2)
- Pod
- Seeker
 Chapter IV: Retracting Tunnels
Head past the black table and the selection of books, then down to the lower ground and a tattered banner. Enter the tunnel to the south, moving around the long left curve to a junction with a black table and two very long passages ahead (east) and right (south). The tunnel ahead with the Magicka and Stamina fonts retracts as you move down it, forcing you right, where a similar retraction occurs.
- Font of Magicka
- Font of Stamina
- Seeker
 Chapter IV: Open and Stepped Area
Backtrack to the initial tunnel; it has turned to the opposite (south) direction, allowing you to move into an open area, where you face two more Seekers. There is a stepped area to the west. Climb the steps, passing two tables (one houses some scrolls) and a Magicka font near your fourth and final ancient book, Gnashing Blades. As you gather this tome, the books around you will shift and expose a new passage.
- Font of Magicka
- Seeker
- On Apocrypha: Gnashing Blades [4/4]
 Chapter IV: Elongating Tunnel
Move down the steps and head right (southeast) into the newly opened tunnel. This ends in a junction with an alcove to your right (south) with two black tables and a corridor that expands when you enter it. Nearby are two additional tables with more books to leaf through.
 Chapter IV: Long Corridor
Move ahead (east) down the long corridor to a pair of Stamina fonts and a pod, before continuing down the left turn and into another chamber with a Stamina font under a walkway.
- Font of Stamina
- Pod
14A.Chapter IV: Frothing Pool
14B. Chapter IV: Secret Vessels
Avoid the black tentacles as you head northwest across the ground bridge, and engage two or three Seekers on the initial stepped balcony. Pass a black table, working your way along an upper bridge heading south, and up more steps to a Scrye. This moves the tunnel you passed through to a new position.
Look closely at the map, and you’ll discover a small, narrow plinth with two strange vessels on it. This is normally inaccessible during your exploration. To reach it, “die” partway through (just after taking On Apocrypha: Gnashing Blades; by succumbing to an enemy or stepping into the fetid waters). Then re-read Black Book: Waking Dreams. This resets the moving hallways into a configuration allowing you to reach the plinth!
- Seeker
- Vessel (2)
 Chapter IV: Eastern Tunnel
Descend and enter the tunnel now heading east, down the long left curve past a small tentacle pool.
 Chapter IV: Lurker-Summoning Chamber
One of these beasts is summoned as you near the circular black ooze in the middle. There’s a Scrye in the northwest corner of the chamber that opens an alcove with a vessel and black table in an adjacent corridor farther northwest (head around the corridor entrance to access it). Just before that alcove is a second Scrye. Activate that, and the chamber’s main door to the north swings open. Slay the horror before proceeding.
- Font of Stamina (2)
- Lurker
 Chapter IV: Stepped Exit
At the end of the corridor to the north is a Magicka font and access to Chapter V.
- Font of Magicka
 Book to Chapter V
 Book to Chapter IV
 Chapter V: Book Tunnel
Siphon the Magicka font near the open book before following the corridor up the steps, past a Stamina font, and out into the upper walkways of the central tower chamber.
- Font of Magicka
- Font of Stamina
 Chapter V: Miraak’s Tower: Book Pedestals
Slay the Seekers first. The focus of the room is a plinth in the central spine of the chamber, which houses access to Chapter VI. Place each of the four Apocrypha Books on their correct pedestals. Simply read the clues from the books and the books’ names and lay the tome on the image best associated with each book. Or, follow this plan:
 Gnashing Blades Pedestal
The pedestal with the fishlike maw is closest to you. Place “Gnashing Blades” here.
 Delving Pincers Pedestal
The pedestal with the two claws is nearby. Place “Delving Pincers” here. Expect Seekers to attack you at this point.
 Boneless Limbs Pedestal
The pedestal with the mass of writhing tentacles is opposite the entrance. Place “Boneless Limbs” here.
 Prying Orbs Pedestal
The pedestal with the strange evil fishlike eye is the last of the plinths. Place “Prying Orbs” here.
If you’ve placed the books on the correct pedestals, the opening to Chapter VI glows green. If not, remove the books and try again. When you’re ready for the final chapter, head to Chapter VI and open it.
- Seeker
- Pod (3)
 Book to Chapter VI
 Book to Chapter V
 Chapter VI: Double Corridor Entrance
Exit via a small double-corridor leading to a single tunnel. Grab the Art of War Magic (a Destruction Skill Book) from the black table as you go.
- Skill Book: The Art of War Magic (Destruction)
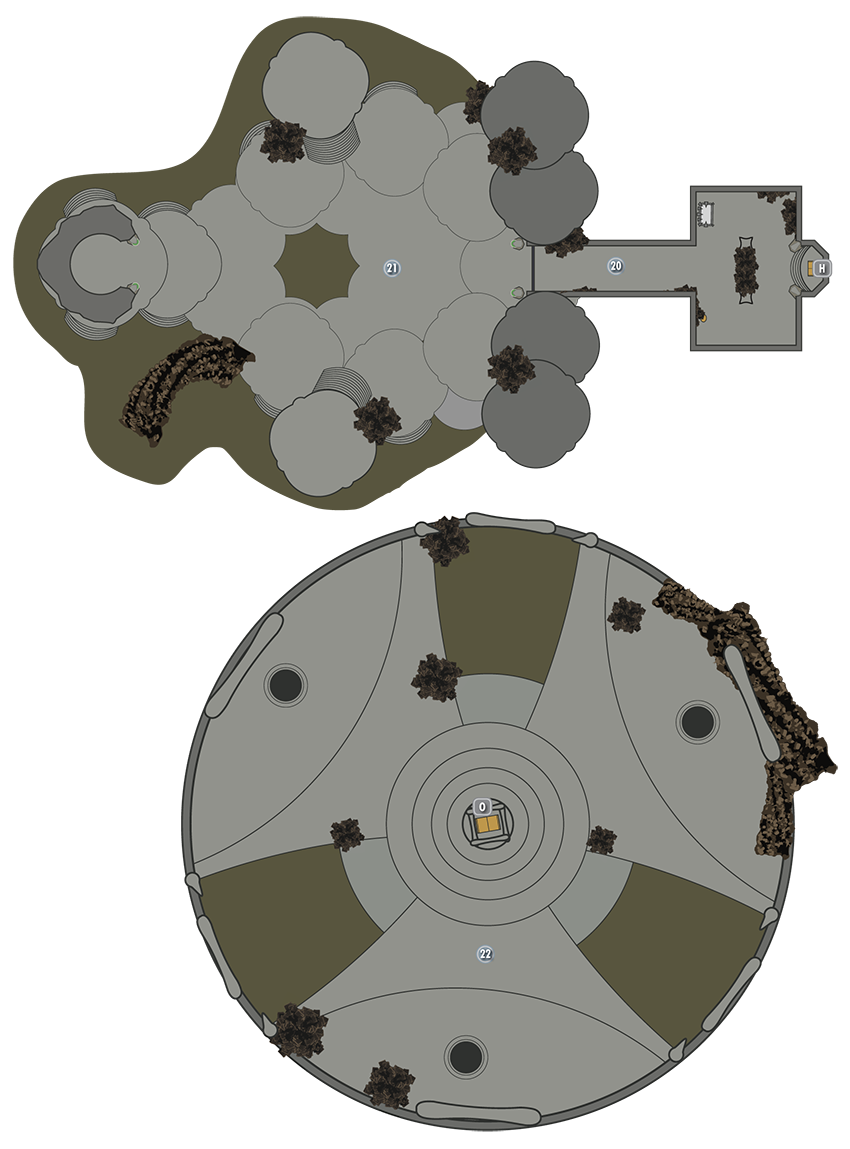
 Chapter VI: Promontory Amid the Unspeakable Ocean
This is bereft of life until you pass the Stamina fonts and approach the curved stone edifice at the opposite end. This is a Word Wall! Approach the Word Wall and defeat the two Seekers that are summoned to prevent your progress. Learn the powerful new Thu’um, part of the Dragon Aspect Shout.
- Seeker
- Sahrotaar
- Word Wall: Dragon Aspect [DB3/3]
Final Chapter: Summit of Apocrypha
At this point, assuming you’re completing the Dragonborn Main Quest, Sahrotaar appears. You must tame him so you can ride him to the final confrontation with Miraak atop Apocrypha. The confrontation occurs on a huge, circular plateau.
 Miraak’s Tower: Summit
When Miraak finally yields, you can claim your just rewards from Hermaeus Mora:
- Dragon Souls
- Unique Weapon: Miraak’s Staff [DB10/11]
- Unique Weapon: Miraak’s Sword [DB11/11]
- Unique Item: Miraak’s Boots [DB1/31]
- Unique Item: Miraak’s Gloves [DB2/31]
- Unique Item: Miraak’s Mask [DB3/31]
- Unique Item: Miraak’s Robes [DB4/31]
After taking Miraak’s equipment, approach the Black Book: Waking Dreams in the center of the summit. Read this tome, and green light envelops you. Look around, and you’ll see shimmering images of the Skill Constellations arrayed around you. You can approach any of these mirages, activate them, and expend a Dragon Soul to clear all of the perks in a particular Skill Constellation. You can:
- Recover all of the Perk Points you have spent in a single constellation, then spend them elsewhere.
- Do this as many times as you wish, as long as you have enough Dragon Souls.
- Read the Black Book a second time to return to Solstheim.
 Book to Solstheim