
Elder Scrolls V: Skyrim Special Edition Guide The Atlas Hold 2: Hjaalmarch
[2.16] Ustengrav
[2.16] Ustengrav
Related Quests
Recommended Level: 6
Dungeon: Bandit Camp
- Animal
- Bandit
- Draugr
- Mage
- Skeleton
Crafting
- Arcane Enchanter
Dangers
- Flamethrowers (pressure plates)
- Oil Lamp Trap
- Oil Pool Trap
Collectibles
- Skill Book [Restoration]: Mystery of Talara, v2 [B1/10]
Special Objects
- Word Wall: Become Ethereal [1/3]
- Area Is Locked (quest required)
- Chest(s)
- Potions
- Loose gear
- Mineable Ore (Corundum, Iron, Silver)
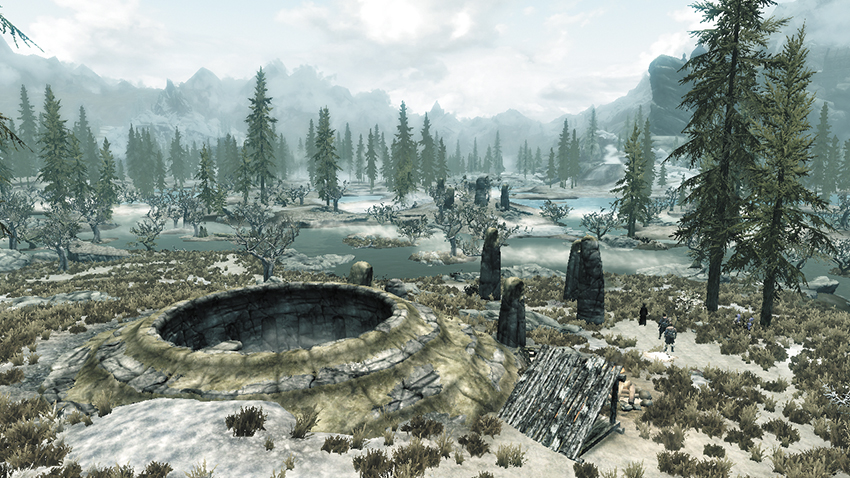
Warlocks have turned the ruins here into a temporary camp as they explore an ancient temple—and pillage the crypts below. You can’t delve too deeply into Ustengrav until you advance to Main Quest: The Way of the Voice, which tasks you with obtaining a special object from the crypts’ depths.
Exterior
Warlock Necromancers have made camp outside. It’s best if you go for the necromancer first since his reanimated followers will drop once he’s taken care of. After you finish off the necromancer and his reanimated bandits, descend into the circular ruins and loot a chest before entering the nearby door.
- Chest
- Loose gear
 Exit to Skyrim
 Entry Cavern
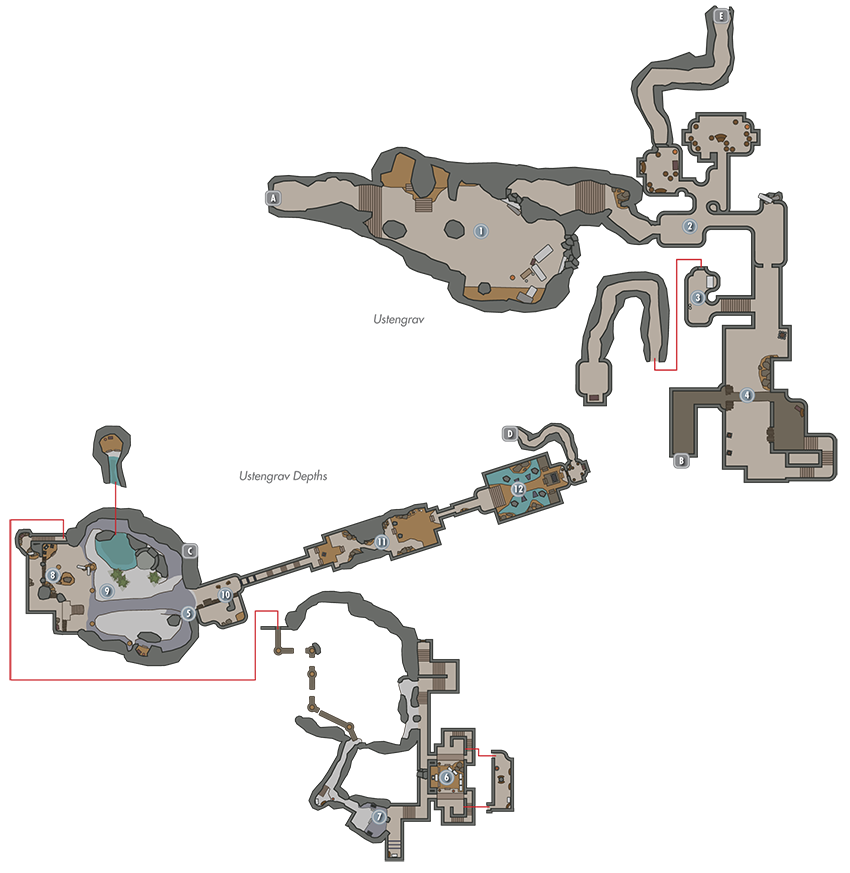
Several reanimated bandits and mages are encountered in this first cavernous chamber. Loot a chest and swipe a few potions before proceeding to [2]. Note that the passage that leads to [2] is blocked when you visit this location prior to starting Main Quest: The Way of the Voice.
- Chest
- Potions
- Loose gear
 Draugr Passages
Cut down the large number of undead Draugr that roam these passages. Search the northern side rooms to locate a chest, Skill Book, and lots of lootable urns.
- Skill Book [Restoration]: Mystery of Talara, v2 [B1/10]
- Chest
- Potions
 Secret Passage
Descend into this small side room and swipe some coins off a table, and take the gear that’s hidden beneath it. Pull the nearby wall chain afterward to reveal a secret passage that leads to a chest.
- Chest
- Loose gear
 Sarcophagi Chamber
Slay more Draugr in this wide burial chamber, then scale the southeast stairs to locate several potions and a chest.
- Chest
- Potions
 Door to Ustengrav Depths
 Door to Ustengrav
 Cavern Access
Navigate a twisting stairway as you descend into this massive subterranean cavern. If you own the Whirlwind Sprint Shout, use it to safely streak past some wide pressure plates that trigger flamethrowers when depressed. Also, if you look closely, you will see that some pressure plates are decoys and don’t actually shoot fire. Figuring this out will help you navigate the halls ahead.
- Danger! Flamethrowers (pressure plates)
- Mineable Ore (Iron)
 Walkway Chamber
Dispatch a few Draugr in this sizeable side chamber. Cross a walkway and head downstairs to raid a chest in the east alcove, then scale the south stairs afterward and cross another walkway on your way to [7].
- Chest
- Potions
 Oily Cavern
Draugr burst out from sarcophagi in this cavern. Quickly knock down the overhead lamps to ignite the oil on the ground and burn them up. Turn the handle on the wall near the south portcullis, then turn another handle on the wall near the south sarcophagus to expose a small crafting nook with a chest.
 Huge Cavern: West Balcony
Upon entering this massive cavern, you can utilize your Whirlwind Shout to jump across these destroyed bridges to discover a chest tucked away behind some rubble. Clear the skeleton archers from the west balcony afterward, and locate a few potions near the throne. Descend the north sloping trail afterward to reach the cavern’s bottom.
- Danger! Flamethrowers (pressure plates)
- Chest
- Potions
 Huge Cavern: Ground Floor
Follow the sound of chanting to locate a Word Wall at the bottom of the cavern. Obtain a new Word of Power, then search behind the nearby waterfall to locate a hidden chest that’s guarded by a powerful Draugr. Backtrack out and explore the cavern’s opposite end to discover a chest and a few potions.
- Word Wall: Word of Power: Become Ethereal [1/3]
- Chests (2)
- Potions
- Mineable Ore (Corundum, Silver)
 Huge Cavern: East Balcony
Return to the cavern’s west balcony and cross the central bridge to reach the opposite balcony, where a series of portcullises block your progress. The portcullises are controlled by the nearby glowing stones. You must use Whirlwind Sprint to dash past the glowing rocks and through the portcullises before they close. The easiest way to make it through the gates is to sprint past all the stones; just after you reach the final stone, use Whirwind Sprint and continue sprinting.
- Potion
 Fire Trap Passage
Use your Whirlwind Sprint Shout again to blaze through this dangerous passage—the entire floor is made of flamethrower traps! Alternatively, remember that some flamethrowers are decoys, and don’t actually shoot flames. Look carefully at the ground coloration to see which is which. Once you’re past the traps, beware of a Giant Frostbite Spider that descends from the ceiling. Cut your way through the thick webs that follow so you may advance.
- Danger! Flamethrowers (pressure plates)
 Jurgen Windcaller’s Tomb
Massive pillars rise from the surrounding water as you enter this large, quiet chamber. Inspect the far tomb of Jurgen Windcaller to advance your quest, then enter the nearby door to locate a giant chest. Navigate the tunnel that follows to find your way back to the surface.
- Chest
 Door to Ustengrav
 Door to Ustengrav Depths