
Elder Scrolls V: Skyrim Special Edition Guide The Atlas Hold 5: The Reach
[5.42] Valthume
[5.42] Valthume
Related Quests
Side Quest: Masks of the Dragon Priests*
Dungeon Quest: Evil in Waiting
Recommended Level: 24
Dungeon: Dragon Priest Lair
Animal
Hevnoraak
Valdar
Crafting
Alchemy Lab
Dangers
Battering Ram Trap (pressure plate)
Dart Trap (lever)
Oil Lamp Traps
Oil Pool Trap
Swinging Blade Trap (pressure plate)
Swinging Wall Trap (pressure plate)
Puzzles
Nordic Puzzle Door (Iron Claw)
Quest Items
Opaque Vessels (3)
Collectibles
Dragon Claw: Iron Claw [6/10]
Dragon Priest Mask: Hevnoraak [8/10]
Skill Book [Restoration]: Withershins
Unique Weapon: Hevnoraak’s Staff [37/80]
Special Objects
Word Wall: Aura Whisper [2/3]
Chest(s)
Potions aplenty
Loose gear
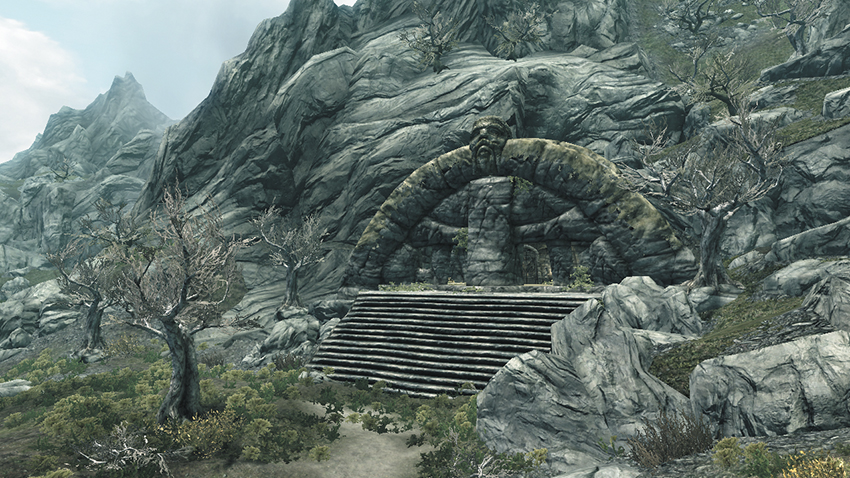
This large network of burial chambers lies at the Reach’s southeast end. Braving this ancient tomb can earn you a precious Dragon Priest Mask, among other valuable prizes.
Vestibule
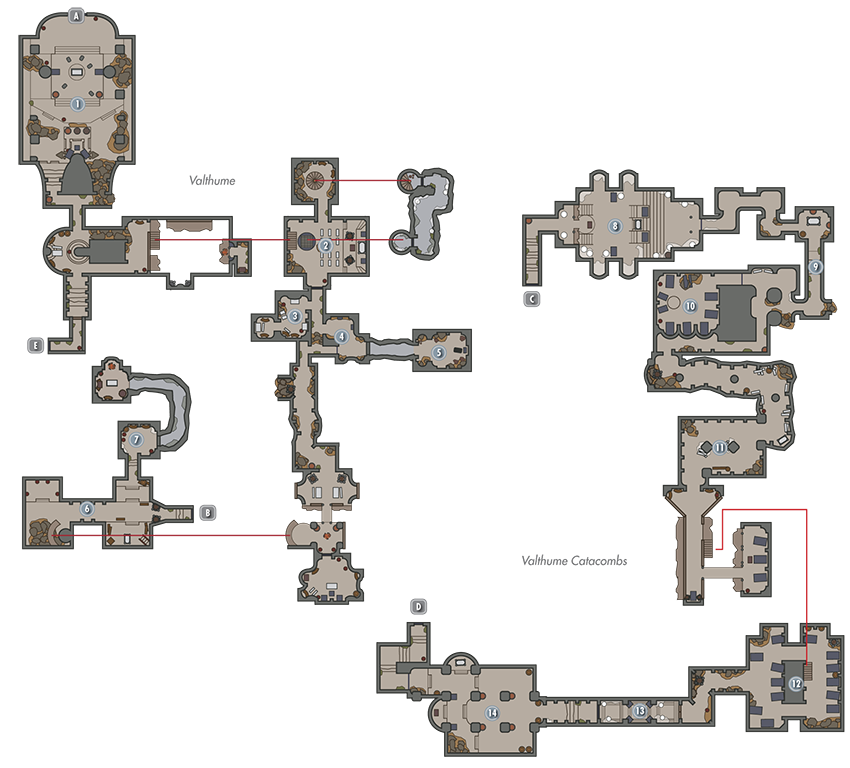
The vestibule serves as the ruins’ entrance. Speak with a ghost named Valdar here to learn that an ancient evil named Hevnoraak is stirring within the depths of this place and gain a new Side Quest. Proceed into Valthume afterward.
 Door to Vestibule
 Throne Room
This cavernous chamber is completely void of loot. Beware the pressure plate trap in the south passage on your way to [2].
- Danger! Battering Ram Trap (pressure plate)
 Trapdoor Chamber
Beware the large trapdoor in the center of this wide chamber. It will open as you battle powerful Draugr here, potentially dropping you into an underground passage filled with Frostbite Spiders. Secure the room and loot a chest, then return upstairs and make a couple of daring jumps along a narrow balcony to reach the ledge where Hevnoraak’s specter is spectating. Ignore Hevnoraak’s specter and loot a second chest in the nearby nook. If you fall into the central pit, slay a Draugr and search its remains to find a key that’ll help you escape.
- Valthume Cellar Key (Draugr)
- Chests (2)
- Apothecary’s Satchel
- Loose gear
 Embalming Chambers
Explore these small side rooms to discover a Skill Book on a table.
- Danger! Oil Lamp Traps
- Skill Book [Restoration]: Withershins
- Knapsack
- Loose gear
 Trapped Passages
Beware the oil that runs through this passage. Knock down a hanging lamp from a safe range to burn away the potential hazard. Then simply sidestep pressure plates as you advance. When you reach a dead end, turn a small handle on the nearby wall to open passages to the east and west.
- Danger! Oil Lamp Traps, Oil Pool Trap, Dart Trap (pressure plates)
 Vessel Chamber 1
Dispatch a powerful Draugr in this small chamber, then claim the Opaque Vessel he leaves behind.
- Opaque Vessel [1/3]
 Two-Tier Chamber
Dispatch more Draugr here, then optionally pick the Adept-level south door to access a room filled with potions and a chest. If you like, follow the lower northeast passage to obtain more plunder on your way to [7] before taking the lower east passage to reach the Valthume Catacombs.
- Chest
- Potions aplenty
 Treasure Run
Turn the handle on the wall here to open a secret passage that leads to a small chamber with an Alchemy Lab and a chest.
- Crafting: Alchemy Lab
- Chest
- Potions
- Loose gear
 Door to Valthume Catacombs
 Door to Valthume
 Spider Lair
Beware: a Giant Frostbite Spider descends from the Catacombs’ first wide chamber, along with several of her young. Slay these dangerous creatures from your elevated vantage, then raid the nearby chest and urns before opening the far portcullis (pull the nearby chain) and advancing.
- Chest
 Burial Passages
Slay Draugr and sidestep a pressure plate trap in these undead-filled passages.
- Danger! Swinging Blade Trap (pressure plate)
 Vessel Chamber 2
Pull a wall chain to gain entry to this small chamber, then exploit the hanging lamps to help you slay a powerful Draugr Knight. Collect the second of three vessels from the room’s altar afterward.
- Area Is Locked (wall chain)
- Danger! Oil Lamp Traps
- Opaque Vessel [2/3]
 Burial Chamber
Loot a host of urns on your way into this wide burial chamber, where more powerful Draugr await. Secure the place and pull the wall chain to advance.
- Danger! Swinging Wall Trap (pressure plate)
 Sarcophagi Chamber
Find plenty of urns and a chest to loot in this large sarcophagi-filled chamber.
- Chest
 Iron Claw Passage
Eradicate a few Frostbite Spiders in this chamber, then quickly retreat after collecting the Iron Claw from this passage’s central pedestal; fire soon spews forth from the surrounding statues. Inspect the Iron Claw carefully in your inventory, and notice its three special markings. Mimic this same sequence of patterns (Dragon, Hawk, Wolf) on the nearby Puzzle Door by spinning its three rings. Inspect the central keyhole afterward to insert the Iron Claw and open the way forward.
- Draqgon Claw: Iron Claw [6/10]
 Vessel Chamber 3
Dispatch a swarm of mighty Draugr in this chamber, then collect the final vessel from the central pedestal. Follow the sound of chanting afterward to locate a Word Wall and gain a new Word of Power. Loot the nearby chest before taking the passage back to [1]. Follow Valdar’s instructions to complete his quest, slaying the Dragon Priest Hevnoraak and obtaining his unique mask.
- Opaque Vessel [3/3]
- Dragon Priest Mask: Hevnoraak [8/10]
- Unique Weapon: Hevnoraak’s Staff [37/80]
- Word Wall: Aura Whisper [2/3]
- Chest