
Elder Scrolls V: Skyrim Special Edition Guide The Atlas Hold 4: Winterhold Hold
[4.12] Saarthal
[4.12] Saarthal
Related Quests
- College of Winterhold Quest: Under Saarthal
- Side Quest: Forbidden Legend
Recommended Level: 6
Dungeon: Draugr Crypt
- Arniel Gane
- Draugr
- Jyrik Gauldurson
- Nerien
Crafting
- Alchemy Lab
Dangers
- Dart Trap (pressure plates)
- Rune Traps (floor)
Puzzles
- Nordic Pillars I
- Nordic Pillars II
Quest Items
- Enchanted Rings (3)
- Saarthal Amulet
Collectibles
- Skill Book [Two-Handed]: The Legendary Sancre Tor
- Unique Item: Enchanted Ring [32/112]
- Unique Item: Gauldur Amulet Fragment (Saarthal) [33/112]
- Unique Item: Saarthal Amulet [34/112]
- Unique Weapon: Staff of Jyrik Gauldurson [23/80]
Special Objects
- Word Wall: Ice Form [2/3]
- Area Is Locked (quest required)
- Chest(s)
- Potions
- Loose gear
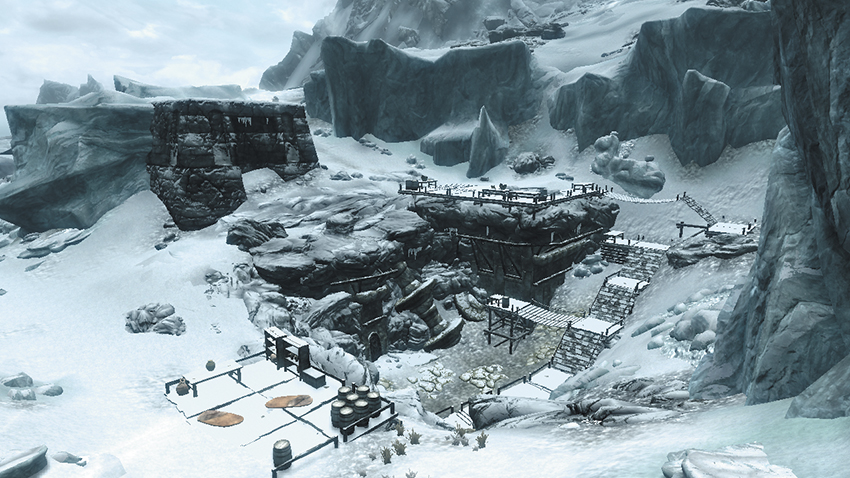
This snowy excavation site lies just southwest of Winterhold’s capital and serves as the setting for the College of Winterhold’s second quest.
Exterior
Loot a chest and several urns before speaking with Tolfdir at the excavation site as part of College of Winterhold Quest: Under Saarthal. Tolfdir unlocks the nearby door and urges you keep pace as he heads inside.
- Chest
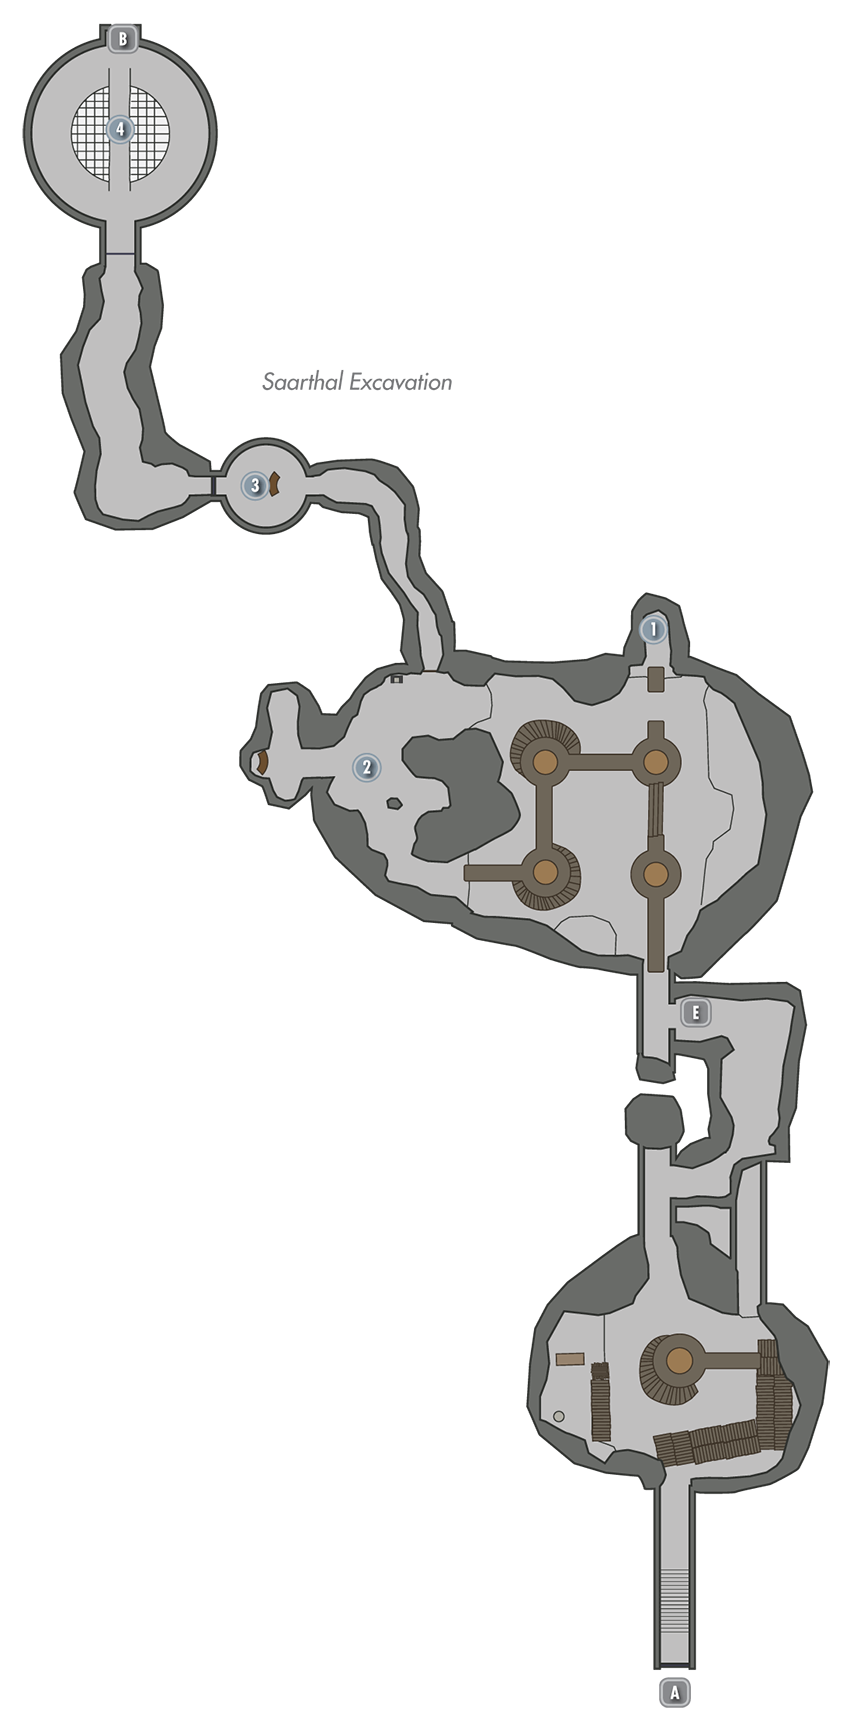
 Exit to Skyrim
 Chest Ledge
Chat up your colleagues as you follow Tolfdir deep into the excavation site. While navigating the high, narrow walkways here, boldly leap over to this north ledge and loot a chest.
- Chest
- Loose gear
 Arniel Gane’s Study
Follow Tolfdir all the way to Arniel Gane’s study, then speak with Arniel to advance the quest. Use your map and compass to locate four magical artifacts scattered about the nearby area—three small enchanted rings found on the ground and one amulet that hangs from a wall. Removing the amulet springs a trap. Speak with Tolfdir, then put on the amulet and strike the wall where you recovered the amulet with any spell to destroy it, gaining your freedom.
- Unique Item: Enchanted Ring [32/112]
- Unique Item: Saarthal Amulet [33/112]
 Vision Chamber
Tell Tolfdir of the curious vision you have upon entering this small chamber, then slay the powerful Draugr that burst out from the room’s standing sarcophagi. Follow Tolfdir into the west passage, pulling a lever to open a gate on your way to [4].
 Coffin Chamber
You become trapped in this chamber when you enter and are forced to battle a swarm of Draugr. Slay them with haste, then pull the far wall chains to open the way forward; this seals off the passage from which you came. Tolfdir remains here to study; head through the west door to brave the heart of Saarthal.
 Door to Saarthal
 Door to Saarthal Excavation
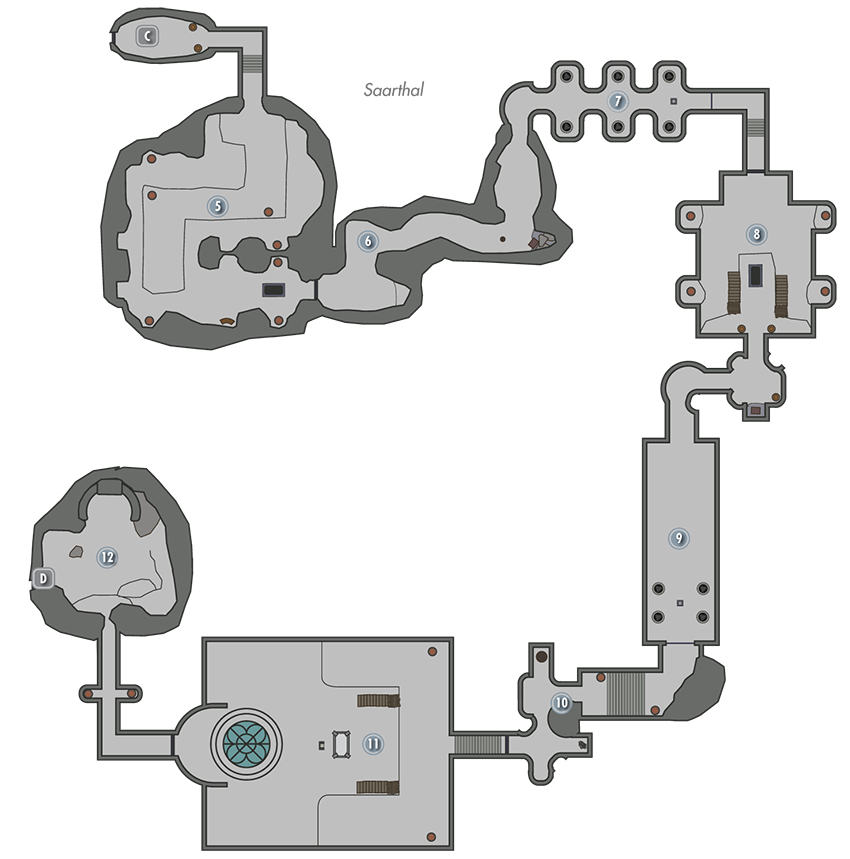
 Draugr Passages
Sneak through these dark corridors, or risk awakening several powerful Draugr. Venture upstairs to loot a few urns and go through an iron door on your way to [6].
 Trapped Passage A
Beware of a rune trap that’s been cast on the ground in this hall. Detonate it with a ranged attack from afar to safely advance. Avoid a pressure plate next, which lies just in front of a tantalizing chest. Slay or sneak past a few more deadly Draugr on your way to [7].
- Danger! Rune Trap (floor), Dart Trap (pressure plate)
- Chest
 Puzzling Pillars
Spin the six pillars in this passage so that each one’s glyph matches the glyph on the wall behind it (Snake, Whale, Hawk, Hawk). Pull the lever to raise the portcullis and advance.
- Potion
 Great Hall
Kill or avoid a deadly Draugr in this cavernous chamber, opening the far door to access a chest on your way to [9]. Beware of more rune traps that lie on the floor just beyond the chest. Detonate them both with ranged attacks from a safe distance.
- Danger! Rune Traps (floor)
- Chest
 More Nordic Pillars
Solve another simple puzzle here by spinning the four pillars so that their facing glyphs match those that make up the mouths of the nearby stone heads (Snake, Whale, Hawk, Whale). This is somewhat tricky, because rotating one pillar may also cause others to spin in sync. One of the pillars can be spun independently—save this one for last as you focus on correctly aligning the other three.
 Trapped Passage B
Tolfdir catches up to you as you enter this passage. Avoid the pressure plate on the floor as you swipe gear, potions, and loot urns here. Collect the Skill Book that rests atop the Alchemy Lab before entering the final cavern.
- Danger! Dart Trap (pressure plate)
- Crafting: Alchemy Lab
- Skill Book [Two-Handed]: The Legendary Sancre Tor
- Potions
- Loose gear
 Orb Chamber
A massive orb that churns with mysterious energy awaits you in this chamber, along with a deadly Draugr named Jyrik Gauldurson. No attack can harm Jyrik until Tolfdir begins to drain the energy from the orb. You must then vary your attacks to counter the Draugr’s defensive magics. Raid the chamber after the fight, then promise Tolfdir that you’ll hurry back to the College to tell the Arch-Mage of your discovery.
- Unique Item: Gauldur Amulet Fragment (Saarthal) [34/112]
- Unique Weapon: Staff of Jyrik Gauldurson [23/80]
 Word Wall Grove
This small cavern houses a mystical Word Wall. Approach the object to gain a new Word of Power as you follow the exit route out of Saarthal.
- Word Wall: Ice Form [2/3]
 Door to Saarthal Excavation
 Door to Saarthal