
Elder Scrolls V: Skyrim Special Edition Guide The Atlas Solstheim: Northern Mountains
[S.N30] Frossel
[S.N30] Frossel
Recommended Level: 6
Dungeon: Riekling Camp
- Riekling
- Mounted Riekling
Dangers
- Danger! Swinging Wall Trap
Collectibles
- East Empire Strongbox [Expert] [DB8/33]
- Imperial War Horn
Miscellaneous
- Chest
- Potions
- Loose gear
- Lots o’ gold
Exterior
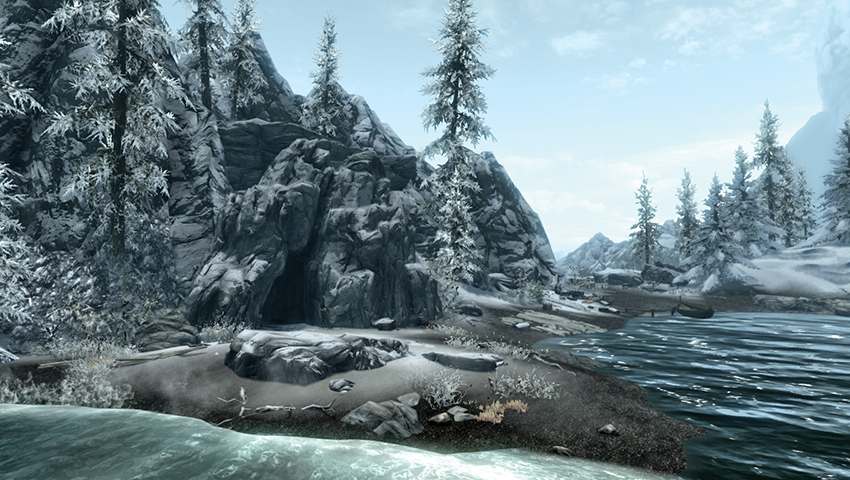
Used as the breeding ground for Riekling mounts known as Bristlebacks since the time of Bloodmoon, the tribe has since expanded the size of these caverns. In addition to the Bristleback pens, they now include a larger meeting room dedicated to the worship of a strange device they recovered from a recent raid.
Just south of the entrance to Frossel, you’ll find the bodies of the bandits involved in the raid and a note explaining what happened up until the attack. You can also learn more about the raid in Wilderness Encounter: The Rabbiting Reaver. Inside, you’re able to battle the Rieklings and recover the actual loot from the heist, which has been discarded in the back of the cave to make room for the wonderful cart!
- Loose gear
- Gold ore vein
Interior
 Exit to Solstheim
 Bristleback Pens
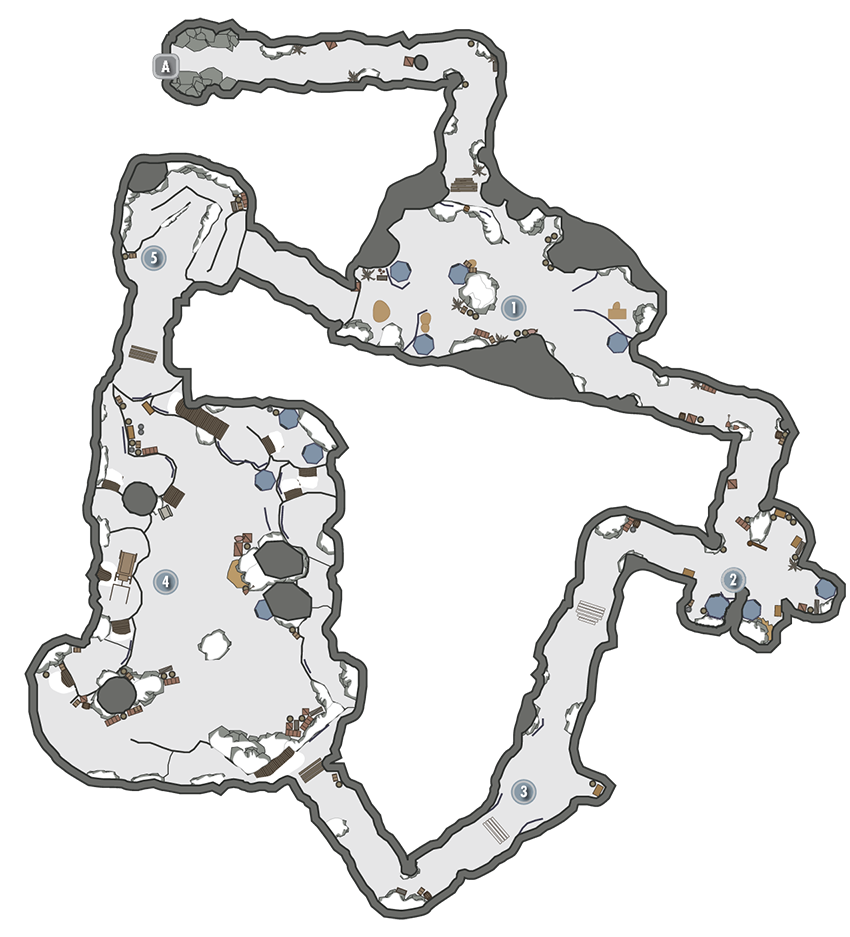
Wander down the tunnel and out into this long ice chamber with three Rieklings and two Bristlebacks to contend with. There are scattered items everywhere, including ingredients, iron ingots, a refined moonstone ingot, and a strong box.
- Riekling
- Bristleback
- Loose gear
- Strongbox
 Ice Tunnel and Small Camp
Pass a second strongbox and watch for the tripwire activating a swinging wall trap. Check the southeast tent area for an East Empire Strongbox [Expert], half buried in the snow near crates and a barrel. Of the chests, only one is closed.
- Riekling
- Strongbox
- Danger! Swinging wall trap
- East Empire Strongbox [Expert] [DB8/33]
- East Empire Pendant
- Chest
- Loose gear
- Potions
- Gold ore vein
 Ice Corridors
Continue down the narrow corridors of ice, passing more Rieklings and an alcove with a chest (and ambush) to check out. Next to the chest is an object of value overlooked by the Rieklings: a fabled Imperial War Horn!
- Riekling
- Chest
- Loose gear
- Imperial War Horn
 Chamber of the Sacred Cart
The tunnel opens up to a huge cavern. You can sneak along the right ledges, avoiding foes if you wish, or head left and down the snow ledge into the main area where seven Rieklings and a Mounted Riekling are worshipping a strange contraption: a sacred cart, painted on and adorned with trinkets and a horse sculpture made from ice, rocks, and refuse saddled to the wagon. Around the sides (and particularly to the northwest) are various bits and pieces of the Reavers’ haul.
- Riekling
- Mounted Riekling
- Chest
- Loose gear
- Ingots
- Dibella Statue
- Gold ore vein (2)
 Ice Ledges
Climb up the meandering ledges, passing more discarded items from the haul. This drops you back at the initial Bristleback Pens (Location [1]).
- Gold ore vein
- Potions