
Elder Scrolls V: Skyrim Special Edition Guide The Atlas Hold 2: Hjaalmarch
[2.02] Chillwind Depths
[2.02] Chillwind Depths
Related Quests
- Dungeon Activity
Recommended Level: 18
Dungeon: Falmer Hive
Dangers
- Spear Trap (pressure plate)
Collectibles
- Skill Book [Lockpicking]: Advances in Lockpicking
- Chest(s)
- Potions
- Loose gear
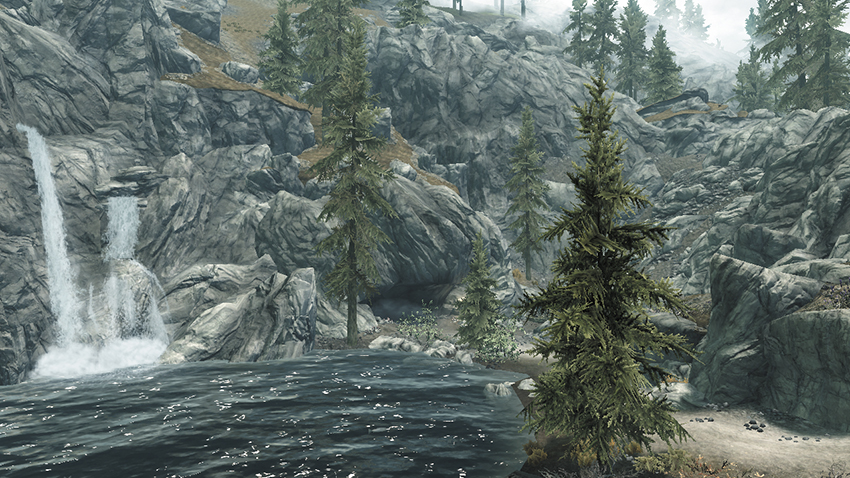
Along Hjaalmarch’s west edge, a dirt path follows the river to a small, watery cave. Beware of predatory animals on your way into the cave.
 Exit to Skyrim
 Fallen Adventurer Chamber
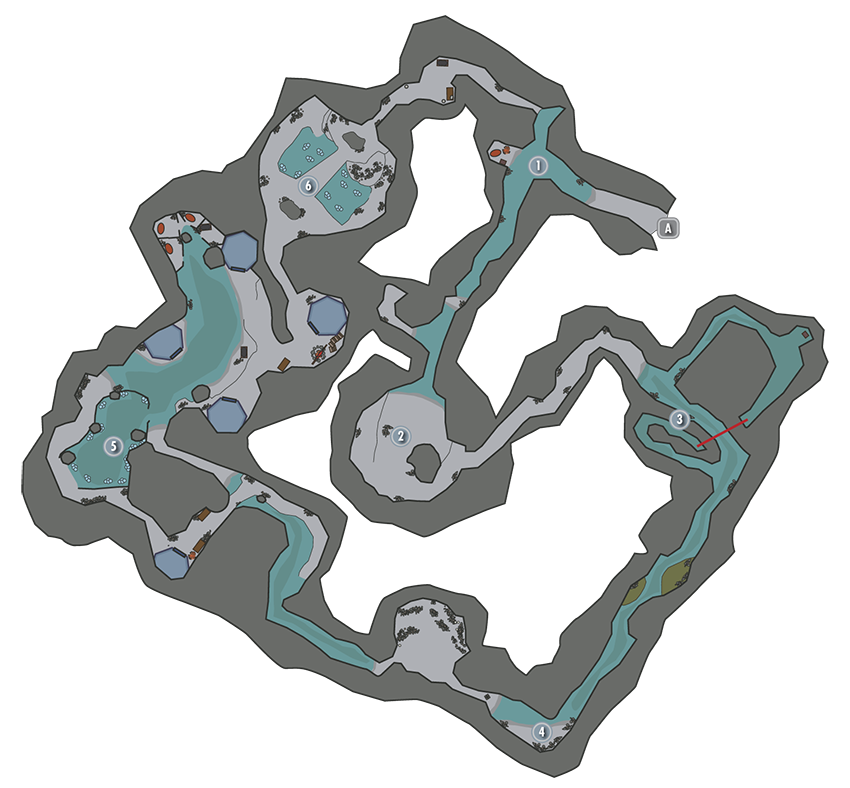
Just inside the cave, a slain adventurer lies on a bedroll near a looted chest. Swipe the nearby potions before venturing southwest toward [2].
- Potions
 Spider Nest
A nest of Frostbite Spiders have made quite a home for themselves here. The first spider is just a decoy—watch out for the others to drop from above if you rush in too quickly. Take the upper path to reach [3].
 Waterlogged Passageway
Explore the north section of these water-filled passages to loot a sunken chest. Beware of Falmer in the long, southern straight; they have a good angle on you.
- Chest (Locked: Apprentice)
 Precarious Passage
Beware the pressure plate as you enter the tunnel—stepping on it causes long spikes to stab out from the wall in lethal fashion. Avoid it, or sprint past after the spikes retract, then battle a blend of Falmer, Frostbite Spiders, and Chaurus in the tunnel ahead.
- Danger! Spear Trap (pressure plate)
 Chaurus Pen
Take either an upper or lower path to reach this wide chamber, where the Falmer are keeping a few pet Chaurus in a pen. If you take the higher path, you’ll face a powerful Falmer and discover some loose gear. Out in the main chamber, make sure to loot the two Chaurus-bone chests.
- Chests (2)
- Loose Gear
 Throne Room
A mighty Falmer sits on a stone throne in this final chamber. Slay the monster to clear the cave, then loot the large chest in the back passage. Follow the trail back to the start and exit this dank cavern.
- Chest
- Apothecary’s Satchel
- Potion
- Loose gear