
Elder Scrolls V: Skyrim Special Edition Guide The Atlas Solstheim: Southern Ash Lands
[S.S08] Kagrumez
[S.S08] Kagrumez
Related Quests
- Solstheim Side Quest: The Challenges of Kagrumez*
Recommended Level: 25
Dungeon: Dwarven City
- Dwarven Automaton
- Reaver
Services
- Follower: Steadfast Dwarven Sphere [DB6/7]
- Follower: Steadfast Dwarven Spider [DB7/7]
Dangers
- Trial Chamber
Puzzle
- Dwarven Puzzle
Collectibles
- Kagrumez Resonance Gem [DB4/5]
- Kagrumez Resonance Gem [DB5/5]
- Unique Weapon: Dwarven Black Bow of Fate [DB7/11]
Miscellaneous
- Area is locked
- Chest
- Loose gear
- Lots o’ gold
Exterior
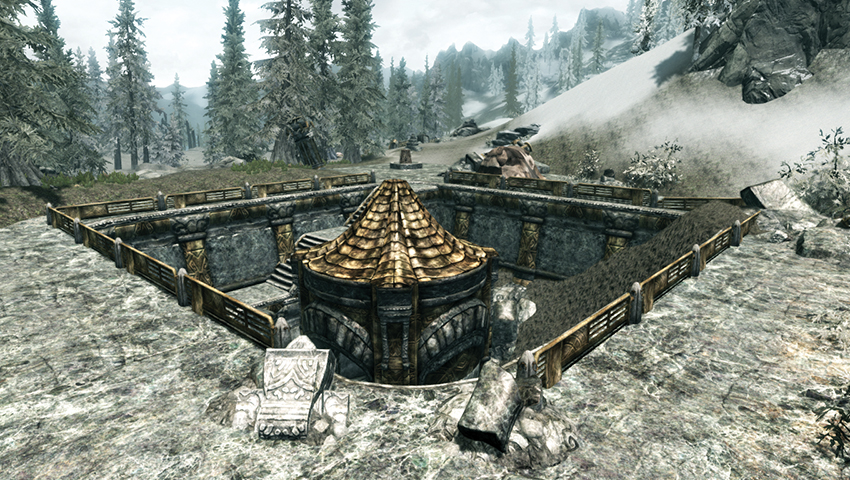
A dead Dunmeri mage is sprawled inside his tent, near a knapsack and a few dwarven parts. Otherwise, this area is desolate. The real entrance to Kagrumez is below. Excavation and rock slides have decimated one of the walls; there’s a chest among the stonework. Activate the elevator to head inside.
- Chest
- Raleth Eldri (Deceased)
Interior
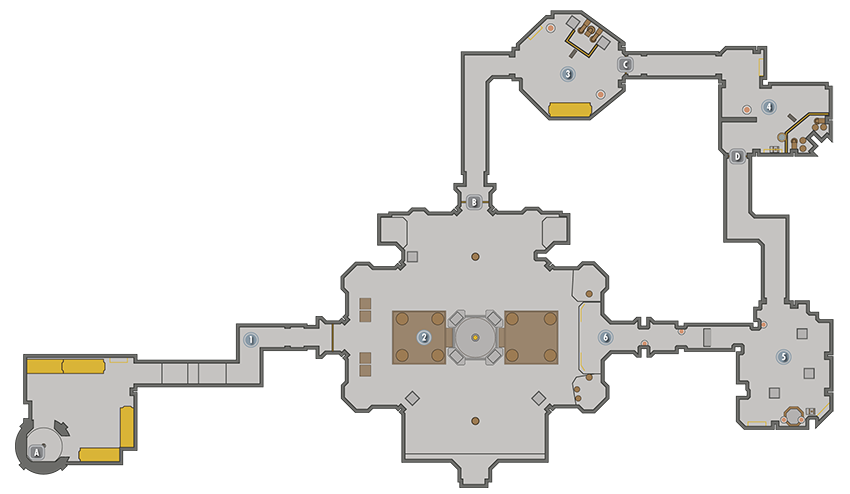
 Elevator to Solstheim
 Corridor to the Golden Door
This is the entrance chamber, with dwarven metal and parts to take.
 Trial Chamber
As you enter, a Reaver is talking about things coming out of the walls and suggests they return with more men. Another replies they have the mettle to slay a few spiders, before claiming the treasure of Kagrumez. Search the leader’s corpse for two Kagrumez Resonance Gems; you need these to activate the strange pedestal receptacle in the middle of the chamber, which begins the forthcoming trials. There is a small journal to read, too, offering hints at what is to come.
- Kagrumez Resonance Gem [DB4/5]
- Kagrumez Resonance Gem [DB5/5]
- Raleth Eldri’s Notes on Kagrumez
Trial 1: Automaton Attack
The resonance receptacle receives any Kagrumez Resonance Gems you wish to insert, and you can remove them without any problems. Look to the northern gate (Location B). Above it is a resonance marker, a golden plate with the fourth and ninth holes covered. Return to the receptacle and place the gems in that pattern to begin. You will face Dwarven Spiders (3) and Dwarven Ballistas (3).
Trial 2: Flame and Fireproof Spheres
In Location 3, locate the gate on the east wall (Location C). Above it is a resonance marker with the second, eighth, and ninth holes covered. Place the gems, and the trial begins. Two flame gouts shoot vertically, while steam blasts between the walls on the east and west sides. Toward the north and south edges of the arena are rotating fire pedestals that activate when you move near them; therefore, stay on the outer edges or the middle of the arena when fighting. You must defeat Dwarven Spiders (5) and Tempered Spheres (2), which are immune to fire damage.
Trial 3: A Short, Sharp Shock
In Location 4, locate the gate southwest of the room (Location D). Above it is a resonance marker with the first, fifth, seventh, and ninth holes covered. Place the gems to begin your final trial. The chamber fills ankle-deep in water, with islands in the center and around the edges. As you navigate the water, expect shock damage (which is extra-nasty if you’re in the water) from Tempered Spheres (2), Dwarven Ballistas (2), and Dwarven Spiders (3).
 Northern Gate
 Spider Storeroom
Head through the northern gate and up the passage. Among shelves of ingots is a lever that opens a strange cage. Inside is an automaton that acts in the same way as an Animal Companion. It can fight alongside you or “go home” (which is here).
- Dwarven Metal Ingot (15)
- Follower: Steadfast Dwarven Spider [DB6/7]
 Eastern Gate
 Sphere Storeroom
This is another storage chamber with a chest and a lever to pull. This reveals a new automaton to control, the Steadfast Dwarven Sphere! Choose this or the Spider to aid you, if you wish.
- Chest
- Follower: Steadfast Dwarven Sphere [DB7/7]
 Southwestern Gate
 Upper Chamber
Head up to a long hall. Among the other treasures is the Dwarven Black Bow of Fate, an impressive haul for your final prize.
- Chest
- Flawless Diamond
- Diamond (2)
- Gold Ingot (7)
- Unique Weapon: Dwarven Black Bow of Fate [DB7/11]
 Viewing Balcony
Although you can use Whirlwind Sprint to access balconies overlooking the trial chamber, they lead nowhere. This location has two stone seats but little else.
[S.S09] Ramshackle Trading Post
Recommended Level: 10
Habitation: Trading Post
- Falas Selvayn
Services
- Trader (General Goods): Falas Selvayn [DB10/16]
Collectibles
- East Empire Strongbox [DB28/33]
- Unique Weapon: Glass Bow of the Stag Prince [DB8/11]
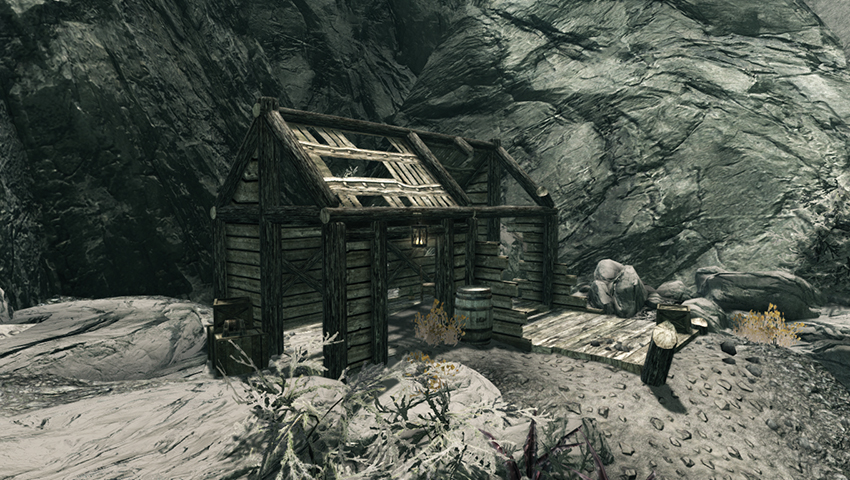
What looks to be an abandoned (and certainly ruined) trading post is actually still used by Falas Selvayn. Enter the structure, looking for an arrow that pins a note to the northwest corner wall. It reads “Meet me here at midnight.” Just outside is an East Empire Strongbox [Expert]. Falas turns up just after midnight (stay away from the location, then return to meet him). He remains here until around 4:00 a.m. Purchase (or pickpocket) a unique bow from him.
- East Empire Strongbox [Expert] [DB28/33]
- East Empire Pendant
- Trader (General Goods): Falas Selvayn [DB10/16]
- Unique Weapon: Glass Bow of the Stag Prince [DB8/11]