Prima Games eGuides
primagames.com Browse Redeem a code Help
Elder Scrolls V: Skyrim Special Edition eGuide
Sign in My Guides

Sign in or create an account

We'll email you a link. No password needed, and if you don't have an account yet, the link makes one.

By creating an account or signing in, you agree to our Terms of Service and Privacy Policy.

Have a password?

Had an account on the old eGuides site, or a code from a printed guide? Help and troubleshooting

Sign in with a password

By signing in, you agree to our Terms of Service and Privacy Policy.

Check your email

A sign-in link is on its way. It works once and expires in 15 minutes. Open it and you're in, with an account if you didn't already have one.

Contents

  • Song of the Dragonborn
    • Introduction
  • Training
    • Training Part 1: Character Creation
      • Welcome to Skyrim
      • The Races of Skyrim
      • Racial Advantages
      • Skills Overview
      • Legendary Difficulty and Skills
      • The Trainers of Skyrim and Solstheim
      • Improving Skills: Skill Books
      • Improving Skills: Augmentations
      • Skill Constellations Overview
      • Combat Skills: The Path of Might – Smithing
      • Combat Skills: The Path of Might – Heavy Armor
      • Combat Skills: The Path of Might – Block
      • Combat Skills: The Path of Might – Two-Handed
      • Combat Skills: The Path of Might – One-Handed
      • Combat Skills: The Path of Might – Archery
      • Stealth Skills: The Path of Shadow – Light Armor
      • Stealth Skills: The Path of Shadow – Sneak
      • Stealth Skills: The Path of Shadow – Lockpicking
      • Stealth Skills: The Path of Shadow – Pickpocket
      • Stealth Skills: The Path of Shadow – Speech
      • Stealth Skills: The Path of Shadow – Alchemy
      • Magic Skills: The Path of Magic – Illusion
      • Magic Skills: The Path of Magic – Conjuration
      • Magic Skills: The Path of Magic – Destruction
      • Magic Skills: The Path of Magic – Restoration
      • Magic Skills: The Path of Magic – Alteration
      • Magic Skills: The Path of Magic – Enchanting
      • Character Archetypes
    • Training Part 2: Combat, Development, and Crafting
      • Character Advancement
      • Combat Improvement
      • Shouts and Other Powers
      • Diseases
      • Lycanthropy
      • Vampirism
      • Crafting
      • Enchanting
      • Smithing
      • Other Crafting Activities
    • Training Part 3: Adventuring Across Skyrim
      • Overview
      • Holds of Skyrim
      • Dungeon Exploration
      • Other Sites of Interest
      • Shadowmarks
      • Books
      • Improving Your Standing in Skyrim
      • Followers
      • Horses
      • Carriages and Ferries
      • Dragon Mounts
      • Services, Collectibles, and Items of Interest
      • Dogs
    • Training Part 4: Hearthfire
      • Overview
      • Part 1: Purchasing Land
      • Part 2: Building Your House
      • Part 3: Building Components
      • Part 4: Additional Structures
      • Part 5: Items Needed to Create Structures
      • Part 6: Furnishing Your Home
      • Part 7: Items Needed to Create Furnishings
      • Part 8: Hiring a Steward
      • Part 9: Home Security
      • Part 10: Spouse and Children
      • Part 11: Radiant Quests
    • Training Part 5: Hearthfire: Adoption
      • Overview
      • Part 1: Readying Your Home
      • Part 2: Choosing an Orphan
      • Part 3: Caring for a Child
      • Part 4: Animal Adoption
    • Inventory
      • Overview
      • Spells
      • Weapons, Armor and Items
      • Crafting: Alchemy
      • Crafting: Enchantments
      • Other Items
    • Bestiary
      • Overview
      • Afflicted
      • Alik’r
      • Animals
      • Apocrypha Keepers
      • Ash Spawn
      • Bandits
      • Chaurus
      • Cultists
      • Daedra
      • Dawnguard
      • Death Hounds
      • Dragons
      • Draugr
      • Dwarven Automatons
      • Ebony Warrior
      • Falmer
      • Forgotten Vale Animals
      • Forgotten Vale Frozen Creatures
      • Forsworn
      • Gargoyles
      • Giants
      • Hagravens
      • Horses
      • Hunters
      • Morag Tong
      • Netch
      • Penitus Oculatus
      • Reavers
      • Rieklings
      • Sailor
      • Skeletons
      • Soldiers and Guards
      • Soul Guards
      • Spiders
      • Spriggan
      • Thalmor
      • Trolls
      • Vampires
      • Vigilants of Stendarr
      • Warlocks
      • Werebears
      • Werewolves
      • Wisps
      • Witches
  • Quests
    • Overview
    • Available Quests
    • Act I
      • Main Quest: Unbound
      • Main Quest: Before the Storm
      • Main Quest: Bleak Falls Barrow
      • Main Quest: Dragon Rising
      • Main Quest: The Way of the Voice
      • Main Quest: The Horn of Jurgen Windcaller
      • Main Quest: A Blade in the Dark
    • Act II
      • Main Quest: Diplomatic Immunity
      • Main Quest: A Cornered Rat
      • Main Quest: Alduin’s Wall
      • Main Quest: The Throat of the World
      • Main Quest: Elder Knowledge
      • Main Quest: Alduin’s Bane
    • Act III
      • Main Quest: The Fallen
      • Main Quest: Paarthurnax
      • Main Quest: Season Unending
      • Main Quest: The World-Eater’s Eyrie
      • Main Quest: Sovngarde
      • Main Quest: Dragonslayer
      • Main Quest: Epilogue
    • The Companions Quests
      • Overview
      • Companions Quests: Take Up Arms
      • Companions Quests: Proving Honor
      • Companions Quests: The Silver Hand
      • Companions Quests: Blood’s Honor
      • Companions Quests: Purity of Revenge
      • Companions Quests: Glory of the Dead
    • The Companions Radiant Quests
      • Companions Radiant Quests: Initial Wave: Animal Extermination (I)
      • Companions Radiant Quests: Initial Wave: Animal Extermination (II)
      • Companions Radiant Quests: Initial Wave: Hired Muscle
      • Companions Radiant Quests: Initial Wave: Trouble in Skyrim
      • Companions Radiant Quests: Initial Wave: Family Heirloom
      • Companions Radiant Quests: Initial Wave: Escaped Criminal
      • Companions Radiant Quests: Initial Wave: Rescue Mission
      • Companions Radiant Quests: Second Wave: Striking the Heart
      • Companions Radiant Quests: Second Wave: Stealing Plans
      • Companions Radiant Quests: Second Wave: Retrieval
      • Companions Radiant Quests: Final Wave: Totems of Hircine
      • Companions Radiant Quests: Final Wave: Purity
      • Companions Radiant Quests: Final Wave: Dragon Seekers
    • The College of Winterhold Quests
      • Overview
      • College of Winterhold Quests: First Lessons
      • College of Winterhold Quests: Under Saarthal
      • College of Winterhold Quests: Hitting the Books
      • College of Winterhold Quests: Good Intentions
      • College of Winterhold Quests: Revealing the Unseen
      • College of Winterhold Quests: Containment
      • College of Winterhold Quests: The Staff of Magnus
      • College of Winterhold Quests: The Eye of Magnus
    • The College of Winterhold Radiant Quests
      • Overview
      • College of Winterhold Radiant Quests: Rejoining the College
      • College of Winterhold Radiant Quests: Tolfdir’s Alembic
      • College of Winterhold Radiant Quests: Out of Balance
      • College of Winterhold Radiant Quests: An Enchanted Journey
      • College of Winterhold Radiant Quests: Restocking Soul Gems
      • College of Winterhold Radiant Quests: Valuable Book Procurement
      • College of Winterhold Radiant Quests: Shalidor’s Insights
      • College of Winterhold Radiant Quests: The Atronach Forge
      • College of Winterhold Radiant Quests: Forgotten Names
      • College of Winterhold Radiant Quests: Aftershock
      • College of Winterhold Radiant Quests: Rogue Wizard
      • College of Winterhold Radiant Quests: Arniel’s Endeavors
    • Apprentice Radiant Quests
      • Apprentice Radiant Quests: Brelyna’s Practice
      • Apprentice Radiant Quests: J’Zargo’s Experiment
      • Apprentice Radiant Quests: Onmund’s Request
    • Ritual Spell Radiant Quests
      • Ritual Spell Quests: Destruction Ritual Spell
      • Ritual Spell Quests: Illusion Ritual Spell
      • Ritual Spell Quests: Conjuration Ritual Spell
      • Ritual Spell Quests: Restoration Ritual Spell
      • Ritual Spell Quests: Alteration Ritual Spell
    • Thieves Guild Quests
      • Overview
      • An Influx of Immigrants
      • Training
      • Other Advantages
      • Available Quests
      • Thieves Guild Quests: A Chance Arrangement
      • Thieves Guild Quests: Taking Care of Business
      • Thieves Guild Quests: Loud and Clear
      • Thieves Guild Quests: Dampened Spirits
      • Thieves Guild Quests: Scoundrel’s Folly
      • Thieves Guild Quests: Speaking With Silence
      • Thieves Guild Quests: Hard Answers
      • Thieves Guild Quests: The Pursuit
      • Thieves Guild Quests: Trinity Restored
      • Thieves Guild Quests: Blindsighted
      • Thieves Guild Quests: Darkness Returns
    • Thieves Guild Radiant Quests
      • Overview
      • Thieves Guild Radiant Quests: No Stone Unturned
      • Thieves Guild Radiant Quests: Reparations
      • Thieves Guild Radiant Quests: Shadowmarks
      • Thieves Guild Radiant Quests: Moon Sugar Rush
      • Thieves Guild Radiant Quests: Armor Exchange
      • Thieves Guild Radiant Quests: Larceny Targets
    • Additional Jobs
      • An Overview
      • Delvin’s Additional Jobs
      • Vex’s Additional Jobs
    • City Influence Quests
      • Growing the Guild and Gaining Influence
      • City Influence Quests: Silver Lining
      • City Influence Quests: The Dainty Sload
      • City Influence Quests: Imitation Amnesty
      • City Influence Quests: Summerset Shadows
      • City Influence Quests: Ultimate Rewards
      • Leadership Quest: Under New Management
    • Dark Brotherhood Quests
      • Overview
      • Assassinations: A Tactical Overview
      • Training
      • Available Quests and Tasks
      • Dark Brotherhood Quests: Delayed Burial
      • Dark Brotherhood Quests: Innocence Lost
      • Dark Brotherhood Quests: With Friends Like These...
      • Dark Brotherhood Quests: Sanctuary
      • Dark Brotherhood Quests: Mourning Never Comes
      • Dark Brotherhood Quests: Whispers in the Dark
      • Dark Brotherhood Quests: The Silence Has Been Broken
      • Dark Brotherhood Quests: Bound Until Death
      • Dark Brotherhood Quests: Breaching Security
      • Dark Brotherhood Quests: The Cure for Madness
      • Dark Brotherhood Quests: Recipe for Disaster
      • Dark Brotherhood Quests: To Kill an Empire
      • Dark Brotherhood Quests: Death Incarnate
      • Dark Brotherhood Quests: Hail Sithis!
      • Dark Brotherhood Quests: Destroy the Dark Brotherhood!
      • Dark Brotherhood Quests: Where You Hang Your Enemy’s Head...
    • Dark Brotherhood Quests: Side Contracts
      • Overview
      • Side Contracts: Part 1
      • Side Contracts: Part 2
      • Side Contracts: Part 3
      • Side Contracts: Part 4
      • Side Contracts: Part 5
      • Side Contracts: Part 6
    • Dark Brotherhood Radiant Quests
      • Dark Brotherhood Radiant Quests: Honor Thy Family
      • Dark Brotherhood Radiant Quests: The Feeble Fortune
      • Dark Brotherhood Radiant Quests: Welcome to the Brotherhood
      • Dark Brotherhood Radiant Quests: Cicero’s Return
      • Dark Brotherhood Radiant Quests: The Dark Brotherhood Forever!
      • Dark Brotherhood Radiant Quests: The Torturer’s Treasure: Parts I, II, III, IV*
    • Civil War Quests
      • General Overview
      • Overview: Imperial Legion
      • Overview: Stormcloak Rebellion
      • Sieges: A Tactical Overview
    • Civil War Quests: Imperial
      • Civil War Quests: Joining the Legion
      • Civil War Quests: The Jagged Crown
      • Civil War Quests: Message to Whiterun
      • Civil War Quests: Defense of Whiterun
      • Civil War Quests: A False Front
      • Civil War Quests: The Battle for Fort Dunstad
      • Civil War Quests: Compelling Tribute
      • Civil War Quests: The Battle for Fort Greenwall
      • Civil War Quests: Rescue from Fort Kastav
      • Civil War Quests: The Battle for Fort Amol
      • Civil War Quests: Battle for Windhelm
    • Civil War Quests: Stormcloak
      • Civil War Quests: Joining the Stormcloaks
      • Civil War Quests: The Jagged Crown
      • Civil War Quests: Message to Whiterun
      • Civil War Quests: Battle For Whiterun
      • Civil War Quests: Rescue from Fort Neugrad
      • Civil War Quests: Compelling Tribute
      • Civil War Quests: The Battle for Fort Sungard
      • Civil War Quests: A False Front
      • Civil War Quests: The Battle for Fort Snowhawk
      • Civil War Quests: The Battle for Fort Hraggstad
      • Civil War Quests: Battle for Solitude
    • Daedric Quests
      • Overview
      • Daedric Quests: The Black Star
      • Daedric Quests: Boethiah’s Calling
      • Daedric Quests: A Daedra’s Best Friend
      • Daedric Quests: Discerning the Transmundane
      • Daedric Quests: Ill Met by Moonlight
      • Daedric Quests: The Cursed Tribe
      • Daedric Quests: Pieces of the Past
      • Daedric Quests: The Whispering Door
      • Daedric Quests: The Break of Dawn
      • Daedric Quests: The House of Horrors
      • Daedric Quests: The Taste of Death
      • Daedric Quests: The Only Cure
      • Daedric Quests: A Night to Remember
      • Daedric Quests: The Mind of Madness
      • Daedric Quests: Waking Nightmare
    • Other Factions Quests
      • Overview
      • Available Quests
    • The Greybeards Quests
      • Overview
      • Greybeards Quests: Word Wall Revelations
    • The Blades Quests
      • Overview
      • Blades Quests: Meditations on Words of Power
      • Blades Quests: Rebuilding the Blades
      • Blades Quests: Dragon Research
      • Blades Quests: Dragonslayer’s Blessing
      • Blades Quests: Dragon Hunting
    • The Bards College Quests
      • The Bards College
      • Bards College Quests: Tending the Flames
      • Bards College Quests: Finn’s Lute
      • Bards College Quests: Pantea’s Flute
      • Bards College Quests: Rjorn’s Drum
    • Temple Quests
      • Overview
      • Temple Quests: The Heart of Dibella
      • Temple Quests: The Book of Love
      • Temple Quests: The Blessings of Nature
    • Other Factions Quests: Side Quests
      • Side Quests: The Bonds of Matrimony
    • Side Quests
      • Overview
      • Side Quests: Blood on the Ice
      • Side Quests: The Ebony Warrior
      • Side Quests: Forbidden Legend
      • Side Quests: The Forsworn Conspiracy
      • Side Quests: No One Escapes Cidhna Mine
      • Side Quests: The Golden Claw
      • Side Quests: In My Time of Need
      • Side Quests: Kyne’s Sacred Trials
      • Side Quests: Laid to Rest
      • Side Quests: Lights Out!
      • Side Quests: Lost to the Ages
      • Side Quests: The Man Who Cried Wolf
      • Side Quests: The Wolf Queen Awakened
      • Side Quests: Missing in Action
      • Side Quests: Promises to Keep
      • Side Quests: A Return to Your Roots
      • Side Quests: Rise in the East
      • Side Quests: Rising at Dawn
      • Side Quests: Unfathomable Depths
      • Side Quests: The White Phial
      • Side Quests: Repairing the Phial
      • Side Quests: Captured Critters
      • Side Quests: The Forgemaster’s Fingers
      • Side Quests: The Great Skyrim Treasure Hunt
      • Side Quests: Masks of the Dragon Priests
    • Dungeon Quests and Other Activities
      • Overview
      • Angarvunde: Medresi Dran and the Wandering Dead
      • Ansilvund: A Love Beyond Death
      • Angi’s Camp: Composure, Speed, and Precision
      • Bard’s Leap Summit: Leap Before You Look
      • Blind Cliff Cave: Melka and Petra
      • Darklight Tower: Repentance
      • Forelhost: Siege on the Dragon Cult
      • Frostflow Lighthouse: What Lies Beneath
      • Frostmere Crypt: The Pale Lady
      • High Gate Ruins: A Scroll for Anska
      • Hillgrund’s Tomb: Ancestral Worship
      • Mistwatch: Forgetting About Fjola
      • Moss Mother Cavern: Hunter and Hunted
      • Nchuand-Zel: The Lost Expedition
      • Nilheim: The Nilheim Scam
      • Ragnvald: Otar’s Mad Guardians
      • Rebel’s Cairn: The Legend of Red Eagle
      • Shroud Hearth Barrow: Wilhelm’s Specter
      • Sleeping Tree Camp: The Secret at the Sleeping Tree
      • Southfringe Sanctum: The Savior of Selveni Nethri
      • Treva’s Watch: Infiltration
      • Valthume: Evil in Waiting
      • Volunruud: Silenced Tongues
      • Yngol Barrow: Ashore in a Sea of Ghosts
      • Dungeon Activities
    • Miscellaneous Objectives
      • Overview
      • Miscellaneous Objectives: Innkeepers
      • Miscellaneous Objectives: Haafingar Hold
      • Miscellaneous Objectives: Hjaalmarch Hold
      • Miscellaneous Objectives: The Pale
      • Miscellaneous Objectives: Winterhold
      • Miscellaneous Objectives: The Reach
      • Miscellaneous Objectives: Whiterun Hold
      • Miscellaneous Objectives: Eastmarch Hold
      • Miscellaneous Objectives: Falkreath Hold
      • Miscellaneous Objectives: The Rift
    • Favors
      • Overview
      • Part 1: Activity Favors
      • Part 2: Favors for Citizens
      • Crafting Tutorials
      • Part 3: Thane Tasks
  • Dawnguard Quests
    • Overview
    • The Dawnguard
    • Dawnguard Trainers And Vendors
    • The Vampires
    • Vampire Trainers And Vendors
    • Important Characters (Neutral)
    • Available Quests And Tasks
    • Dawnguard Main Quest
      • Dawnguard Main Quest: Dawnguard
      • Dawnguard Main Quest: Awakening
      • Dawnguard Main Quest: Bloodline
      • Dawnguard Main Quest: Power Of The Blood
      • Dawnguard Main Quest: The Bloodstone Chalice
      • Dawnguard Main Quest: A New Order
      • Dawnguard Main Quest: Prophet
      • Dawnguard Main Quest: Seeking Disclosure
      • Dawnguard Main Quest: Scroll Scouting
      • Dawnguard Main Quest: Chasing Echoes
      • Dawnguard Main Quest: Beyond Death
      • Dawnguard Main Quest: Unseen Visions
      • Dawnguard Main Quest: Touching The Sky
      • Dawnguard Main Quest: Kindred Judgment
    • Postquest Activities
      • Overview
      • Postquest Activity: Elder Scrolls For Sale
      • Postquest Activity: Repairing The Castle
      • Postquest Activity: Serana’s Cure
      • Postquest Activity: Valerica’s Return
    • Dawnguard Faction Quests
      • Overview
      • Dawnguard Faction Quest: Ancient Technology
      • Dawnguard Faction Quest: Bolstering The Ranks
      • Dawnguard Faction Quest: Cleansing Light
      • Dawnguard Faction Quest: Hide And Seek
      • Dawnguard Faction Quest: Hunting The Monster
      • Dawnguard Faction Quest: A Jarl’s Justice
      • Dawnguard Faction Quest: Lost Relic
      • Dawnguard Faction Quest: Preemptive Strike
    • Vampire Faction Quests
      • Overview
      • Vampire Faction Quest: Rescue
      • Vampire Faction Quest: Amulets Of Night Power
      • Vampire Faction Quest: Ancient Power
      • Vampire Faction Quest: Culling The Beast
      • Vampire Faction Quest: Deceiving The Herd
      • Vampire Faction Quest: Destroying The Dawnguard
      • Vampire Faction Quest: The Gift
      • Vampire Faction Quest: The Hunt
      • Vampire Faction Quest: New Allegiances
      • Vampire Faction Quest: Protecting The Bloodline
      • Vampire Faction Quest: Rings Of Blood Magic
    • Dawnguard Side Quests
      • Overview
      • Side Quests: Durnehviir
      • Side Quests: Face To Face
      • Side Quests: Impatience of a Saint
      • Side Quests: The Great Skyrim Cache Grab
    • Dawnguard Regional Activities: Soul Cairn
      • Overview
      • Regional Activity: Arvak The Spectral Steed*
      • Regional Activity: Dark Conjurations
      • Regional Activity: (Don’t Fear) The Reaper
      • Regional Activity: The Soul Husk Merchant
      • Regional Activity: Valerica’s Concoction
      • Regional Activity: The Whole Soul
    • Dawnguard Regional Activities: Forgotten Vale
      • Regional Activity: Ancient Falmer Tomes
      • Regional Activity: Paragons of the Frost Giants
  • Dragonborn Quests
    • Overview
    • Important Locations
    • Important Characters
    • Available Quests
    • Dragonborn Main Quest
      • Dragonborn Main Quest: Dragonborn
      • Dragonborn Main Quest: The Temple Of Miraak
      • Dragonborn Main Quest: The Fate Of The Skaal
      • Dragonborn Main Quest: Cleansing The Stones
      • Dragonborn Main Quest: The Path of Knowledge
      • Dragonborn Main Quest: The Gardener of Men
      • Dragonborn Main Quest: At the Summit of Apocrypha
    • Solstheim Side Quests
      • Overview
      • Solstheim Side Quests: Azra’s Staffs
      • Solstheim Side Quests: Black Book: Filament And Filigree
      • Solstheim Side Quests: Black Book: The Hidden Twilight
      • Solstheim Side Quests: Black Book: The Sallow Regent
      • Solstheim Side Quests: Black Book: The Winds Of Change
      • Solstheim Side Quests: Black Book: Untold Legends
      • Solstheim Side Quests: Briarheart Necropsy
      • Solstheim Side Quests: The Chief Of Thirsk Hall
      • Solstheim Side Quests: Deathbrand
      • Solstheim Side Quests: Experimental Subject
      • Solstheim Side Quests: Filial Bonds
      • Solstheim Side Quests: The Final Descent
      • Solstheim Side Quests: From The Ashes
      • Solstheim Side Quests: Healing A House
      • Solstheim Side Quests: Heart Stones
      • Solstheim Side Quests: Lost Knowledge
      • Solstheim Side Quests: Lost Legacy
      • Solstheim Side Quests: March Of The Dead
      • Solstheim Side Quests: A New Source Of Stalhrim
      • Solstheim Side Quests: Old Friends
      • Solstheim Side Quests: Reluctant Steward
      • Solstheim Side Quests: A New Debt
      • Solstheim Side Quests: Retaking Thirsk
      • Solstheim Side Quests: Served Cold
      • Solstheim Side Quests: Telvanni Research
      • Solstheim Side Quests: Unearthed
      • Solstheim Side Quests: Wind And Sand
      • Solstheim Side Quests: The Challenges Of Kagrumez
      • Solstheim Side Quests: The Great Solstheim Strongbox Hunt
      • Solstheim Side Quests: Karstaag’s Resurrection
      • Solstheim Side Quests: Masks of the Acolyte Priests
      • Solstheim Side Quests: Rings of the Werewolves
      • Solstheim Side Quests: Spider Crafting
    • Solstheim Regional Activities
      • Overview
      • Raven Rock Regional Activities
      • Skaal Village Regional Activities
      • Tel Mithryn Regional Activities
      • Thirsk Mead Hall Regional Activities
  • World Interactions and Encounters
    • Overview
    • World Interactions
    • World Encounters
    • Dawnguard World Interactions
    • Dawnguard World Encounters
    • Dragonborn World Interactions
    • Dragonborn World Encounters
  • The Atlas
    • Atlas of Skyrim
    • Hold 1: Haafingar
      • Overview
      • Hold Capital: Solitude
      • [1.01] Northwatch Keep
      • [1.02] Rimerock Burrow
      • [1.03] Pinefrost Tower
      • [1.04] Volskygge
      • [1.05] Steepfall Burrow and Lower Steepfall Burrow
      • [1.06] Lost Echo Cave
      • [1.07] Orphan's Tear
      • [1.08] Fort Hraggstad
      • [1.09] Widow's Watch Ruins
      • [1.10] Pinemoon Cave
      • [1.11] Clearpine Pond
      • [1.12] Ravenscar Hollow
      • [1.13] The Steed Stone
      • [1.14] Ironback Hideout
      • [1.15] Wolfskull Cave
      • [1.16] Statue to Meridia and Kilkreath Ruins
      • [1.17] Dragon Bridge
      • [1.18] Haafingar Stormcloak Camp
      • [1.19] Broken Oar Grotto
      • [1.20] Shadowgreen Cavern
      • [1.21] Thalmor Embassy
      • [1.22] Solitude Sawmill
      • [1.23] Katla's Farm
      • [1.24] East Empire Company Warehouse
      • [1.25] Brinewater Grotto
      • [1.26] Solitude Lighthouse
      • [1.27] Dainty Sload
      • [1.28] The Katariah
      • Secondary Locations
      • Additional Locations
    • Hold 2: Hjaalmarch
      • Overview
      • Hold Capital: Morthal
      • [2.01] Meeko's Shack
      • [2.02] Chillwind Depths
      • [2.03] Robber's Gorge
      • [2.04] Dead Men's Respite
      • [2.05] Crabber's Shanty
      • [2.06] Orotheim
      • [2.07] Talking Stone Camp
      • [2.08] Folgunthur
      • [2.09] The Apprentice Stone
      • [2.10] Fort Snowhawk
      • [2.11] Brood Cavern
      • [2.12] North and South Cold Rock Pass
      • [2.13] Eldersblood Peak
      • [2.14] Wreck of the Icerunner
      • [2.15] Abandoned Shack
      • [2.16] Ustengrav
      • [2.17] Hjaalmarch Stormcloak Camp
      • [2.18] Mzinchaleft
      • [2.19] Great Lift at Mzinchaleft
      • [2.20] Movarth's Lair
      • [2.21] Hjaalmarch Imperial Camp
      • [2.22] Kjenstag Ruins
      • [2.23] Stonehills
      • [2.24] Labyrinthian
      • [2.25] Lost Valkygg
      • [2.26] Skyborn Altar
      • Secondary Locations
      • Additional Locations
    • Hold 3: The Pale
      • Overview
      • Hold Capital: Dawnstar
      • [3.01] High Gate Ruins
      • [3.02] Wreck of the Brinehammer
      • [3.03] Pale Imperial Camp
      • [3.04] Windward Ruins
      • [3.05] Dawnstar Sanctuary
      • [3.06] Nightcaller Temple
      • [3.07] Red Road Pass
      • [3.08] Frostmere Crypt
      • [3.09] Hall of the Vigilant
      • [3.10] Fort Dunstad
      • [3.11] Shrine of Mehrunes Dagon
      • [3.12] The Lord Stone
      • [3.13] Volunruud
      • [3.14] Stonehill Bluff
      • [3.15] Tower of Mzark
      • [3.16] Loreius Farm
      • [3.17] Blizzard Rest
      • [3.18] Weynon Stones
      • [3.19] Duskglow Crevice
      • [3.20] Silverdrift Lair
      • [3.21] Shrouded Grove
      • [3.22] Korvanjund
      • [3.23] Tumble Arch Pass
      • [3.24] Shearpoint
      • [3.25] Nightgate Inn
      • [3.26] Blackreach Elevator (Alftand)
      • [3.27] Forsaken Cave
      • [3.28] Yorgrim Overlook
      • [3.29] Bronze Water Cave
      • [3.30] Pale Stormcloak Camp
      • [3.31] Irkngthand
      • [3.32] Raldbthar
      • [3.33] Blackreach Elevator (Raldbthar)
      • [3.34] Anga's Mill
      • Secondary Locations
      • Additional Locations
    • Hold 4: Winterhold Hold
      • Overview
      • Hold Capital: Winterhold
      • [4.01] Hela's Folly
      • [4.02] Yngvild
      • [4.03] The Tower Stone
      • [4.04] Winterhold Imperial Camp
      • [4.05] Hob's Fall Cave
      • [4.06] Frostflow Lighthouse
      • [4.07] Driftshade Refuge
      • [4.08] Fort Fellhammer
      • [4.09] Snowpoint Beacon
      • [4.10] Pilgrim's Trench
      • [4.11] Ysgramor's Tomb
      • [4.12] Saarthal
      • [4.13] Alftand
      • [4.14] Wayward Pass
      • [4.15] Ironbind Barrow
      • [4.16] Mount Anthor
      • [4.17] Sightless Pit
      • [4.18] Shrine of Azura
      • [4.19] Fort Kastav
      • [4.20] Septimus Signus's Outpost
      • [4.21] Skytemple Ruins
      • [4.22] Wreck of the Pride of Tel Vos
      • [4.23] The Serpent Stone
      • [4.24] Bleakcoast Cave
      • [4.25] Whistling Mine
      • [4.26] Journeyman's Nook
      • [4.27] Stillborn Cave
      • [4.28] Snow Veil Sanctum
      • [4.29] Winterhold Stormcloaks Camp
      • [4.30] Yngol Barrow
      • [4.31] Wreck of the Winter War
      • Secondary Locations
    • Hold 5: The Reach
      • Overview
      • Hold Capital: Markarth
      • [5.01] Mor Khazgur
      • [5.02] Deepwood Redoubt
      • [5.03] Hag's End
      • [5.04] Deep Folk Crossing
      • [5.05] Bruca's Leap Redoubt
      • [5.06] Bthardamz
      • [5.07] Druadach Redoubt
      • [5.08] Dragontooth Crater
      • [5.09] Harmugstahl
      • [5.10] Reach Stormcloak Camp
      • [5.11] Liar's Retreat
      • [5.12] Cliffside Retreat
      • [5.13] Dragon Bridge Overlook
      • [5.14] Ragnvald
      • [5.15] Reach Imperial Camp
      • [5.16] Shrine of Peryite
      • [5.17] Karthwasten
      • [5.18] Broken Tower Redoubt
      • [5.19] Markarth Stables
      • [5.20] Salvius Farm
      • [5.21] Left Hand Mine
      • [5.22] Kolskeggr Mine
      • [5.23] The Lover Stone
      • [5.24] Blind Cliff Cave
      • [5.25] Four Skull Lookout
      • [5.26] Red Eagle Redoubt
      • [5.27] Sundered Towers
      • [5.28] Rebel's Cairn
      • [5.29] Karthspire Camp
      • [5.30] Karthspire
      • [5.31] Sky Haven Temple
      • [5.32] Soljund's Sinkhole
      • [5.33] Bleakwind Bluff
      • [5.34] Old Hroldan
      • [5.35] Hag Rock Redoubt
      • [5.36] Dead Crone Rock
      • [5.37] Purewater Run
      • [5.38] Dushnikh Yal
      • [5.39] Reachwater Rock
      • [5.40] Reachwind Eyrie
      • [5.41] Reachcliff Cave
      • [5.42] Valthume
      • [5.43] Gloomreach
      • [5.44] Lost Valley Redoubt
      • [5.45] Bard's Leap Summit
      • [5.46] Cradle Stone Tower
      • [5.47] Fort Sungard
      • Secondary Locations
      • Additional Locations
    • Hold 6: Whiterun Hold
      • Overview
      • Hold Capital: Whiterun
      • [6.01] Lund's Hut
      • [6.02] Rorikstead
      • [6.03] Serpent's Bluff Redoubt
      • [6.04] Whiterun Imperial Camp
      • [6.05] Swindler's Den
      • [6.06] Gjukar's Monument
      • [6.07] Broken Fang Cave
      • [6.08] Sleeping Tree Camp
      • [6.09] Rannveig's Fast
      • [6.10] Drelas' Cottage
      • [6.11] Greenspring Hollow
      • [6.12] Dustman's Cairn
      • [6.13] Hamvir's Rest
      • [6.14] Redoran's Retreat
      • [6.15] Fort Greymoor
      • [6.16] Silent Moons Camp
      • [6.17] Halted Stream Camp
      • [6.18] Bleakwind Basin
      • [6.19] Western Watchtower
      • [6.20] Whiterun Stables
      • [6.21] Pelagia Farm
      • [6.22] Honningbrew Meadery
      • [6.23] Chillfurrow Farm
      • [6.24] Battle-Born Farm
      • [6.25] Whitewatch Tower
      • [6.26] White River Watch
      • [6.27] Riverwood
      • [6.28] Shimmermist Cave
      • [6.29] Fellglow Keep
      • [6.30] Graywinter Watch
      • [6.31] The Ritual Stone
      • [6.32] Whiterun Stormcloak Camp
      • [6.33] Valtheim Towers
      • [6.34] Darkshade
      • [6.35] Guldun Rock
      • [6.36] Hillgrund's Tomb
      • [6.37] High Hrothgar
      • [6.38] Throat of the World
      • Secondary Locations
      • Additional Locations
    • Hold 7: Eastmarch
      • Overview
      • Hold Capital: Windhelm
      • [7.01] Uttering Hills Cave
      • [7.02] Gallows Rock
      • [7.03] Mara's Eye Pond
      • [7.04] Morvunskar
      • [7.05] Kynesgrove
      • [7.06] Windhelm Stables
      • [7.07] Brandy-Mug Farm
      • [7.08] Hlaalu Farm
      • [7.09] Hollyfrost Farm
      • [7.10] Traitor's Post
      • [7.11] Refugees' Rest
      • [7.12] Sacellum of Boethiah
      • [7.13] Cradlecrush Rock
      • [7.14] Abandoned Prison
      • [7.15] Mixwater Mill
      • [7.16] Broken Limb Camp
      • [7.17] Cronvangr Cave
      • [7.18] Riverside Shack
      • [7.19] Witchmist Grove
      • [7.20] Bonestrewn Crest
      • [7.21] Steamcrag Camp
      • [7.22] Narzulbur
      • [7.23] Gloombound Mine
      • [7.24] Cragwallow Slope
      • [7.25] Mzulft
      • [7.26] Lost Knife Hideout
      • [7.27] Fort Amol
      • [7.28] Darkwater Pass
      • [7.29] Snapleg Cave
      • [7.30] Eldergleam Sanctuary
      • [7.31] Darkwater Crossing
      • [7.32] The Atronach Stone
      • [7.33] Mistwatch
      • [7.34] Eastmarch Imperial Camp
      • [7.35] Kagrenzel
      • [7.36] Stony Creek Cave
      • [7.37] Cragslane Cavern
      • [7.38] Ansilvund
      • Secondary Locations
    • Hold 8: Falkreath Hold
      • Overview
      • Hold Capital: Falkreath
      • [8.01] Bilegulch Mine
      • [8.02] Sunderstone Gorge
      • [8.03] Glenmoril Coven
      • [8.04] Falkreath Imperial Camp
      • [8.05] Moss Mother Cavern
      • [8.06] Hunter's Rest
      • [8.07] Knifepoint Ridge
      • [8.08] Twilight Sepulcher
      • [8.09] Bannermist Tower
      • [8.10] Evergreen Grove
      • [8.11] Half-Moon Mill
      • [8.12] Bloated Man's Grotto
      • [8.13] North Brittleshin Pass
      • [8.14] South Brittleshin Pass
      • [8.15] Ilinalta's Deep
      • [8.16] The Lady Stone
      • [8.17] Secunda's Kiss
      • [8.18] Bleak Falls Barrow
      • [8.19] Anise's Cabin
      • [8.20] Cracked Tusk Keep
      • [8.21] Halldir's Cairn
      • [8.22] Dark Brotherhood Sanctuary
      • [8.23] Roadside Ruins
      • [8.24] Falkreath Watchtower
      • [8.25] North Shriekwind Bastion
      • [8.26] South Shriekwind Bastion
      • [8.27] Peak's Shade Tower
      • [8.28] Pinewatch
      • [8.29] Angi's Camp
      • [8.30] The Guardian Stones
      • [8.31] Embershard Mine
      • [8.32] Helgen
      • [8.33] South Skybound Watch
      • [8.34] North Skybound Watch
      • [8.35] Orphan Rock
      • [8.36] Falkreath Stormcloak Camp
      • [8.37] Haemar's Shame
      • [8.38] Bonechill Passage
      • [8.39] Ancient's Ascent
      • [8.40] Bloodlet Throne
      • [8.41] Greywater Grotto
      • [8.42] Fort Neugrad
      • [8.43] Southfringe Sanctum
      • Secondary Locations
      • Additional Locations
    • Hold 9: The Rift
      • Overview
      • Hold Capital: Riften
      • [9.01] Ivarstead
      • [9.02] Shroud Hearth Barrow
      • [9.03] Pinepeak Cavern
      • [9.04] Geirmund's Hall
      • [9.05] Nilheim
      • [9.06] Sarethi Farm
      • [9.07] Rift Stormcloak Camp
      • [9.08] Rift Watchtower
      • [9.09] Alchemist's Shack
      • [9.10] Honeystrand Cave
      • [9.11] Rift Imperial Camp
      • [9.12] Ruins of Bthalft
      • [9.13] Arcwind Point
      • [9.14] Autumnwatch Tower
      • [9.15] Froki's Shack
      • [9.16] Treva's Watch
      • [9.17] Angarvunde
      • [9.18] Avanchnzel
      • [9.19] Clearspring Tarn
      • [9.20] Boulderfall Cave
      • [9.21] Northwind Mine
      • [9.22] Northwind Summit
      • [9.23] Tolvald's Cave
      • [9.24] Shor's Watchtower
      • [9.25] Shor's Stone
      • [9.26] Fort Greenwall
      • [9.27] Heartwood Mill
      • [9.28] Faldar's Tooth
      • [9.29] Goldenglow Estate
      • [9.30] Autumnshade Clearing
      • [9.31] Merryfair Farm
      • [9.32] Riften Stables
      • [9.33] Fallowstone Cave and Giant's Grove
      • [9.34] Lost Prospect Mine
      • [9.35] Black-Briar Lodge
      • [9.36] Largashbur
      • [9.37] Darklight Tower
      • [9.38] Ruins of Rkund
      • [9.39] Crystaldrift Cave
      • [9.40] Lost Tongue Overlook
      • [9.41] Snow-Shod Farm
      • [9.42] The Shadow Stone
      • [9.43] Nightingale Hall
      • [9.44] Broken Helm Hollow
      • [9.45] Forelhost
      • [9.46] Stendarr's Beacon
      • Secondary Locations
      • Additional Locations
    • Blackreach
      • Overview
      • [10.00] Khajiit Caravans
      • [10.01] Azura's Star
      • [10.02] Blackreach
      • [10.03] Blue Palace Pelagius Wing
      • [10.04] Japhet's Folly
      • [10.05] Skuldafn
      • [10.06] Sovngarde
    • Soul Cairn
      • Overview
      • [SC1.1] Portal to Volkihar Ruins
      • Soul Cairn Minor Locations
    • Forgotten Vale
      • Overview
      • Area 1: Hidden Vale
      • [FV1.1] Portal to Darkfall Passage and Cave Entrance
      • [FV1.2] Wayshrine of Sight
      • Forgotten Vale Minor Locations
    • Solstheim: Northern Mountains
      • Overview
      • Skaal Village
      • [S.N01] Damphall Mine
      • [S.N02] Water Stone
      • [S.N03] Fahlbtharz
      • [S.N04] Hvitkald Peak
      • [S.N05] Abandoned Lodge
      • [S.N06] Bristleback Cave
      • [S.N07] Northshore Landing
      • [S.N08] Broken Tusk Mine
      • [S.N09] Stalhrim Source
      • [S.N10] Castle Karstaag Ruins
      • [S.N11] Castle Karstaag Caverns
      • [S.N12] Glacial Cave
      • [S.N13] Mortrag Peak
      • [S.N14] Frykte Peak
      • [S.N15] Saering's Watch
      • [S.N16] Benkongerike
      • [S.N17] White Ridge Barrow
      • [S.N18] Hrothmund's Barrow
      • [S.N19] Moesring Pass
      • [S.N20] Snowclad Ruins
      • [S.N21] Mount Moesring
      • [S.N22] Frostmoon Crag
      • [S.N23] Altar of Thrond
      • [S.N24] Temple of Miraak (Tree Stone)
      • [S.N25] Beast Stone
      • [S.N26] Thirsk Mead Hall
      • [S.N27] Headwaters of Harstrad
      • [S.N28] Wind Stone
      • [S.N29] Haknir's Shoal
      • [S.N30] Frossel
      • [S.N31] Bujold's Retreat
      • [S.N32] Gyldenhul Barrow
      • [S.N33] Horker Island
      • Secondary Locations
    • Solstheim: Southern Ash Lands
      • Overview
      • Raven Rock
      • Tel Mithryn
      • [S.S01] Earth Stone
      • [S.S02] Bloodskal Barrow
      • [S.S03] Old Attius Farm
      • [S.S04] Kolbjorn Barrow
      • [S.S05] Wreck of the Strident Squall
      • [S.S06] Hrodulf's House
      • [S.S07] Brodir Grove
      • [S.S08] Kagrumez
      • [S.S09] Ramshackle Trading Post
      • [S.S10] Highpoint Tower
      • [S.S11] Fort Frostmoth
      • [S.S12] Ashfallow Citadel
      • [S.S13] Vahlok's Tomb
      • [S.S14] Nchardak
      • [S.S15] Sun Stone
      • Secondary Locations
    • Apocrypha
      • Overview
      • [S.A01] Apocrypha: Epistolary Acumen
      • [S.A02] Apocrypha: Filament and Filigree
      • [S.A03] Apocrypha: The Hidden Twilight
      • [S.A04] Apocrypha: The Sallow Regent
      • [S.A05] Apocrypha: Untold Legends
      • [S.A06] Apocrypha: The Winds of Change
      • [S.A07] Apocrypha: Waking Dreams of a Starless Sky
  • Interactive World Map
    • Skyrim Atlas
  • Appendices
    • Overview
    • Appendix I: Achievements and Trophies
    • Appendix II: Traders
    • Appendix III: Shrines
    • Appendix IV: Unique Weapons
    • Appendix V: Unique Armor and Items
    • Appendix VI: Skill Books
    • Appendix VII: Other References
    • The Language of Dragons
  • Bonus Content Videos
    • Favored Archetypes
    • Favored Followers
    • Top 5 Shouts
    • Traps
  • Extras
    • Choosing the Correct Attire
    • The Path of the Undeath
    • The Path of the Lycanthrope
    • Advanced Crafting
    • Hearthfire: Owning a Home
    • Top Ten Inventory Items
    • Places to See in Solstheim

Elder Scrolls V: Skyrim Special Edition Guide › Quests › Act I

Main Quest: The Horn of Jurgen Windcaller

Main Quest: The Horn of Jurgen Windcaller

PREREQUISITES: Complete Main Quest: The Way of the Voice, 10 gold pieces

INTERSECTING QUESTS: Main Quest: The Way of the Voice, Main Quest: The Horn of Jurgen Windcaller

LOCATIONS: High Hrothgar, High Hrothgar Courtyard, Riverwood, Sleeping Giant Inn, Ustengrav, Ustengrav Depths

CHARACTERS: Delphine, Master Arngeir, Master Borri, Master Einarth, Master Wulfgar, Orgnar

ENEMIES: Bandit, Bandit Thrall, Conjurer, Draugr, Fire Mage, Frostbite Spider, Necromancer , Skeleton

OBJECTIVES: Retrieve the horn, Meet with whoever took the horn, Return the horn to Arngeir, Learn the Word of Power from Wulfgar, Receive the Greybeards’ greeting

Underground in Ustengrav

  • OBJECTIVE: Retrieve the horn
  • TARGET: Horn of Jurgen Windcaller, inside Ustengrav

Once Arngeir gives you this quest, you may ask him about the Greybeards, why dragons are returning, who Jurgen Windcaller is, and other conversation topics. Turn to your world map and locate Ustengrav on the eastern edge of the great marsh, northeast of Morthal in Hjaalmarch Hold. Your first task is to descend from High Hrothgar.

Tip

Your descent can be done on foot or by horse (if you came on a steed), but a much quicker plan is to halve the distance between here at Ustengrav and Fast-Travel to Whiterun, the Western Watchtower, or any location closest to the temple tomb. Don’t forget to use your new Whirlwind Sprint Shout to cover distances more swiftly than before!

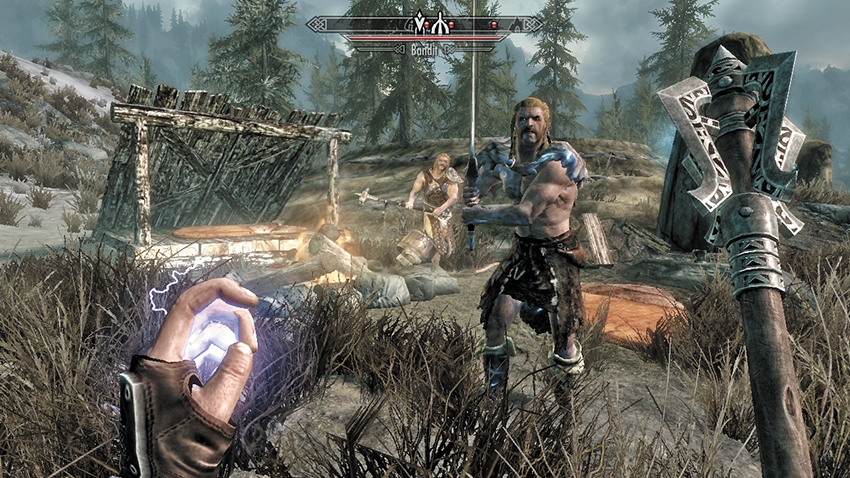
When you finally reach Ustengrav, you may find a small campfire and lean-to by the circular barrow entrance. Expect a confrontation with bandits and a necromancer. Then descend the barrow steps and open the door to Ustengrav.
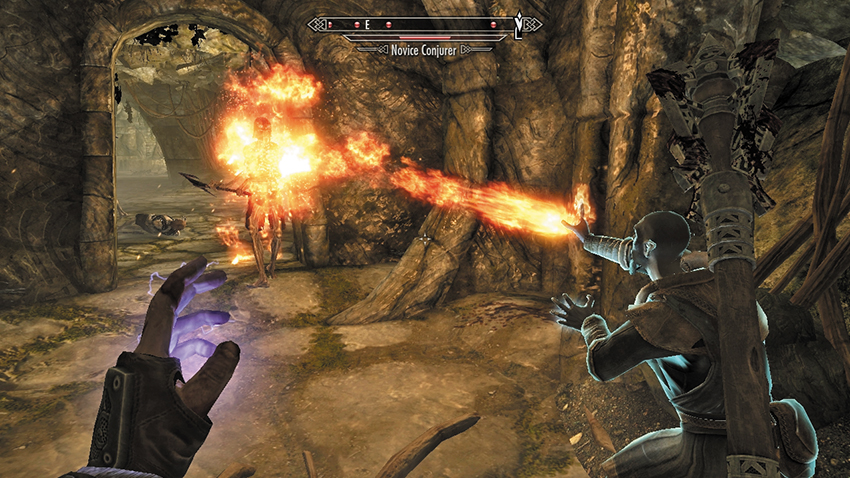
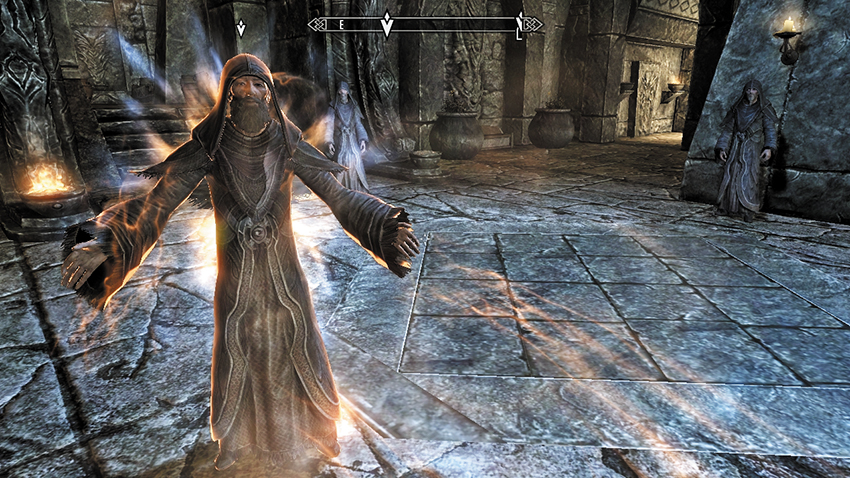
Heading down the wide steps, into the gloom of the ancient temple, you stumble upon a group of mages and conjurers picking clean the remains of a thwarted bandit attack. You can slink by using Sneak or engage the magicians in combat.

Tip

The Bandit Thralls are being controlled by a necromancer—kill him, and the thralls die too.

Locate the opening in the northeast wall of the temple entrance, and follow the trail of lanterns down the steps. This soon becomes a trail of mage corpses, as you watch a group of Draugr demolish the wizards and make a run at you. Cut down the Draugr, or use whatever cunning magic or sneaking you wish, before continuing into the first burial crypt. Scavenge whatever you wish, then head east and turn south, down a passage lit by candles.

There are steps down to your right (west), leading to a small crypt. Grab the items and yank the pull-chain. A section of wall rumbles open, leading you down a cramped tunnel to a secret dead-end chamber and a treasure chest. Retrace your steps. Enter the great hall, with a stone bridge ahead of and above you. Fend off the Draugr that clamber out of their vertical tombs. Then climb the interior stairwell, and cross the bridge you just passed under. Locate the iron door and enter the Ustengrav Depths.
Head down the winding tunnel until it opens into a gigantic, multilevel grotto. It is immense enough to have trees, a waterfall, and a Word Wall! Continue down the tree-root ledge and tunnel, heading south and then east. You appear on a bridge overlooking an ancient banqueting hall. Follow the steps down, eliminating Draugr as you go. To the east are the remains of a food-preparation area running parallel to the hall. Head south, up more stairs, and cross a second bridge to exit the hall.

The tunnel to the southwest widens into an entrance room with a middle pillar. To the left is a double portcullis (open it with two wall handles; one is farther along the southwest wall) behind which is a small room with treasure. Take this and optionally shoot the lamp down onto the oil below to burn any Draugr that come to investigate you. Head west through a gap in the wall. Here, there are steps up to a small preparation alcove, and more importantly, an earthen and rock corridor that leads into the gigantic grotto.
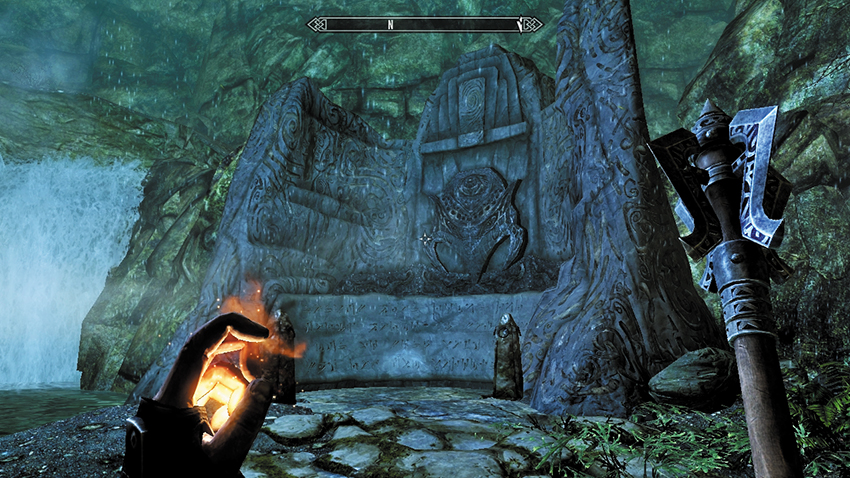
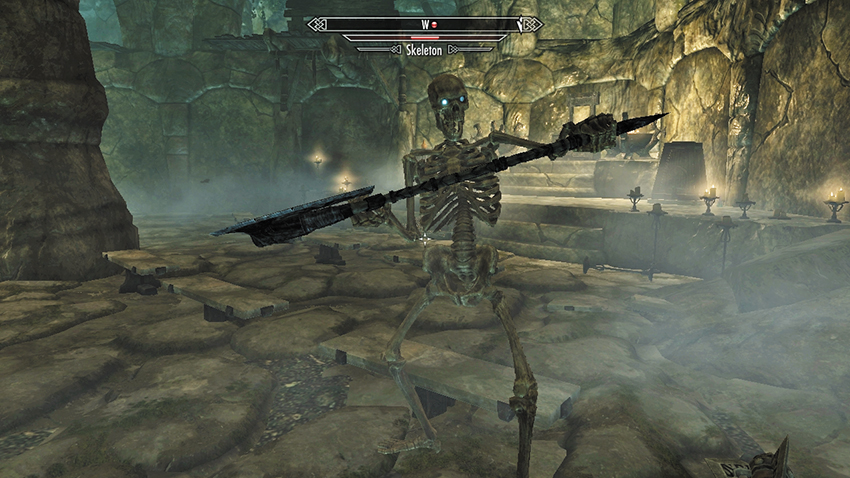
Follow the collapsed bridge down to the massive pillars under the chamber, where parts of an ancient fire trap still burn and skeletons roam. Cut down all the bony fiends in this two-floor area, inspect the throne area (with another skeleton to slaughter), and then run northeast around the perimeter wall ledge, down to the rocky base of the grotto. Moments later, you learn a word from the Become Ethereal Shout. Afterward, you fight with a Draugr over a treasure chest behind the waterfall. Before you leave, try your Whirlwind Sprint Shout and traverse the collapsed bridges in this area, leading to a small chamber you can loot.

  • Word of Power: Become Ethereal

The Tomb Raider
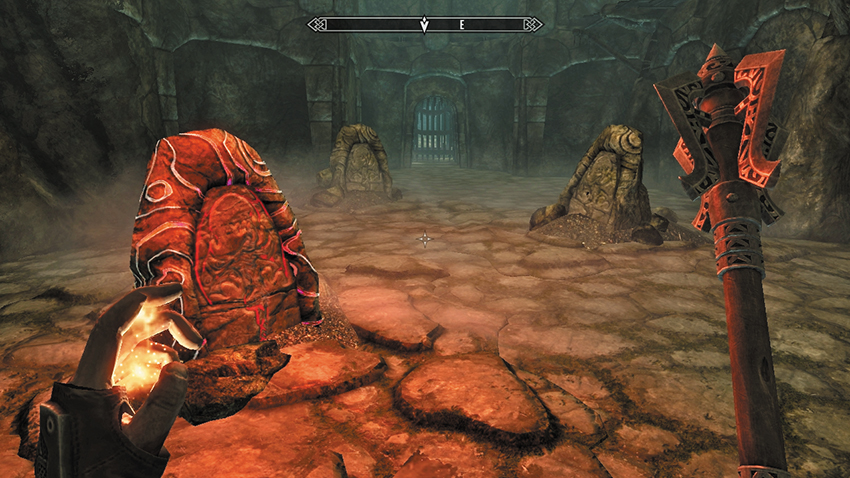
Backtrack to the throne area where you fought the skeletons, and look to your east. Cross the large natural bridge that spans the grotto, to a second two-floor underchamber on the eastern side. First, clear out the skeletons from the balcony above, and then inspect a set of three strange stones back on the lower underchamber area.

Puzzle Solution: If you stand close to each one of the three stones, they pulse with an eerie, magical glow. This has the added effect of opening one of three portcullises in the tunnel to the east. However, after a second or two, the light switches off, blocking your path. This is the only way the portcullises open. If you get through one or two of them, you must turn back; all three must be raised for you to continue. The trick here is to line yourself up on the western side of the stones, as shown in the preceding picture with the stones between you and the portcullises. Then execute a Whirlwind Sprint Shout, followed by another to make sure you dash past the stones and the opening portcullises immediately.
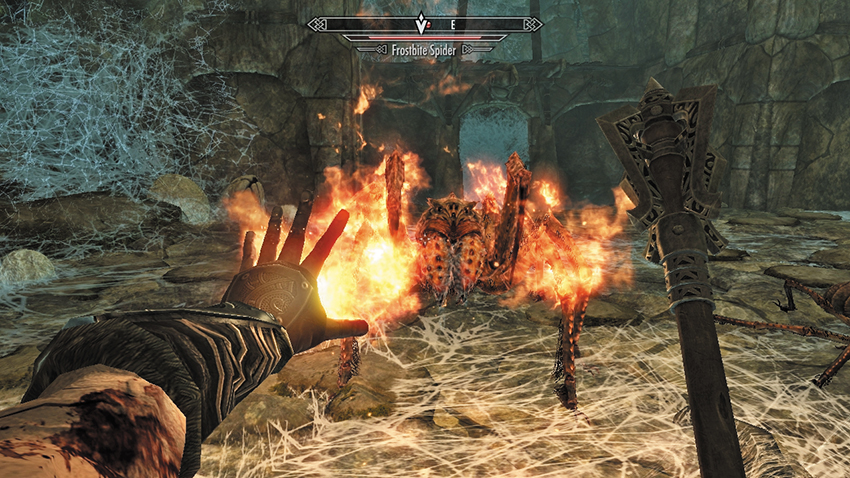
Continue east, jumping to the natural rock on either side of the circular floor tiles, as they blast gouts of fire when you stand on them. This can prove handy when you reach the raised section of floor in the room of alcoves—a pack of Frostbite Spiders descends from the ceiling to attack. Optionally back up so the spiders scuttle onto the floor tiles and are burned along with your own attacks. Exit by hacking the cobwebs from the doorway to the east. Then open the wooden door.
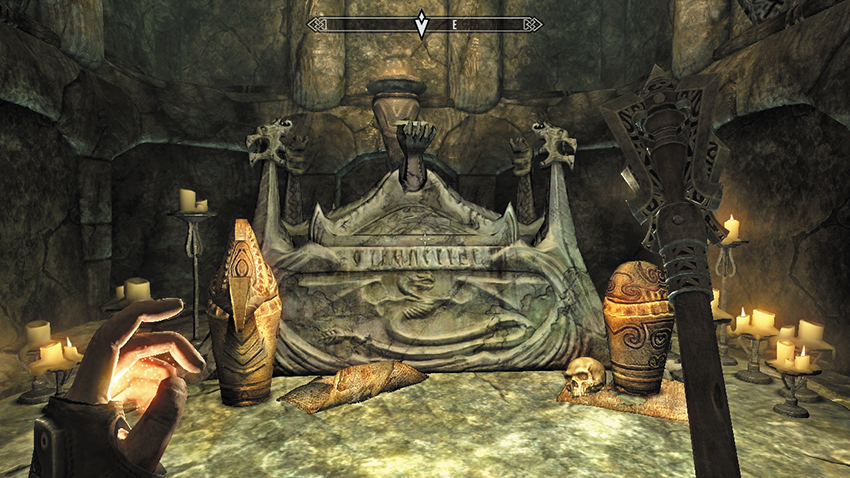
Pull the chain to raise the portcullis that leads into the final resting place of Jurgen Windcaller. As you step forward, four dragon statue heads rumble up from the water. Continue across the bridge over the flooded lower floor and approach the ornate tomb. The horn should be still clutched by the carved arm of Jurgen in his sarcophagus...but it isn’t! Instead, there’s a small piece of paper. Take and read it. The damned thief who took the horn has left you a note; it requests that you rent the attic room at the Sleeping Giant Inn in Riverwood, and it is signed “A friend.”

  • Mysterious Note
  • Objective Failed: Retrieve the horn
  • OBJECTIVE: Meet with whoever took the horn
  • TARGET: “A friend” inside Sleeping Giant Inn, in Riverwood

Caution

This may be the first time that you’ve failed an objective. This is mandatory; you cannot succeed at this particular objective at the moment.

A Mysterious Stranger

You’d think “a friend” wouldn’t want you risking your life in a Draugr dungeon! Stifle any indignant rage you may be experiencing, and console yourself with any treasure you find through the wooden door behind the sarcophagus. There is an exit tunnel in the left (north) wall, offering a shortcut to an iron door, and a lever that lowers a section of stone wall, allowing you to step into the initial crypt, up into the temple entrance, and out of Ustengrav.
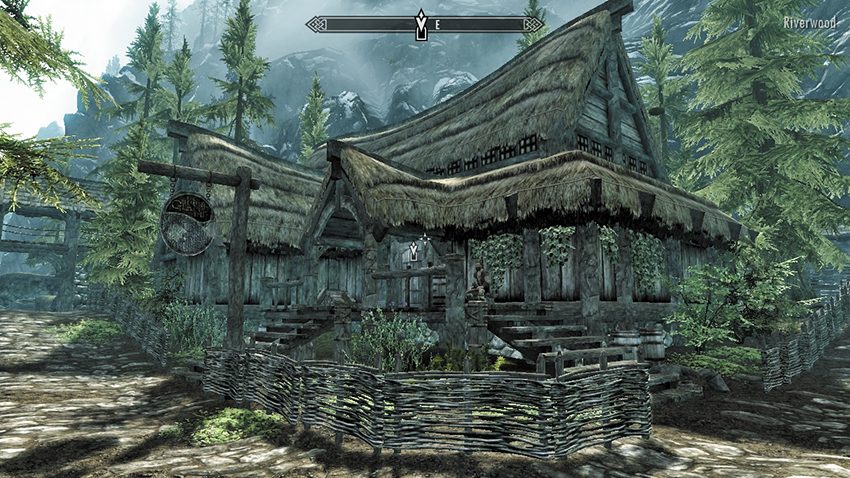
Fast-Travel (or trek back) to Riverwood, and follow the instructions of the Mysterious Note. Locate the Sleeping Giant Inn, enter, and locate Delphine, who owns the place with her slightly dense friend Orgnar. Step up to Delphine and ask to rent the attic room for 10 gold. After the money changes hands, she tells you the Sleeping Giant doesn’t have an attic room, but you can take the room on the left. Enter the room, and after a few moments, Delphine joins you. Apparently you’re the Dragonborn she’s been hearing so much about. As a way of a peace offering, she hands you the horn that you seek.

  • Horn of Jurgen Windcaller
  • Main Quest: A Blade in the Dark begins
  • OBJECTIVE: Return the horn to Arngeir
  • TARGET: Master Arngeir, in High Hrothgar

Tip

You now have two Main Quests active. In order to finish this one, you must return to High Hrothgar. You can attempt this at any time, but it is usually advisable to speak with Delphine first (the initial part of the next Main Quest). Once you leave the Sleeping Giant, trek (or Fast-Travel) back to High Hrothgar.

Quest Conclusion

Enter High Hrothgar, and head through the monastery until you spot Arngeir. He already knows you have returned with the Horn of Jurgen Windcaller and remarks that the time has come for the Greybeards to recognize you formally as Dragonborn.

  • OBJECTIVE: Learn the Word of Power from Wulfgar
  • TARGET: Master Wulfgar, in High Hrothgar

Return to the central chamber inside High Hrothgar as the Greybeards assemble. Master Wulfgar approaches the center of the floor and bellows the word Dah (“Push”) into the granite. Step onto the glowing runes and absorb the Word of Power. You can now utilize the Shout Unrelenting Force with maximum potency! Absorb the learning from Wulfgar as well.

  • Word of Power: Push, Unrelenting Force
  • OBJECTIVE: Receive the Greybeards’ greeting

Remain in the center of the room. The Greybeards stand at each point of the diamond paving, and Arngeir greets you with a ferocious chant in dragon tongue. You withstand the blast, which pleases and impresses Arngeir. You’ve tasted the Voice of the Greybeards and passed through unscathed. High Hrothgar is now open to you!

Postquest Activities

There are two tasks you can attempt with the Greybeards from this point on. Also remember that Main Quest: A Blade in the Dark is already under way!

Return to Ustengrav and activate Jurgen Windcaller’s tomb. The horn returns to its rightful resting place, and you receive a bonus Dragon Soul.

  • Dragon Soul

Keep reading with a free account

The first 3 sections of Elder Scrolls V: Skyrim Special Edition are open to everyone. An account opens the rest of it, and every other guide in the archive. It's free, and there's nothing to buy.

Bought guides on the old Prima Games site? Your account and every guide you own moved here, so there's nothing to buy again. Sign in.

Create a free account Or browse our free guides

PreviousMain Quest: The Way of the Voice NextMain Quest: A Blade in the Dark