
Elder Scrolls V: Skyrim Special Edition Guide The Atlas Hold 9: The Rift
[9.28] Faldar's Tooth
[9.28] Faldar’s Tooth
Recommended Level: 6
Dungeon: Bandit Camp
- Animal
- Bandit
Crafting
- Blacksmith Forge
- Grindstone
- Tanning Rack
Dangers
- Battering Ram Trap (trip wire)
- Bear Traps
- Bone Alarm Trap
- Oil Pool Trap
- Rockfall (trip wire)
- Spear Trap (pressure plates)
- Swinging Wall Trap (pressure plates/lever)
- Trapped Chest
Collectibles
- Skill Book [Alteration]: The Lunar Lorkhan
- Skill Book [Archery]: The Marksmanship Lesson
- Skill Book [Lockpicking]: Proper Lock Design [B2/10]
- Chests
- Potions aplenty
- Loose Gear
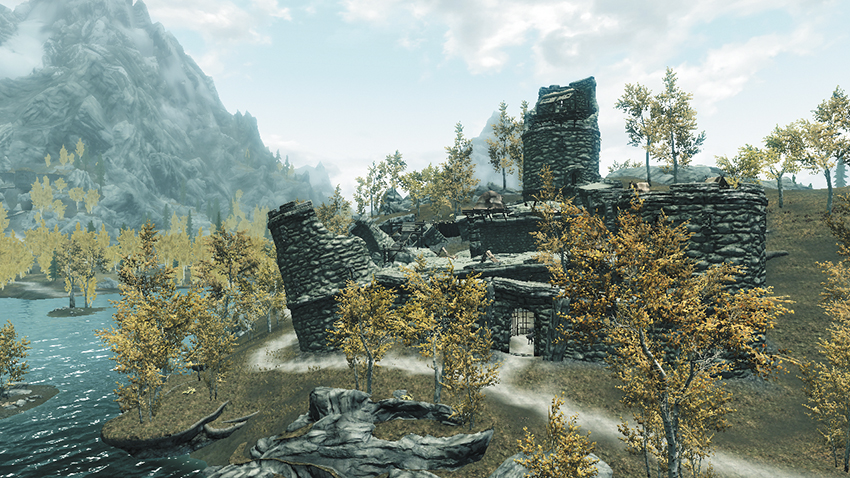
This mighty keep overlooks Lake Honrich from the north and has been overrun by lawless bandits who are running a wolf fighting ring.
Exterior
The bandits are quick to open the stronghold’s front gate when they see you approach, but it isn’t a warm welcome. They release vicious pit wolves to maul you! Slay the wicked beasts, then decide how you wish to enter the keep: either hurry inside the main gate and storm its interior, or remain outside the walls and circle around the fort’s west side to unlock an Adept-level gate and bypass the keep’s sizeable inner working altogether.
Later, after you’ve advanced to the fort’s upper ramparts, fight your way up its wooden stairs and walkways until you reach a large tent with a chest and useful key. Go back downstairs a few levels and use the key to unlock the Expert-level door of the keep’s eastern tower. Loot the chest within and proceed to the tower’s top, then follow a rampart to reach the next tower. Go in and head up to battle the bandits’ formidable leader, then loot the giant chest he was guarding and collect a couple of Skill Books.
- Skill Book [Alteration]: The Lunar Lorkhan
- Skill Book [Lockpicking]: Proper Lock Design [B2/10]
- Faldar’s Tooth Key
- Chest (Locked: Novice)
- Chest (Locked: Apprentice)
- Loose Gear
 Exit to Skyrim (Lower Grounds)
 Entry Tower
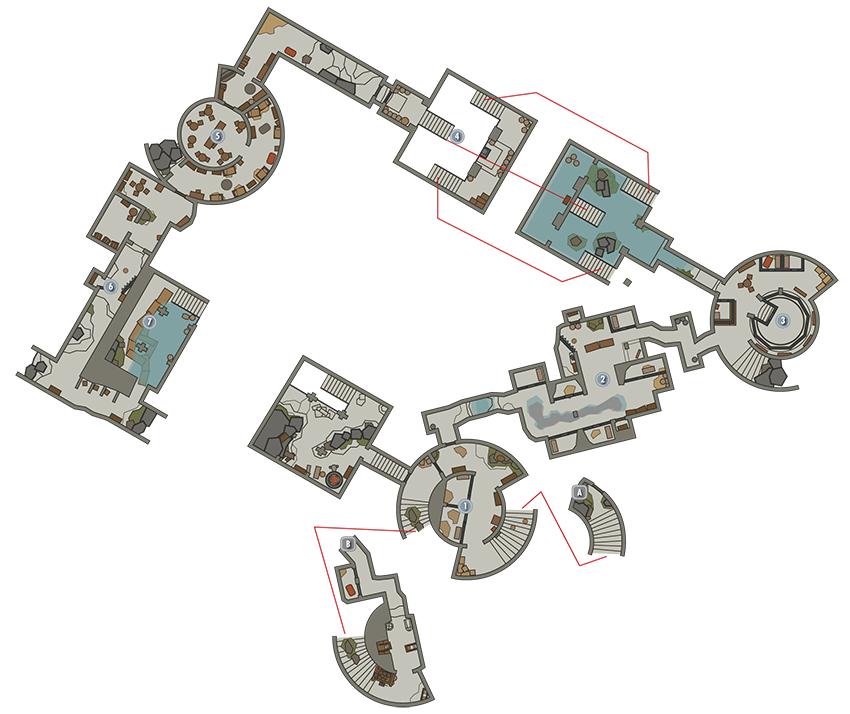
Avoid hanging rattles and pressure plates as you descend the keep’s first stairwell. Don’t free the caged pit wolf you encounter unless you wish to combat it. Simply go down to the lowest level and take the north passage to [2].
- Danger! Bone Alarm Trap, Spear Trap (pressure plates)
 Cage Chamber
Ignite the oily floor here before you’re detected by the patrolling bandits—one of them is a mage whose fireballs may set the room ablaze if you don’t take advantage of the hazard first. Secure the room afterward, then optionally pick the Adept-level cages to free (and fight) a number of pit wolves. If you’re swift, carefully step on the pressure plate to trigger a swinging wall trap, then deftly slip around the spiked gate to reach a locked chest in the small nook beyond. Pull the lever afterward to unhinge the spiked gate and escape the nook. Finally, unlock the Novice-level north door to access a small closet filled with potions.
- Danger! Oil Pool Trap, Swinging Wall Trap (pressure plate/lever)
- Crafting: Tanning Rack
- Chest (Locked: Adept)
- Potions aplenty
- Loose Gear
 Training Pit
The bandits use this wide chamber to train their wolves and bet on fights. Slaughter the distracted onlookers, then open the locked cage door and check behind the betting counter to discover loads of gold and a large chest.
- Chest
- Potion
- Loose Gear
 Waterlogged Chamber
A few feet of water cover the floor of this chamber. Search behind the stairs to discover a submerged chest, then scale the southern steps to find worthy loot and a satchel. Tug the pullbar on the southern balcony to open the far portcullis so you may proceed to [5].
- Chest
- Apothecary’s Satchel
- Loose Gear
 Kitchen and Quarters
Collect an interesting journal on your way to this area, where a slew of bandits await. Fight hard to slay this large group of scoundrels. Discover a Skill Book on a small table in the room with the firewood (west of the curved stairs).
- Skill Book [Archery]: The Marksmanship Lesson
- Potions
- Loose Gear
 Exit Passage
Make a thorough search for loot as you navigate the keep’s last few corridors, claiming plenty of potions. Beware of a trapped treasure chest, opening it from the side to avoid being shot by arrows or deactivating its trigger hinge. Dodge the pressure plate in the following passage on your way to the fort’s final chamber.
- Danger! Bone Alarm Trap, Swinging Wall Trap (pressure plate), Trapped Chest
- Potions aplenty
- Loose Gear
 Forge
Forge
Beware the trip wire that lies just underwater as you enter this final, waterlogged chamber. Numerous bear traps lie just beneath the water’s surface as well, so keep an eye to the ground as you carefully creep through. Go upstairs and slay one final bandit to secure a crafting area. Carry on to find yourself back at [1], in an area you couldn’t have reached before.
- Danger! Battering Ram Trap (trip wire), Bear Traps
- Crafting: Blacksmith Forge, Grindstone
- Chest (Locked: Novice)
- Loose Gear
Entry Tower Revisited
Pull the wall chain as you reenter this first chamber to lower the nearby portcullis. Now you’ll never need to take the long way around the keep again. Mind a trip wire as you head upstairs, and exit the keep via the upstairs door to reach the upper exterior ramparts (see the previous “Exterior” section for more.)
- Rockfall (trip wire)
 Exit to Skyrim (Upper Ramparts)