
Elder Scrolls V: Skyrim Special Edition Guide The Atlas Hold 3: The Pale
[3.22] Korvanjund
[3.22] Korvanjund
Related Quests
- Civil War Quest: The Jagged Crown
Recommended Level: 12
Dungeon: Draugr Crypt
- Bandit (Prequest)
- Soldier (Imperial or Stormcloak depending on your allegiance)
- Draugr
Dangers
Puzzles
- Nordic Puzzle Door (Ebony Claw)
Quest Items
- Jagged Crown
Collectibles
- Dragon Claw: Ebony Claw [3/10]
- Skill Book [Light Armor]: Jornibret’s Last Dance
- Unique Item: Jagged Crown [24/112]
Special Objects
- Word Wall: Slow Time [2/3]
- Chest(s)
- Potions
- Loose gear
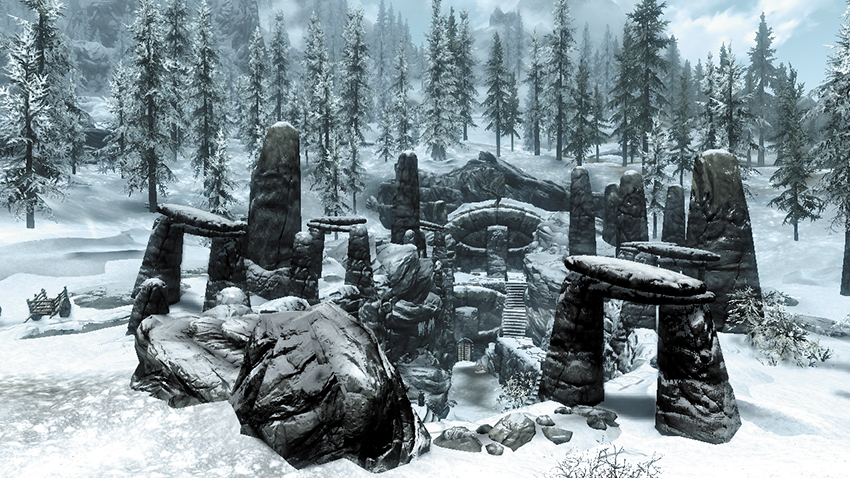
These unusual, crevicelike ruins are found north of the Pale’s southern mountains. You can’t do much here until you visit Korvanjund as a part of Civil War Quest: The Jagged Crown. A rockslide seals off much of the ruins until then.
Exterior
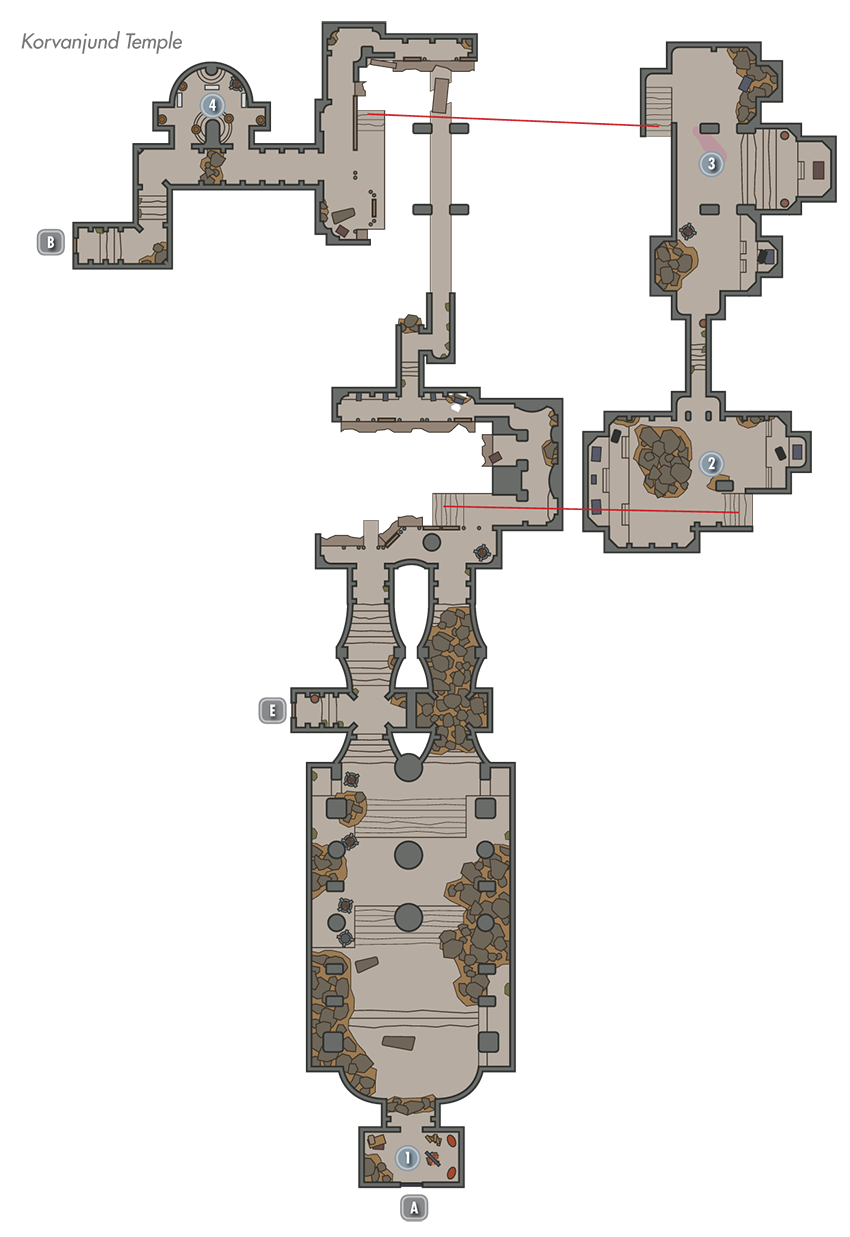
Defeat a few dangerous bandits to secure the crevicelike exterior of these ancient ruins. (During Civil War Quest: The Jagged Crown, the bandits will already be slain and replaced with either Imperial or Stormcloak soldiers, depending on your allegiance.) If possible, unlock a Master-level gate at the far basin to access a chest and a few coin purses. Head through the upper door to enter the Korvanjund Temple.
- Chest
 Exit to Skyrim
 Entry Chamber
Loot a chest in this first small chamber, then cross the huge hall that follows.
- Chest
- Loose gear
 Open-Air Chamber
The ceiling has collapsed here, allowing fresh air and light to pour in. Raid the chest on the east balcony and loot a number of urns found at the chamber’s bottom, then take either the upper or lower north passage to reach [3] (taking the upper passage gives you a tactical advantage).
- Chest (Locked: Novice)
- Potion
- Loose gear
 Oil Lamp Chamber
Knock down this chamber’s plentiful array of hanging lamps to ignite various pools of oil on the ground and burn up the enemy soldiers that assault you here. Though the large east chest is empty, a Skill Book sits not far away.
 Urn Room
Loot an assortment of urns on your way through this small chamber as you make for the Korvanjund Halls.
 Door to Korvanjund Halls
 Door to Korvanjund Temple
 Trapped Treasure Nook A
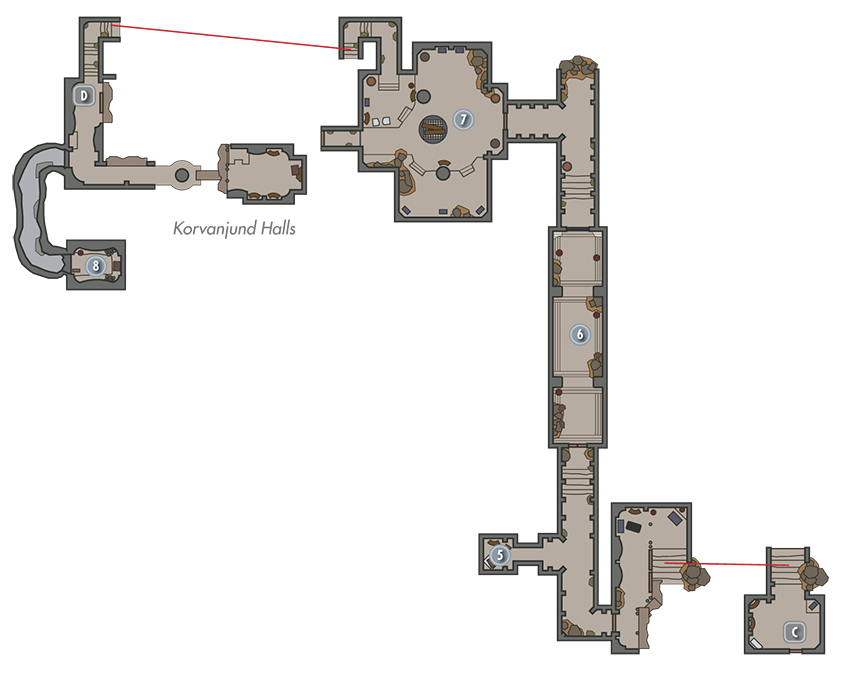
Sprint straight past the swinging blades in the passage that leads to this small treasure room—you can just make it through unscathed. Pull a lever in the room to deactivate the blades and make your exit less stressful.
- Danger! Swinging Blade Trap
- Chest
 Puzzle Door Passage
Collect the Ebony Claw from the ground near this passage’s peculiar door. Inspect the Ebony Claw in your inventory to notice three symbols running down its palm. Rotate the door’s three rings to mimic the same sequence of symbols (Wolf, Moth, Dragon), then inspect the central keyhole to insert the Ebony Claw and open the way forward.
- Dragon Claw: Ebony Claw [3/10]
 Great Hall
Take the north passage to go upstairs, then cross this large chamber’s elevated walkway to locate a chest. Pull the nearby wall handle to open the portcullis, gaining access to the Korvanjund Crypts—but beware that doing so causes a number of Draugr to burst out from the surrounding sarcophagi.
 Trapped Treasure Nook B
Before rushing off to the crypts, take the upstairs west passage to locate a dagger sitting on a pedestal. If you take the dagger off the pedestal, a secret passage will open, revealing a tunnel to a room containing a large chest. Notice the holes in the floor and ensure you’re not standing near one when opening the chest—spikes shoot up when you lift its lid. (You may also attempt to disable the chest’s trigger hinge.)
- Danger! Trapped Chest
- Potion
 Door to Korvanjund Crypts
Korvanjund Crypts
Slay the mighty Draugr that sleeps upon this great chamber’s central throne, then loot the locked chest behind the throne and approach the far Word Wall to gain a new Word of Power. You’re all done here. Take the southeast passage to quickly find your way back to the temple’s entrance.
- Word Wall: Slow Time [2/3]
- Chest (Locked: Apprentice)
- Potion
 Door to Korvanjund Crypts