Prima Games eGuides
primagames.com Browse Redeem a code Help
Elder Scrolls V: Skyrim Special Edition eGuide
Sign in My Guides

Sign in or create an account

We'll email you a link. No password needed, and if you don't have an account yet, the link makes one.

By creating an account or signing in, you agree to our Terms of Service and Privacy Policy.

Have a password?

Had an account on the old eGuides site, or a code from a printed guide? Help and troubleshooting

Sign in with a password

By signing in, you agree to our Terms of Service and Privacy Policy.

Check your email

A sign-in link is on its way. It works once and expires in 15 minutes. Open it and you're in, with an account if you didn't already have one.

Contents

  • Song of the Dragonborn
    • Introduction
  • Training
    • Training Part 1: Character Creation
      • Welcome to Skyrim
      • The Races of Skyrim
      • Racial Advantages
      • Skills Overview
      • Legendary Difficulty and Skills
      • The Trainers of Skyrim and Solstheim
      • Improving Skills: Skill Books
      • Improving Skills: Augmentations
      • Skill Constellations Overview
      • Combat Skills: The Path of Might – Smithing
      • Combat Skills: The Path of Might – Heavy Armor
      • Combat Skills: The Path of Might – Block
      • Combat Skills: The Path of Might – Two-Handed
      • Combat Skills: The Path of Might – One-Handed
      • Combat Skills: The Path of Might – Archery
      • Stealth Skills: The Path of Shadow – Light Armor
      • Stealth Skills: The Path of Shadow – Sneak
      • Stealth Skills: The Path of Shadow – Lockpicking
      • Stealth Skills: The Path of Shadow – Pickpocket
      • Stealth Skills: The Path of Shadow – Speech
      • Stealth Skills: The Path of Shadow – Alchemy
      • Magic Skills: The Path of Magic – Illusion
      • Magic Skills: The Path of Magic – Conjuration
      • Magic Skills: The Path of Magic – Destruction
      • Magic Skills: The Path of Magic – Restoration
      • Magic Skills: The Path of Magic – Alteration
      • Magic Skills: The Path of Magic – Enchanting
      • Character Archetypes
    • Training Part 2: Combat, Development, and Crafting
      • Character Advancement
      • Combat Improvement
      • Shouts and Other Powers
      • Diseases
      • Lycanthropy
      • Vampirism
      • Crafting
      • Enchanting
      • Smithing
      • Other Crafting Activities
    • Training Part 3: Adventuring Across Skyrim
      • Overview
      • Holds of Skyrim
      • Dungeon Exploration
      • Other Sites of Interest
      • Shadowmarks
      • Books
      • Improving Your Standing in Skyrim
      • Followers
      • Horses
      • Carriages and Ferries
      • Dragon Mounts
      • Services, Collectibles, and Items of Interest
      • Dogs
    • Training Part 4: Hearthfire
      • Overview
      • Part 1: Purchasing Land
      • Part 2: Building Your House
      • Part 3: Building Components
      • Part 4: Additional Structures
      • Part 5: Items Needed to Create Structures
      • Part 6: Furnishing Your Home
      • Part 7: Items Needed to Create Furnishings
      • Part 8: Hiring a Steward
      • Part 9: Home Security
      • Part 10: Spouse and Children
      • Part 11: Radiant Quests
    • Training Part 5: Hearthfire: Adoption
      • Overview
      • Part 1: Readying Your Home
      • Part 2: Choosing an Orphan
      • Part 3: Caring for a Child
      • Part 4: Animal Adoption
    • Inventory
      • Overview
      • Spells
      • Weapons, Armor and Items
      • Crafting: Alchemy
      • Crafting: Enchantments
      • Other Items
    • Bestiary
      • Overview
      • Afflicted
      • Alik’r
      • Animals
      • Apocrypha Keepers
      • Ash Spawn
      • Bandits
      • Chaurus
      • Cultists
      • Daedra
      • Dawnguard
      • Death Hounds
      • Dragons
      • Draugr
      • Dwarven Automatons
      • Ebony Warrior
      • Falmer
      • Forgotten Vale Animals
      • Forgotten Vale Frozen Creatures
      • Forsworn
      • Gargoyles
      • Giants
      • Hagravens
      • Horses
      • Hunters
      • Morag Tong
      • Netch
      • Penitus Oculatus
      • Reavers
      • Rieklings
      • Sailor
      • Skeletons
      • Soldiers and Guards
      • Soul Guards
      • Spiders
      • Spriggan
      • Thalmor
      • Trolls
      • Vampires
      • Vigilants of Stendarr
      • Warlocks
      • Werebears
      • Werewolves
      • Wisps
      • Witches
  • Quests
    • Overview
    • Available Quests
    • Act I
      • Main Quest: Unbound
      • Main Quest: Before the Storm
      • Main Quest: Bleak Falls Barrow
      • Main Quest: Dragon Rising
      • Main Quest: The Way of the Voice
      • Main Quest: The Horn of Jurgen Windcaller
      • Main Quest: A Blade in the Dark
    • Act II
      • Main Quest: Diplomatic Immunity
      • Main Quest: A Cornered Rat
      • Main Quest: Alduin’s Wall
      • Main Quest: The Throat of the World
      • Main Quest: Elder Knowledge
      • Main Quest: Alduin’s Bane
    • Act III
      • Main Quest: The Fallen
      • Main Quest: Paarthurnax
      • Main Quest: Season Unending
      • Main Quest: The World-Eater’s Eyrie
      • Main Quest: Sovngarde
      • Main Quest: Dragonslayer
      • Main Quest: Epilogue
    • The Companions Quests
      • Overview
      • Companions Quests: Take Up Arms
      • Companions Quests: Proving Honor
      • Companions Quests: The Silver Hand
      • Companions Quests: Blood’s Honor
      • Companions Quests: Purity of Revenge
      • Companions Quests: Glory of the Dead
    • The Companions Radiant Quests
      • Companions Radiant Quests: Initial Wave: Animal Extermination (I)
      • Companions Radiant Quests: Initial Wave: Animal Extermination (II)
      • Companions Radiant Quests: Initial Wave: Hired Muscle
      • Companions Radiant Quests: Initial Wave: Trouble in Skyrim
      • Companions Radiant Quests: Initial Wave: Family Heirloom
      • Companions Radiant Quests: Initial Wave: Escaped Criminal
      • Companions Radiant Quests: Initial Wave: Rescue Mission
      • Companions Radiant Quests: Second Wave: Striking the Heart
      • Companions Radiant Quests: Second Wave: Stealing Plans
      • Companions Radiant Quests: Second Wave: Retrieval
      • Companions Radiant Quests: Final Wave: Totems of Hircine
      • Companions Radiant Quests: Final Wave: Purity
      • Companions Radiant Quests: Final Wave: Dragon Seekers
    • The College of Winterhold Quests
      • Overview
      • College of Winterhold Quests: First Lessons
      • College of Winterhold Quests: Under Saarthal
      • College of Winterhold Quests: Hitting the Books
      • College of Winterhold Quests: Good Intentions
      • College of Winterhold Quests: Revealing the Unseen
      • College of Winterhold Quests: Containment
      • College of Winterhold Quests: The Staff of Magnus
      • College of Winterhold Quests: The Eye of Magnus
    • The College of Winterhold Radiant Quests
      • Overview
      • College of Winterhold Radiant Quests: Rejoining the College
      • College of Winterhold Radiant Quests: Tolfdir’s Alembic
      • College of Winterhold Radiant Quests: Out of Balance
      • College of Winterhold Radiant Quests: An Enchanted Journey
      • College of Winterhold Radiant Quests: Restocking Soul Gems
      • College of Winterhold Radiant Quests: Valuable Book Procurement
      • College of Winterhold Radiant Quests: Shalidor’s Insights
      • College of Winterhold Radiant Quests: The Atronach Forge
      • College of Winterhold Radiant Quests: Forgotten Names
      • College of Winterhold Radiant Quests: Aftershock
      • College of Winterhold Radiant Quests: Rogue Wizard
      • College of Winterhold Radiant Quests: Arniel’s Endeavors
    • Apprentice Radiant Quests
      • Apprentice Radiant Quests: Brelyna’s Practice
      • Apprentice Radiant Quests: J’Zargo’s Experiment
      • Apprentice Radiant Quests: Onmund’s Request
    • Ritual Spell Radiant Quests
      • Ritual Spell Quests: Destruction Ritual Spell
      • Ritual Spell Quests: Illusion Ritual Spell
      • Ritual Spell Quests: Conjuration Ritual Spell
      • Ritual Spell Quests: Restoration Ritual Spell
      • Ritual Spell Quests: Alteration Ritual Spell
    • Thieves Guild Quests
      • Overview
      • An Influx of Immigrants
      • Training
      • Other Advantages
      • Available Quests
      • Thieves Guild Quests: A Chance Arrangement
      • Thieves Guild Quests: Taking Care of Business
      • Thieves Guild Quests: Loud and Clear
      • Thieves Guild Quests: Dampened Spirits
      • Thieves Guild Quests: Scoundrel’s Folly
      • Thieves Guild Quests: Speaking With Silence
      • Thieves Guild Quests: Hard Answers
      • Thieves Guild Quests: The Pursuit
      • Thieves Guild Quests: Trinity Restored
      • Thieves Guild Quests: Blindsighted
      • Thieves Guild Quests: Darkness Returns
    • Thieves Guild Radiant Quests
      • Overview
      • Thieves Guild Radiant Quests: No Stone Unturned
      • Thieves Guild Radiant Quests: Reparations
      • Thieves Guild Radiant Quests: Shadowmarks
      • Thieves Guild Radiant Quests: Moon Sugar Rush
      • Thieves Guild Radiant Quests: Armor Exchange
      • Thieves Guild Radiant Quests: Larceny Targets
    • Additional Jobs
      • An Overview
      • Delvin’s Additional Jobs
      • Vex’s Additional Jobs
    • City Influence Quests
      • Growing the Guild and Gaining Influence
      • City Influence Quests: Silver Lining
      • City Influence Quests: The Dainty Sload
      • City Influence Quests: Imitation Amnesty
      • City Influence Quests: Summerset Shadows
      • City Influence Quests: Ultimate Rewards
      • Leadership Quest: Under New Management
    • Dark Brotherhood Quests
      • Overview
      • Assassinations: A Tactical Overview
      • Training
      • Available Quests and Tasks
      • Dark Brotherhood Quests: Delayed Burial
      • Dark Brotherhood Quests: Innocence Lost
      • Dark Brotherhood Quests: With Friends Like These...
      • Dark Brotherhood Quests: Sanctuary
      • Dark Brotherhood Quests: Mourning Never Comes
      • Dark Brotherhood Quests: Whispers in the Dark
      • Dark Brotherhood Quests: The Silence Has Been Broken
      • Dark Brotherhood Quests: Bound Until Death
      • Dark Brotherhood Quests: Breaching Security
      • Dark Brotherhood Quests: The Cure for Madness
      • Dark Brotherhood Quests: Recipe for Disaster
      • Dark Brotherhood Quests: To Kill an Empire
      • Dark Brotherhood Quests: Death Incarnate
      • Dark Brotherhood Quests: Hail Sithis!
      • Dark Brotherhood Quests: Destroy the Dark Brotherhood!
      • Dark Brotherhood Quests: Where You Hang Your Enemy’s Head...
    • Dark Brotherhood Quests: Side Contracts
      • Overview
      • Side Contracts: Part 1
      • Side Contracts: Part 2
      • Side Contracts: Part 3
      • Side Contracts: Part 4
      • Side Contracts: Part 5
      • Side Contracts: Part 6
    • Dark Brotherhood Radiant Quests
      • Dark Brotherhood Radiant Quests: Honor Thy Family
      • Dark Brotherhood Radiant Quests: The Feeble Fortune
      • Dark Brotherhood Radiant Quests: Welcome to the Brotherhood
      • Dark Brotherhood Radiant Quests: Cicero’s Return
      • Dark Brotherhood Radiant Quests: The Dark Brotherhood Forever!
      • Dark Brotherhood Radiant Quests: The Torturer’s Treasure: Parts I, II, III, IV*
    • Civil War Quests
      • General Overview
      • Overview: Imperial Legion
      • Overview: Stormcloak Rebellion
      • Sieges: A Tactical Overview
    • Civil War Quests: Imperial
      • Civil War Quests: Joining the Legion
      • Civil War Quests: The Jagged Crown
      • Civil War Quests: Message to Whiterun
      • Civil War Quests: Defense of Whiterun
      • Civil War Quests: A False Front
      • Civil War Quests: The Battle for Fort Dunstad
      • Civil War Quests: Compelling Tribute
      • Civil War Quests: The Battle for Fort Greenwall
      • Civil War Quests: Rescue from Fort Kastav
      • Civil War Quests: The Battle for Fort Amol
      • Civil War Quests: Battle for Windhelm
    • Civil War Quests: Stormcloak
      • Civil War Quests: Joining the Stormcloaks
      • Civil War Quests: The Jagged Crown
      • Civil War Quests: Message to Whiterun
      • Civil War Quests: Battle For Whiterun
      • Civil War Quests: Rescue from Fort Neugrad
      • Civil War Quests: Compelling Tribute
      • Civil War Quests: The Battle for Fort Sungard
      • Civil War Quests: A False Front
      • Civil War Quests: The Battle for Fort Snowhawk
      • Civil War Quests: The Battle for Fort Hraggstad
      • Civil War Quests: Battle for Solitude
    • Daedric Quests
      • Overview
      • Daedric Quests: The Black Star
      • Daedric Quests: Boethiah’s Calling
      • Daedric Quests: A Daedra’s Best Friend
      • Daedric Quests: Discerning the Transmundane
      • Daedric Quests: Ill Met by Moonlight
      • Daedric Quests: The Cursed Tribe
      • Daedric Quests: Pieces of the Past
      • Daedric Quests: The Whispering Door
      • Daedric Quests: The Break of Dawn
      • Daedric Quests: The House of Horrors
      • Daedric Quests: The Taste of Death
      • Daedric Quests: The Only Cure
      • Daedric Quests: A Night to Remember
      • Daedric Quests: The Mind of Madness
      • Daedric Quests: Waking Nightmare
    • Other Factions Quests
      • Overview
      • Available Quests
    • The Greybeards Quests
      • Overview
      • Greybeards Quests: Word Wall Revelations
    • The Blades Quests
      • Overview
      • Blades Quests: Meditations on Words of Power
      • Blades Quests: Rebuilding the Blades
      • Blades Quests: Dragon Research
      • Blades Quests: Dragonslayer’s Blessing
      • Blades Quests: Dragon Hunting
    • The Bards College Quests
      • The Bards College
      • Bards College Quests: Tending the Flames
      • Bards College Quests: Finn’s Lute
      • Bards College Quests: Pantea’s Flute
      • Bards College Quests: Rjorn’s Drum
    • Temple Quests
      • Overview
      • Temple Quests: The Heart of Dibella
      • Temple Quests: The Book of Love
      • Temple Quests: The Blessings of Nature
    • Other Factions Quests: Side Quests
      • Side Quests: The Bonds of Matrimony
    • Side Quests
      • Overview
      • Side Quests: Blood on the Ice
      • Side Quests: The Ebony Warrior
      • Side Quests: Forbidden Legend
      • Side Quests: The Forsworn Conspiracy
      • Side Quests: No One Escapes Cidhna Mine
      • Side Quests: The Golden Claw
      • Side Quests: In My Time of Need
      • Side Quests: Kyne’s Sacred Trials
      • Side Quests: Laid to Rest
      • Side Quests: Lights Out!
      • Side Quests: Lost to the Ages
      • Side Quests: The Man Who Cried Wolf
      • Side Quests: The Wolf Queen Awakened
      • Side Quests: Missing in Action
      • Side Quests: Promises to Keep
      • Side Quests: A Return to Your Roots
      • Side Quests: Rise in the East
      • Side Quests: Rising at Dawn
      • Side Quests: Unfathomable Depths
      • Side Quests: The White Phial
      • Side Quests: Repairing the Phial
      • Side Quests: Captured Critters
      • Side Quests: The Forgemaster’s Fingers
      • Side Quests: The Great Skyrim Treasure Hunt
      • Side Quests: Masks of the Dragon Priests
    • Dungeon Quests and Other Activities
      • Overview
      • Angarvunde: Medresi Dran and the Wandering Dead
      • Ansilvund: A Love Beyond Death
      • Angi’s Camp: Composure, Speed, and Precision
      • Bard’s Leap Summit: Leap Before You Look
      • Blind Cliff Cave: Melka and Petra
      • Darklight Tower: Repentance
      • Forelhost: Siege on the Dragon Cult
      • Frostflow Lighthouse: What Lies Beneath
      • Frostmere Crypt: The Pale Lady
      • High Gate Ruins: A Scroll for Anska
      • Hillgrund’s Tomb: Ancestral Worship
      • Mistwatch: Forgetting About Fjola
      • Moss Mother Cavern: Hunter and Hunted
      • Nchuand-Zel: The Lost Expedition
      • Nilheim: The Nilheim Scam
      • Ragnvald: Otar’s Mad Guardians
      • Rebel’s Cairn: The Legend of Red Eagle
      • Shroud Hearth Barrow: Wilhelm’s Specter
      • Sleeping Tree Camp: The Secret at the Sleeping Tree
      • Southfringe Sanctum: The Savior of Selveni Nethri
      • Treva’s Watch: Infiltration
      • Valthume: Evil in Waiting
      • Volunruud: Silenced Tongues
      • Yngol Barrow: Ashore in a Sea of Ghosts
      • Dungeon Activities
    • Miscellaneous Objectives
      • Overview
      • Miscellaneous Objectives: Innkeepers
      • Miscellaneous Objectives: Haafingar Hold
      • Miscellaneous Objectives: Hjaalmarch Hold
      • Miscellaneous Objectives: The Pale
      • Miscellaneous Objectives: Winterhold
      • Miscellaneous Objectives: The Reach
      • Miscellaneous Objectives: Whiterun Hold
      • Miscellaneous Objectives: Eastmarch Hold
      • Miscellaneous Objectives: Falkreath Hold
      • Miscellaneous Objectives: The Rift
    • Favors
      • Overview
      • Part 1: Activity Favors
      • Part 2: Favors for Citizens
      • Crafting Tutorials
      • Part 3: Thane Tasks
  • Dawnguard Quests
    • Overview
    • The Dawnguard
    • Dawnguard Trainers And Vendors
    • The Vampires
    • Vampire Trainers And Vendors
    • Important Characters (Neutral)
    • Available Quests And Tasks
    • Dawnguard Main Quest
      • Dawnguard Main Quest: Dawnguard
      • Dawnguard Main Quest: Awakening
      • Dawnguard Main Quest: Bloodline
      • Dawnguard Main Quest: Power Of The Blood
      • Dawnguard Main Quest: The Bloodstone Chalice
      • Dawnguard Main Quest: A New Order
      • Dawnguard Main Quest: Prophet
      • Dawnguard Main Quest: Seeking Disclosure
      • Dawnguard Main Quest: Scroll Scouting
      • Dawnguard Main Quest: Chasing Echoes
      • Dawnguard Main Quest: Beyond Death
      • Dawnguard Main Quest: Unseen Visions
      • Dawnguard Main Quest: Touching The Sky
      • Dawnguard Main Quest: Kindred Judgment
    • Postquest Activities
      • Overview
      • Postquest Activity: Elder Scrolls For Sale
      • Postquest Activity: Repairing The Castle
      • Postquest Activity: Serana’s Cure
      • Postquest Activity: Valerica’s Return
    • Dawnguard Faction Quests
      • Overview
      • Dawnguard Faction Quest: Ancient Technology
      • Dawnguard Faction Quest: Bolstering The Ranks
      • Dawnguard Faction Quest: Cleansing Light
      • Dawnguard Faction Quest: Hide And Seek
      • Dawnguard Faction Quest: Hunting The Monster
      • Dawnguard Faction Quest: A Jarl’s Justice
      • Dawnguard Faction Quest: Lost Relic
      • Dawnguard Faction Quest: Preemptive Strike
    • Vampire Faction Quests
      • Overview
      • Vampire Faction Quest: Rescue
      • Vampire Faction Quest: Amulets Of Night Power
      • Vampire Faction Quest: Ancient Power
      • Vampire Faction Quest: Culling The Beast
      • Vampire Faction Quest: Deceiving The Herd
      • Vampire Faction Quest: Destroying The Dawnguard
      • Vampire Faction Quest: The Gift
      • Vampire Faction Quest: The Hunt
      • Vampire Faction Quest: New Allegiances
      • Vampire Faction Quest: Protecting The Bloodline
      • Vampire Faction Quest: Rings Of Blood Magic
    • Dawnguard Side Quests
      • Overview
      • Side Quests: Durnehviir
      • Side Quests: Face To Face
      • Side Quests: Impatience of a Saint
      • Side Quests: The Great Skyrim Cache Grab
    • Dawnguard Regional Activities: Soul Cairn
      • Overview
      • Regional Activity: Arvak The Spectral Steed*
      • Regional Activity: Dark Conjurations
      • Regional Activity: (Don’t Fear) The Reaper
      • Regional Activity: The Soul Husk Merchant
      • Regional Activity: Valerica’s Concoction
      • Regional Activity: The Whole Soul
    • Dawnguard Regional Activities: Forgotten Vale
      • Regional Activity: Ancient Falmer Tomes
      • Regional Activity: Paragons of the Frost Giants
  • Dragonborn Quests
    • Overview
    • Important Locations
    • Important Characters
    • Available Quests
    • Dragonborn Main Quest
      • Dragonborn Main Quest: Dragonborn
      • Dragonborn Main Quest: The Temple Of Miraak
      • Dragonborn Main Quest: The Fate Of The Skaal
      • Dragonborn Main Quest: Cleansing The Stones
      • Dragonborn Main Quest: The Path of Knowledge
      • Dragonborn Main Quest: The Gardener of Men
      • Dragonborn Main Quest: At the Summit of Apocrypha
    • Solstheim Side Quests
      • Overview
      • Solstheim Side Quests: Azra’s Staffs
      • Solstheim Side Quests: Black Book: Filament And Filigree
      • Solstheim Side Quests: Black Book: The Hidden Twilight
      • Solstheim Side Quests: Black Book: The Sallow Regent
      • Solstheim Side Quests: Black Book: The Winds Of Change
      • Solstheim Side Quests: Black Book: Untold Legends
      • Solstheim Side Quests: Briarheart Necropsy
      • Solstheim Side Quests: The Chief Of Thirsk Hall
      • Solstheim Side Quests: Deathbrand
      • Solstheim Side Quests: Experimental Subject
      • Solstheim Side Quests: Filial Bonds
      • Solstheim Side Quests: The Final Descent
      • Solstheim Side Quests: From The Ashes
      • Solstheim Side Quests: Healing A House
      • Solstheim Side Quests: Heart Stones
      • Solstheim Side Quests: Lost Knowledge
      • Solstheim Side Quests: Lost Legacy
      • Solstheim Side Quests: March Of The Dead
      • Solstheim Side Quests: A New Source Of Stalhrim
      • Solstheim Side Quests: Old Friends
      • Solstheim Side Quests: Reluctant Steward
      • Solstheim Side Quests: A New Debt
      • Solstheim Side Quests: Retaking Thirsk
      • Solstheim Side Quests: Served Cold
      • Solstheim Side Quests: Telvanni Research
      • Solstheim Side Quests: Unearthed
      • Solstheim Side Quests: Wind And Sand
      • Solstheim Side Quests: The Challenges Of Kagrumez
      • Solstheim Side Quests: The Great Solstheim Strongbox Hunt
      • Solstheim Side Quests: Karstaag’s Resurrection
      • Solstheim Side Quests: Masks of the Acolyte Priests
      • Solstheim Side Quests: Rings of the Werewolves
      • Solstheim Side Quests: Spider Crafting
    • Solstheim Regional Activities
      • Overview
      • Raven Rock Regional Activities
      • Skaal Village Regional Activities
      • Tel Mithryn Regional Activities
      • Thirsk Mead Hall Regional Activities
  • World Interactions and Encounters
    • Overview
    • World Interactions
    • World Encounters
    • Dawnguard World Interactions
    • Dawnguard World Encounters
    • Dragonborn World Interactions
    • Dragonborn World Encounters
  • The Atlas
    • Atlas of Skyrim
    • Hold 1: Haafingar
      • Overview
      • Hold Capital: Solitude
      • [1.01] Northwatch Keep
      • [1.02] Rimerock Burrow
      • [1.03] Pinefrost Tower
      • [1.04] Volskygge
      • [1.05] Steepfall Burrow and Lower Steepfall Burrow
      • [1.06] Lost Echo Cave
      • [1.07] Orphan's Tear
      • [1.08] Fort Hraggstad
      • [1.09] Widow's Watch Ruins
      • [1.10] Pinemoon Cave
      • [1.11] Clearpine Pond
      • [1.12] Ravenscar Hollow
      • [1.13] The Steed Stone
      • [1.14] Ironback Hideout
      • [1.15] Wolfskull Cave
      • [1.16] Statue to Meridia and Kilkreath Ruins
      • [1.17] Dragon Bridge
      • [1.18] Haafingar Stormcloak Camp
      • [1.19] Broken Oar Grotto
      • [1.20] Shadowgreen Cavern
      • [1.21] Thalmor Embassy
      • [1.22] Solitude Sawmill
      • [1.23] Katla's Farm
      • [1.24] East Empire Company Warehouse
      • [1.25] Brinewater Grotto
      • [1.26] Solitude Lighthouse
      • [1.27] Dainty Sload
      • [1.28] The Katariah
      • Secondary Locations
      • Additional Locations
    • Hold 2: Hjaalmarch
      • Overview
      • Hold Capital: Morthal
      • [2.01] Meeko's Shack
      • [2.02] Chillwind Depths
      • [2.03] Robber's Gorge
      • [2.04] Dead Men's Respite
      • [2.05] Crabber's Shanty
      • [2.06] Orotheim
      • [2.07] Talking Stone Camp
      • [2.08] Folgunthur
      • [2.09] The Apprentice Stone
      • [2.10] Fort Snowhawk
      • [2.11] Brood Cavern
      • [2.12] North and South Cold Rock Pass
      • [2.13] Eldersblood Peak
      • [2.14] Wreck of the Icerunner
      • [2.15] Abandoned Shack
      • [2.16] Ustengrav
      • [2.17] Hjaalmarch Stormcloak Camp
      • [2.18] Mzinchaleft
      • [2.19] Great Lift at Mzinchaleft
      • [2.20] Movarth's Lair
      • [2.21] Hjaalmarch Imperial Camp
      • [2.22] Kjenstag Ruins
      • [2.23] Stonehills
      • [2.24] Labyrinthian
      • [2.25] Lost Valkygg
      • [2.26] Skyborn Altar
      • Secondary Locations
      • Additional Locations
    • Hold 3: The Pale
      • Overview
      • Hold Capital: Dawnstar
      • [3.01] High Gate Ruins
      • [3.02] Wreck of the Brinehammer
      • [3.03] Pale Imperial Camp
      • [3.04] Windward Ruins
      • [3.05] Dawnstar Sanctuary
      • [3.06] Nightcaller Temple
      • [3.07] Red Road Pass
      • [3.08] Frostmere Crypt
      • [3.09] Hall of the Vigilant
      • [3.10] Fort Dunstad
      • [3.11] Shrine of Mehrunes Dagon
      • [3.12] The Lord Stone
      • [3.13] Volunruud
      • [3.14] Stonehill Bluff
      • [3.15] Tower of Mzark
      • [3.16] Loreius Farm
      • [3.17] Blizzard Rest
      • [3.18] Weynon Stones
      • [3.19] Duskglow Crevice
      • [3.20] Silverdrift Lair
      • [3.21] Shrouded Grove
      • [3.22] Korvanjund
      • [3.23] Tumble Arch Pass
      • [3.24] Shearpoint
      • [3.25] Nightgate Inn
      • [3.26] Blackreach Elevator (Alftand)
      • [3.27] Forsaken Cave
      • [3.28] Yorgrim Overlook
      • [3.29] Bronze Water Cave
      • [3.30] Pale Stormcloak Camp
      • [3.31] Irkngthand
      • [3.32] Raldbthar
      • [3.33] Blackreach Elevator (Raldbthar)
      • [3.34] Anga's Mill
      • Secondary Locations
      • Additional Locations
    • Hold 4: Winterhold Hold
      • Overview
      • Hold Capital: Winterhold
      • [4.01] Hela's Folly
      • [4.02] Yngvild
      • [4.03] The Tower Stone
      • [4.04] Winterhold Imperial Camp
      • [4.05] Hob's Fall Cave
      • [4.06] Frostflow Lighthouse
      • [4.07] Driftshade Refuge
      • [4.08] Fort Fellhammer
      • [4.09] Snowpoint Beacon
      • [4.10] Pilgrim's Trench
      • [4.11] Ysgramor's Tomb
      • [4.12] Saarthal
      • [4.13] Alftand
      • [4.14] Wayward Pass
      • [4.15] Ironbind Barrow
      • [4.16] Mount Anthor
      • [4.17] Sightless Pit
      • [4.18] Shrine of Azura
      • [4.19] Fort Kastav
      • [4.20] Septimus Signus's Outpost
      • [4.21] Skytemple Ruins
      • [4.22] Wreck of the Pride of Tel Vos
      • [4.23] The Serpent Stone
      • [4.24] Bleakcoast Cave
      • [4.25] Whistling Mine
      • [4.26] Journeyman's Nook
      • [4.27] Stillborn Cave
      • [4.28] Snow Veil Sanctum
      • [4.29] Winterhold Stormcloaks Camp
      • [4.30] Yngol Barrow
      • [4.31] Wreck of the Winter War
      • Secondary Locations
    • Hold 5: The Reach
      • Overview
      • Hold Capital: Markarth
      • [5.01] Mor Khazgur
      • [5.02] Deepwood Redoubt
      • [5.03] Hag's End
      • [5.04] Deep Folk Crossing
      • [5.05] Bruca's Leap Redoubt
      • [5.06] Bthardamz
      • [5.07] Druadach Redoubt
      • [5.08] Dragontooth Crater
      • [5.09] Harmugstahl
      • [5.10] Reach Stormcloak Camp
      • [5.11] Liar's Retreat
      • [5.12] Cliffside Retreat
      • [5.13] Dragon Bridge Overlook
      • [5.14] Ragnvald
      • [5.15] Reach Imperial Camp
      • [5.16] Shrine of Peryite
      • [5.17] Karthwasten
      • [5.18] Broken Tower Redoubt
      • [5.19] Markarth Stables
      • [5.20] Salvius Farm
      • [5.21] Left Hand Mine
      • [5.22] Kolskeggr Mine
      • [5.23] The Lover Stone
      • [5.24] Blind Cliff Cave
      • [5.25] Four Skull Lookout
      • [5.26] Red Eagle Redoubt
      • [5.27] Sundered Towers
      • [5.28] Rebel's Cairn
      • [5.29] Karthspire Camp
      • [5.30] Karthspire
      • [5.31] Sky Haven Temple
      • [5.32] Soljund's Sinkhole
      • [5.33] Bleakwind Bluff
      • [5.34] Old Hroldan
      • [5.35] Hag Rock Redoubt
      • [5.36] Dead Crone Rock
      • [5.37] Purewater Run
      • [5.38] Dushnikh Yal
      • [5.39] Reachwater Rock
      • [5.40] Reachwind Eyrie
      • [5.41] Reachcliff Cave
      • [5.42] Valthume
      • [5.43] Gloomreach
      • [5.44] Lost Valley Redoubt
      • [5.45] Bard's Leap Summit
      • [5.46] Cradle Stone Tower
      • [5.47] Fort Sungard
      • Secondary Locations
      • Additional Locations
    • Hold 6: Whiterun Hold
      • Overview
      • Hold Capital: Whiterun
      • [6.01] Lund's Hut
      • [6.02] Rorikstead
      • [6.03] Serpent's Bluff Redoubt
      • [6.04] Whiterun Imperial Camp
      • [6.05] Swindler's Den
      • [6.06] Gjukar's Monument
      • [6.07] Broken Fang Cave
      • [6.08] Sleeping Tree Camp
      • [6.09] Rannveig's Fast
      • [6.10] Drelas' Cottage
      • [6.11] Greenspring Hollow
      • [6.12] Dustman's Cairn
      • [6.13] Hamvir's Rest
      • [6.14] Redoran's Retreat
      • [6.15] Fort Greymoor
      • [6.16] Silent Moons Camp
      • [6.17] Halted Stream Camp
      • [6.18] Bleakwind Basin
      • [6.19] Western Watchtower
      • [6.20] Whiterun Stables
      • [6.21] Pelagia Farm
      • [6.22] Honningbrew Meadery
      • [6.23] Chillfurrow Farm
      • [6.24] Battle-Born Farm
      • [6.25] Whitewatch Tower
      • [6.26] White River Watch
      • [6.27] Riverwood
      • [6.28] Shimmermist Cave
      • [6.29] Fellglow Keep
      • [6.30] Graywinter Watch
      • [6.31] The Ritual Stone
      • [6.32] Whiterun Stormcloak Camp
      • [6.33] Valtheim Towers
      • [6.34] Darkshade
      • [6.35] Guldun Rock
      • [6.36] Hillgrund's Tomb
      • [6.37] High Hrothgar
      • [6.38] Throat of the World
      • Secondary Locations
      • Additional Locations
    • Hold 7: Eastmarch
      • Overview
      • Hold Capital: Windhelm
      • [7.01] Uttering Hills Cave
      • [7.02] Gallows Rock
      • [7.03] Mara's Eye Pond
      • [7.04] Morvunskar
      • [7.05] Kynesgrove
      • [7.06] Windhelm Stables
      • [7.07] Brandy-Mug Farm
      • [7.08] Hlaalu Farm
      • [7.09] Hollyfrost Farm
      • [7.10] Traitor's Post
      • [7.11] Refugees' Rest
      • [7.12] Sacellum of Boethiah
      • [7.13] Cradlecrush Rock
      • [7.14] Abandoned Prison
      • [7.15] Mixwater Mill
      • [7.16] Broken Limb Camp
      • [7.17] Cronvangr Cave
      • [7.18] Riverside Shack
      • [7.19] Witchmist Grove
      • [7.20] Bonestrewn Crest
      • [7.21] Steamcrag Camp
      • [7.22] Narzulbur
      • [7.23] Gloombound Mine
      • [7.24] Cragwallow Slope
      • [7.25] Mzulft
      • [7.26] Lost Knife Hideout
      • [7.27] Fort Amol
      • [7.28] Darkwater Pass
      • [7.29] Snapleg Cave
      • [7.30] Eldergleam Sanctuary
      • [7.31] Darkwater Crossing
      • [7.32] The Atronach Stone
      • [7.33] Mistwatch
      • [7.34] Eastmarch Imperial Camp
      • [7.35] Kagrenzel
      • [7.36] Stony Creek Cave
      • [7.37] Cragslane Cavern
      • [7.38] Ansilvund
      • Secondary Locations
    • Hold 8: Falkreath Hold
      • Overview
      • Hold Capital: Falkreath
      • [8.01] Bilegulch Mine
      • [8.02] Sunderstone Gorge
      • [8.03] Glenmoril Coven
      • [8.04] Falkreath Imperial Camp
      • [8.05] Moss Mother Cavern
      • [8.06] Hunter's Rest
      • [8.07] Knifepoint Ridge
      • [8.08] Twilight Sepulcher
      • [8.09] Bannermist Tower
      • [8.10] Evergreen Grove
      • [8.11] Half-Moon Mill
      • [8.12] Bloated Man's Grotto
      • [8.13] North Brittleshin Pass
      • [8.14] South Brittleshin Pass
      • [8.15] Ilinalta's Deep
      • [8.16] The Lady Stone
      • [8.17] Secunda's Kiss
      • [8.18] Bleak Falls Barrow
      • [8.19] Anise's Cabin
      • [8.20] Cracked Tusk Keep
      • [8.21] Halldir's Cairn
      • [8.22] Dark Brotherhood Sanctuary
      • [8.23] Roadside Ruins
      • [8.24] Falkreath Watchtower
      • [8.25] North Shriekwind Bastion
      • [8.26] South Shriekwind Bastion
      • [8.27] Peak's Shade Tower
      • [8.28] Pinewatch
      • [8.29] Angi's Camp
      • [8.30] The Guardian Stones
      • [8.31] Embershard Mine
      • [8.32] Helgen
      • [8.33] South Skybound Watch
      • [8.34] North Skybound Watch
      • [8.35] Orphan Rock
      • [8.36] Falkreath Stormcloak Camp
      • [8.37] Haemar's Shame
      • [8.38] Bonechill Passage
      • [8.39] Ancient's Ascent
      • [8.40] Bloodlet Throne
      • [8.41] Greywater Grotto
      • [8.42] Fort Neugrad
      • [8.43] Southfringe Sanctum
      • Secondary Locations
      • Additional Locations
    • Hold 9: The Rift
      • Overview
      • Hold Capital: Riften
      • [9.01] Ivarstead
      • [9.02] Shroud Hearth Barrow
      • [9.03] Pinepeak Cavern
      • [9.04] Geirmund's Hall
      • [9.05] Nilheim
      • [9.06] Sarethi Farm
      • [9.07] Rift Stormcloak Camp
      • [9.08] Rift Watchtower
      • [9.09] Alchemist's Shack
      • [9.10] Honeystrand Cave
      • [9.11] Rift Imperial Camp
      • [9.12] Ruins of Bthalft
      • [9.13] Arcwind Point
      • [9.14] Autumnwatch Tower
      • [9.15] Froki's Shack
      • [9.16] Treva's Watch
      • [9.17] Angarvunde
      • [9.18] Avanchnzel
      • [9.19] Clearspring Tarn
      • [9.20] Boulderfall Cave
      • [9.21] Northwind Mine
      • [9.22] Northwind Summit
      • [9.23] Tolvald's Cave
      • [9.24] Shor's Watchtower
      • [9.25] Shor's Stone
      • [9.26] Fort Greenwall
      • [9.27] Heartwood Mill
      • [9.28] Faldar's Tooth
      • [9.29] Goldenglow Estate
      • [9.30] Autumnshade Clearing
      • [9.31] Merryfair Farm
      • [9.32] Riften Stables
      • [9.33] Fallowstone Cave and Giant's Grove
      • [9.34] Lost Prospect Mine
      • [9.35] Black-Briar Lodge
      • [9.36] Largashbur
      • [9.37] Darklight Tower
      • [9.38] Ruins of Rkund
      • [9.39] Crystaldrift Cave
      • [9.40] Lost Tongue Overlook
      • [9.41] Snow-Shod Farm
      • [9.42] The Shadow Stone
      • [9.43] Nightingale Hall
      • [9.44] Broken Helm Hollow
      • [9.45] Forelhost
      • [9.46] Stendarr's Beacon
      • Secondary Locations
      • Additional Locations
    • Blackreach
      • Overview
      • [10.00] Khajiit Caravans
      • [10.01] Azura's Star
      • [10.02] Blackreach
      • [10.03] Blue Palace Pelagius Wing
      • [10.04] Japhet's Folly
      • [10.05] Skuldafn
      • [10.06] Sovngarde
    • Soul Cairn
      • Overview
      • [SC1.1] Portal to Volkihar Ruins
      • Soul Cairn Minor Locations
    • Forgotten Vale
      • Overview
      • Area 1: Hidden Vale
      • [FV1.1] Portal to Darkfall Passage and Cave Entrance
      • [FV1.2] Wayshrine of Sight
      • Forgotten Vale Minor Locations
    • Solstheim: Northern Mountains
      • Overview
      • Skaal Village
      • [S.N01] Damphall Mine
      • [S.N02] Water Stone
      • [S.N03] Fahlbtharz
      • [S.N04] Hvitkald Peak
      • [S.N05] Abandoned Lodge
      • [S.N06] Bristleback Cave
      • [S.N07] Northshore Landing
      • [S.N08] Broken Tusk Mine
      • [S.N09] Stalhrim Source
      • [S.N10] Castle Karstaag Ruins
      • [S.N11] Castle Karstaag Caverns
      • [S.N12] Glacial Cave
      • [S.N13] Mortrag Peak
      • [S.N14] Frykte Peak
      • [S.N15] Saering's Watch
      • [S.N16] Benkongerike
      • [S.N17] White Ridge Barrow
      • [S.N18] Hrothmund's Barrow
      • [S.N19] Moesring Pass
      • [S.N20] Snowclad Ruins
      • [S.N21] Mount Moesring
      • [S.N22] Frostmoon Crag
      • [S.N23] Altar of Thrond
      • [S.N24] Temple of Miraak (Tree Stone)
      • [S.N25] Beast Stone
      • [S.N26] Thirsk Mead Hall
      • [S.N27] Headwaters of Harstrad
      • [S.N28] Wind Stone
      • [S.N29] Haknir's Shoal
      • [S.N30] Frossel
      • [S.N31] Bujold's Retreat
      • [S.N32] Gyldenhul Barrow
      • [S.N33] Horker Island
      • Secondary Locations
    • Solstheim: Southern Ash Lands
      • Overview
      • Raven Rock
      • Tel Mithryn
      • [S.S01] Earth Stone
      • [S.S02] Bloodskal Barrow
      • [S.S03] Old Attius Farm
      • [S.S04] Kolbjorn Barrow
      • [S.S05] Wreck of the Strident Squall
      • [S.S06] Hrodulf's House
      • [S.S07] Brodir Grove
      • [S.S08] Kagrumez
      • [S.S09] Ramshackle Trading Post
      • [S.S10] Highpoint Tower
      • [S.S11] Fort Frostmoth
      • [S.S12] Ashfallow Citadel
      • [S.S13] Vahlok's Tomb
      • [S.S14] Nchardak
      • [S.S15] Sun Stone
      • Secondary Locations
    • Apocrypha
      • Overview
      • [S.A01] Apocrypha: Epistolary Acumen
      • [S.A02] Apocrypha: Filament and Filigree
      • [S.A03] Apocrypha: The Hidden Twilight
      • [S.A04] Apocrypha: The Sallow Regent
      • [S.A05] Apocrypha: Untold Legends
      • [S.A06] Apocrypha: The Winds of Change
      • [S.A07] Apocrypha: Waking Dreams of a Starless Sky
  • Interactive World Map
    • Skyrim Atlas
  • Appendices
    • Overview
    • Appendix I: Achievements and Trophies
    • Appendix II: Traders
    • Appendix III: Shrines
    • Appendix IV: Unique Weapons
    • Appendix V: Unique Armor and Items
    • Appendix VI: Skill Books
    • Appendix VII: Other References
    • The Language of Dragons
  • Bonus Content Videos
    • Favored Archetypes
    • Favored Followers
    • Top 5 Shouts
    • Traps
  • Extras
    • Choosing the Correct Attire
    • The Path of the Undeath
    • The Path of the Lycanthrope
    • Advanced Crafting
    • Hearthfire: Owning a Home
    • Top Ten Inventory Items
    • Places to See in Solstheim

Elder Scrolls V: Skyrim Special Edition Guide › Quests › The College of Winterhold Quests

Overview

Optimal Quest Start

The College of Winterhold Quests begin when you arrive at the College for the first time. They give you access to trainers and vendors that considerably increase your magical abilities and skills. You can join the College whenever you like, although Magic-focused characters may want to join sooner rather than later to gain access to this ready source of spells. Most other characters will come to the College much later, as part of Main Quest: Elder Knowledge.

Note

Cross-Referencing: Do you want to see maps and learn more about the traps, non-quest-related items, collectibles, crafting areas, and other important rooms of note in every location during these quests? Then cross-reference the location you travel to with the information on that location contained in this guide’s Atlas.

Sanctuary: College of Winterhold

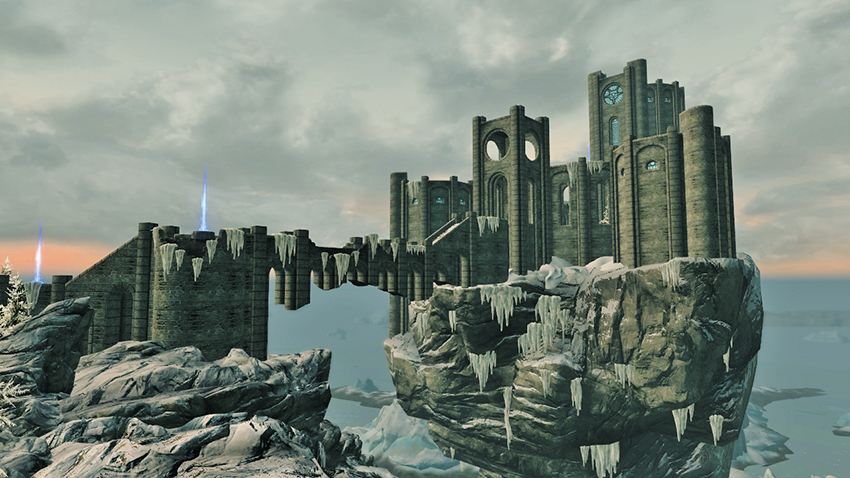
The College of Winterhold, perched on its pillar of rock.
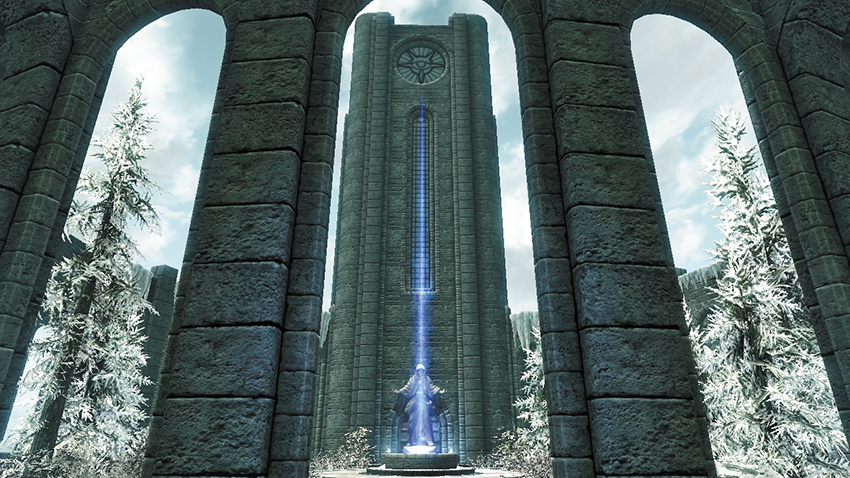
Inside the College, where mages perfect their magic.

The threadbare Hold City of Winterhold has seen most of its population driven away. The center of life in these parts nowadays is the College of Winterhold. Once a prominent, influential location in Skyrim, Winterhold has fallen on hard times but is still a haven for mages in Skyrim, a safe refuge from distrustful Nords. Largely self-sufficient, the College of Winterhold is quite content to be isolated from the rest of the province, although a more peaceful coexistence with the outside world is always preferred.

The College of Winterhold is situated on a cliff overlooking the Sea of Ghosts. Over the years, the cliff has fallen into the sea, taking nearly all of the original city with it. Only a few buildings remain, though somehow the College of Winterhold has largely been untouched by the damage. It now resides on a free-standing crag of rock and ice. Inside, the College is split into three distinctive towers: Halls of Countenance and Attainment where apprentices and senior mages reside; the Hall of the Elements, where the Arch-Mage resides, gatherings are held, and the Arcanaeum (the College’s great library) is kept. Below the College lies the Midden, a warren of icy tunnels where the remnants of long-forgotten experiments reside.

Important Characters

Arch-Mage: Savos Aren
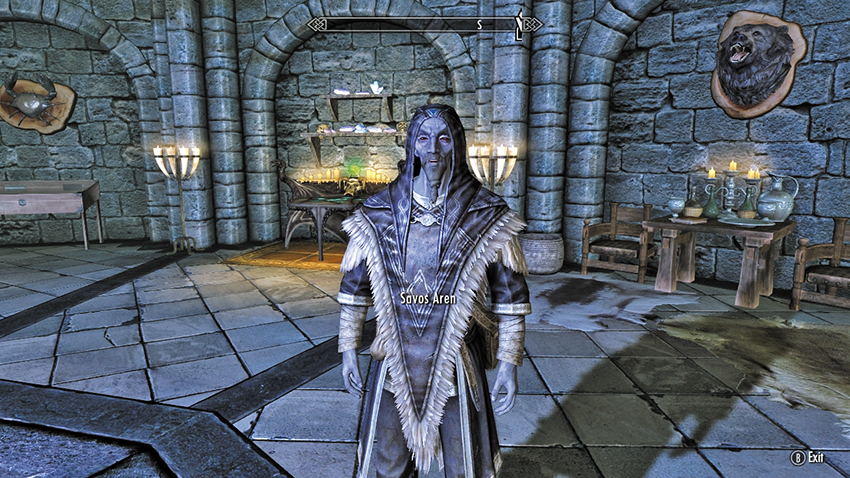
Savos has been the Arch-Mage of the College for a very long time and tried to assure the people that the College was not responsible for the Great Collapse. He took threats seriously after the White-Gold Concordat and helped secure the grounds of the College. Through it all, he’s managed to maintain his good demeanor and his faith in humanity. He has little concern for public perception these days, believing that if the mages of the College keep to themselves, no one will bother them. As such, he has every intention of staying out of the Civil War and the Thalmor’s rise to power.

Thalmor Advisor: Ancano
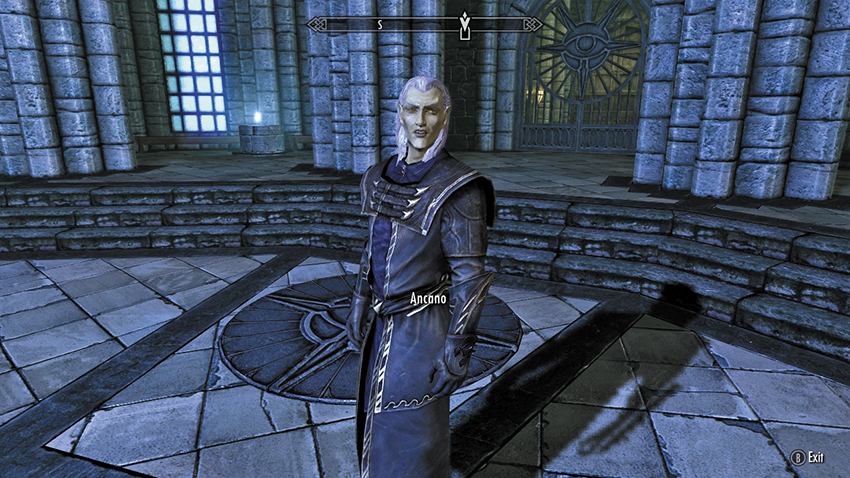
A Thalmor agent currently residing at the College of Winterhold, acting in an “advisory” position, Ancano’s patronizing tone and haughtiness have made this High Elf into a hated figure. Feeling he has no one to answer to, Ancano is using his time at the College to find out any secrets he can and relay them to his masters back at the Embassy in Haafingar. He isn’t winning any popularity awards in the College.

Master-Wizard: Mirabelle Ervine
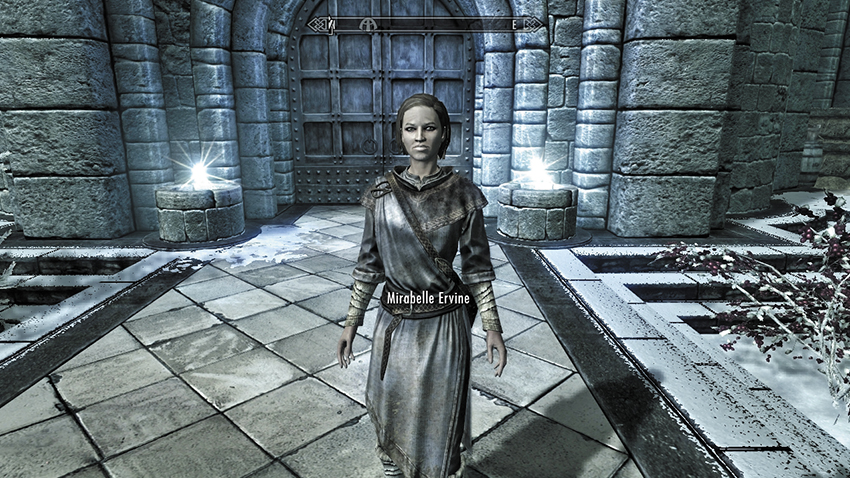
Mirabelle may be second-in-command, but she’s the one who really runs the College. The day-to-day operations are under her jurisdiction, which doesn’t make her popular, but she knows someone has to do the job. Mirabelle is frustrated that the College is seen as a black mark, that magic in general is shunned, and takes very seriously any allegations of wrongdoing leveled at the College or its members. She has no use for either the Psijics or the Thalmor—they’re all just getting in the way and giving the College a bad reputation.

Wizard: Sergius Turrianus
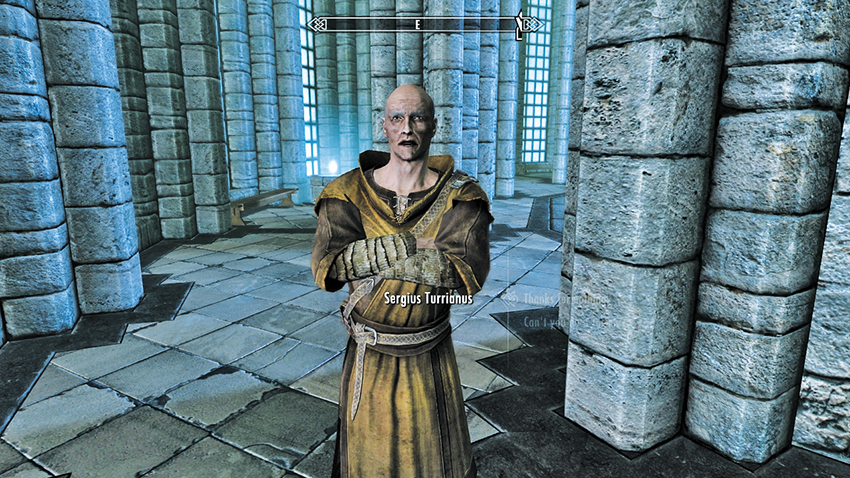
Well aware of the contempt Nirya and Faralda have for one another, Sergius takes time from his duties as Enchanting instructor to instigate conflict between the two women, in the hopes that Faralda will turn to him for comfort. While he’s sure this is going to backfire on him eventually, he’s going to enjoy it while he can.

  • Trainer (Enchanting: Expert): Sergius Turrianus

Wizard: Drevis Neloren
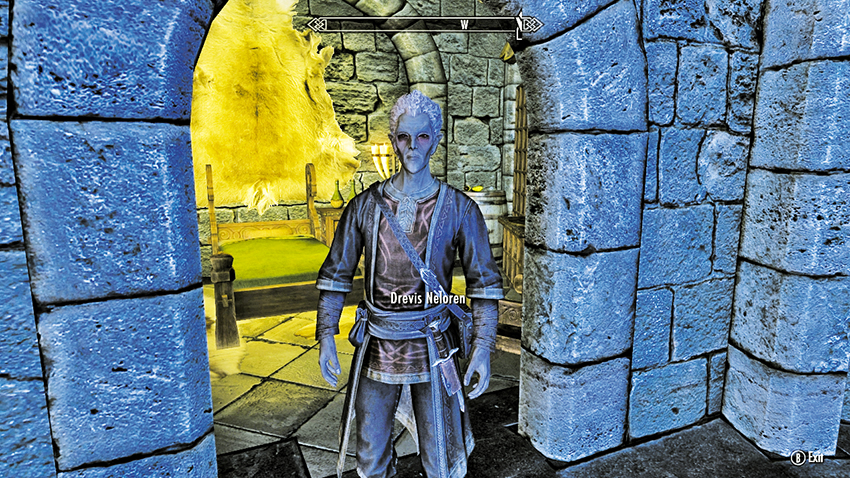
Drevis is a strange duck. Quite versed in Illusion, he’s well liked by the apprentices but has little presence outside his class. His colleagues barely seem to acknowledge him; he floats through the day leaving little mark on anything. If they were paying attention, one might question whether he’s really there at all....Drevis has a habit of wandering into the Arcanaeum and talking Urag gro-Shub’s ear off, largely because Urag can’t get away.

  • Vendor: Illusion spells
  • Trainer (Illusion: Master): Drevis Neloren

Wizard: Faralda
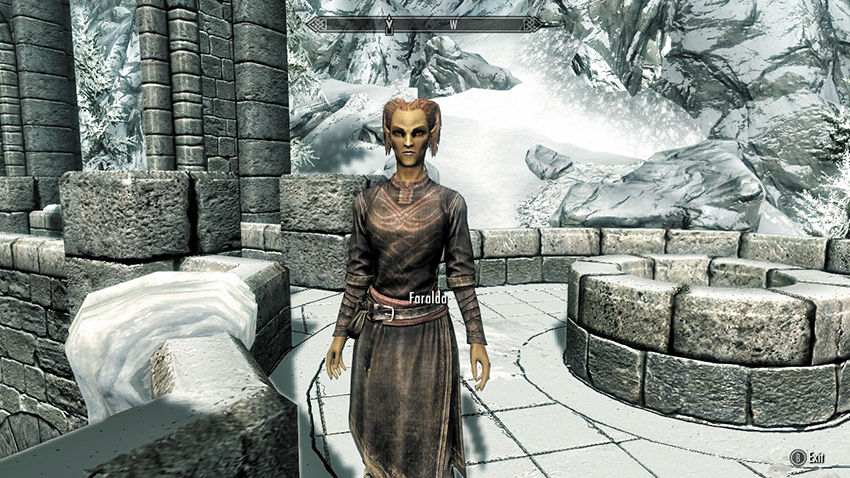
Faralda has her eye on Mirabelle Ervine’s position, a stepping stone on her way to being Arch-Mage. Recently she’s noticed that Nirya seems to have her sights set on the same position, and the two have developed a bitter rivalry over it. Rumors of sabotaged experiments and undermined research provide plenty of gossip for the other mages. When upset over something Nirya has done, Faralda goes running to Sergius Turrianus, who is in fact playing up both sides of this conflict to get close to Faralda.

  • Vendor: Destruction spells
  • Trainer (Destruction: Expert): Faralda

Wizard: Phinis Gestor
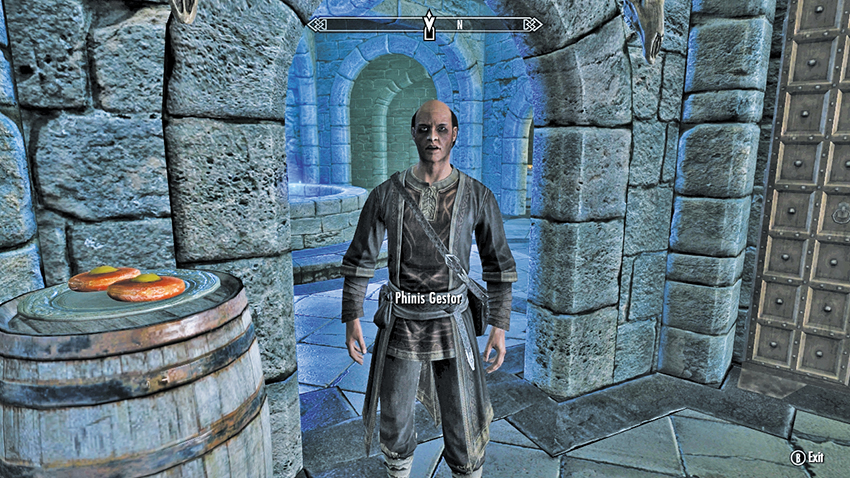
Phinis has little concern for the affairs of mortals. He’s a wizard who conjures creatures from the Beyond—what else matters? Phinis is also interested in Necromancy and takes solace in the notion that the College is one of the few places he can get away with honing his art without being stoned to death in the process. He regularly relies on Enthir to procure some of the more sensitive items his conjurations require, but only interacts socially with Arniel Gane, the one person in the College who doesn’t seem nervous when speaking to him.

  • Vendor: Conjuration spells
  • Trainer (Conjuration: Expert): Phinis Gestor

Scholar: Arniel Gane
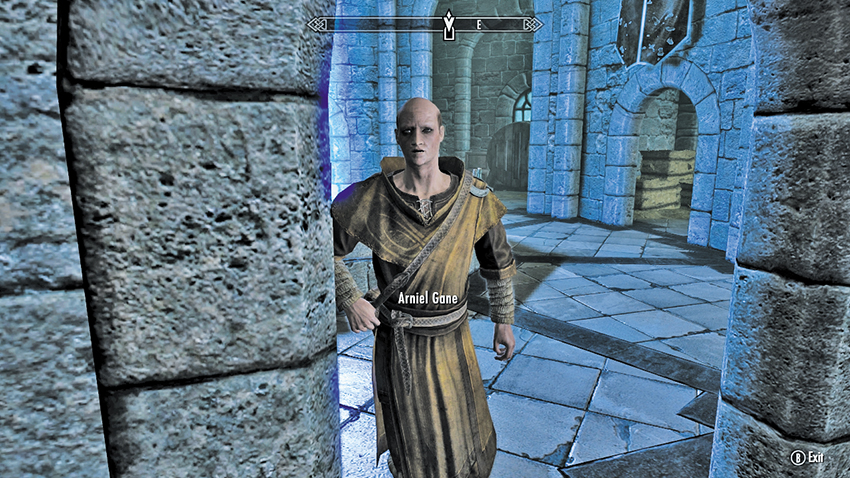
Arniel is a small, frail little man who’s never been entirely comfortable in his own skin. He feels weak and helpless, and while turning to magic has alleviated some of that, he wants to take it a step further. His ultimate (and very secret) goal is to research dwarven artifacts and figure out why the civilization disappeared. To that end, he occasionally procures the services of Enthir for some controversial items.

Scholar: Colette Marence
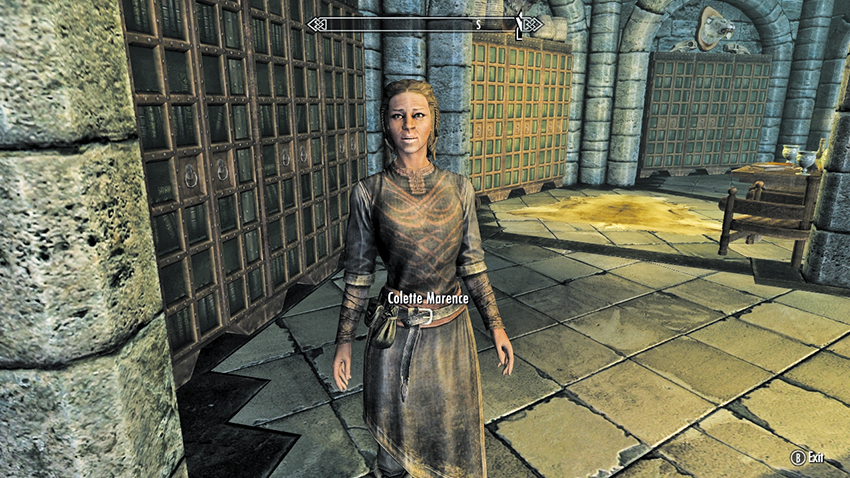
Colette is the Restoration teacher at the College and is well aware that she’s been labeled as a peace-loving star-gazing Spriggan-hugger. Having made repeated attempts to break out of that role and finding that everyone treated her even worse when she no longer fit the image they’d created for her, she’s finally given in and accepted that no one will ever see her differently.

  • Vendor: Restoration spells
  • Trainer (Restoration: Expert): Colette Marence

Scholar: Enthir
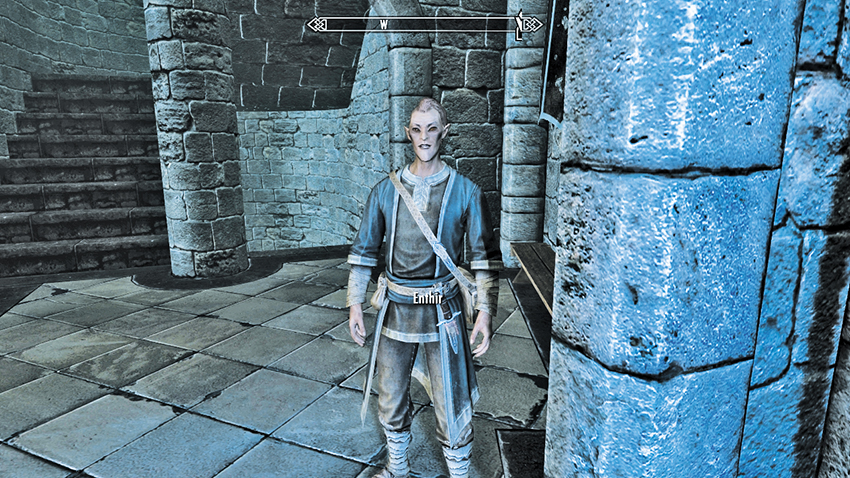
Enthir is the “man who knows how to obtain materials” in the College. While the College has very flexible rules on what’s acceptable research and what’s not, there are some reagents and spell components that just can’t be acquired through legal means. Enthir, working with Birna in Winterhold, is the elf who takes care of that. He also becomes a Fence in Winterhold during the Thieves Guild Quests.

  • Fence (Thieves Guild)

Scholar: Nirya

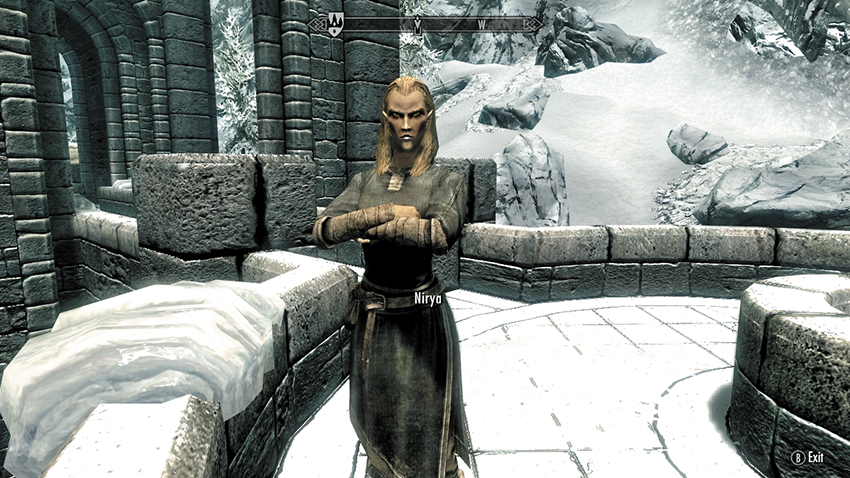
Nirya is supremely confident of her abilities and is far more interested in jostling for a leadership position than improving her skills. As Faralda seems to be the only other mage to share these ambitions, she’s decided to take her down. Sergius provides insight as to how to go about doing this, and while Nirya has a sense that he may be using her, she can’t imagine what his motivation is and so she doesn’t worry about it.

Wizard: Tolfdir
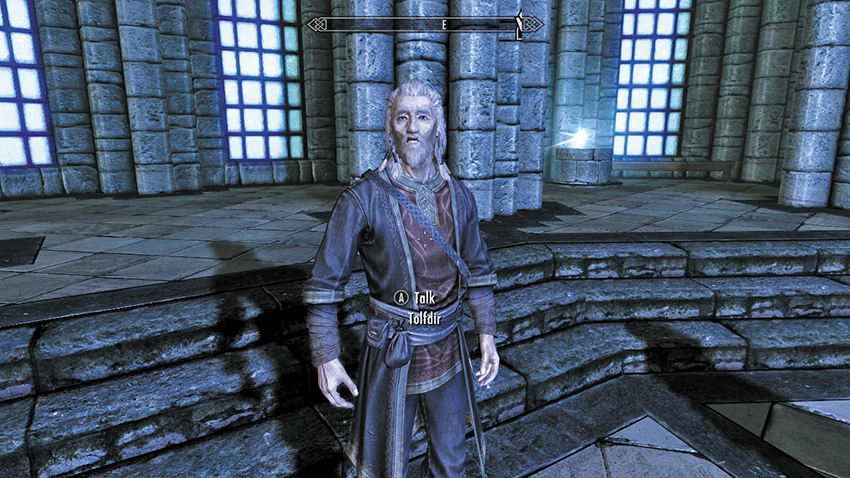
Tolfdir is old. Very old. And while it’s easy for the others to write him off as a doddering old fool, he is actually one of the few real masters of Alteration magic. He loves his work, offering to give new apprentices their first taste of the College, and is always available to help if it’s needed and if it doesn’t involve too much physical activity. Despite his elderly nature, those with perceptive qualities know to treat him as the venerable mentor and advisor that his years have taught him to be.

  • Vendor: Alteration spells
  • Trainer (Alteration: Master): Tolfdir

Lorekeeper: Urag gro-Shub
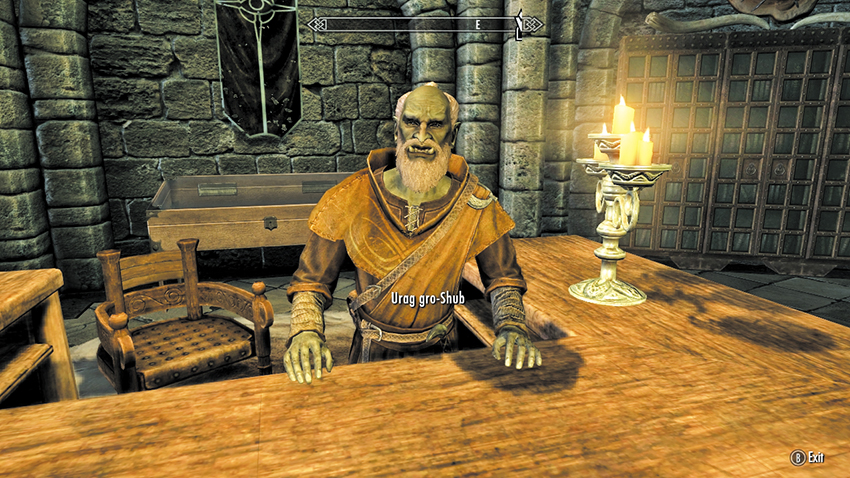
Urag’s never been a “normal” Orc, preferring books and spells to blades and war paint. He put on a good show for as long as he could, then quietly snuck off to the College of Winterhold when he had the chance. While he’s very good at what he does and loves it, he’s still somewhat conflicted by how contrary this is to what’s perceived as typical Orc behavior. As such, he feels it necessary to attempt to maintain a gruff, serious exterior. He’s actually developed a close relationship with Savos Aren and with Drevis Neloren (against his better judgment), largely because Drevis seems oblivious at Urag’s attempts to drive him away.

  • Vendor: Books

Apprentice: Brelyna Maryon
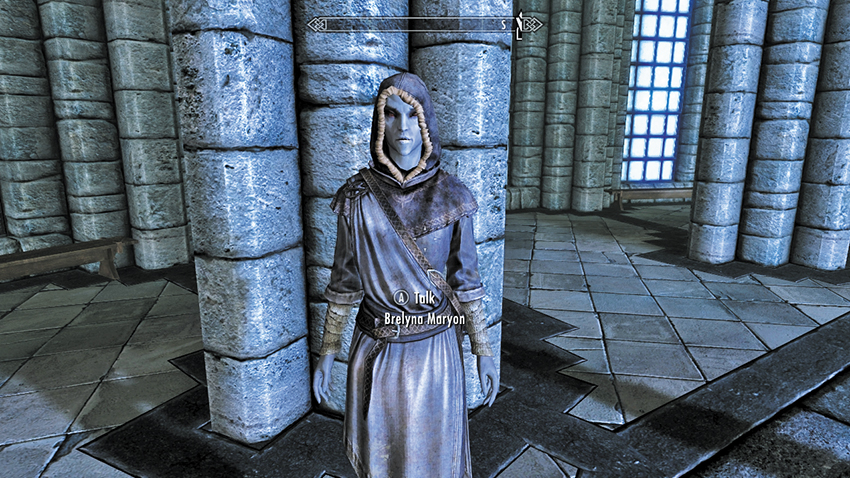
Brelyna comes from a line of Telvanni wizards, well known for their proficiency. However, she is struggling with magic and has opted to study at the College, out of sight of her friends and relatives. Her plan is to get over whatever problem she’s having and then return to Solstheim to finish her studies—and do so as quickly as possible.

  • Follower: Brelyna Maryon

Apprentice: J’Zargo
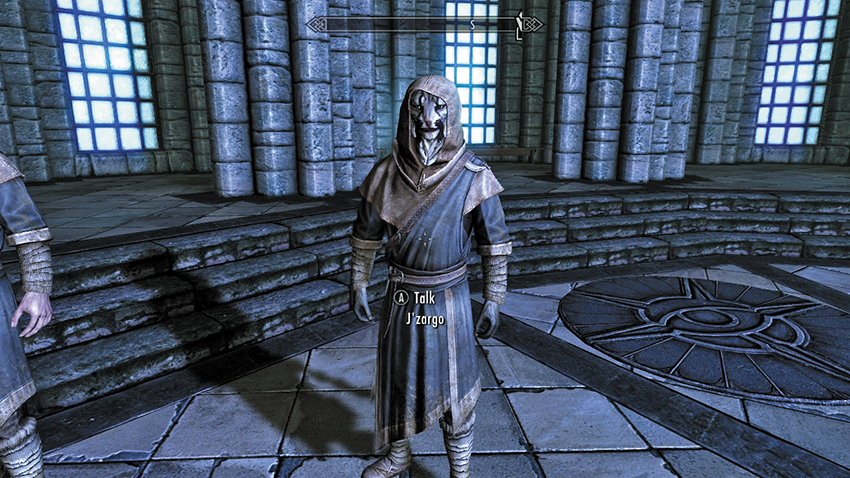
Encouraged by his peers to seek greater magical knowledge, he’s traveled to Skyrim to learn what the Nords have to offer about magic. J’Zargo is not intimidated to be the only of his kind at the College; rather, he takes this as a sign that he’s an exceptional mage. He believes himself superior to his fellow apprentices and thinks the only reason he hasn’t already been made a scholar (or higher) is protocol.

  • Follower: J’Zargo

Apprentice: Onmund

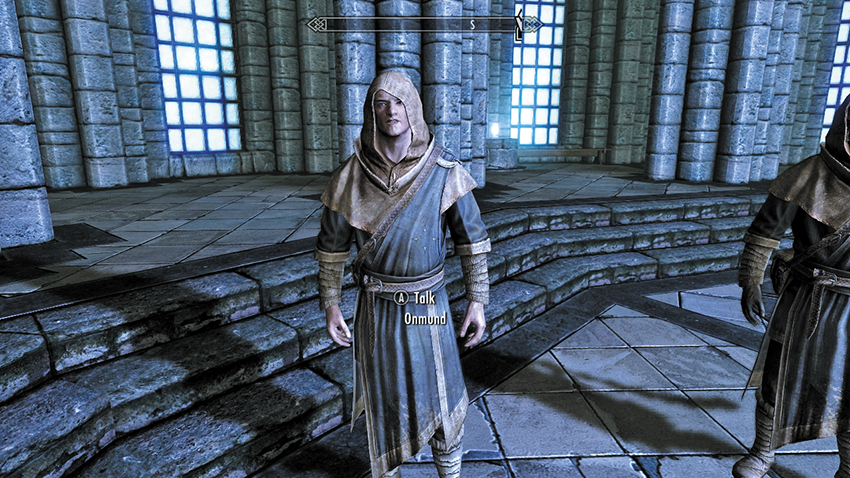
As a Nord, Onmund’s natural magical ability was seriously frowned upon by his family. Coming from a difficult childhood as a result, he’s happy to finally be someplace where everyone is more like him. Unfortunately, no one seems quite as happy as he is, which he finds to be very puzzling. His frequent attempts to make friends and engage in social activities often fall flat, but this has not dampened his enthusiasm.

  • Follower: Onmund

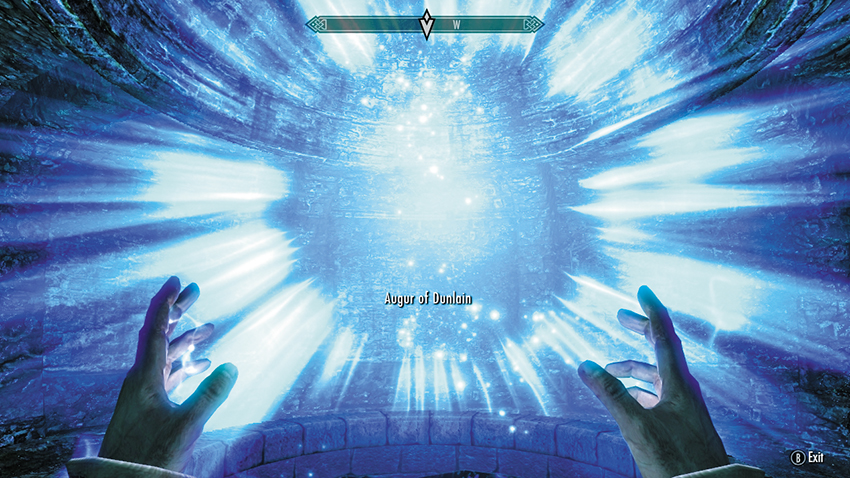
Augur of Dunlain

Formerly a mage from Dunlain in High Rock, Augur was working on some unapproved experiments in the Midden and wound up fused to the magical energies that flow through the College. Now incorporeal, he has sequestered himself in a locked room in the Midden but keeps tabs on everything going on in the College.

Psijic Monk: Quaranir
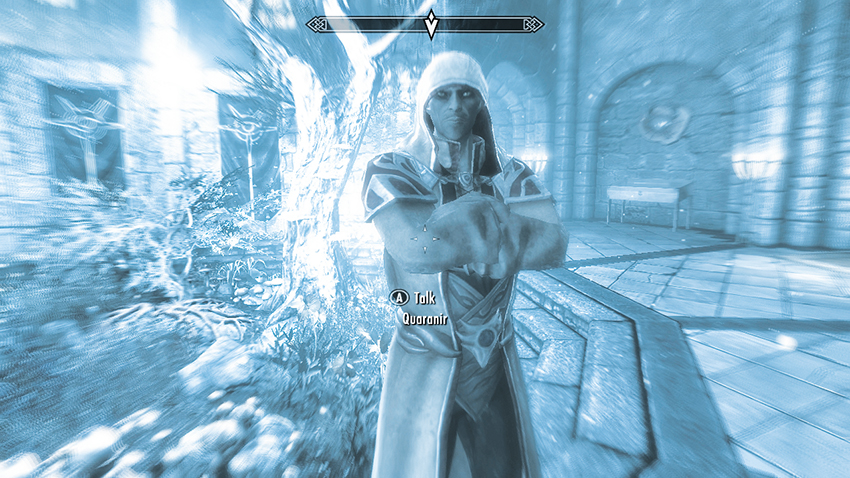
Quaranir is a member of the Psijic Order, a group that teaches a philosophy called the Elder Way, peaceful meditation to reach a higher state of consciousness and manipulation of the living world. These monks have been known to guide particularly adept mages, and Quaranir believes that his guidance is needed now.

Training and other Notes

In addition to a warm bed and like-minded brethren, some of the members of this College of mages are extremely talented in a particular skill. Speak to each of them and increase the chosen skill by a point, to a maximum of five points before you level up. If you have enough gold, you can complete this numerous times:

SkillRankTrainer
Alteration Master Tolfdir
Conjuration Expert Phinis Gestor
Destruction Master Faralda
Illusion Master Drevis Neloren
Restoration Expert Colette Marence
Enchanting Expert Sergius Turrianus

Followers and Marriage

Any of the three Apprentices—Brelyna, Onmund, and J’Zargo—can become Followers once you complete their Faction Radiant Quests. In addition, Onmund and Brelyna are candidates for marriage. Consult Side Quests: The Bonds of Matrimony for more details on the nuptials.

Magic Robes

Scour the College for a series of different-colored variations of College Robes; these are the finest premade enchanted robes you can obtain and are rarely found as loot. You can find them from merchants and randomly lying around in chests, wardrobes, or other containers.

Available Quests

There are 31 different quests available with the College of Winterhold. Eight of these are Critical Path Quests; 23 are Radiant Quests.

Critical Path Quests

Simply referred to as “quests,” these are the main quests you attempt. All but the first quest have one or more prerequisites, as shown in the following table:

Quest NamePrerequisites
College of Winterhold Quests: First Lessons None
College of Winterhold Quests: Under Saarthal Complete College of Winterhold Quests: First Lessons
College of Winterhold Quests: Hitting the Books Complete College of Winterhold Quests: Under Saarthal
College of Winterhold Quests: Good Intentions Complete College of Winterhold Quests: Hitting the Books
College of Winterhold Quests: Revealing the Unseen Complete College of Winterhold Quests: Good Intentions
College of Winterhold Quests: Containment Complete College of Winterhold Quests: Revealing the Unseen
College of Winterhold Quests: The Staff of Magnus Complete College of Winterhold Quests: Containment
College of Winterhold Quests: The Eye of Magnus Complete College of Winterhold Quests: The Staff of Magnus

Radiant Quests

Also known as “Faction Radiant Quests,” these are usually smaller quests that require you to complete an objective for a particular person. New quests of this nature appear as you progress through the Critical Path Quests. In most cases, the objectives of a Radiant Quest are randomized. They are listed in more detail after the Critical Path Quests, but for the prerequisites required to begin every Radiant Quest, consult the following table:

Quest NameQuest GiverPrerequisites
Radiant Quests: Rejoining the College N/A Complete College of Winterhold Quests: First Lessons, violence against a member
Radiant Quests: Tolfdir’s Alembic* Tolfdir Complete College of Winterhold Quests: First Lessons
Radiant Quests: Out of Balance* Drevis Neloren Complete College of Winterhold Quests: First Lessons
Radiant Quests: An Enchanted Journey* Sergius Turrianus Complete College of Winterhold Quests: First Lessons
Radiant Quests: Restocking Soul Gems* Sergius Turrianus Complete College of Winterhold Quests: First Lessons
Radiant Quests: Valuable Book Procurement* Urag gro-Shub Complete College of Winterhold Quests: First Lessons
Radiant Quests: Shalidor’s Insights Urag gro-Shub Complete College of Winterhold Quests: First Lessons
Radiant Quests: The Atronach Forge* N/A Complete College of Winterhold Quests: First Lessons; Ritual Spell Quests: Conjuration Ritual Spell to unlock the forge’s full potential.
Radiant Quests: Forgotten Names* N/A Complete College of Winterhold Quests: First Lessons
Radiant Quests: Aftershock Tolfdir Complete College of Winterhold Quests: The Eye of Magnus
Radiant Quests: Rogue Wizard Tolfdir Complete College of Winterhold Quests: The Eye of Magnus
Arniel’s Endeavors: Arniel’s Endeavor (Part 1) Arniel Gane Complete College of Winterhold: Under Saarthal
Arniel’s Endeavors: Arniel’s Endeavor (Part 2) Arniel Gane Complete College of Arniel’s Endeavors: Arniel’s Endeavor (Part 1)
Arniel’s Endeavors: Arniel’s Endeavor (Part 3) Arniel Gane Complete College of Arniel’s Endeavors: Arniel’s Endeavor (Part 2), and College of Winterhold Quests: The Eye of Magnus
Arniel’s Endeavors: Arniel’s Endeavor (Part 4) Arniel Gane Complete College of Arniel’s Endeavors: Arniel’s Endeavor (Part 3) and College of Winterhold Quests: The Eye of Magnus
Apprentice Radiant Quests: Brelyna’s Practice Brelyna Maryon Complete College of Winterhold: Under Saarthal
Apprentice Radiant Quests: J’Zargo’s Experiment J’Zargo Complete College of Winterhold: Under Saarthal
Apprentice Radiant Quests: Onmund’s Request Onmund Complete College of Winterhold: Under Saarthal
Ritual Spell Quests: Destruction Ritual Spell Faralda Destruction Skill of 90
Ritual Spell Quests: Illusion Ritual Spell Drevis Neloren Illusion Skill of 90
Ritual Spell Quests: Conjuration Ritual Spell Phinis Gestor Conjuration Skill of 90
Ritual Spell Quests: Restoration Ritual Spell Colette Marence Restoration Skill of 90
Ritual Spell Quests: Alteration Ritual Spell Tolfdir Alteration Skill of 90

Note

* Indicates the quest name does not appear in your Quest menu; check the “Miscellaneous” area for objectives that may appear.

Keep reading with a free account

The first 3 sections of Elder Scrolls V: Skyrim Special Edition are open to everyone. An account opens the rest of it, and every other guide in the archive. It's free, and there's nothing to buy.

Bought guides on the old Prima Games site? Your account and every guide you own moved here, so there's nothing to buy again. Sign in.

Create a free account Or browse our free guides

PreviousCompanions Radiant Quests: Final Wave: Dragon Seekers NextCollege of Winterhold Quests: First Lessons