
Elder Scrolls V: Skyrim Special Edition Guide The Atlas Hold 1: Haafingar
[1.25] Brinewater Grotto
[1.25] Brinewater Grotto
Related Quests
- Thieves Guild Quest: Scoundrel’s Folly
- Dungeon Activity
Recommended Level: 6
Dungeon: Bandit Camp
- Animal
- Bandit
Dangers
- Bear Trap
- Bone Alarm Trap
- Flail Trap (tripwire)
- Battering Ram Trap
Underground Connection: East Empire Company Warehouse [1.24]
Collectibles
- Chest(s)
- Potions
- Loose gear
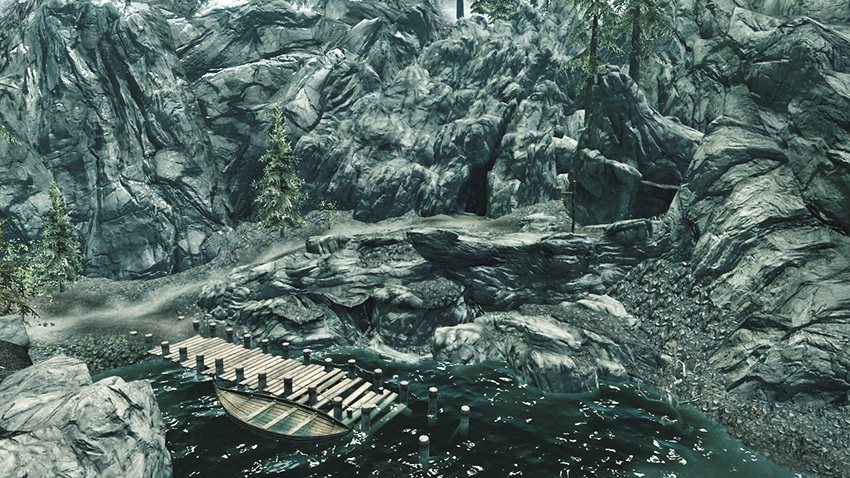
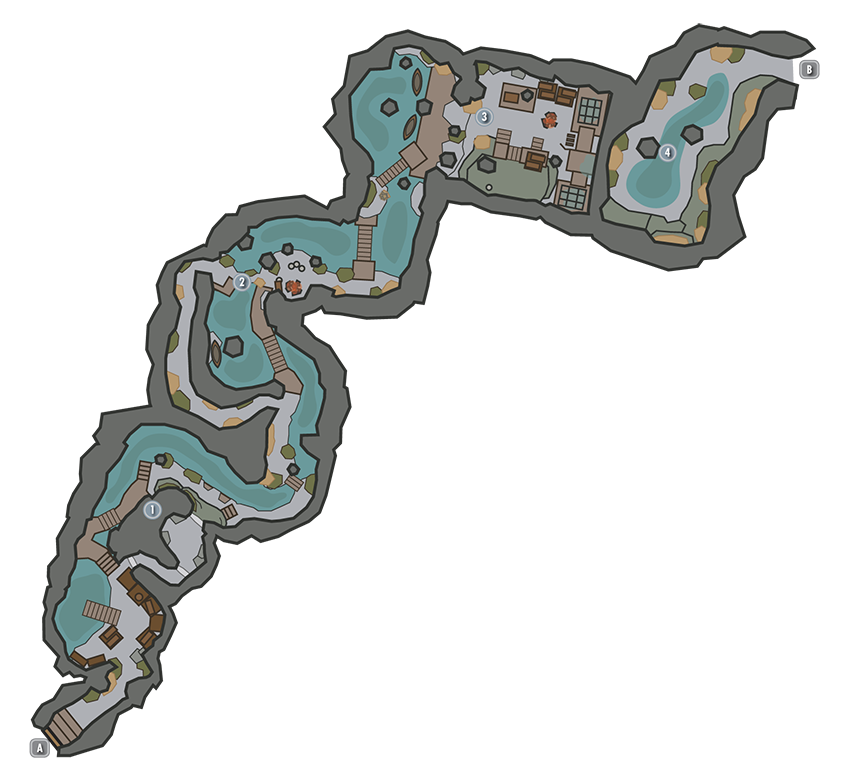
This sizable cave is located along Haafingar’s frigid northeast shoreline; however, this location actually marks the cave’s exit, not its entrance. Entering from this shoreline site only allows you to visit the cave’s final, Horker-filled chamber. To fully explore Brinewater Grotto, you must enter from the East Empire Company Warehouse [1.24]. This can only be accomplished by properly spying on Gulum-Ei during Thieves Guild Quest: Scoundrel’s Folly. Regardless, when exiting the cave, be sure to loot the exterior chest.
- Chest
- Loose gear
 Door to East Empire Company Warehouse
 Watery Path
Slay or sneak past bandits as you navigate this winding passage, and don’t miss the chest that’s hidden underwater to the north. If you like, you can tear through some thick spiderwebs here to expose a spider-filled passage that can help you slip past the guards.
- Chest
 Trapped Passage Cavern
More bandits lurk near a campfire in this area—the goons guard a chest with a tricky lock. Hanging rattles have been strung to prevent you from sneaking along the water. If you like, you can creep through a trap-filled passage in the west wall to get the drop on the bandits. Just beware of the passage’s array of tripwires and bear traps, as well as a feisty guard dog.
- Danger! Bear Trap, Bone Alarm Trap, Flail Trap (trip wire), Battering Ram Trap
- Chest (Locked: Adept)
 Lever Chamber
Slay more rugged bandits here, then find several chests—two aboard the docked rowboats you pass on your way into the cavern and five more near the east shelving—along with some valuable loose gear, including a Skill Book. Don’t miss the coin purses hidden on the southwest ledge, either. Use the east levers to open the two nearby cages and reveal a secret passage that leads to the final cavern.
- Chest (Locked: Apprentice)
- Chest (Locked: Master)
- Chests (2) (Locked: Expert)
- Loose gear
 Horker Cavern
Slay a few giant Horkers as you move through the final cavern, and don’t miss the exterior chest, which is located just outside the cave (as previously detailed).
 Exit to Skyrim