
Elder Scrolls V: Skyrim Special Edition Guide The Atlas Hold 9: The Rift
[9.23] Tolvald's Cave
[9.23] Tolvald’s Cave
Related Quests
- Thieves Guild Radiant Quest: No Stone Unturned
- Dungeon Activity
Recommended Level: 18
Dungeon: Falmer Hive
- Animal
- Falmer
Crafting
- Alchemy Lab
- Tanning Racks (3)
Dangers
- Bear Traps
- Bone Alarm Trap
- Swinging Wall Trap (trip wire)
- Trapped Chest
Quest Items
- Crown of Barenziah
Collectibles
- Skill Book [Block]: Battle of Red Mountain [B2/10]
- Skill Book [Destruction]: Mystery of Talara, v3
- Chest(s)
- Potions
- Loose Gear
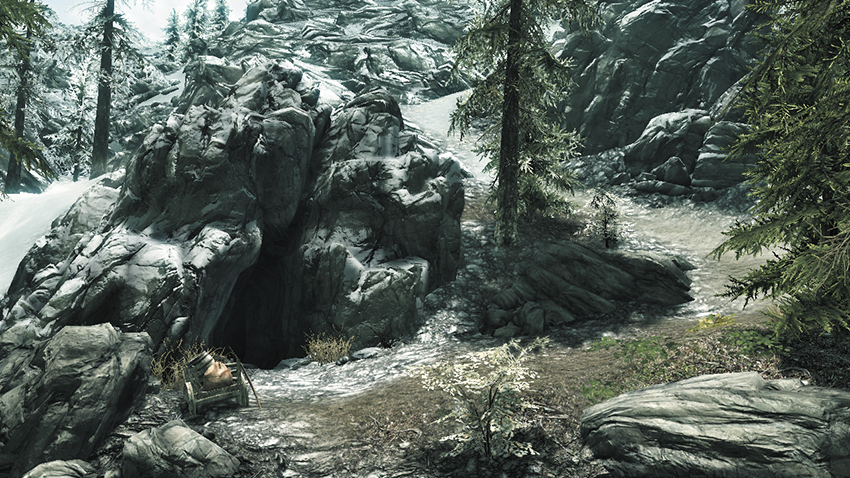
This sizeable cave lies northeast of Shor’s Stone [9.25] and runs deep into the Rift’s eastern mountains, eventually giving way to ancient dwarven ruins. After collecting all of the Unusual Gems that are scattered throughout Skyrim, you’re told to visit Tolvad’s Cave in search of a special crown, to which the gems belong.
 Exit to Skyrim
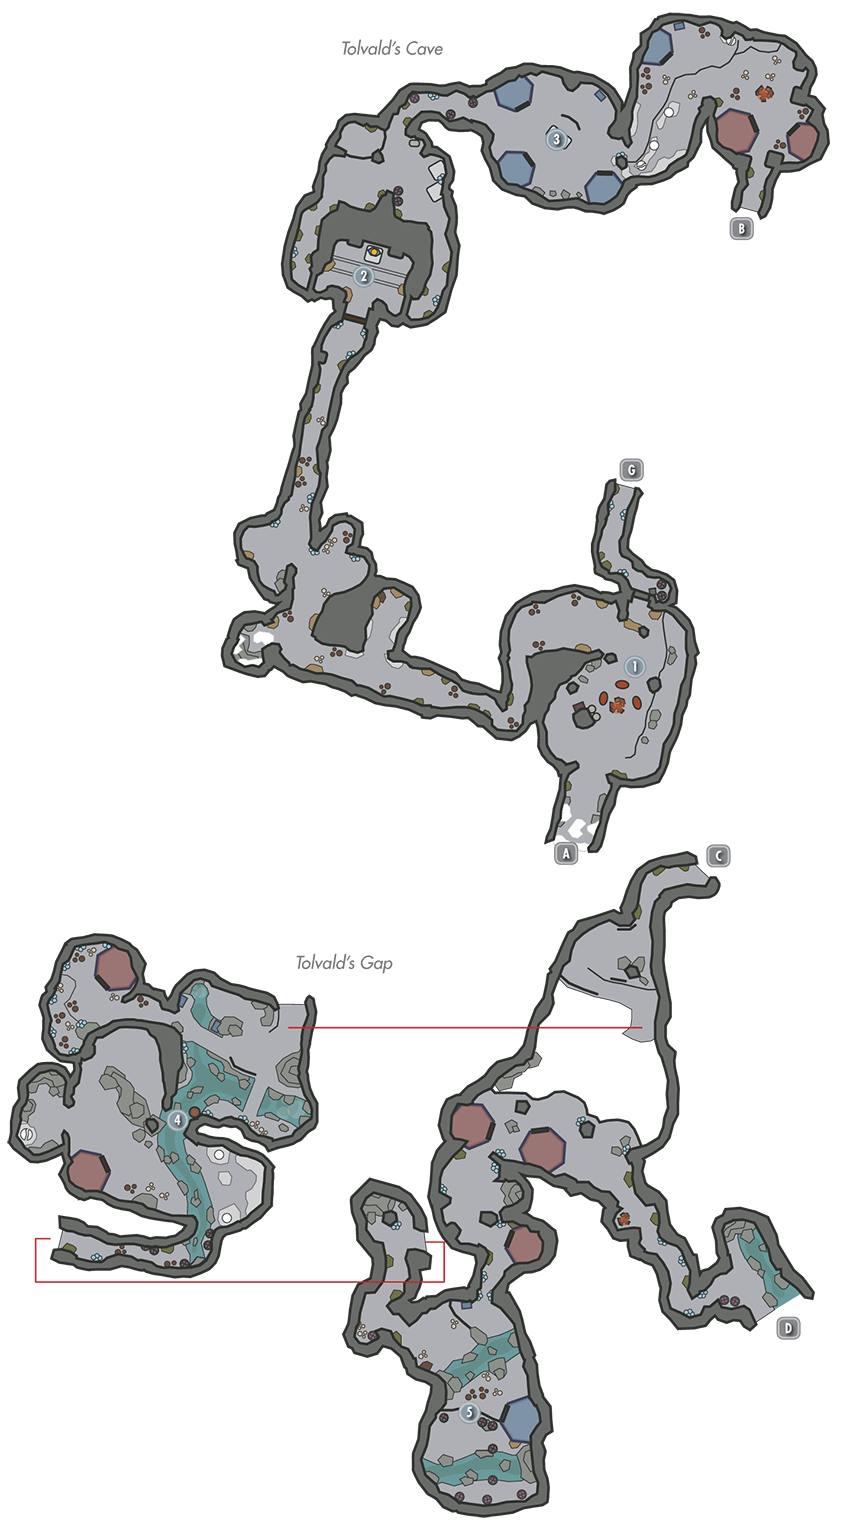
 Entry Cavern
Slaughter a few angry predators in the first cavern, then loot a locked chest near the central fire pit and flip through an informative journal that sits on a nearby stool. Beware of bear traps, hanging rattles, and many more predators as you make your way to the next room.
- Danger! Bear Traps, Bone Alarm Trap
- Chest (Locked: Apprentice)
 Trapped Chest Chamber
An ornate metal door leads into this small, stone room. First, pull the chain on the west wall to open two side passages and slay a few Falmer. These villains would have ambushed you when you opened the room’s tantalizing trapped chest. If you can’t unlock the chest’s trap hinge, stand atop the chest when opening it to avoid being shot by arrows. Then use the Falmer passages to visit a higher chamber, where you find an Alchemy Lab and several potions.
- Danger! Trapped Chest
- Crafting: Alchemy Lab
- Potions
- Loose Gear
 Falmer Lair
Kill the many Falmer in this cavern, then find a useful key on one of their bodies. Loot an odd-looking chest and then cut down an overgrown Frostbite Spider on your way to the back cavern, opening a locked chest along the way. Beware of additional Falmer emerging from small holes in the walls and find a third chest in a tent before taking the nearby passage to Tolvald’s Gap.
 Path to Tolvald’s Gap
 Path to Tolvald’s Cave
 Divided Cavern
Dispatch several Falmer and a Skeever or two as you descend into the Gap’s first cavern. Take a northwest passage to locate a small side cave with a chest in a Falmer tent and a large amount of mushrooms the Falmer have been cultivating. Backtrack out and locate another chest near a waterfall. Follow the stream to the cavern’s southern half, where many more Falmer lurk. Follow the stream to its end, then take a side passage up to the next cavern.
- Chest
- Chest (Locked: Apprentice)
- Potions
- Loose Gear
 Chaurus Den
Dangerous Chaurus lurk in this far chamber. Find a chest atop the waterfall here, then take the nearby passage to arrive at the previous chamber’s high southern ledge, collecting a few potions from a nook along the way.
- Chest
- Potions
Divided Cavern Revisited
Loot another chest in a tent on this side of the cavern as you loop around to a passage that leads even deeper into the cave.
- Chest (Locked: Adept)
 Path to Tolvald’s Crossing
 Path to Tolvald’s Gap
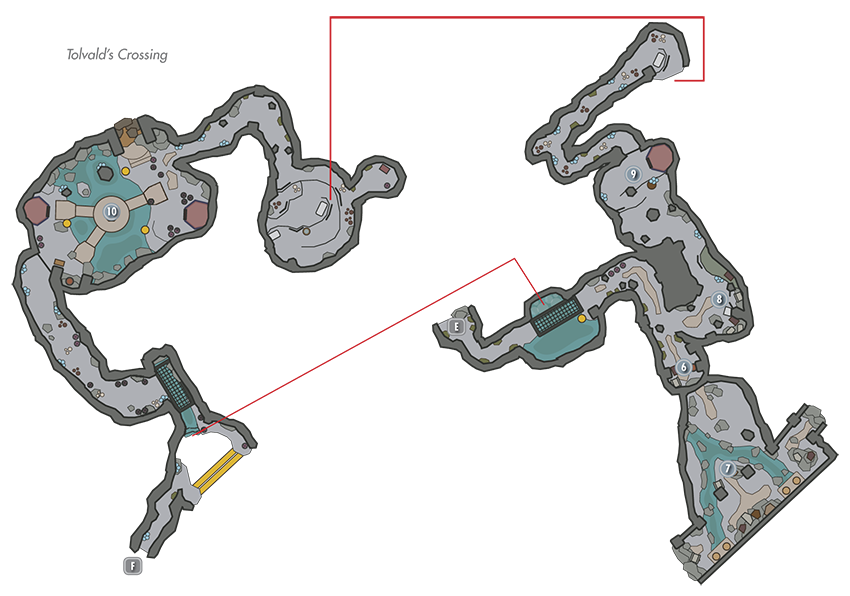
 Dead End
Beware of the powerful Falmer that lurks in the thick spray of the giant waterfall here, then head south when you reach a fork in the tunnel to reach this dead end, where a spirit materializes for a moment before vanishing. Inspect the interesting journal that lies near a skeleton here before looting the locked chest.
- Danger! Swinging Wall Trap (trip wire)
- Chest (Locked: Apprentice)
 Old Road
If you’ve found all 24 Unusual Gems and are visiting this place as part of the “No Stone Unturned” quest, then the aforementioned dead-end passage will be opened, exposing a section of ancient underground dwarven road that’s been caved in. Sift through the rubble here to locate the Crown of Barenziah.
- Crown of Barenziah
 Caravan Junkyard
Stand as far back as possible before intentionally triggering the trip wire at the start of the junction’s east passage, which leads to this treasure-filled passage. Treasured belongings pillaged from Dark Elf refugees lie heaped in a pile. You may not be able to open the giant locked chest here, but you can collect two valuable Skill Books, then explore an upper ramp to locate another locked chest before making your way to [8].
- Skill Book [Block]: Battle of Red Mountain [B2/10]
- Skill Book [Destruction]: Mystery of Talara, v3
- Chest (Locked: Expert)
- Chest (Locked: Master)
- Potion
- Loose Gear
 Winding Ramp Cavern
Find a chest in a Falmer tent on your way to this tall cavern, where another mysterious Dark Elf spirit briefly appears to you once more. Inspect the nearby trailbook to uncover a bit more of the intrigue surrounding this place. Ascend the winding uphill path, being wary of the many overhead ledges from which Falmer archers can fire down at you. Find another chest in a tent before taking a high passage to [9].
- Crafting: Tanning Rack
- Chests (2)
- Loose Gear
 Shallow Rapids Cavern
Several powerful Falmer and a hulking Chaurus lurk in this final cavern, which features a rushing stream. A large chest is attached to the wall near the makeshift throne the Falmer have erected here. Open the south gate and take a winding passage back to the Crossing’s first cavern. Carefully navigate the ledges and steam pipes without falling to make your way to an exit path that leads back to the start of Tolvald’s Cave.
 Path to Tolvald’s Cave
 Path to Tolvald’s Crossing