
Elder Scrolls V: Skyrim Special Edition Guide The Atlas Hold 3: The Pale
[3.32] Raldbthar
[3.32] and  [DG.15] Raldbthar
Related Quests
- Dark Brotherhood Quest: Mourning Never Comes
- Side Quest: Lost to the Ages
- A Dungeon Activity Is Available
Hold: The Pale
Recommended Level: 12
Dungeon: Dwarven City
- Alain Dufont
- Animal
- Bandit
- Dwarven Centurion
- Dwarven Sphere
- Dwarven Spider
- Falmer
- Katria
Crafting
- Workbench (3)
Dangers
- Dwarven Ballista Trap (pressure plate)
- Dwarven Piston
- Dwarven Thresher (proximity)
- Dwarven Thresher (pressure plate)
- Flamethrower
- Flamethrower (buttons)
- Oil Pool Traps
Underground Connection: Blackreach [10.02]
Collectibles
- Chest(s)
- Loose gear
- Potions
- Skill Book [Sneak]: 2920, Lost Seed, v8 [A1/10]
- Unique Weapon: Aegisbane [20/81]
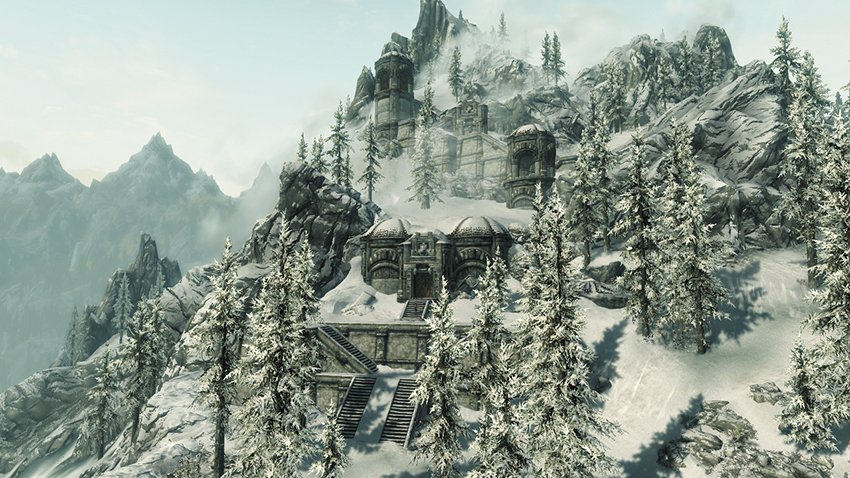
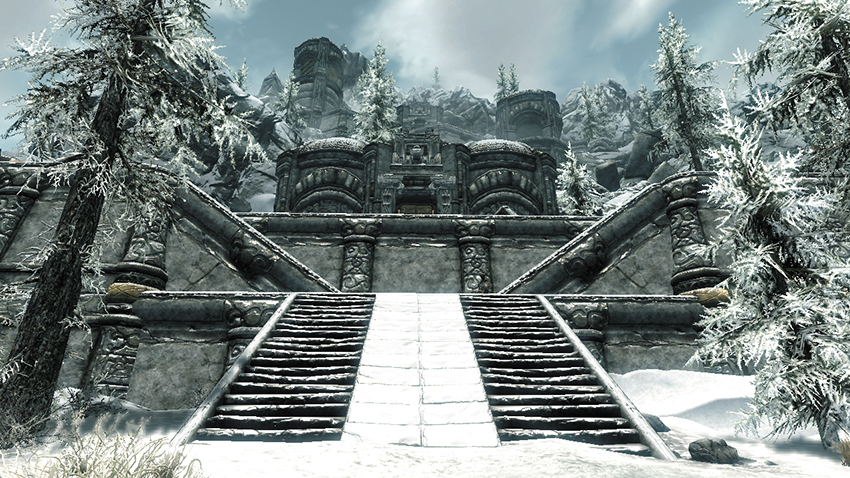
These ancient dwarven ruins, which run through the mountains at the Pale’s southeast tip, have been overrun by treasure-seeking bandits.
 Exit to Skyrim
 Bandit Den
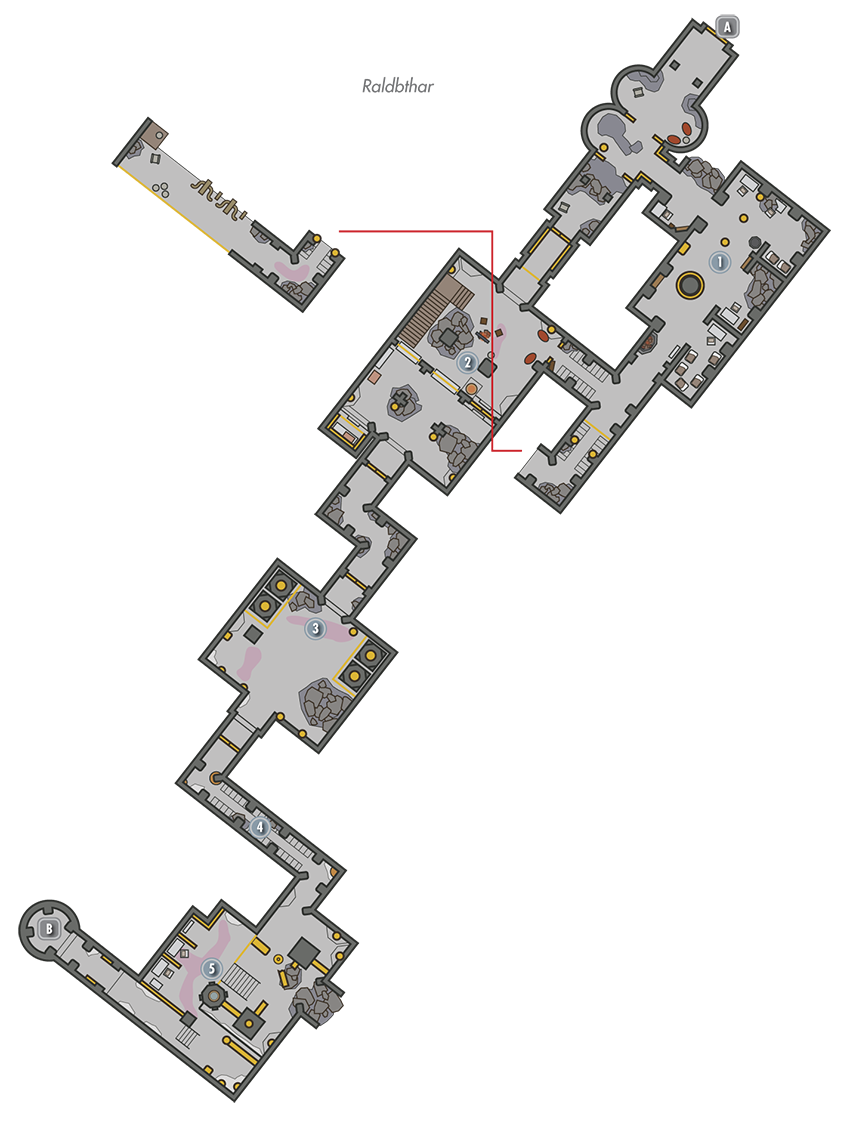
Ignore the passage that’s blocked by active fire spouts, and take a side passage to reach this chamber, which the bandits have secured as a base of operations. Dispatch the villains and loot an odd-looking dwarven chest that’s tucked to one side of the room’s entry doorway.
- Chest
- Crafting: Workbench
- Loose gear
 Trading Consortium
If possible, pick a locked gate in the hall that leads to this chamber so you may enter from an elevated position; then pull a few levers to fire large siege weapons down at the bandits below. Eliminate all bandits to discover a valuable key on one of their bodies. If you’re running quests for the Dark Brotherhood, ensure that you kill Alain Dufont in this room as well. Collect a Skill Book from the counter in the center of the room, and loot a chest that’s tucked beneath the northwest stairs. Pass through the central gate and raid the odd-shaped dwarven chests on the other side. If possible, unlock a Master-level gate to claim even more plunder.
- Chest [Locked: Apprentice]
- Chests (4)
- Crafting: Workbench
- Danger! Oil Pool Trap
- Irkngthand Consortium Key (bandit)
- Loose gear
- Potions
- Skill Book [Sneak]: 2920, Lost Seed, v8 [A1/10]
- Unique Weapon: Aegisbane [20/81]
 Oily Floor Chamber
Formidable Dwarven Spheres emerge from small holes in this second chamber’s walls. Look to ignite the room’s oil slicks to help defeat these foes. Secure the chamber and pillage the chest near the northwest wall. Find a coin purse tucked away near the southeast wall as well.
- Chest [Locked: Apprentice]
- Danger! Oil Pool Traps
 Thresher Hallway
Carefully time the movement of the spinning blades as you scale this sloping passage, and keep close to the walls to avoid being sliced to ribbons.
- Danger! Dwarven Thresher (proximity)
 Pipeworks
Search the wall near the stairs here to find a well-hidden dwarven chest. Find two more chests upstairs in the cubicles—one is long and rectangular and features a difficult lock. Beware of Dwarven Spiders that emerge from holes in the walls as you head for the far lift that ferries you to Raldbthar’s Deep Market.
- Chest [Locked: Master]
- Chests [Locked: Novice] (2)
- Crafting: Workbench
- Danger! Dwarven Piston
- Danger! Flamethrower
- Danger! Oil Pool Trap
- Loose gear
 Door to Deep Market
 Door to Raldbthar
 Deep Market Entry
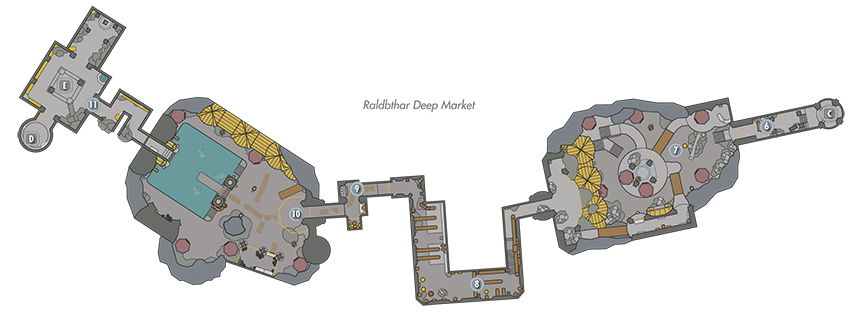
Carefully move past the spinning blade that emerges from the ground as you descend this first sloping passage. Raid a chest that’s tucked away in a corner at the bottom.
- Chest [Locked: Novice]
- Danger! Dwarven Thresher (proximity)
 Fountain Square
Beware: vicious Falmer lurk in this massive cavern. Free a couple of Skeevers from a holding pen as you enter, then flee—they may attack their captors for you. Loot an odd-looking Falmer chest in the west tent, then scale the north steps and raid a locked dwarven chest. Slay a powerful Falmer on the high central balcony—believe it or not, you can circle around the Falmer tents up here to locate a chest that’s cleverly hidden behind them. Cross a ramp afterward to locate another Falmer chest and a button. Press the button to lower a drawbridge that grants you access to the room’s southern and western ledges. Loop around and take the west passage to [8].
- Chests (2)
- Chest [Locked: Apprentice]
- Loose gear
- Potion
 Trapped Passage
Dodge pressure plate traps as you navigate this passage, slaying the odd Dwarven Automaton as you go. Loot a dwarven chest that’s curiously affixed to the east wall. If you have Whirlwind Sprint, you can walk up the diagonal pipes in this room, then sprint across to the caged area you just walked under to find another hidden chest.
- Chest (2)
- Danger! Dwarven Ballista Trap (pressure plate)
- Danger! Swinging Blade Trap (pressure plate)
 Button Puzzle Passage
Four buttons are lined up in a row in this passage. Simply press the third button from the left to open the way forward. Pressing any other button causes lethal flamethrowers to jet out from the surrounding walls.
- Danger! Flamethrower (buttons)
 Jammed Gear Chamber
Battle several fierce Falmer in this sizeable chamber. If you are feeling tough, unlock the small trading post to battle the Chaurus and obtain the treasure lock in the cage. Find a chest at the chamber’s west end and another within a Falmer tent that features an Expert-level locked gate. A third chest sits near another tent to the north. Remove obstructions from four gears around the room to restore power to the central button—search underwater to find one of the blocked gears. Press the button to lower the far drawbridge and unleash a fearsome Dwarven Centurion! Loot the rectangular chest across the drawbridge after defeating the Centurion.
- Chests (4)
- Potion
 Mechanism Chamber
If you are on Side Quest: Lost to the Ages, Katria appears as you enter this chamber and helps you fend off a swarm of dwarven automatons. Raid the chest that lies among this final room’s north rubble, along with the locked chest that’s affixed to the west wall; then grab the Glowing Crystal Shard in the northern part of this chamber. If you’ve previously been to Blackreach [10.02], you can use the central mechanism here to return to the dwarves’ subterranean city. Otherwise, the nearby lift will take you back out to Skyrim. Loot one last dwarven chest as you descend the outdoor steps that lead back to Raldbthar’s main entrance.
- Aetherium Shard [3/4]
- Chest
- Chest (outdoors)
- Chest [Locked: Adept]
- Loose gear
- Potion
 Exit to Skyrim
 Elevator to Blackreach