
Elder Scrolls V: Skyrim Special Edition Guide The Atlas Hold 9: The Rift
[9.02] Shroud Hearth Barrow
[9.02] Shroud Hearth Barrow
Related Quests
- Dungeon Quest: Wilhelm’s Specter*
Recommended Level: 6
Dungeon: Draugr Crypt
- Draugr
- Skeleton
- Wyndelius Gatharian
Crafting
- Alchemy Lab
Dangers
- Battering Ram Trap (pressure plate)
- Dart Trap (lever, pressure plate)
- Flamethrower Trap (trapped door)
- Oil Lamp Trap
- Oil Pool Trap
- Rockfall Trap (trip wire)
- Swinging Blade Trap (trip wire, wall chain)
- Spear Trap (pressure plate)
- Swinging Wall Trap (pressure plates)
Puzzles
- Claw Door (Sapphire Claw)
- Nordic Pillars
Quest Items
- Wyndelius’ Journal
Collectibles
- Skill Book [Illusion]: Before the Ages of Man [B2/10]
Special Objects
- Word Wall: Kyne’s Peace [3/3]
- Chests
- Potions
- Loose gear
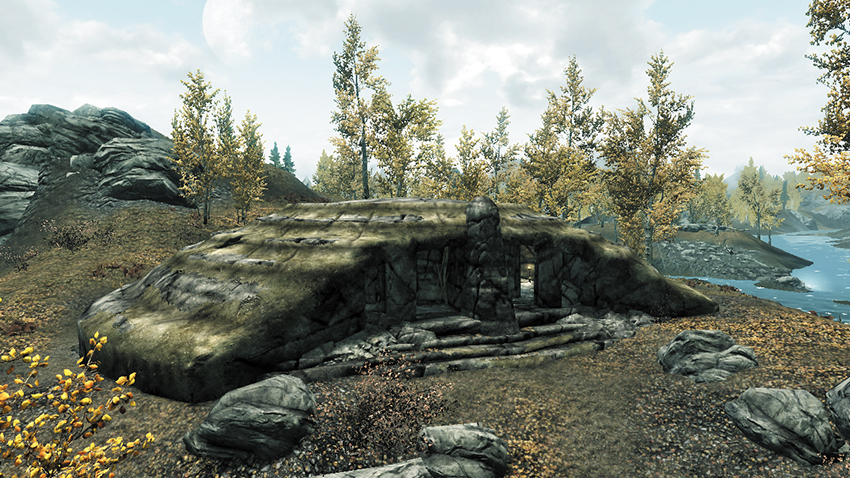
This barrow lies on the hill overlooking the village of Ivarstead. Speaking with Wilhelm, the town’s innkeeper, provides you with a Dungeon Quest that entices you to investigate this haunted place in search of treasure.
 Exit to Skyrim
 Lever Puzzle Passage
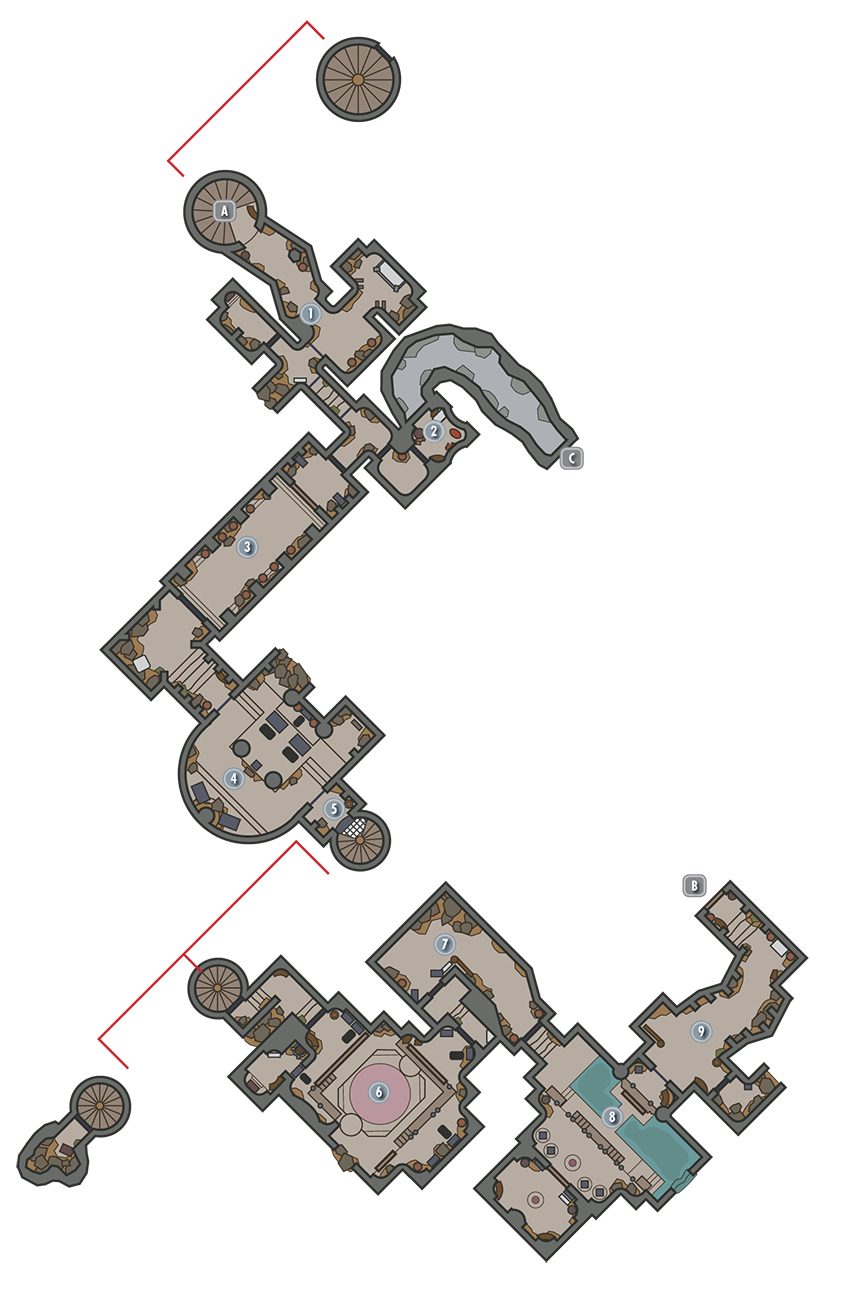
Obtain a bit of loot from a shelf on your way into this passage, where the ghost of Wyndelius Gatharian urges you to leave, then vanishes. Enter the nearby alcove, grab a Skill Book off the stone table, then face west, toward the far portcullis, so that two pairs of wall levers are visible. Looking at the portcullis, pull the leftmost lever, followed by the “inside” right lever, to manipulate the gates so that you may progress. Don’t touch the far-right lever—it triggers a trap. Pull the wall chain that follows to raise the next few portcullises, and optionally unlock an Adept-level iron door to access a dangerous nook with a trapped chest and a pressure plate trap.
- Danger! Dart Trap (lever, trigger hinge), Spear Trap (pressure plate, wall chain)
- Skill Book [Illusion]: Before the Ages of Man [B2/10]
- Potion
 Wyndelius’s Study
Visit this room to catch up with the specter that warned you before. The ghost of Wyndelius Gatharian now lashes out at you. Lay it to rest to discover that it was never a ghost at all—just a man who’d been drinking a special potion to disguise himself as a specter. Collect the nearby journal and a few samples of the potion to gain new insight and advance the plot.
- Crafting: Alchemy Lab
- Wyndelius’s Journal
- Philter of the Phantom
- Satchel
- Potions
- Loose gear
 Hall of Stories
Bring the journal that you find at [2] back to Ivarstead’s innkeeper, Wilhelm. In thanks, he’ll give you the Sapphire Claw, which you need to open the Nordic Puzzle Door here. Beware of gouts of flame as you open the door and enter the passage (or look to the floor and disarm that particular trap), then inspect the Sapphire Claw and notice three symbols etched on its palm (Moth, Owl, Wolf). Rotate the door’s three concentric rings to form the same pattern of symbols, then inspect the central keyhole to insert the claw and open the way forward.
- Danger! Flamethrower Traps (trapped door)
 Draugr Ambush
A number of Draugr burst out of sarcophagi as you move through this chamber, and portcullises fall to trap you inside. Deal with the undead, then pull the lever in the east alcove to open the portcullises and continue on.
- Loose gear
 Spiral Stairwell
A trapdoor plunges you into shallow water at the foot of this winding stairwell. Nab some gear from the bottom of the pool, then swim up and climb out (or pull the lever to lift yourself out). Go all the way upstairs to locate a Master-level locked door. If you can pick this tricky lock, you should have no trouble opening the large chest in the nook beyond.
- Chest (Locked: Expert)
- Loose gear
 Oil Pit Chamber
Leap two pressure plates and slay a skeleton as you descend into this chamber, where a mob of skeletons are gathered in the center of the room below. Quickly knock down one of the central hanging lamps to ignite the oily floor beneath them and decimate all of the skeletons at once. Before going downstairs, spy a handle near a sarcophagus and pull it to allow you to enter the treasure room. More Draugr awaken when you reach the room’s far side. Deal with them, then proceed through the northeast door. Beware of the trip wire stretched across the passage beyond.
- Danger! Battering Ram Trap (pressure plate), Dart Trap (pressure plate), Oil Lamp Trap, Oil Pool Trap
- Chest
- Potions
- Loose gear
 Trapped Passage
Avoid triggering a trip wire and pressure plate as you battle a bow-wielding Draugr here. Jump the trip wire and sneak around the plate to avoid stirring more undead. Once again, you find yourself locked in the room. Pick the lock on the far door, or take it from the corpse of the Draugr near the door once you kill it—again.
- Danger! Swinging Blade Trap (trip wire/wall chain), Swinging Wall Trap (pressure plate)
 Drawbridge Chamber
A waterfall pushes a gentle stream through this long, enemy-free chamber. Pull a nearby wall chain to open the portcullis at the end of the stream, then claim a coin purse from the bottom of the small pool beyond. Find some gear behind the waterfall as well, then go upstairs and open the large southwest door to enter a chamber with a lone Draugr guard. Step on the pressure plate here to rotate the walls and catch glimpses of four glyphs. Spin the four glyph pillars outside the room to mimic the same pattern (Whale, Hawk, Snake, Whale), then step on the central pressure plate to lower a drawbridge.
- Potion
- Loose gear
 Path to the Depths
Avoid the pressure plate just inside the door, then deliberately hit the trip wire to trigger a rockfall trap that smashes the Draugr in this passage. See if you can open the Apprentice-level locked door to access a small nook with a gold bar, but beware the flamethrower trap that fires when you remove it.
- Danger! Flamethrower Trap (pressure pedestal), Rockfall Trap (trip wire), Swinging Wall Trap (pressure plate)
- Potion
- Loose gear
 Door to Shroud Hearth Depths
Your trip through the barrow has brought you to a cavernous underground temple. Slaughter all skeletons and Draugr that rise from their sarcophagi here—the last few are quite powerful. Proceed to the back room when the northwest passage opens, and disarm the trap on the large chest (or carefully stand to the side) to avoid being shot by darts. Gain a new Word of Power from the far Word Wall before taking your leave of this haunted barrow.
- Danger! Dart Trap
- Word Wall: Kyne’s Peace [3/3]
- Potion
- Loose gear
 Door to Shroud Hearth Barrow