
Elder Scrolls V: Skyrim Special Edition Guide The Atlas Hold 9: The Rift
[9.29] Goldenglow Estate
[9.29] Goldenglow Estate
Related Quests
- Side Quest: Captured Critters*
- Thieves Guild Quest: Loud and Clear
- Thieves Guild Radiant Quest: Larceny Targets*
Recommended Level: 6
Dungeon: Special
- Animal
- Aringoth
- Mercenary
Dangers
- Flail Trap (trip wire)
- Oil Lamp Trap (trip wire)
- Oil Pool Traps
Quest Items
- Goldenglow Bill of Sale
Collectibles
- Captured Critter: Bee in a Jar [5/5]
- Larceny Target: Queen Bee Statue [7/7]
- Skill Book [Pickpocket]: Guide to Better Thieving
- Area Is Locked (quest required)
- Chest(s)
- Potions
- Loose Gear
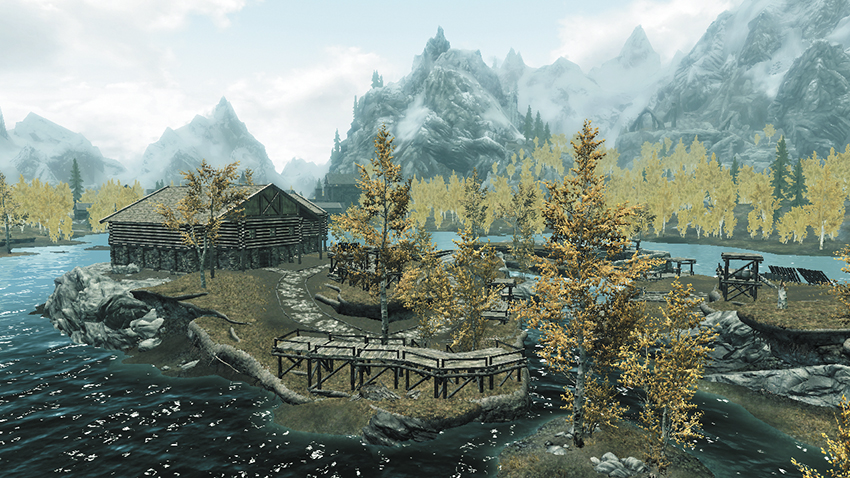
West of Riften, the sprawling Goldenglow Estate spans several islands across Lake Honrich. A small army of rugged Mercenaries guard the compound, and the south gate remains locked at all times; however, you discover means of slipping onto the premises during Thieves Guild Quest: Loud and Clear.
 Main Gate
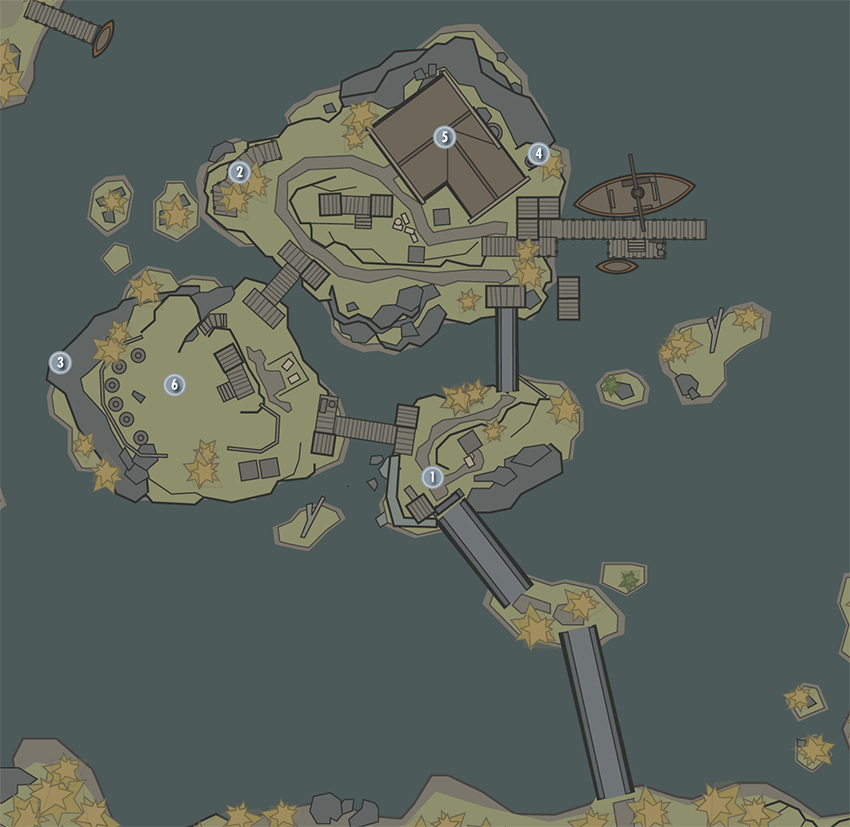
Goldenglow is a secure compound with only one entrance, and the guards aren’t about to let anyone in.
 Sewer Access
Approach Goldenglow Estate from the north to discover a low bank that you can climb onto, which is located here. This means of entry is only available during the “Loud and Clear” quest. Enter the nearby sewer to begin your infiltration.
 Nirnroot Nook
Before entering the sewer, optionally swim over here to find a rare sprig of tingling Nirnroot growing down by the water.
Goldenglow Estate Sewer
Slay the Skeevers that scutter about the sewer, and safely trigger the trip wire near the oily floor with a ranged attack to ignite the oil and torch some more. If you can, unlock the Adept-level door that follows to claim a Skill Book and loot a chest. Beware of another trip-wire trap as you advance.
- Danger! Flail Trap (trip wire), Oil Lamp Trap (trip wire), Oil Pool Trap
- Skill Book [Pickpocket]: Guide to Better Thieving
- Chest (Locked: Apprentice)
- Loose gear
 Sewer Exit
The sewer spits you out behind the estate building, close to its rear door. Unfortunately, the door features an Expert-level lock—if you can’t pick it, you’ll need to risk sneaking around front and slipping in through the manor’s unlocked front door.
 Goldenglow Estate (Main Floor)
The estate’s ground floor features two locked closets. Avoid the guards who patrol the halls and open both Adept-level doors to claim valuable loot from within. Cut through the central dining room to locate the stairs that lead up to the second floor, along with a Novice-level locked metal door that leads down to the basement.
- Strongbox (Adept)
- Chests (2)
- Knapsack
- Apothecary’s Satchel
- Potions
Goldenglow Estate (Second Floor)
Visit the second floor in search of useful keys and loot. Sneak through the central bedroom to avoid detection and open an Adept-level door to raid a closet with an apothecary satchel hidden atop a shelf. Open the Novice-level door to Aringoth’s bedchamber and quietly swipe a pair of keys from the wall hooks. Loot the chest by the bed as well, and take the unusual Bee in a Jar off the dresser. Lastly, nab the Queen Bee Statue from the nightstand—one of your fellow Thieves Guild comrades will be interested in this.
- Caged Critter: Bee in a Jar [5/5]
- Larceny Target: Queen Bee Statue [7/7]
- Goldenglow Cellar Key
- Goldenglow Safe Key
- Chest (Locked: Apprentice)
- Knapsack
- Apothecary’s Satchel
- Loose gear
Goldenglow Estate (Basement)
Still more Mercenaries guard the basement. Continue to sneak through here, or slay the men so you may loot the chest they guard. Both men carry a Goldenglow Cellar Key, if you didn’t obtain one from the second floor. Farther ahead, a seated guard can be barbecued by igniting a long patch of oil on the floor. Go downstairs to at last find the safe you seek, along with another chest.
- Danger! Oil Pool Trap
- Goldenglow Bill of Sale (Aringoth’s Safe)
- Goldenglow Cellar Keys (Mercenaries)
- Aringoth’s Safe (Locked: Expert)
- Chest (Locked: Novice)
- Chest (Locked: Apprentice)
 Apiaries
Sneak over to this collection of beehives here—or simply sprint over at breakneck speed, hoping to outrun the guards—and use any fire-based attack to burn three of the apiaries. This completes a quest objective, but you’d better clear out of here fast!