
Elder Scrolls V: Skyrim Special Edition Guide The Atlas Solstheim: Northern Mountains
[S.N17] White Ridge Barrow
[S.N17] White Ridge Barrow
Related Quests
- Solstheim Side Quest: Black Book: The Sallow Regent
- Solstheim Side Quest: Masks of the Acolyte Priests*
- Solstheim Side Quest: Spider Crafting*
Recommended Level: 50
Dungeon: Draugr Crypt
- Albino Spider
- Bandit
- Draugr
- Dukaan
- Flame Cloaked Spider
- Jumping Flame Spider
- Merilar Rendas
- Servos Rendas
Special Area
- Black Book: The Sallow Regent
- Word Wall: Cyclone [DB2/3]
Underground Connection
Collectibles
- Unique Item: Dukaan (Mask) [DB7/31]
Miscellaneous
- Chest
- Potions
- Loose gear
- Lots o’ gold
Exterior
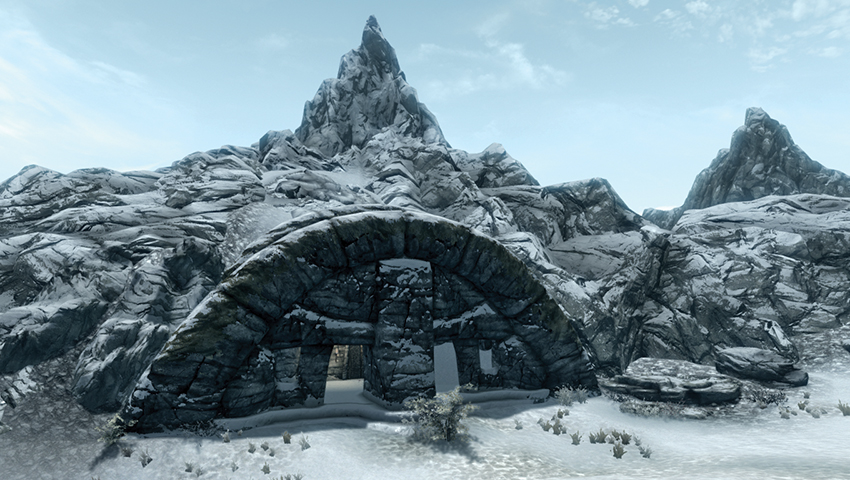
In the snow below Mortrag Peak is a familiar barrow entrance, behind which is a door leading to the tomb of the Dragon Priest Acolyte Dukaan. White Ridge Barrow is also home to some more recent inhabitants: a gang of bandits and some strange dark elven spider magic.
Interior: White Ridge Barrow
 Door to Solstheim
 Entrance Room
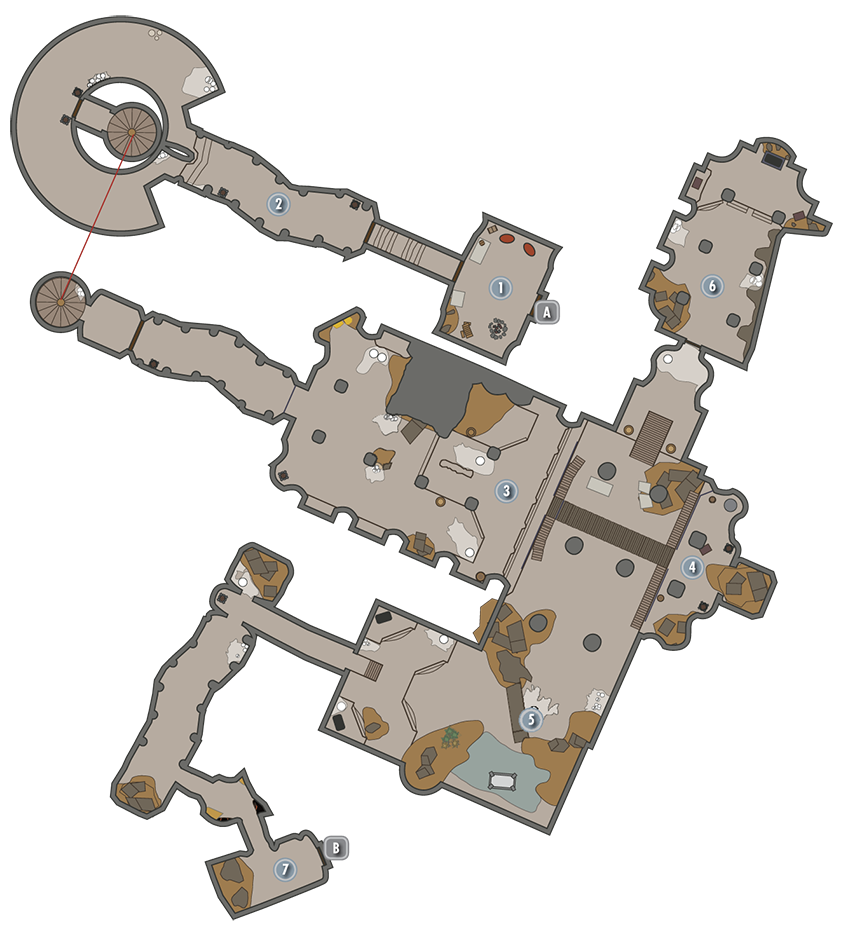
There are signs of violence at the entrance, where two dead Reavers have barred the wooden door shut. Remove the bar and open the door.
- Chest
- Loose gear
 Entrance Corridor
Pass two dead Albino Spiders and three dead Reavers before encountering live arachnids. Circle around the spiral steps leading deeper into the tomb.
 Tomb Tunnel
Head east down the tomb tunnel and engage more spiders (including Flame Cloaked Spiders) as the passage separates into two parallel corridors. Beware of exploding egg sacs, and mine any geodes you see; there are two Ruby Geodes to the north. Continue east down the corridors, past additional egg sacs. There is a chain on one of the two end pillars, which releases a bridge platform ahead (east).
- Pickaxe
- Ruby Geode (2)
 Eastern Balcony
The chamber’s far side is inaccessible unless you use the Whirlwind Sprint Shout (or a similar ability, like the Vampire Lord’s Bats power), enabling you to hurtle across the chamber, circle behind the wooden buttresses, lower the rest of the bridge using the chain near the chest, and check the area for items.
- Chest
 Hallway Chamber
You’re attacked by spiders and a bandit under the control of a parasitical spider clinging to his shoulders. There are exits here to the north and west. In the sloping southeast of the room, work your way around to the west, hacking through more spiders, watching for egg sacs and more possessed bandits, and continuing down the corridor south and then east.
- Bandit
- Loose gear
 Upper Burial Chamber
Cut through thick cobwebs to open an iron door and enter a burial chamber with a nasty Draugr at the far end. There are two chests to pilfer from.
- Chest (2)
 Natural Cave
The corridor from the hallway chamber leads here, past Heart Stone and ruby deposits, to the door to White Ridge Sanctum.
- Heart Stone deposit (2)
- Ruby Geode (2)
 Door to White Ridge Sanctum
Interior: White Ridge Sanctum
 Door to White Ridge Barrow
 Grand Cavern
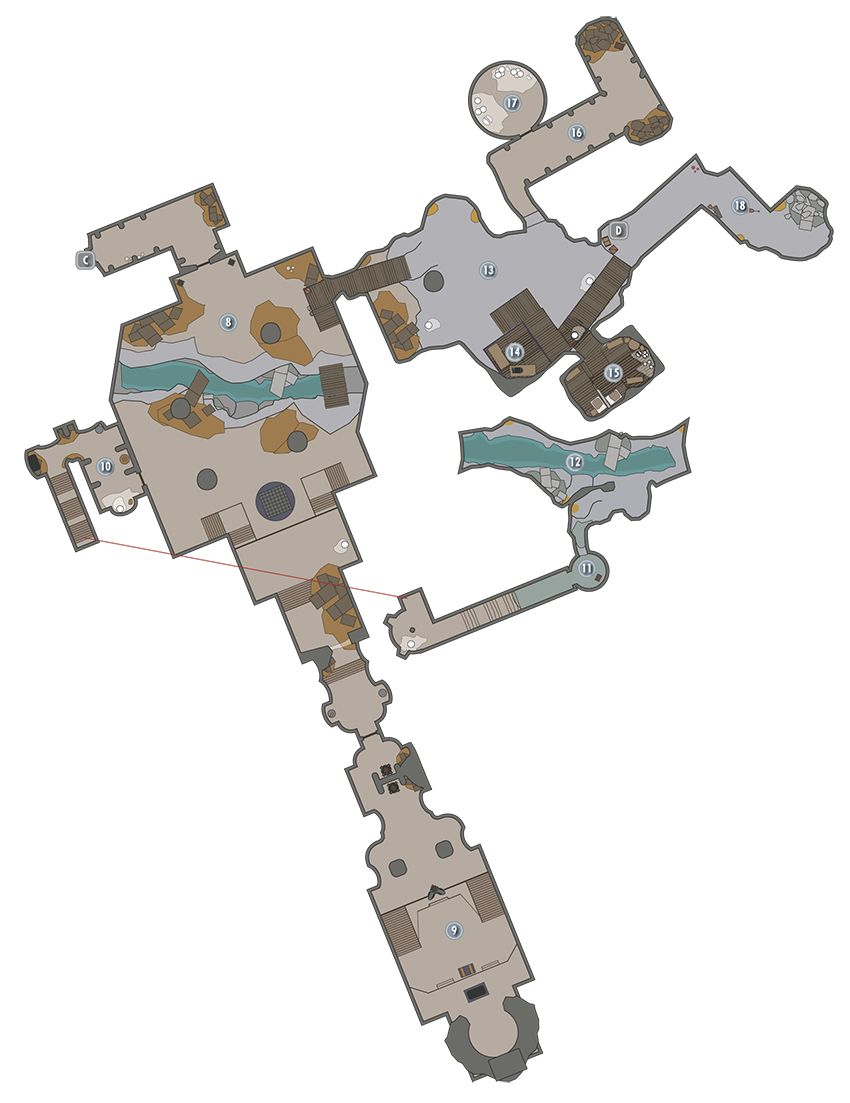
Move east and south, removing a bar from the door leading to a grand cavern where you’re set upon by bandits, Flame Spiders, and a sorcerer named Merilar Rendas, who actually throws spiders at you! Remove the key and journal (revealing a difference of opinion with another mage) from her corpse before you move on. Slay her fast enough, and you can lob Flame Cloaked Spiders and Jumping Flame Spiders at incoming foes after taking them from her corpse. Then inspect the four exits (including the one you entered from):
- Merilar Rendas
- Merilar’s Cage Door Key
- Merilar’s Journal
- Pickaxe
 Tomb of Dukaan
If you feel up to the challenge, optionally continue south to a Word Wall and crypt with a frightening Acolyte Priest named Dukaan, who guards the Black Book: The Sallow Regent. Consult the Solstheim Side Quests for more information on them.
- Chest
- Dukaan
- Unique Item: Dukaan (Mask) [DB7/31]
- Word Wall: Cyclone [DB2/3]
- Black Book: The Sallow Regent
 ,
,  , and
, and  Side Passage, Well, and Stream
West of the Grand Cavern is a narrow winding crypt passage leading down and eventually out to a waterlogged well directly below Location [6], with a chest. There’s a fissure and stream running through it with more geodes to mine too.
- Chest
- Ruby Geode (4)
 and
and  Mine and Imbuing Chamber
These are the remains of a disused mining chamber, with more geodes, spiders, and possessed bandits to cull. In the north wall is a cell door [Adept], which Merilar’s key opens. Climb the wooden ramps to the cage [Expert]; you must reach here to begin Spider Crafting. The cage holds the remains of Servos Rendas, a Dunmeri mage with a journal explaining how badly wrong his friendship with Merilar went. Of greater importance is the odd metal device and Spider Experiment Notes near it. This is the Imbuing Chamber, where the Dark Elves’ research can be put into practice!
- Ruby Geode (3)
- Servos Rendas (Deceased)
- Servos’ Journal
- Imbuing Chamber
- Spider Experiment Notes
 Servos Rendas’ Quarters
The dead mage’s bedroom is quickly filling with cobwebs, but there are some handy items, including gems and books.
- Merilar’s Cage Door Key
- Potions
- Lots o’ gold
 and
and  Dead-End Corridor and Bandit Incubation Chamber
Head through some webs to a dead-end corridor with a chest and a barred door to a circular chamber filled with possessed bandits and spiders.
 Ladder to Solstheim
This leads to Secondary Location: White Ridge Hut, a small hut with spiders and a sapphire geode; this is a great alternate entrance to the imbuing device on subsequent returns.
 Northern Tunnel
Chip away at the deposits here before returning to the main mine room and imbuing chamber.
- Potions
- Rube Geode (2)