
Elder Scrolls V: Skyrim Special Edition Guide The Atlas Hold 7: Eastmarch
[7.38] Ansilvund
[7.38] Ansilvund
Related Quests
- Side Quest: No Stone Unturned
- Dungeon Quest: A Love Beyond Death*
Recommended Level: 8
Dungeon: Warlock Lair
- Atronach
- Draugr
- Fjori
- Holgeir
- Lu’ah Al-Skaven
- Mage
Crafting
- Alchemy Lab
- Arcane Enchanter
- Arcane Imbuer
Dangers
- Dart Trap (pedestal pressure plates)
- Flail Trap (tripwire)
- Flamethrowers (pressure plates)
- Oil Lamp Traps
- Oil Pool Trap
- Rising Floor Trap
- Rockfall Trap (trip wire)
- Swinging Blade Trap (pressure plates/lever)
- Swinging Wall Trap (pressure plates)
Puzzles
- Nordic Pillars
Collectibles
- Skill Book [Illusion]: 2920, Sun’s Dawn, v2
- Unique Weapon: Ghostblade [53/80]
- Unusual Gem: [19/24]
- Chests
- Potions
- Loose gear
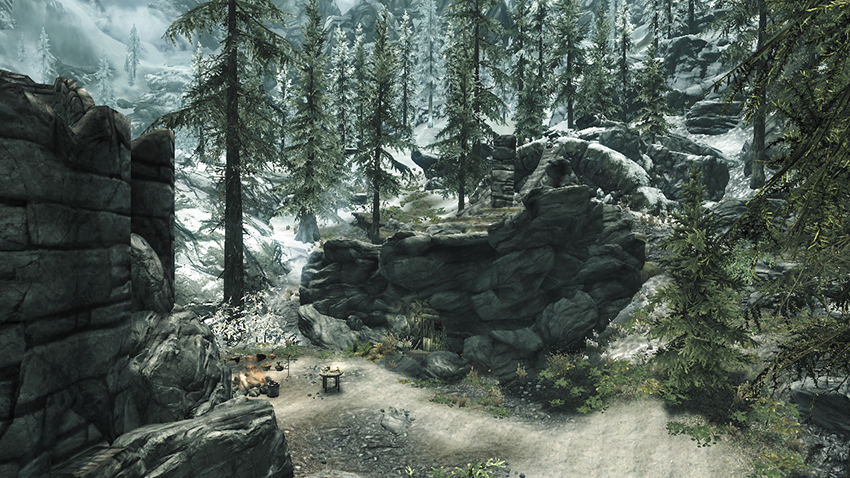
Located at Eastmarch’s southeastern tip, this recently excavated crypt runs deep into Skyrim’s eastern mountains. The fragments of a story about the lovers interred here, Fjori and Holgier, can still be found.
Exterior
Slay a mage and nab some goodies before entering the excavation site’s interior.
- Crafting: Alchemy Lab
- Chest (Locked: Apprentice)
- Potions
 Exit to Skyrim
 Entry Chamber
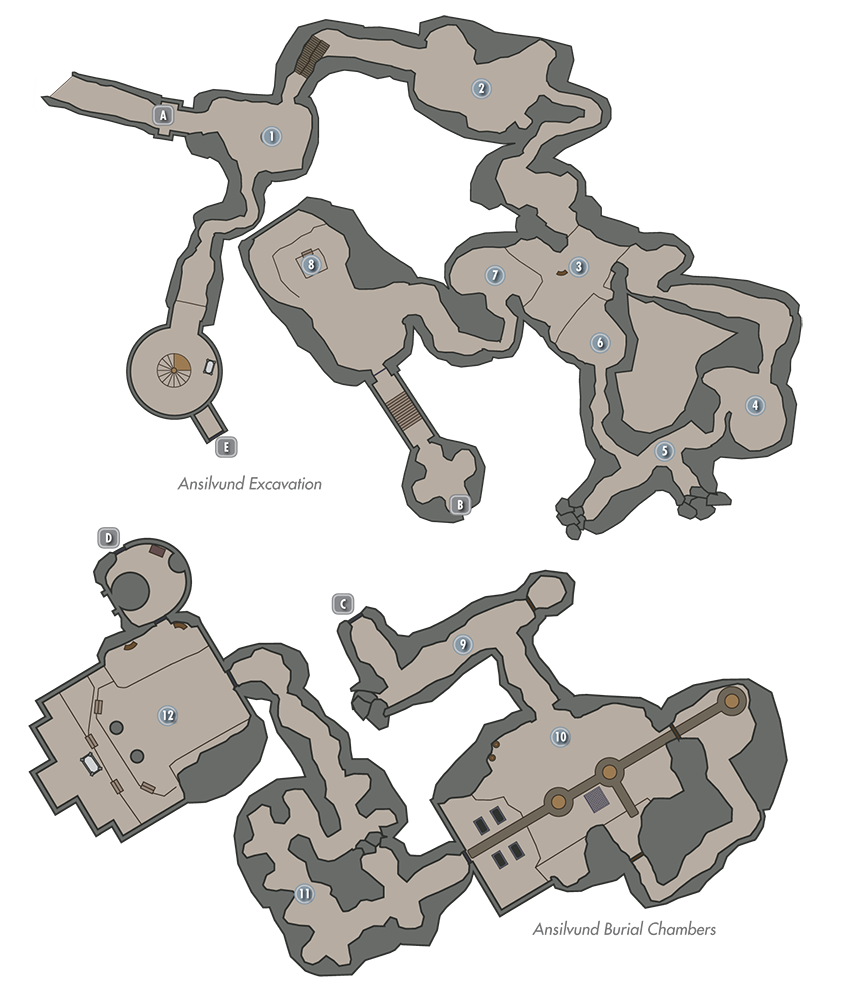
Snag a few potions and any mining tools you may need on your way into this first chamber, where a powerful Draugr lurks. Venture down the lower passage to eliminate another Draugr if you like before taking the upper trail to [2].
- Potions
- Loose gear
 Small Excavation Chamber
A mage watches over a pair of ensorcelled Draugr here, bemoaning his task of watching over them as they are forced to excavate the ruins. Try to exploit the hanging lamp and oil slick on the room’s far side. Loot the locked chest on the scaffolding as you make your way here from [1].
- Danger! Oil Lamp Trap, Oil Pool Trap
- Chest (Locked: Novice)
- Potions
- Loose gear
 Nordic Overlook Chamber
Open a locked chest as you enter this cavern, and beware the trip wire in the following passage. A haunting voice calls out to you here, initiating a new Side Quest. Loot the Draugr corpses as you proceed to [4].
- Danger! Flail Trap (trip wire), Oil Lamp Trap
- Chest (Locked: Apprentice)
- Potions
 Arcane Cave
More mages lurk in this small chamber, where various ingredients and food items are found.
 Draugr Hall
The haunting voice returns as you move through this hall, calling upon the resting dead to rise up and attack you.
 Fatal Floor Chamber
Beware: the entire center of this room rises if you step on it, delivering you up to deadly spikes that line the ceiling. Avoid the chamber’s center as you make your way through here.
- Danger! Rising Floor Trap
 Nordic Overlook Chamber Revisited
Cross elevated walkways to reach this location, where some valuable potions sit on a small table. A small chest can be found on the wooden platform overlooking the area where you first came into this chamber. Another possessed Draugr is busy digging near a large scaffold that over the doorway onward.
- Oil Lamp Traps
- Potions
 Pillar Puzzle
Beware the trip-wire trap as you approach this large cavern. A power Draugr, mage, and Flame Atronach engage you here. When the dust settles, solve the far puzzle by rotating the upper row of Nordic pillars so that they feature the same symbols as the row of glyphs hidden near the floor below (from left to right: Snake, Hawk, Whale, Snake). You may have noticed this solution in the common book Fjori and Holgier! This opens the south gate; avoid the pressure plate when crossing the footbridge or you’ll be scorched. Loot a chest on your way to the Ansilvund Burial Chambers.
- Danger! Flamethrower (pressure plate), Rockfall Trap (tripwire)
- Chest
- Potions
 Door to Ansilvund Burial Chambers
 Door to Ansilvund Excavation
 Swinging Blades Passage
Avoid the many pressure plates in this first passage—stepping on any of them causes a host of swinging blades to activate in the adjacent hall. Pick the Adept-level door at the end of this corridor to access a small nook with a locked chest and lever. Pull the lever to deactivate the swinging blades if you happened to trigger them.
- Danger! Swinging Blade Trap (pressure plates/lever)
- Chest (Locked: Master)
 Key Chamber
This Draugr-filled chamber also sports several traps. Avoid the central pressure plates or you’ll be burned by flames. Beware when taking the item off the nearby pedestal as well—removing it causes arrows to fire from the wall directly behind you. (Stand to one side to avoid damage.) Taking the key from the far pedestal causes a host of Draugr to awaken, but the key is a great help in opening the upper gates, whose Master-level locks aren’t easily picked. When you loop back around to the main chamber, sprint straight across the elevated walkway to avoid damage from traps.
- Danger! Dart Trap (pedestal pressure plate), Flamethrower (pressure plates), Oil Lamp Trap, Swinging Wall Trap (pressure plates)
- Ansilvund Key
- Chest
- Chest (Locked: Adept)
- Loose gear
 Floor Trap Passage
Lay more Draugr to rest and snag some potions as you pass through this area. Avoid the rising floor trap where the passage widens, and stand near the far wall when collecting the item off the pedestal in the nearby alcove to avoid being shot by arrows from the wall. A Skill Book rests atop another, trap-free pedestal here.
- Danger! Dart Trap (pedestal pressure plate), Rising Floor Trap
- Skill Book [Illusion]: 2920, Sun’s Dawn, v2
- Potions
 Lamp-Lit Hall
Lu’ah Al-Skaven awaits you here. You’re just in time to disrupt her nefarious ritual. However, Lu’ah manages to raise two powerful Draugr. Try knocking down the cavern’s many hanging lamps to inflict extra damage upon these dangerous foes. Kill Lu’ah to complete your Side Quest. This also frees the souls of Fjori and Holgeir, who leave a unique blade behind in thanks. Use the key you find on Lu’ah’s corpse to open the upstairs door and sack one last chest on your way back to the surface.
- Danger! Oil Lamp Traps
- Crafting: Alchemy Lab, Arcane Imbuer
- Unique Weapon: Ghostblade [53/80]
- Unusual Gem: [19/24]
- Lu’ah’s Key (Lu’ah Al-Skaven)
- Chest
- Potions
- Loose gear
 Door to Ansilvund Excavation
 Door to Ansilvund Burial Chambers