
Elder Scrolls V: Skyrim Special Edition Guide The Atlas Hold 3: The Pale
[3.08] Frostmere Crypt
[3.08] Frostmere Crypt
Related Quests
- Dungeon Quest: The Pale Lady
Recommended Level: 6
Dungeon: Bandit Camp
- Bandit
- Eisa Blackthorn
- Kyr
- Ra’jirr
- The Pale Lady
Crafting
- Grindstone
Quest Items
- Eisa’s Log
- Kyr’s Log
- Ra’jirr’s Note
Collectibles
- Skill Book [Sneak]: The Red Kitchen Reader [D1/10]
- Unique Weapon: The Pale Blade [13/80]
Special Objects
- Word Wall: Ice Form [1/3]
- Chest(s)
- Potions
- Loose gear
- Mineable ore: Iron
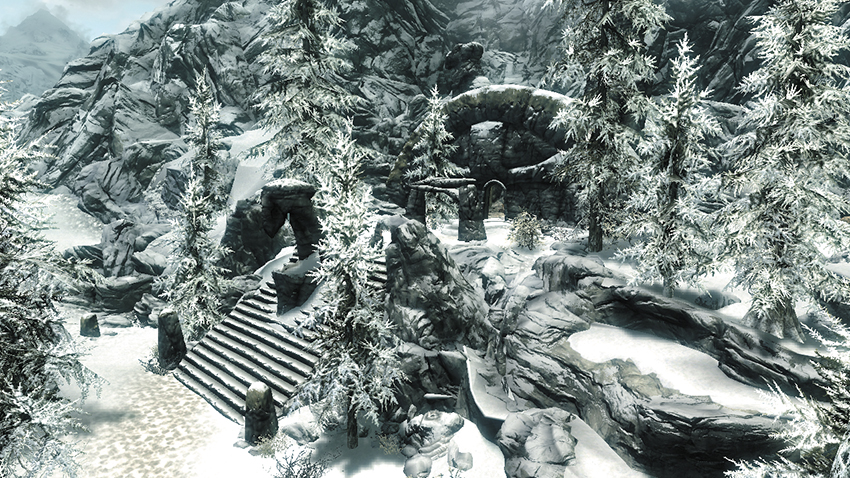
When you approach these mountain ruins, a warrior named Eisa flees down the steps, pursued by several bandits. Help her fight off the ruffians, then speak with her to begin a new quest that takes place within the nearby ruins.
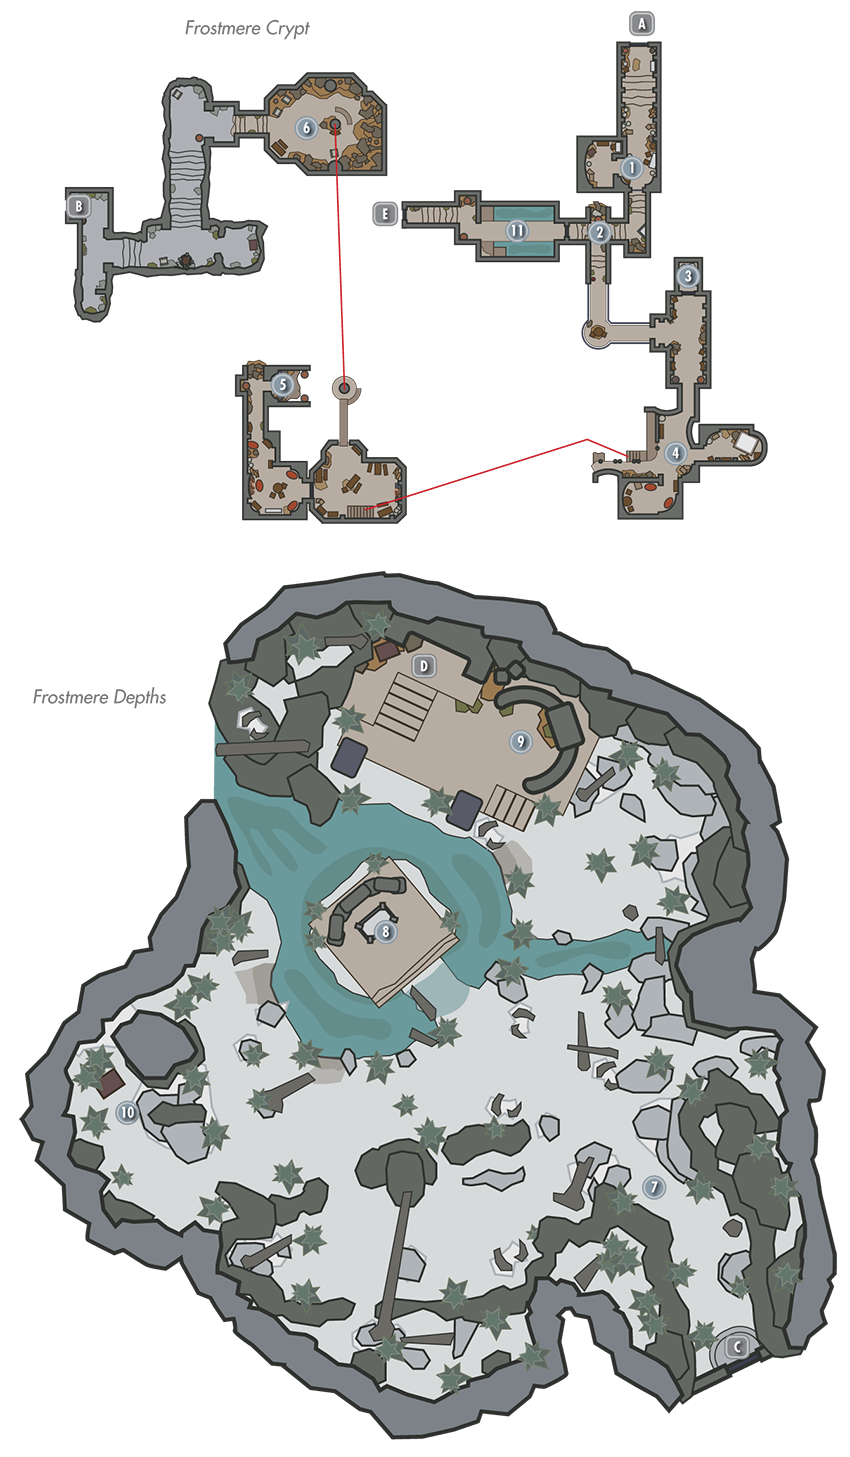
 Exit to Skyrim
 Guard Room
Slay a couple of bandits in this entry hall and loot a locked chest in the western nook. Pull the wall chain near the portcullis to open the way forward.
- Chest (Locked: Apprentice)
- Potions
- Loose gear
 Connecting Tunnels
Claim a few valuables on your way through these short passages.
- Potion
- Loose gear
 Grindstone Alcove
Grab a Skill Book from a shelf before picking a locked door to enter this small nook, where a crafting station and some valuable gear is found.
- Area Is Locked (Adept)
- Skill Book [Sneak]: The Red Kitchen Reader [D1/10]
- Crafting: Grindstone
- Loose gear
 Upper Quarters
Search these small bedchambers to loot a chest and collect important quest-related documents.
- Eisa’s Journal (if you didn’t take it from outside)
- Kyr’s Log
- Ra’jirr’s Note
- Chest
- Potion
- Loose gear
 Lever Overlook
Silence more bandits, then swipe a potion and loot an urn on your way to this overlook, where a Bandit Archer awaits. Pull the nearby lever to cause a drawbridge to fall, then head to [6] and head north across this new bridge.
- Potion
 Drawbridge and Stairwell
Cross the drawbridge to enter this chamber from the south, then descend some stairs and slay a Bandit Mage in the lower chamber. Press onward through a winding mining tunnel, looting a chest and optionally mining some Iron Ore on your way to the crypt’s lower depths.
- Chest
- Mineable ore: Iron
- Loose gear
 Door to Frostmere Depths
 Door to Frostmere Crypt
 Shrouded Grove
A massive, overgrown cavern lies beneath the Frostmere Crypt. You find Kyr just inside—he’s near death and gasps out a few final words before expiring. Continue deeper into the grove, and you’ll spot Ra’jirr racing to the altar. The wraithlike form of the Pale Lady emerges and strikes him down before turning her wrath on you.
 The Pale Blade
Claim the Pale Blade from Ra’jirr’s corpse, then deal with the Pale Lady. Slay her or return the sword to the stand on the central altar to seal her away. Either choice completes this quest.
- Unique Weapon: The Pale Blade [13/80]
 Word Wall
After defeating the Pale Lady, go upstairs and follow the sound of chanting to this location, where a Word Wall bestows you with an new Word of Power. Scale more steps and open a large chest near the exit door to the crypts. Don’t leave just yet!
- Word Wall: Ice Form [1/3]
- Chest
 Chest Nook
Raid a large locked chest that rests on a rise in this corner of the cavern. There’s also some gear on a nearby skeleton that’s just to the left as you step out into the grove proper.
- Chest (Locked: Master)
- Loose gear
 Door to Frostmere Crypt
 Door to Frostmere Depths
 Watery Chamber
Take a quick dive underwater and try to open a chest for some loot before scaling this watery chamber’s ramp. Unbar the far door and go through to return to the crypt’s entrance.
- Chest (Locked: Adept)
- Loose gear