
Elder Scrolls V: Skyrim Special Edition Guide The Atlas Hold 5: The Reach
[5.14] Ragnvald
[5.14] Ragnvald
Related Quests
Side Quest: Masks of the Dragon Priests*
Dungeon Quest: Otar’s Mad Guardians*
Recommended Level: 24
Dungeon: Dragon Priest Lair
Guardian Saerek
Guardian Torsten
Otar the Mad
Crafting
Arcane Enchanter
Dangers
Dart Trap (pressure plates)
Flamethrowers (iron door)
Oil Lamp Traps
Oil Pool Traps
Swinging Blade Trap
Trapped Chest
Quest Items
Saerek’s Skull Key
Torsten’s Skull Key
Collectibles
Dragon Priest Mask: Otar [7/10]
Skill Book [Restoration]: Mystery of Talara, v2
Special Objects
Word Wall: Kyne’s Peace [1/3]
Chest(s)
Potions
Loose gear
Exterior
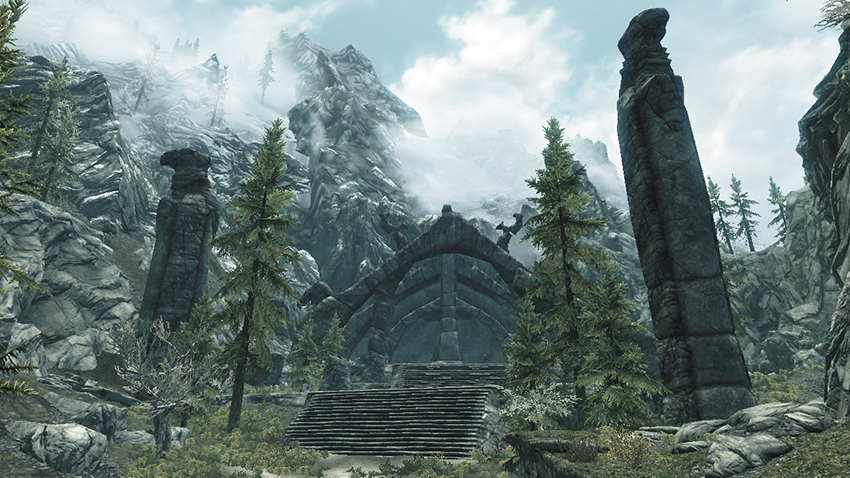
These ancient ruins lie within the reach’s western mountains, on the edge of Skyrim. Dispatch a few Draugr as you scale the massive stone steps that lead into the temple. Before you enter, check to the left (southwest) of the main entrance; the narrow side hides a dead bandit with some loot.
Interior (Ragnvald Temple)
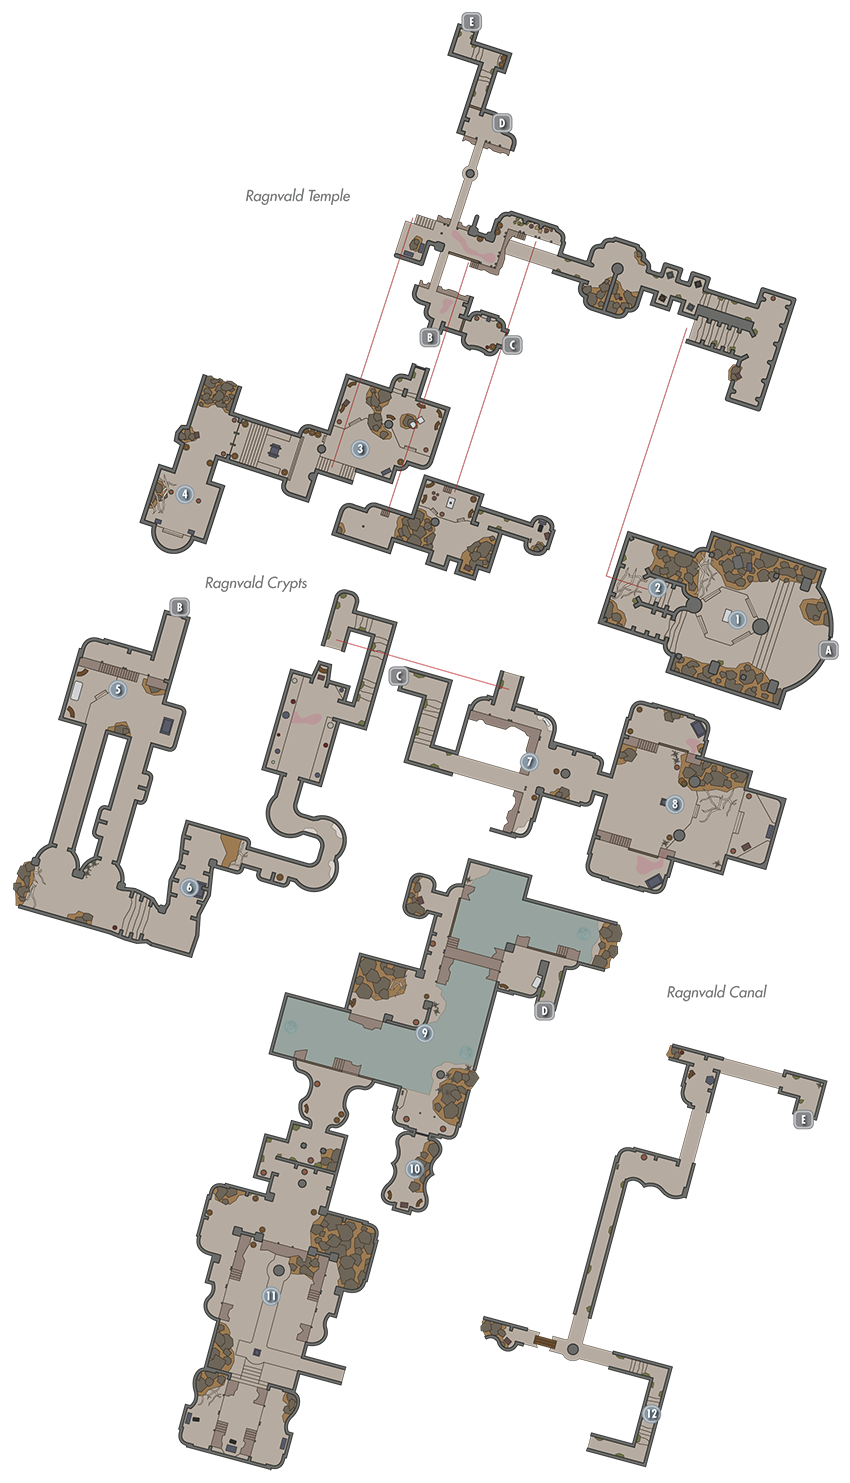
 Door to Skyrim
 Grand Embalming Chamber
The cavernous temple is silent. Pass by the desiccated form on the table to the narrowing tunnel steps ahead (west) of you.
 Dead Draugr Steps
The tunnel steps lead to a small landing with a dead Draugr. The next landing (with the two ceremonial stone torch burners, and chest) has a further tunnel that’s narrower still. This winds along to the large hub chamber of Otar.
- Potion
- Chest
 Tomb of Otar
This sprawling chamber has exits to both side catacombs (the Crypts and Canal), and Draugr both on the walkways and the stone ground below (some are standing below Oil Lamps you can smash). Check this area for some scattered potions and two chests. Continue west to a strange and ornate sarcophagus with two odd slots in them. Return with two Skulls (one from each catacomb), insert them into the slots, and open the sarcophagus, summoning the mighty Dragon Priest Otar!
 Word Wall of Kyne
Once Otar is defeated, the spears preventing you from accessing this chamber retract. Aside from the Word Wall, there are two chests (a locked one is found in a northern nook).
- Word Wall: Kyne’s Peace [1/3]
- Chest
- Chest [Apprentice]
 Door to Ragnvald Crypts (upper)
 Door from Ragnvald Crypts (upper)
This has a door bar behind it, meaning you can only access it from the Crypts area, the first time you exit.
 Door to Ragnvald Canal (lower)
 Door from Ragnvald Canal (upper)
This has a door bar behind it, meaning you can only access it from the Canal area, the first time you exit.
Interior (Ragnvald Crypts)
Door to Ragnvald Temple
 Draugr Guard Chamber
Awaken the Draugr as you descend into this first chamber, then take the right (west) passage to avoid the left passage’s traps.
- Danger! Dart Trap (Pressure Plates)
 Burial Passages
Slay a host of powerful Draugr as you progress.
 Offering Chamber
Kill any foes, then watch out of the trapped chest that tempts you; open it from as far away as possible to avoid being impaled by spears. Then head to the walkways above this room to reach the final chamber, temporarily ignoring the upper tunnel and steps to the west, which lead you back into the Temple, after you face Saerek.
- Danger! Trapped chest
- Chest
- Skill Book (Restoration): Mystery of Talara, v2
 Guardian Saerek’s Tomb
This two-storey chamber has Draugr to slay first, before you inspect and take the strange skull on the pedestal in front of you. Then take it, and face the fearsome Guardian Saerek in combat!
- Danger! Oil Lamp Trap, Oil Pool Trap
- Saerek’s Skull Key
- Chest
Door to Ragnvald Temple
Interior (Ragnvald Canal)
Door to Ragnvald Temple
 North Canal Chamber
Search northwest to discover a chest. Then pull a southeast lever to lower a drawbridge ahead, but before you cross, open the nearby iron door from as far away as possible (or unlock the Trap Trigger [Expert]): a fire trap activates when the door opens.
- Chest
- Potions
 Nook
Nook
Gather the items you need from the chest in here.
- Chest
 Guardian Torsten’s Tomb
 Escape Route
Advance through the small maze of corridors and into this two-storey tomb. Swipe another skull from the central pedestal here to battle Guardian Torsten, who emerges from the far sarcophagus. Slay his brethren first, if you want fewer enemies to face at a time. Go upstairs to loot a locked chest, take the upper north corridor back to the previous cavern, jumping the pressure plate at the corridor’s start to avoid activating a nasty trap. open one last chest near the arcane Enchanter before following the walkways back to the temple.
- Danger! Flamethrowners (Iron Door), Swinging Blade Trap (Pressure Plate)
- Arcane Enchanter
- Chest
- Chest [Novice]
- Torsten’s Skull Key