
Elder Scrolls V: Skyrim Special Edition Guide The Atlas Hold 8: Falkreath Hold
[8.08] Twilight Sepulcher
[8.08] Twilight Sepulcher
Related Quests
- Side Quest: Kyne’s Sacred Trials
- Thieves Guild Quest: Darkness Returns
Recommended Level: 8
Dungeon: Special
- Karliah
- Nocturnal
- Nightingale Sentinel
- Gallus
Crafting
- Alchemy Lab
- Dangers Battering Ram Trap (trapped door)
- Dart Trap (pressure plates/tripwires)
- Lethal Light
- Spear Trap (pressure plate)
- Swinging Blade Trap (proximity)
Collectibles
- Skill Book [Lockpicking]: Proper Lock Design
- Skill Book [Sneak]: Sacred Witness
- Area Is Locked (quest required)
- Chests
- Potions aplenty
- Loose gear
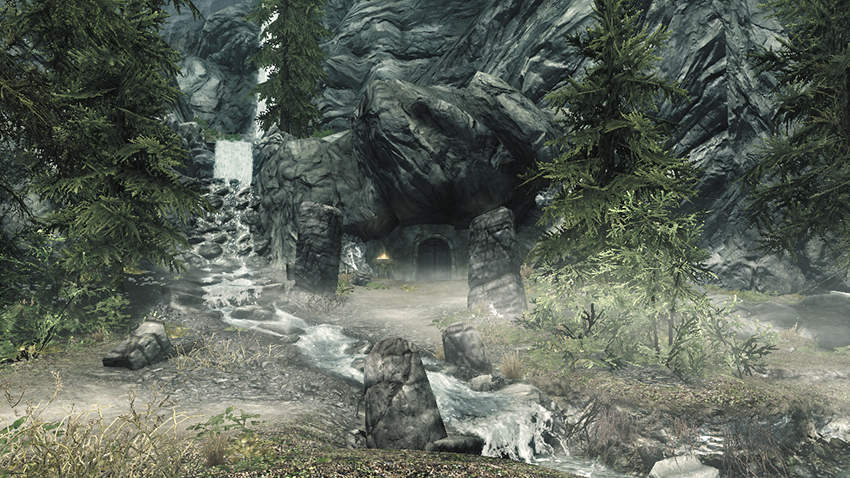
This large burial site has been carved into Falkreath’s western mountains and holds several trials to test those who would probe its depths. You cannot enter this place until you’ve obtained the “Darkness Returns” quest from the Thieves Guild.
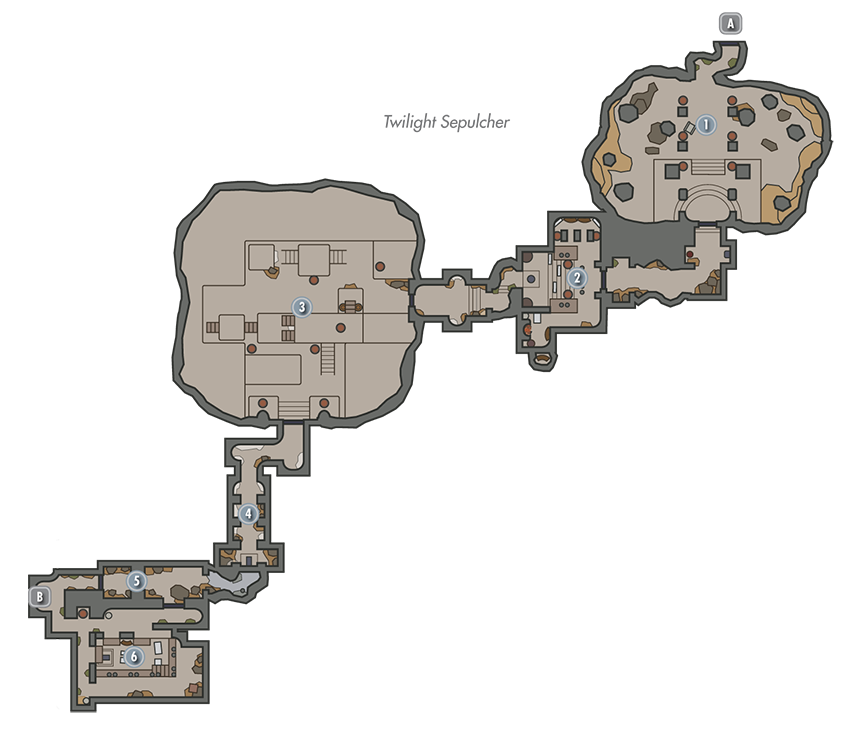
 Exit to Skyrim
 Entry Chamber
Speak with the friendly Nightingale Sentinel in the first chamber to advance your quest, and question him thoroughly to obtain an optional side objective that leads you to the nearby remains of an adventurer named Nystrom, whose journal provides clues on how to survive the trials ahead.
- Nystrom’s Satchel
- Loose gear
 First Trial: Sentinels of the Dark
Sneak to avoid the two vicious Nightingale Sentinels in this chamber—they’ll quickly cut you to ribbons. If you can head into the upper southwest study, press a button on the ground near the table to expose a secret nook containing treasure. Sidestep a pressure plate as you sneak through the passage that leads to [3], avoiding another Nightingale Sentinel as you go.
- Danger! Dart Trap (pressure plate)
- Crafting: Alchemy Lab
- Chest
- Knapsack
- Potions aplenty
 Second Trial: Vigilance Everlasting
Avoid the light and keep to the darkness as you navigate this massive chamber—for the light here is fatal. Equip a light source of your own, such as a torch, to help you spot traps that are concealed in the dark. No enemies lurk here.
- Danger! Lethal Light, Dart Trap (trip wires)
 Third Trial: The Offering
Loot a chest as you make your way to this quiet shrine. Collect the offerings near the statue if you like before pulling two wall chains near the side torches to open a passage behind the statue.
- Chest
 Fourth Trial: Path to Salvation
Don’t let this passage’s swinging blades stupefy you into stepping on the pressure plate that lies before them. If you can, open the Master-level iron door to the south to sneak through [6] and bypass the blades altogether. Otherwise, you must time it right and sprint straight through—you’ll trigger another pressure plate midway through, so move to the left the moment you clear the passage to avoid being shot by arrows. Beware of another as you exit the blade passage, and stand back before opening the iron door ahead to avoid being struck by a battering ram (or simply disable its trap hinge). Proceed through the door that follows to reach the inner sanctum.
- Danger! Battering Ram Trap (door), Swinging Blade Trap (proximity), Spear Trap (pressure plate), Dart Trap (pressure plates)
 Great Hall
Pick a locked door to enter this large chamber and avoid the swinging blade passage altogether. A few items of interest are found in the chamber’s lower central area, including a pair of Skill Books. Sneak through here to avoid alerting the two roaming Nightingale Sentries.
- Skill Book [Lockpicking]: Proper Lock Design
- Skill Book [Sneak]: Sacred Witness
- Potions
- Loose gear
 Door to Twilight Sepulcher Inner Sanctum
Final Trial: Hesitate Not
Sprint down a long, empty corridor to reach this deep pit. Drop down—you’ll suffer a bit of damage—then loot a skeleton to discover an informative note. You seem trapped but are soon whisked away to an alternate version of the pit chamber by the magic of the Skeleton Key that you possess. Insert the key into the central lock on the floor to summon Nocturnal. Speak with Karliah after Nocturnal departs, then watch her reunion with Gallus. Afterward, decide which portal to enter—each grants you a different (and substantial) bonus to a certain thieving discipline.