
Borderlands 2 Game of the Year Guide Hyperion's Most Wanted
Zero
AS THE ASSASSIN
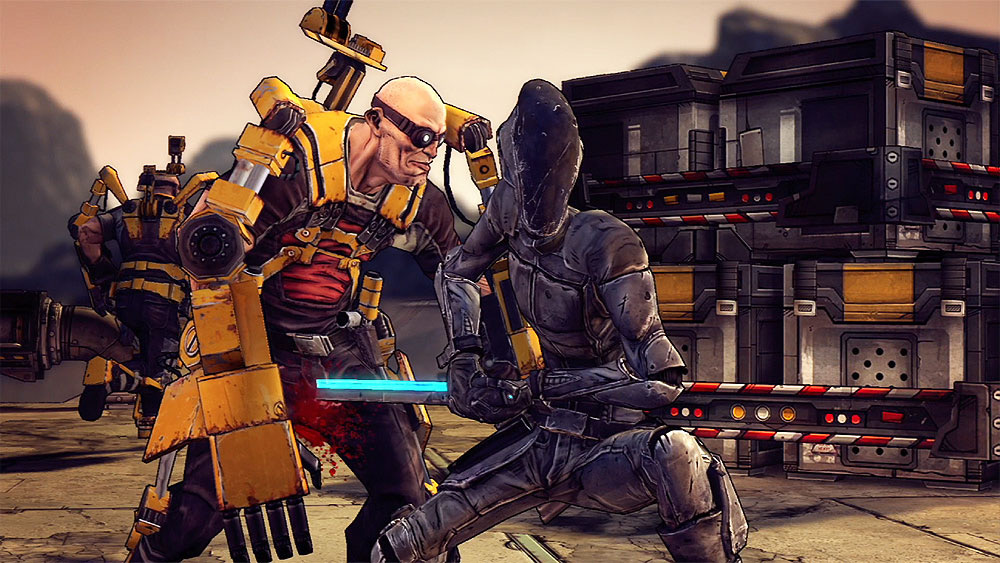
Zero is a question mark, wrapped inside an enigma box, covered in mystery wrapping, and topped with a bow of confusion. Meaning, nobody knows who or what he/she/it is. All that is known of Zero is that he appeared on Pandora a few months ago, accepted a few assassination contracts, and suddenly started looking for the next Vault. Rumor has it that Zero is just looking for the next big challenge. Granted, rumor also says that Zero has four fingers because he’s actually an alien robot with the face of a demon. So, rumor can go suck it.
 Action Skill: DECEPTION
Zero’s ability to pump out heavy damage is largely thanks to his Action Skill Deception and the skills that augment it. At the beginning of Deception, Zero deploys a convincing hologram of himself, then becomes invisible. Being invisible is like Phasewalking as Lilith in the first Borderlands—enemies can’t see you and won’t target you. They’ll instead target the hologram. The first attack you make out of Deception will “break” the invisibility, and that attack (if successful) will inflict greatly amplified damage. The closer you wait until just before Deception ends, the larger the bonus becomes! All bonuses stack with one another. So as an example, your cloaked Deception critical hit might also be boosted by the Headshot skill, and by zooming in with Kill Confirmed, and by a critical damage boost from your weapon, and more of the same from Badass Tokens, and so on… It is eventually not unreasonable for you to be able to stack so many bonuses to critical damage that you see damage in the hundreds of thousands!
Deception has a very short cooldown of only 15 seconds, so it can and should be used frequently. When Deception is active, the closer you wait until the very last moment the decoy is actually up before you strike to prematurely break Deception, the bigger than combat boosts will be. Activate Deception, and then melee right away? A bonus, sure, but not anything like what’s possible. Activate Deception, and then melee at the very last moment? Huge boosts: up to +650% Melee Damage, +200% Gun Damage, and +250% Gun Critical Hit Damage!
Deception gives you one of two things and is adaptable depending on the situation. If you end up in serious trouble, deploying Deception and then sprinting the hell out of there will save you nine times out of 10. And on the offensive, dropping Deception gives you an ideal interval with which to stack all the damage you can into a single ideal strike against a precision-chosen target. And your own bonuses aren’t the only thing playing into this… allies may whittle away the first half of the target’s health while you move in, allowing your Deception strike to benefit from Killing Blow. Maya as a teammate may have totally incapacitated the target with Phaselock, or Salvador may have temporarily punched their lights out with Fistful of Hurt, or a teammate may have knocked them flat and briefly stunned by hitting them with a truck, making them sitting ducks for a perfect headshot. Zero himself also has a unique debuff called Death Mark only he can apply, pushing the envelope further still.
Sniping
Zero’s Sniping tree is the most focused in the game—every single skill relates directly to sniping. There is utility here for general gunplay, with most skills applying to other gun types, as well. But the real weight here is for sniper rifles, especially with the second to last skill and the capstone, which is sniper rifle-specific. If you’re running a kill skill build during solo play, you’ll want Killer in the second tier here. There’s not much else to say—this is a seriously stacked and pretty straightforward gunplay tree. If you have good aim, score a lot of criticals, and use equipment and Badass Token bonuses that jive with what’s found here, you’ll inflict significant long-range damage.
TIER 1
 Headshot
Increases Critical Hit Damage.
|
Level 1 |
Critical Hit Damage: +4% |
|
Level 2 |
Critical Hit Damage: +8% |
|
Level 3 |
Critical Hit Damage: +12% |
|
Level 4 |
Critical Hit Damage: +16% |
|
Level 5 |
Critical Hit Damage: +20% |
 0ptics
Increases your Zoom with all gun types. Also, your aim is not disrupted as much when taking damage.
|
Level 1 |
Zoom: +3%, Aim Steadiness: +12% |
|
Level 2 |
Zoom: +6%, Aim Steadiness: +24% |
|
Level 3 |
Zoom: +9%, Aim Steadiness: +36% |
|
Level 4 |
Zoom: +12%, Aim Steadiness: +48% |
|
Level 5 |
Zoom: +15%, Aim Steadiness: +60% |
TIER 2
 Killer
Kill skill. Killing an enemy gives you bonus Critical Hit Damage and Reload Speed for a few seconds.
|
Level 1 |
Critical Hit Damage: +10%, Reload Speed: +15% |
|
Level 2 |
Critical Hit Damage: +20%, Reload Speed: +30% |
|
Level 3 |
Critical Hit Damage: +30%, Reload Speed: +45% |
|
Level 4 |
Critical Hit Damage: +40%, Reload Speed: +60% |
|
Level 5 |
Critical Hit Damage: +50%, Reload Speed: +75% |
 Precision
Improves your Accuracy with all gun types.
|
Level 1 |
Accuracy: +5% |
|
Level 2 |
Accuracy: +10% |
|
Level 3 |
Accuracy: +15% |
|
Level 4 |
Accuracy: +20% |
|
Level 5 |
Accuracy: +25% |
TIER 3
 0ne Shot 0ne Kill
The first shot fired from a fully loaded magazine causes Bonus Damage.
|
Level 1 |
Gun Damage: +12% |
|
Level 2 |
Gun Damage: +24% |
|
Level 3 |
Gun Damage: +36% |
|
Level 4 |
Gun Damage: +48% |
|
Level 5 |
Gun Damage: +60% |
 Bore
Bore
Your shots pierce through enemies. If your shot hits another enemy after piercing the first foe, it causes massive Bonus Damage. B0re does not work with rockets and some special projectiles. Also, while Deception is active, your visor will highlight enemy crit locations.
|
Level 1 |
Each additional target hit takes +100% damage, enemy crit spots highlighted while Deception is active |
 Velocity
Increases Bullet Speed, Damage, and Critical Damage with all guns.
|
Level 1 |
Bullet Speed: +20%, Critical Hit Damage: +3%, Gun Damage: +2% |
|
Level 2 |
Bullet Speed: +40%, Critical Hit Damage: +6%, Gun Damage: +4% |
|
Level 3 |
Bullet Speed: +60%, Critical Hit Damage: +9%, Gun Damage: +6% |
|
Level 4 |
Bullet Speed: +80%, Critical Hit Damage: +12%, Gun Damage: +8% |
|
Level 5 |
Bullet Speed: +100%, Critical Hit Damage: +15%, Gun Damage: +10% |
TIER 4
 Kill Confirmed
Aiming Down the Sights with your gun grants you a bonus to Critical Hit Damage. The longer you aim down the sights, the greater the bonus.
|
Level 1 |
Up to +8% Critical Hit Damage |
|
Level 2 |
Up to +16% Critical Hit Damage |
|
Level 3 |
Up to +24% Critical Hit Damage |
|
Level 4 |
Up to +32% Critical Hit Damage |
|
Level 5 |
Up to +40% Critical Hit Damage |
TIER 5
 At 0ne with the Gun
Greatly improves your Accuracy with sniper rifles when shooting from the hip. Also increases your Reload Speed and Magazine Size with sniper rifles.
|
Level 1 |
Sniper Hip-Shot Accuracy: +25%, Sniper Reload Speed: +10%, Sniper Magazine Size: +1 |
|
Level 2 |
Sniper Hip-Shot Accuracy: +45%, Sniper Reload Speed: +20%, Sniper Magazine Size: +2 |
|
Level 3 |
Sniper Hip-Shot Accuracy: +65%, Sniper Reload Speed: +30%, Sniper Magazine Size: +3 |
|
Level 4 |
Sniper Hip-Shot Accuracy: +85%, Sniper Reload Speed: +40%, Sniper Magazine Size: +4 |
|
Level 5 |
Sniper Hip-Shot Accuracy: +105%, Sniper Reload Speed: +50%, Sniper Magazine Size: +5 |
TIER 6
 Critical Ascension
Scoring a Critical Hit with a sniper rifle increases your Damage and Critical Hit Damage with sniper rifles. This effect can stack up to 999 times. Stacks slowly decay if you haven’t scored a Critical Hit in a while.
|
Level 1 |
+6% Critical Hit Damage per stack, +5% Damage per stack |
Cunning
Cunning is a strange smorgasbord that allows mild deepening of the advantages of both Sniping and Bloodshed while also throwing in some unique abilities you won’t find elsewhere.
If you go into the Cunning tree at all, Ambush is an easy pick, as it jacks up damage against enemies targeting someone who isn’t you. So, the bonus will come into play every single time you hit an adversary out of Deception, and plenty of the rest of the time, too.
Rising Shot is an interesting skill that is directly opposed to the Be Like Water skill in the Bloodshed tree. Be Like Water grants bonuses to alternating gun and melee attacks; Rising Shot grants a slowly rising bonus to repeated melee or gun attacks, without alternating between them. It’s not ridiculous to think about having both of these skills, so that regardless of whether your next attack is with a gun or a swing, you’ll have some bonus!
Death Mark can be thought of as an extra mini-Slag. Unforeseen grants a mild taste of what it’s like to be Cataclysm Maya… each time Deception is broken and the decoy is shown to be a fraud, the decoy explodes in a shocking electric shower. It never hurts to send a little groovy electricity through enemy bodies, and foes fooled by the hologram and attacking it are sure to be exposed, but you’ll appreciate Unforeseen the most against shielded adversaries and stalkers. Mostly stalkers.
And finally, the presence of Two Fang, and it preceding a potentially long-range debuffing ability, means that you can think of Cunning as an alternate Sniping build. Perhaps you’d take the roughly one-in-three chance that your sniper rifle will fire two shots for the price of one, along with Death Marking Kunai, over At One With the Gun and Critical Ascension in the Sniping tree.
TIER 1
 Fast Hands
Increases your Reload Speed and Weapon Swap speed.
|
Level 1 |
Reload Speed: +5%, Weapon Swap Speed: +10% |
|
Level 2 |
Reload Speed: +10%, Weapon Swap Speed: +20% |
|
Level 3 |
Reload Speed: +15%, Weapon Swap Speed: +30% |
|
Level 4 |
Reload Speed: +20%, Weapon Swap Speed: +40% |
|
Level 5 |
Reload Speed: +25%, Weapon Swap Speed: +50% |
 Counter Strike
After getting hit, your next melee attack has a chance to deal massive Melee Damage.
|
Level 1 |
Counter Strike Damage: +50% |
|
Level 2 |
Counter Strike Damage: +100% |
|
Level 3 |
Counter Strike Damage: +150% |
|
Level 4 |
Counter Strike Damage: +200% |
|
Level 5 |
Counter Strike Damage: +250% |
TIER 2
 Fearless
While your shield is depleted, you gain increased Gun Damage and Fire Rate.
|
Level 1 |
Fire Rate: +5%, Gun Damage: +3% |
|
Level 2 |
Fire Rate: +10%, Gun Damage: +6% |
|
Level 3 |
Fire Rate: +15%, Gun Damage: +9% |
|
Level 4 |
Fire Rate: +20%, Gun Damage: +12% |
|
Level 5 |
Fire Rate: +25%, Gun Damage: +15% |
 Ambush
Increases Damage when attacking from behind or when attacking an enemy that is targeting someone other than you.
|
Level 1 |
Damage: +4% |
|
Level 2 |
Damage: +8% |
|
Level 3 |
Damage: +12% |
|
Level 4 |
Damage: +16% |
|
Level 5 |
Damage: +20% |
TIER 3
 Rising Shot
Each successful ranged or melee attack gives you a Damage bonus for a short time. This bonus can stack up to five times. Faster weapons can gain stack more quickly, but slower weapons retain stacks for a longer period of time.
|
Level 1 |
Gun Damage per stack: +2.0%, Melee Damage per stack: +1.8% |
|
Level 2 |
Gun Damage per stack: +4.0%, Melee Damage per stack: +3.6% |
|
Level 3 |
Gun Damage per stack: +6.0%, Melee Damage per stack: +5.4% |
|
Level 4 |
Gun Damage per stack: +8.0%, Melee Damage per stack: +7.2% |
|
Level 5 |
Gun Damage per stack: +10.0%, Melee Damage per stack: +9.0% |
 Death Mark
Dealing Melee Damage marks the target for a short duration. Marked targets take additional Damage from all sources. Also, it’s not an easy thing to live with.
|
Level 1 |
Marked targets take 20% additional Damage from all sources. Marks last for eight seconds |
 Unforeseen
Your holographic decoy explodes when you become visible again, causing shock damage to nearby enemies.
|
Level 1 |
Rank 1 Shock Damage |
|
Level 2 |
Rank 2 Shock Damage |
|
Level 3 |
Rank 3 Shock Damage |
|
Level 4 |
Rank 4 Shock Damage |
|
Level 5 |
Rank 5 Shock Damage |
TIER 4
 Innervate
While Deception is active, you gain increased Gun Damage, health regeneration, and Movement Speed.
|
Level 1 |
Gun Damage: +2%, Regenerate 0.8% of your Maximum Health per second. Movement Speed: +7% |
|
Level 2 |
Gun Damage: +4%, Regenerate 1.6% of your Maximum Health per second. Movement Speed: +14% |
|
Level 3 |
Gun Damage: +6%, Regenerate 2.4% of your Maximum Health per second. Movement Speed: +21% |
|
Level 4 |
Gun Damage: +8%, Regenerate 3.2% of your Maximum Health per second. Movement Speed: +28% |
|
Level 5 |
Gun Damage: +10%, Regenerate 4.0% of your Maximum Health per second. Movement Speed: +35% |
TIER 5
 Two Fang
Every time you fire a gun, you have a chance to fire twice.
|
Level 1 |
Chance to fire two shots: 6% |
|
Level 2 |
Chance to fire two shots: 12% |
|
Level 3 |
Chance to fire two shots: 18% |
|
Level 4 |
Chance to fire two shots: 24% |
|
Level 5 |
Chance to fire two shots: 30% |
TIER 6
 Death Blossom
Action Skill augment. Press the Action Skill button while Deception is active to throw a handful of Kunai. Each Kunai will explode with a random elemental type. Kunai do not benefit from Deception damage bonuses, but throwing Kunai does not end Deception and can apply Death Mark.
|
Level 1 |
May throw Kunai five times per cooldown |
Bloodshed
The skills in the Bloodshed tree make Zero into a murderous, invisible ninja, traveling unseen from distracted victim to distracted victim. The very first two skills both enhance melee damage (Killing Blow in a particularly interesting way—melee blows are drastically stronger against badly damaged enemies, increasing killshot chance). Two kill skills (and really, four kill skills unofficially—Resurgence and Many Must Fall are both pretty much kill skills, too) here grant terrific bonuses. It’s great to incorporate them all if you’re hogging all the kills to yourself in a solo game, or if you’re playing with just one friend and you’re taking point. Their usefulness diminishes in full games, though that doesn’t mean Zero can’t focus on insane melee damage.
TIER 1
 Killing Blow
Massively increases Melee Damage against enemies with low health.
|
Level 1 |
Melee Damage: +100% |
|
Level 2 |
Melee Damage: +200% |
|
Level 3 |
Melee Damage: +300% |
|
Level 4 |
Melee Damage: +400% |
|
Level 5 |
Melee Damage: +500% |
 Iron Hand
Increases your Melee Damage and your Maximum Health.
|
Level 1 |
Melee Damage: +3%, Maximum Health: +3% |
|
Level 2 |
Melee Damage: +6%, Maximum Health: +6% |
|
Level 3 |
Melee Damage: +9%, Maximum Health: +9% |
|
Level 4 |
Melee Damage: +12%, Maximum Health: +12% |
|
Level 5 |
Melee Damage: +15%, Maximum Health: +15% |
TIER 2
 Grim
Grim
Kill skill. Killing an enemy causes your shields to quickly regenerate and increases your Action Skill Cooldown Rate for a few seconds.
|
Level 1 |
Regenerates 0.7% of your shield per sec. Deception Cooldown Rate: +1.5% |
|
Level 2 |
Regenerates 1.4% of your shield per sec. Deception Cooldown Rate: +3.0% |
|
Level 3 |
Regenerates 2.1% of your shield per sec. Deception Cooldown Rate: +4.5% |
|
Level 4 |
Regenerates 2.8% of your shield per sec. Deception Cooldown Rate: +6.0% |
|
Level 5 |
Regenerates 3.5% of your shield per sec. Deception Cooldown Rate: +7.5% |
 Be like Water
Shooting an enemy improves the Melee Damage of your next melee attack. Melee attacks improve the Shooting Damage of your next shot.
|
Level 1 |
Gun Damage: +4%, Melee Damage: +6% |
|
Level 2 |
Gun Damage: +8%, Melee Damage: +12% |
|
Level 3 |
Gun Damage: +12%, Melee Damage: +18% |
|
Level 4 |
Gun Damage: +16%, Melee Damage: +24% |
|
Level 5 |
Gun Damage: +20%, Melee Damage: +30% |
TIER 3
 Followthrough
Kill skill. Killing an enemy increases your Movement Speed, Melee Damage, and Gun Damage for a few seconds.
|
Level 1 |
Movement Speed: +8%, Gun Damage: +6%, Melee Damage: +8% |
|
Level 2 |
Movement Speed: +16%, Gun Damage: +12%, Melee Damage: +16% |
|
Level 3 |
Movement Speed: +24%, Gun Damage: +18%, Melee Damage: +24% |
|
Level 4 |
Movement Speed: +32%, Gun Damage: +24%, Melee Damage: +32% |
|
Level 5 |
Movement Speed: +40%, Gun Damage: +30%, Melee Damage: +40% |
 Execute
Melee override skill. While Deception is active and a target is under your crosshairs, press the Melee Button to dash forward a short distance and perform a special melee attack, dealing massive damage.
|
Level 1 |
Execute range: 3 meters |
 Backstab
Your melee attacks deal Bonus Melee Damage when hitting an enemy in the back.
|
Level 1 |
Backstab: +8% melee damage |
|
Level 2 |
Backstab: +16% melee damage |
|
Level 3 |
Backstab: +24% melee damage |
|
Level 4 |
Backstab: +32% melee damage |
|
Level 5 |
Backstab: +40% melee damage |
TIER 4
 Resurgence
Killing an enemy with a melee attack restores health. The lower your health, the more health you receive.
|
Level 1 |
Restores up to 4% of your health |
|
Level 2 |
Restores up to 8% of your health |
|
Level 3 |
Restores up to 12% of your health |
|
Level 4 |
Restores up to 16% of your health |
|
Level 5 |
Restores up to 20% of your health |
TIER 5
 Like the Wind
While moving, you gain increased Melee Damage and Gun Damage.
|
Level 1 |
Gun Damage: +3%, Melee Damage: +3% |
|
Level 2 |
Gun Damage: +6%, Melee Damage: +6% |
|
Level 3 |
Gun Damage: +9%, Melee Damage: +9% |
|
Level 4 |
Gun Damage: +12%, Melee Damage: +12% |
|
Level 5 |
Gun Damage: +15%, Melee Damage: +15% |
TIER 6
 Many Must Fall
Killing an enemy with a melee attack while Deception is active causes you to deploy another holographic decoy, re-stealth, and add time to Deception’s duration. This can be done multiple times in succession.
|
Level 1 |
“Call no man happy ‘til he is dead. Happy, happy, happy, happy, happy…” |
Solo Play
Zero is by far the most damage focused character—more than any other Vault Hunter in Pandora’s history, what he’s bringing to the table is the ability to spike damage on solo targets. “A lot of damage” means that if you stick with it long enough, you are going to see what it looks like when you deal over a million damage in one single strike. (There are enemies that have hit points in the hundreds of millions too, though, so don’t go thinking Zero is a total one-enigmatic-being-army yet.) That his Deception hologram distracts enemies similar to Axton’s Sabre Turret is the icing on the cake. Zero’s purpose is to deal craploads of damage without being a target himself. Whether you build him as a sniper down Sniping or a slasher down Bloodshed is up to you, but when you have enough skill points to do it, maximizing one way or the other will be the way to go.
Depending on your playstyle and your friends, you might take a brief moment to consider the Cunning capstone, Death Blossom, over the admittedly incredible cappers in either other tree; Death Mark is quite nice indeed, like an extra half-Slag on top of anything else, and only Zero can apply it, but if you’re playing a sniping-oriented Zero, you won’t often be applying Death Mark via melee. Your Deception will be more a tool you use to get out of trouble or to stack with Kill Confirmed etc. than to distract and set up Ambush and Backstab out of Deception in the midst of a big scrum. So, if you take Death Blossom over Critical Ascension you lose some peak damage capability, but you gain the ability to use Deception more frequently just to spam all five waves of Kunai at the party’s current targets, before going right back to sniping with a critical shot out of Deception. The next time Deception is ready, time to throw more Kunai. So you can apply Zero’s unique debuff (along with random elemental status effects!) while still hanging back in a high-damage sniping role.
Co-operative Play
Co-operative / There’s a word I do not like / What do friends matter?
The closest Zero gets to team consideration in skills involves using Unforeseen to turn the decoy into a shocking distraction and Death Mark to add a decent chunk to anyone’s damage. Apart from that, his teamwork involves universal gestures of etiquette expected of any Vault Hunter, regardless of class or build—for example, don’t do annoying things like kill near-dead enemies or chump peons right next to an ally who is trying to score Second Wind, and generally try to kill the things your teammates are actually killing. But apart from that, Zero’s battlefield interactions are limited to those between him and his current target. But those interactions are intense.
You must change your approach a little bit, though. An out-and-out Bloodshed build is dripping with what are all essentially kill skills, but with more partners, there are inevitably fewer average kills per player, and so you’ll have kill skills active in any given co-op game a dramatically lower amount of time than in single play—yeah, yeah, you get it, okay. If you were playing pure Bloodshed in single player, then in co-op, you might respec and take the points that were in Grim, Followthrough, Resurgence, and Many Must Fall and place them further up in Cunning instead, for Unforeseen, Rising Shot, and Innervate. This still allows you to play a hideously punishing melee build, but it works for different reasons and isn’t as dependent on scoring kills.