
Borderlands 2 Game of the Year Guide Hyperion's Most Wanted
Axton
AS THE COMMANDO
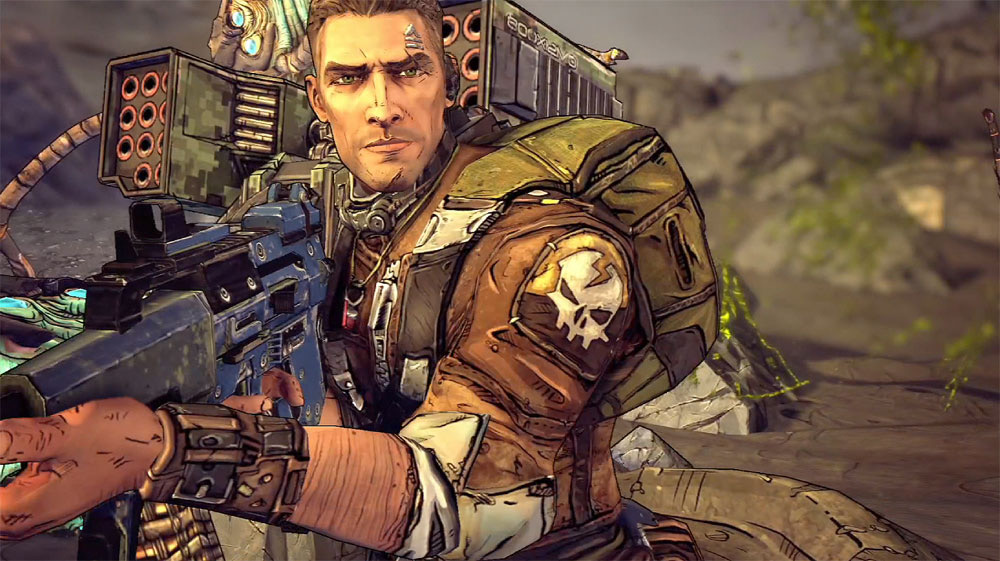
Okay, this Sergeant Axton jerk should’ve been dead. Official Dahl PMC reports say he was scheduled for summary execution, but he disappeared. Somehow, he managed to escape the firing squad by stealing one of Dahl’s transports. Now he’s here on Pandora - presumably to lay low, since Dahl isn’t exactly forgiving when you make them look like chumps. Though “laying low” is relative, since Axton’s a bit of a showboat—he just loves combat and adores letting his enemies know how much better he is than them. You know, if he wasn’t being such a pain in my ass, I might actually like this guy.
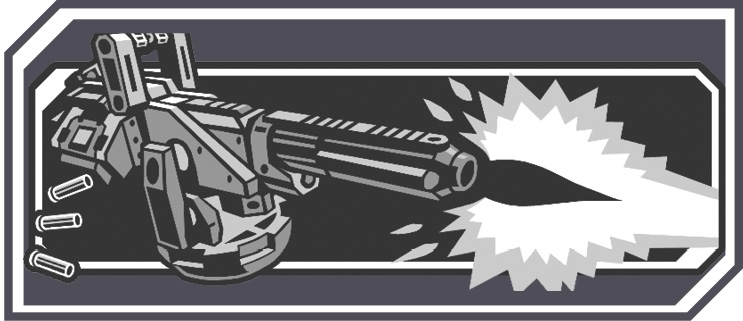 Action Skill: SABRE TURRET
Axton’s Action Skill deploys his Dahl Sabre-class auto-turret. While deployed the Sabre Turret automatically fires at nearby enemies for its duration. It can be attacked and even destroyed by foes—in fact, one of the nicest benefits of the Sabre Turret is the attention it diverts away from Axton and other Vault Hunters. The turret’s base cooldown after it deactivates is 42 seconds, though you can reduce this a few ways: by reclaiming the turret before it disappears, which reduces your cooldown interval; by investing in skills that reduce turret cooldown; and by equipping Relics and class mods that reduce Action Skill cooldown. In co-op games, your friends may also be wearing items that reduce cooldown for the Action Skills of the entire team.
Dahl’s Sabre Turret line is much more customizable and aggressively focused than the Atlas Scorpio Turret used by Roland during the events of the first Borderlands. Ultimately, the Scorpio was about defense and replenishment, and Roland himself was more of a medic than a gunner, but the Sabre is about pushing forward, and Axton is a straightforward damage-dealing character. Axton’s skill trees offer several different ways to alter the Sabre turret so that it’s more powerful in its armaments and more flexible in its deployment.
Guerrilla
Axton’s green skill tree is mostly based around strengthening his Action Skill, the Dahl Sabre Turret. Axton’s Action Skill involves a deployable, and there are lots of ways to tailor it to your preference or to a specific situation. Buffing your Sabre Turret almost always involves going at least halfway up the Guerrilla tree so you can obtain the Sentry, Laser Sight, and Scorched Earth skills. This results in a Sabre Turret that fires more ammo, and more accurately, with rocket salvos to boot. After that, if you’re just going for the best possible Sabre Turret, you can continue to the Guerrilla capstone skill for a Slag-capable turret, or trudge up the Survival tree so you can deploy two Sabre Turrets at once, each with Phalanx Shields!
Apart from enhancing the Sabre Turret, there are also a few general performance boosts for Axton. Most noteworthy are the Willing skill, which grants gigantic boosts to shield recharge performance, and Onslaught, perhaps the most appealing kill skill in the game. (When capped, +30% gun damage and +60% movement speed after a kill? Potentially more than doubled through the right Relic? Sure, that sounds all right.)
TIER 1
 Sentry
Increases the number of shots your Sabre Turret fires in each burst. Also increases your Sabre Turret’s Duration.
|
Level 1 |
Shots fired per burst: +1, Turret Duration: +2 seconds |
|
Level 2 |
Shots fired per burst: +2, Turret Duration: +4 seconds |
|
Level 3 |
Shots fired per burst: +3, Turret Duration: +6 seconds |
|
Level 4 |
Shots fired per burst: +4, Turret Duration: +8 seconds |
|
Level 5 |
Shots fired per burst: +5, Turret Duration: +10 seconds |
 Ready
Ready
Increases your Reload Speed.
|
Level 1 |
Reload Speed: +8% |
|
Level 2 |
Reload Speed: +16% |
|
Level 3 |
Reload Speed: +24% |
|
Level 4 |
Reload Speed: +32% |
|
Level 5 |
Reload Speed: +40% |
TIER 2
 Laser Sight
Increases the Accuracy of your Sabre Turret.
|
Level 1 |
Turret Accuracy: +10% |
|
Level 2 |
Turret Accuracy: +20% |
|
Level 3 |
Turret Accuracy: +30% |
|
Level 4 |
Turret Accuracy: +40% |
|
Level 5 |
Turret Accuracy: +50% |
 Willing
Improves your Shield Recharge Rate and Shield Recharge Delay.
|
Level 1 |
Shield Recharge Rate: +15%, Shield Recharge Delay: -12% |
|
Level 2 |
Shield Recharge Rate: +30%, Shield Recharge Delay: -24% |
|
Level 3 |
Shield Recharge Rate: +45%, Shield Recharge Delay: -36% |
|
Level 4 |
Shield Recharge Rate: +60%, Shield Recharge Delay: -48% |
|
Level 5 |
Shield Recharge Rate: +75%, Shield Recharge Delay: -60% |
TIER 3
 Onslaught
Kill skill. Killing an enemy increases your Gun Damage and Movement Speed for a short time.
|
Level 1 |
Gun Damage: +6%, Movement Speed: +12% |
|
Level 2 |
Gun Damage: +12%, Movement Speed: +24% |
|
Level 3 |
Gun Damage: +18%, Movement Speed: +36% |
|
Level 4 |
Gun Damage: +24%, Movement Speed: +48% |
|
Level 5 |
Gun Damage: +30%, Movement Speed: +60% |
 Scorched Earth
Adds Multi-Rocket Pods to your Sabre Turret.
|
Level 1 |
22 rockets per volley |
 Able
Able
Damaging an enemy causes you to regenerate health for a few seconds. This effect does not stack multiple times.
|
Level 1 |
Regenerates 0.4% of your Maximum Health per second. Duration: 3 seconds |
|
Level 2 |
Regenerates 0.8% of your Maximum Health per second. Duration: 3 seconds |
|
Level 3 |
Regenerates 1.2% of your Maximum Health per second. Duration: 3 seconds |
|
Level 4 |
Regenerates 1.6% of your Maximum Health per second. Duration: 3 seconds |
|
Level 5 |
Regenerates 2.0% of your Maximum Health per second. Duration: 3 seconds |
TIER 4
 Grenadier
Increases the maximum number of grenades you can carry.
|
Level 1 |
Grenade Capacity: +1 |
|
Level 2 |
Grenade Capacity: +2 |
|
Level 3 |
Grenade Capacity: +3 |
|
Level 4 |
Grenade Capacity: +4 |
|
Level 5 |
Grenade Capacity: +5 |
TIER 5
 Crisis Management
You gain bonus Gun Damage and Melee Damage when your shields are depleted.
|
Level 1 |
Gun Damage: +7%, Melee Damage: +6% |
|
Level 2 |
Gun Damage: +14%, Melee Damage: +12% |
|
Level 3 |
Gun Damage: +21%, Melee Damage: +18% |
|
Level 4 |
Gun Damage: +28%, Melee Damage: +24% |
|
Level 5 |
Gun Damage: +35%, Melee Damage: +30% |
TIER 6
 Double Up
Adds a second gun to your Sabre Turret and changes both guns to fire Slag bullets. Slagged enemies take bonus damage from all non-Slag attacks.
|
Level 1 |
+100% more turret guns |
Gunpowder
Building up Axton’s blue Gunpowder tree lets you enhance combat in general, while also making Sabre Turret deployment more flexible. Eventually, the Sabre Turret can basically become a Longbow nuke that happens to also drop a turret! Picking the Steady skill and the tier four gamechanger Do Or Die also lets Axton users focus on rocket launcher and grenade damage, if desired. (The Grenadier skill in the Guerrilla tree can enhance this end, as well.)
If you’re interested in kill skills, Metal Storm pairs magnificently with other Axton kill skills like Onslaught. The Ranger skill, the last you’ll have access to before the capstone, is like a free swatch of Badass Tokens—you get subtle bonuses to a lot of things, rather than focused bonuses on two or three categories.
And note that the Battlefront skill, located in the third tier of the Gunpowder tree, grants combat buffs to all damage types for Axton while his turret is deployed. In combat, the turret is more likely to be deployed than not, so this is no small benefit.
TIER 1
 Impact
Increases Gun Damage and Melee Damage.
|
Level 1 |
Gun Damage: +4%, Melee Damage: +3% |
|
Level 2 |
Gun Damage: +8%, Melee Damage: +6% |
|
Level 3 |
Gun Damage: +12%, Melee Damage: +9% |
|
Level 4 |
Gun Damage: +16%, Melee Damage: +12% |
|
Level 5 |
Gun Damage: +20%, Melee Damage: +15% |
 Expertise
Increases your Weapon Swap Speed and Aim Speed. Also, your Movement Speed is increased while aiming.
|
Level 1 |
Weapon Swap Speed: +14%, Aim Speed: +14%, Movement Speed: +7% |
|
Level 2 |
Weapon Swap Speed: +28%, Aim Speed: +28%, Movement Speed: +14% |
|
Level 3 |
Weapon Swap Speed: +42%, Aim Speed: +42%, Movement Speed: +21% |
|
Level 4 |
Weapon Swap Speed: +56%, Aim Speed: +56%, Movement Speed: +28% |
|
Level 5 |
Weapon Swap Speed: +70%, Aim Speed: +70%, Movement Speed: +35% |
TIER 2
 Overload
Increases Magazine Size with assault rifles.
|
Level 1 |
Magazine Size: +10% |
|
Level 2 |
Magazine Size: +20% |
|
Level 3 |
Magazine Size: +30% |
|
Level 4 |
Magazine Size: +40% |
|
Level 5 |
Magazine Size: +50% |
 Metal Storm
Kill skill. Killing an enemy dramatically increases your Fire Rate and reduces Recoil for a short period of time.
|
Level 1 |
Fire Rate: +12%, Recoil Reduction: +15% |
|
Level 2 |
Fire Rate: +24%, Recoil Reduction: +30% |
|
Level 3 |
Fire Rate: +36%, Recoil Reduction: +45% |
|
Level 4 |
Fire Rate: +48%, Recoil Reduction: +60% |
|
Level 5 |
Fire Rate: +60%, Recoil Reduction: +75% |
TIER 3
 Steady
Reduces Recoil with all weapon types and increases Grenade Damage and Rocket Launcher Damage.
|
Level 1 |
Recoil Reduction: +8%, Grenade Damage: +5%, Rocket Launcher Damage: +4% |
|
Level 2 |
Recoil Reduction: +16%, Grenade Damage: +10%, Rocket Launcher Damage: +8% |
|
Level 3 |
Recoil Reduction: +24%, Grenade Damage: +15%, Rocket Launcher Damage: +12% |
|
Level 4 |
Recoil Reduction: +32%, Grenade Damage: +20%, Rocket Launcher Damage: +16% |
|
Level 5 |
Recoil Reduction: +40%, Grenade Damage: +25%, Rocket Launcher Damage: +20% |
 Longbow Turret
Your Sabre Turret can be deployed using Longbow technology, allowing you to deploy it much farther away. Also, increases the health of your Sabre Turret.
|
Level 1 |
Turret Deploy Range: +10,000%, Turret Health: +110% |
 Battlefront
While your Sabre Turret is deployed, you deal increased Damage.
|
Level 1 |
Gun Damage: +6%, Melee Damage: +6%, Grenade Damage: +6% |
|
Level 2 |
Gun Damage: +12%, Melee Damage: +12%, Grenade Damage: +12% |
|
Level 3 |
Gun Damage: +18%, Melee Damage: +18%, Grenade Damage: +18% |
|
Level 4 |
Gun Damage: +24%, Melee Damage: +24%, Grenade Damage: +24% |
|
Level 5 |
Gun Damage: +30%, Melee Damage: +30%, Grenade Damage: +30% |
TIER 4
 Duty Calls
Increases the Damage and Fire Rate of non-elemental guns.
|
Level 1 |
Gun Damage: +5%, Fire Rate: +3% |
|
Level 2 |
Gun Damage: +10%, Fire Rate: +6% |
|
Level 3 |
Gun Damage: +15%, Fire Rate: +9% |
|
Level 4 |
Gun Damage: +20%, Fire Rate: +12% |
|
Level 5 |
Gun Damage: +25%, Fire Rate: +15% |
 Do or Die
Allows you to throw grenades while in Fight For Your Life. Also, increases your Grenade Damage and Rocket Launcher Damage.
|
Level 1 |
Grenade Damage: +10%, Rocket Launcher Damage: +10% |
TIER 5
 Ranger
Makes you better at just about everything.
|
Level 1 |
Gun Damage: +1%, Accuracy: +1%, Critical Hit Damage: +1%, Fire Rate: +1%, Magazine Size: +1%, Reload Speed: +1%, Maximum Health: +1% |
|
Level 2 |
Gun Damage: +2%, Accuracy: +2%, Critical Hit Damage: +2%, Fire Rate: +2%, Magazine Size: +2%, Reload Speed: +2%, Maximum Health: +2% |
|
Level 3 |
Gun Damage: +3%, Accuracy: +3%, Critical Hit Damage: +3%, Fire Rate: +3%, Magazine Size: +3%, Reload Speed: +3%, Maximum Health: +3% |
|
Level 4 |
Gun Damage: +4%, Accuracy: +4%, Critical Hit Damage: +4%, Fire Rate: +4%, Magazine Size: +4%, Reload Speed: +4%, Maximum Health: +4% |
|
Level 5 |
Gun Damage: +5%, Accuracy: +5%, Critical Hit Damage: +5%, Fire Rate: +5%, Magazine Size: +5%, Reload Speed: +5%, Maximum Health: +5% |
TIER 6
 Nuke
Nuke
Deploying your Sabre Turret sets off a small nuclear blast.
|
Level 1 |
“Impotent and Obsolete? Hardly.” |
Survival
The rightmost red skill tree of Axton’s does pretty much what the title says—it increases Axton’s survivability. There are various skills here that help Axton stay alive, and this is also the tree that allows you to add Phalanx Shields, bubbles that enemy projectiles cannot penetrate, to the Sabre Turret. The Guerrilla skill tree has the skills of both Willing and Able, which dovetail nicely with the purpose of the Survival tree. Last Ditch Effort grants big bonuses to Axton during Fight For Your Life, especially to movement speed, which is normally quite sluggish while bleeding out. (Though it’s still an improvement over the first Borderlands, where you couldn’t crawl at all!) And Grit grants a chance for Axton to not only ignore a killing blow entirely, but also gain back half his health while doing so! Talk about a saving throw.
TIER 1
 Healthy
Increases your Maximum Health.
|
Level 1 |
Maximum Health: +6% |
|
Level 2 |
Maximum Health: +12% |
|
Level 3 |
Maximum Health: +18% |
|
Level 4 |
Maximum Health: +24% |
|
Level 5 |
Maximum Health: +30% |
 Preparation
Increases your Shield Capacity. Also, when your shield is full, you regenerate health.
|
Level 1 |
Shield Capacity: +3%, Regenerate 0.4% of your health per second when your shields are full |
|
Level 2 |
Shield Capacity: +6%, Regenerate 0.8% of your health per second when your shields are full |
|
Level 3 |
Shield Capacity: +9%, Regenerate 1.2% of your health per second when your shields are full |
|
Level 4 |
Shield Capacity: +12%, Regenerate 1.6% of your health per second when your shields are full |
|
Level 5 |
Shield Capacity: +15%, Regenerate 2.0% of your health per second when your shields are full |
TIER 2
 Last Ditch Effort
Increases your Gun Damage and Movement Speed while in Fight For Your Life.
|
Level 1 |
Damage: +8%, Movement Speed: +14% |
|
Level 2 |
Damage: +16%, Movement Speed: +28% |
|
Level 3 |
Damage: +24%, Movement Speed: +42% |
|
Level 4 |
Damage: +32%, Movement Speed: +56% |
|
Level 5 |
Damage: +40%, Movement Speed: +70% |
 Pressure
Improves your Reload Speed and Shield Recharge Delay based on how much health you have. The lower your health, the higher the bonuses.
|
Level 1 |
Up to +14% Reload Speed, Up to -12% Recharge Delay |
|
Level 2 |
Up to +28% Reload Speed, Up to -24% Recharge Delay |
|
Level 3 |
Up to +42% Reload Speed, Up to -36% Recharge Delay |
|
Level 4 |
Up to +56% Reload Speed, Up to -48% Recharge Delay |
|
Level 5 |
Up to +70% Reload Speed, Up to -60% Recharge Delay |
TIER 3
 Forbearance
Reduces the duration of status effects on you (Burned, Corroded, Electrocuted, and Slagged). Also, increases Maximum Health.
|
Level 1 |
Status Effect Duration: -8%, Maximum Health: +1% |
|
Level 2 |
Status Effect Duration: -16%, Maximum Health: +2% |
|
Level 3 |
Status Effect Duration: -24%, Maximum Health: +3% |
|
Level 4 |
Status Effect Duration: -32%, Maximum Health: +4% |
|
Level 5 |
Status Effect Duration: -40%, Maximum Health: +5% |
 Phalanx Shield
Your Sabre Turret projects a protective shield, which attempts to block enemy ranged attacks but lets friendly ranged attacks pass through. Enemy movement and melee attacks are not affected.
|
Level 1 |
Turret Shields: +1 |
 Quick Charge
Kill skill. Killing an enemy causes your shields to quickly regenerate for a short time..
|
Level 1 |
Regenerate 1% of your shield |
|
Level 2 |
Regenerate 2% of your shield |
|
Level 3 |
Regenerate 3% of your shield |
|
Level 4 |
Regenerate 4% of your shield |
|
Level 5 |
Regenerate 5% of your shield |
TIER 4
 Resourceful
Increases your Cooldown Rate on your Sabre Turret Action Skill.
|
Level 1 |
Action Skill Cooldown Rate: +5% |
|
Level 2 |
Action Skill Cooldown Rate: +10% |
|
Level 3 |
Action Skill Cooldown Rate: +15% |
|
Level 4 |
Action Skill Cooldown Rate: +20% |
|
Level 5 |
Action Skill Cooldown Rate: +25% |
 Mag-Lock
Your Sabre Turret can be deployed on walls and ceilings.
|
Level 1 |
+100% more Sticky |
TIER 5
 Grit
Grit
You gain a chance to ignore damage that would otherwise kill you. In addition to not taking damage from attack, you will regenerate half your Maximum Health.
|
Level 1 |
4% chance of ignoring death |
|
Level 2 |
8% chance of ignoring death |
|
Level 3 |
12% chance of ignoring death |
|
Level 4 |
16% chance of ignoring death |
|
Level 5 |
20% chance of ignoring death |
TIER 6
 Gemini
Allows you to deploy two Sabre Turrets. Once the first Sabre Turret is deployed, press (Action Skill Button) again to deploy the second.
|
Level 1 |
“Sometimes one just isn’t enough.” |
Solo Play
Kill skills are naturally more valuable during solo play, where you’ll score just about every kill yourself, and Axton has some of the very best. Snagging all three of his kill skills (Onslaught in Guerrilla tree, Metal Storm in Gunpowder tree, Quick Charge in Survival tree) will activate shield regeneration for a short time and also temporarily boost gun damage, movement speed, fire rate, and recoil reduction. Not bad for something that happens every single time you or your turret kill something. Though this applies just as much to co-operative play, you should also constantly think about building toward Battlefront. That’s another passive skill that will be active whenever your Sabre Turret is up; again, most of the time.
For self-sustaining health, Preparation in the Survival tree allows you to replenish HP over time during breathers, as long as your shield is full. The Pressure skill in the Survival tree can enhance the already sizable shield benefit conferred by Willing in the Guerrilla tree—between those skills and a solid, low-delay, high-recharge rate shield, you can end up with a shield that starts recharging almost immediately after you take any shield damage at all! Refilling to full can be as easy as getting behind cover for just a couple of seconds… or inside a Phalanx Shield bubble.
If you pick up the Grenadier skill in Guerrilla tree, Axton can carry more grenades than anyone else. This means you can also carry more Transfusion grenades than anyone else; good self-prescribed medicine, and a decent healing solution if you choose to forgo the Survival tree. Getting in a tight spot with your health situation and your shield down may just mean dropping the turret if possible, then pitching some (preferably Homing) Transfusion grenades in the general direction of all the rowdies on your case, then turning tail and scooting off to wait for the HP reaping to come.
And in general, if you fear you’re about to go down, remember to drop the turret if it’s ready, even if it’s the last thing you do. The turret won’t disappear just because you’ve entered Fight For Your Life, and having it out when there’s any quantity of enemies on the field almost assures Second Wind. If you happen to have Phalanx Shield, it may even guard you from fierce damage that quickens the deathclock when you’re downed. Then, as you rise from Second Wind, it’s natural to stay in the confines of the shield to get a breather. And several skills make Fight For Your Life easier to emerge from successfully, too—Do or Die and Last Ditch Effort boost capabilities while downed, and Grit gives you a chance to avoid killing blows entirely, actually gaining half health back from the rush of almost dying when it works!
Co-operative Play
Any teammate will graciously appreciate the distraction the Sabre Turret provides, so if there’s a firefight going on, keep it active as much as possible. You can approach this in one of two ways—one is more cautious, dropping the turret and then babysitting and defending it, concentrating fire on targets the turret picks first (lowering the number of opposing guns pointed your way most quickly), taking out monsters that crowd the turret, and reclaiming it the moment a conflagration calms down to refund yourself some cooldown time. Or, you can drop the turret somewhere it’s most likely to benefit your teammates, whether by joining forces with their fire or providing a distraction, then run off and free yourself, snaking around the fringe of the battlefield while most attention is focused on your turret and your comrades. Unlike Roland, Axton can’t build toward being a specific medic for others—that’s now Maya’s domain.
When you have enough levels built up to get Double Up for your Sabre Turret, you might be expected to do so. This is especially true during True Vault Hunter Mode, or if no one else is on some sort of Slag duty (like a Scorn or Ruin build Maya, or a Salvador who is always wielding a Slag weapon in one hand, or another Double Up-using Axton).
If Slag is already taken care of reliably, you may consider swapping to Gemini or Nuke for extra damage or a change of pace. Double turrets, especially with Phalanx Shields, can also be invaluable in certain situations, like boss fights, arena battles, and blistering slaughterhouses like Sawtooth Cauldron—even in a chaotic four-player game, you can set up two separate shielded rally points in different places to keep enemies from grouping up too much against you.