
Borderlands 2 Game of the Year Guide Bestiary
Marauders
The marauder component of the bandit clans is a little more composed than the totally untethered psycho contingent. These guys can keep it together enough to operate firearms, and some of them can even drive vehicles. They can’t keep it together enough, however, to do anything with those things other than kill, though, so they’re still filed under “enemies.”
Since they’re bipedal, shooting out their legs can trip them or knock them down. Shooting them in the head deals critical damage, and will make them flinch. You’ll see an unsurprising trend, in that human enemies don’t like getting shot in the head very much. Being flesh, marauders are susceptible to fire.
Through various skills and some shields manufactured by Vladof, bullets aimed at you can be absorbed, or even reflected. Bandits are the enemy most likely to give you the chance to use these abilities. They all pack guns, and that’s what they use. Bandits only opt to fight with melee attacks if you bring the fight to them. Otherwise, they’re content to get somewhere comfortable and open up with the weapon in hand. They can take cover and fire, and also commonly employ grenades.
Nomads hold deep sway over marauders, and can command them all to fire, charge, or throw grenades in unison at the drop of a hat. If you hear bellowing from a nomad to the marauders in the area, this might be very actionable intel—if, for example, a half dozen grenades are about to get tossed your way, it might be wise to relocate.
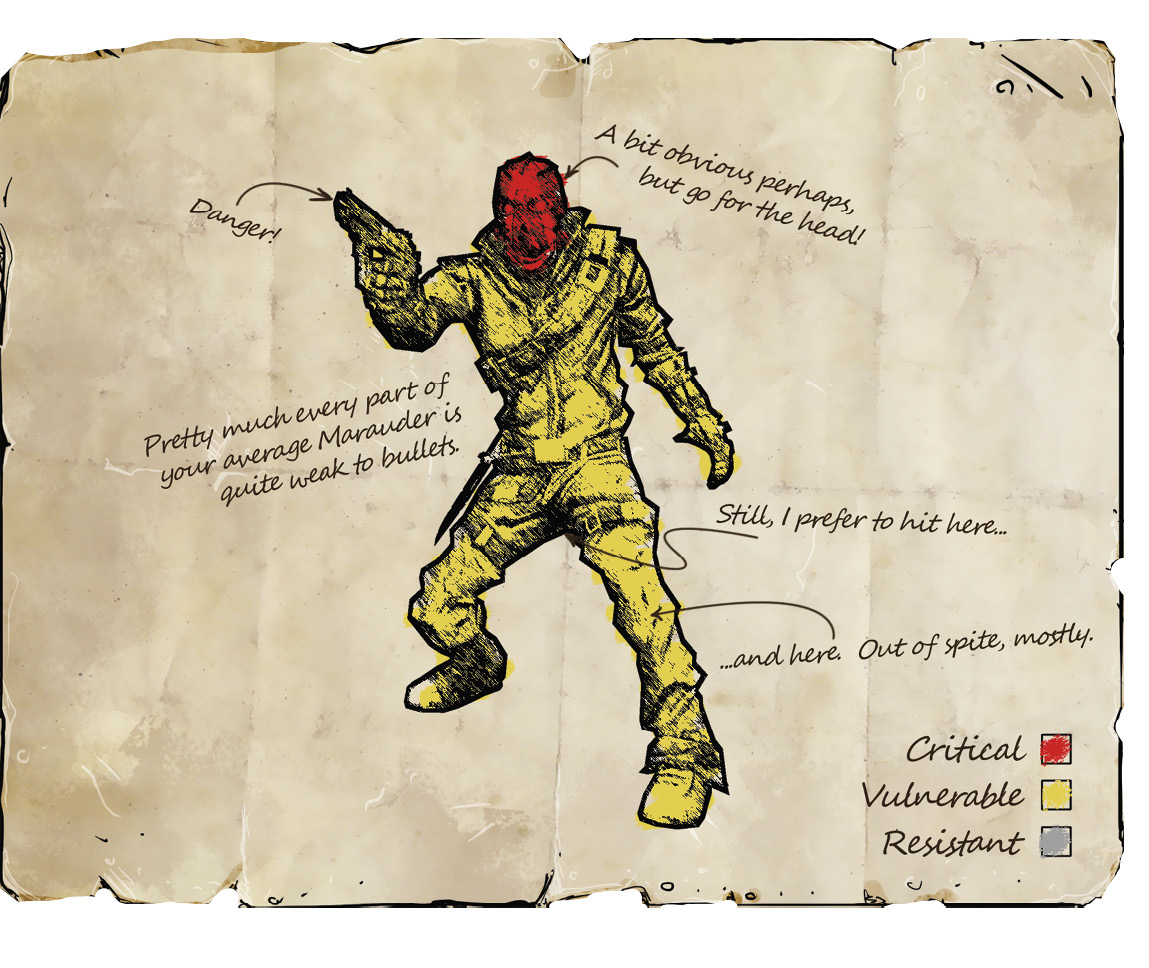
Marauder
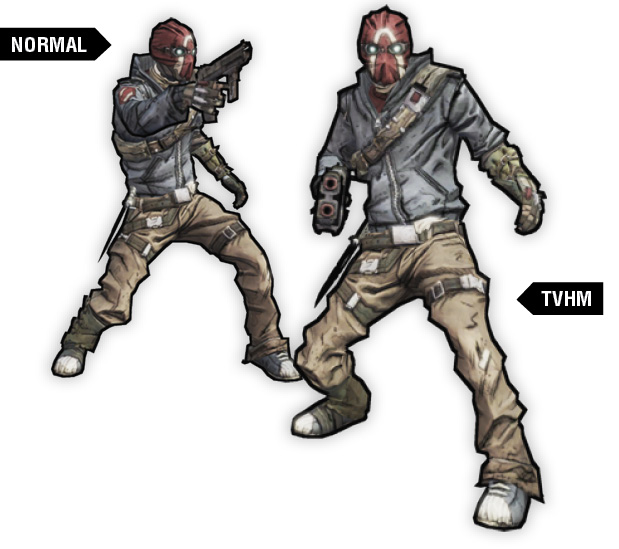
TVHM name: Outlaw Marauder
The lowest-level marauder is the weakest gun-wielder in Pandora, packing only a pistol. They’re found practically everywhere, so you’ll grow accustomed to their presence on the battlefield. While psychos will attempt to rush in, marauders will hang back and rely on their firepower from behind cover if possible, raining bullets and grenades at their targets.
| Health Multiplier | Shield Level | DMG. Multiplier | XP Value | Crit. Areas | Weak./Res. |
|---|---|---|---|---|---|
| 1 | TVHM: 1 | 1.5 | Chump | Head |  / — / — |
Location: Southern Shelf, Three Horns, Southpaw, Frostburn Canyon, The Dust, Bloodshot Stronghold/Ramparts, Tundra Express, The Fridge, Thousand Cuts, Lynchwood, Sawtooth Cauldron
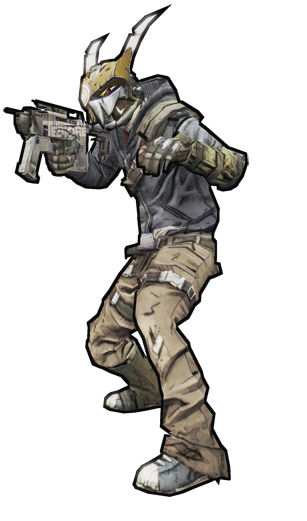
Killer Marauder
TVHM name: Outlaw Executioner
Killer Marauders are higher-ranking than plain old marauders, and they have gear to match, sporting SMGs in addition to pistols. This is the first type of enemy you encounter who can possess a shield; if you see a blue shield bar along the normal red health bar, that’s your clue. Health can’t be damaged until the shield is removed, and the shield takes reduced damage from any non-shock source.
| Health Multiplier | Shield Level | DMG. Multiplier | XP Value | Crit. Areas | Weak./Res. |
|---|---|---|---|---|---|
| 2 | 1 | 1 | Normal | Head |  / — / — |
Location: Southern Shelf, Three Horns, Southpaw, Frostburn Canyon, The Dust, Bloodshot Stronghold/Ramparts, Tundra Express, The Fridge, Thousand Cuts, Lynchwood, Sawtooth Cauldron
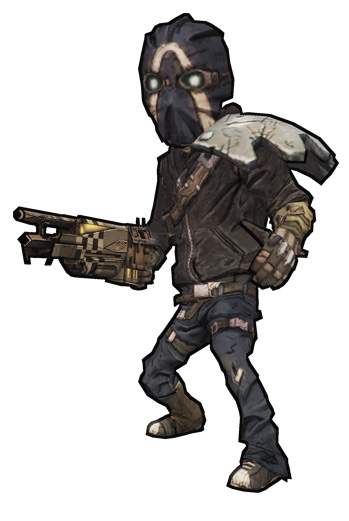
Shotgun Midget
TVHM name: Angry Shotgun Midget
Midget marauders make their mark by toting shotguns—it’s hard for a shotgun to be non-threatening, even if it’s a tiny marauder holding it. Shotgun Midgets have a little bit more health than their Psycho Midget counterparts, so they’re sturdier, too, although those big heads sure are prime for headshots…
| Health Multiplier | Shield Level | DMG. Multiplier | XP Value | Crit. Areas | Weak./Res. |
|---|---|---|---|---|---|
| 1.75 | 1 | 1 | Normal | Head |  / — / — |
Location: Southern Shelf, Three Horns, Southpaw, Frostburn Canyon, The Dust, Bloodshot Stronghold/Ramparts, Tundra Express, The Fridge, Thousand Cuts, Lynchwood, Sawtooth Cauldron
Elite Marauder
TVHM name: Violent Marauder
The cream-of-the-crop among standard marauders, these units have a higher likelihood of coming equipped with a shield than lesser marauders. They can also use assault rifles, increasing their effective range.
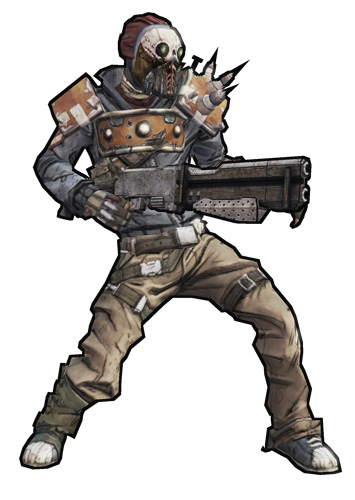
| Health Multiplier | Shield Level | DMG. Multiplier | XP Value | Crit. Areas | Weak./Res. |
|---|---|---|---|---|---|
| 3 | 1 | 1.5 | Normal+ | Head |  / — / — |
Location: Southern Shelf, Three Horns, Southpaw, Frostburn Canyon, The Dust, Bloodshot Stronghold/Ramparts, Tundra Express, The Fridge, Thousand Cuts, Lynchwood, Sawtooth Cauldron
Crazed Marauder
TVHM name: Lunatic Marauder
These marauders have one foot in the shoes of a psycho, the other a marauder; they use a machinegun, but without the usual restraint and discipline befitting a marauder.

| Health Multiplier | Shield Level | DMG. Multiplier | XP Value | Crit. Areas | Weak./Res. |
|---|---|---|---|---|---|
| 2 | 1 | 1 | Normal | Head |  / — / — |
Location: Southern Shelf, Three Horns, Southpaw, Frostburn Canyon, The Dust, Bloodshot Stronghold/Ramparts, Tundra Express, The Fridge, Thousand Cuts, Lynchwood, Sawtooth Cauldron
Airborne Marauder
TVHM name: Airborne Outlaw
These gyromen usually die when a Buzzard gyrocopter crashes, but occasionally they manage to survive, falling just right or hopping off at the last second. If they do survive, they simply go from being flyboys to running boys, same as any other marauder. They come equipped with assault rifles, like Elite Marauders.
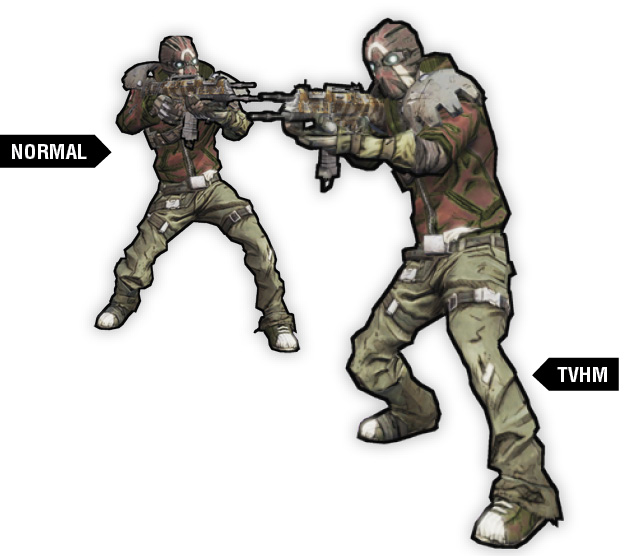
| Health Multiplier | Shield Level | DMG. Multiplier | XP Value | Crit. Areas | Weak./Res. |
|---|---|---|---|---|---|
| 1.5 | 0.25 | 1 | Normal | Head |  / — / — |
Location: The Dust, Thousand Cuts
Tundra Patrol
This snowy sentinel patrols around the entrance to Tundra Express, by a small shack. When he dies, he’ll drop an ECHO Recorder that proclaims his lack of enmity toward his murderer, who is almost certainly you (unless perhaps you trained varkids over him or something). This begins the “No Hard Feelings” optional mission, which can be accomplished quickly, in the same area. You are wise to question his honesty, but you should walk willingly into his trap anyway, because life is an adventure, and you can’t worry about every little thing.
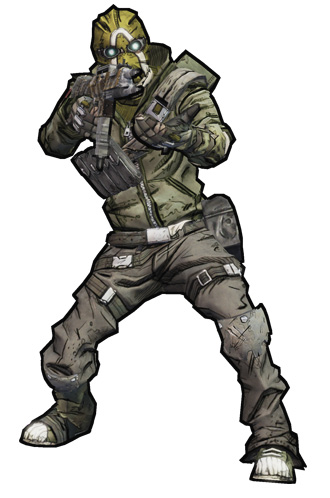
| Health Multiplier | Shield Level | DMG. Multiplier | XP Value | Crit. Areas | Weak./Res. |
|---|---|---|---|---|---|
| 5 | — | 1 | Normal | Head |  / — / — |
Location: Tundra Express
Scavenger
(TVHM ONLY)
Only during True Vault Hunter Mode do these thieving marauders show up. They scamper around the field of battle, looking to scoop up weapons, ammo, and equipment dropped by other dying combatants. Don’t worry if you see a Scavenger hoist up a gun you’re lusting after—kill him and he’ll drop what he tried to take.
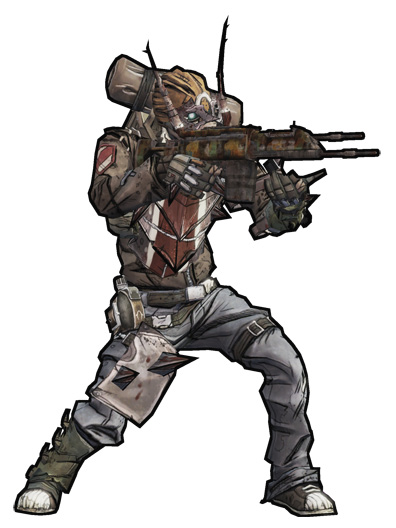
| Health Multiplier | Shield Level | DMG. Multiplier | XP Value | Crit. Areas | Weak./Res. |
|---|---|---|---|---|---|
| 2.5 | 1 | 1.5 | Normal+ | Head |  / — / — |
Location: Southern Shelf, Three Horns, Southpaw, Frostburn Canyon, The Dust, Bloodshot Stronghold/Ramparts, Tundra Express, The Fridge, Thousand Cuts, Lynchwood, Sawtooth Cauldron
Burning Hodunk
Most living things don’t like being set afire without warning, and Hodunks are no different. They react downright poorly to the stimulation, in fact.

| Health Multiplier | Shield Level | DMG. Multiplier | XP Value | Crit. Areas | Weak./Res. |
|---|---|---|---|---|---|
| 1 | — | 1 | Normal | Head |  / — / — |
Location: The Dust, mission: “Clan War: Trailer Trashing”
Hodunk Grunt & Zaford Grunt
These meatheads glower at each other from opposite ends of the pasture, coming closer and closer to all-out war as the “Clan War” mission line progresses. Do things eventually come to a head? Does a bear crap in the woods, and so on and so forth the part about the furry white rabbit? Yes, things come to a head.
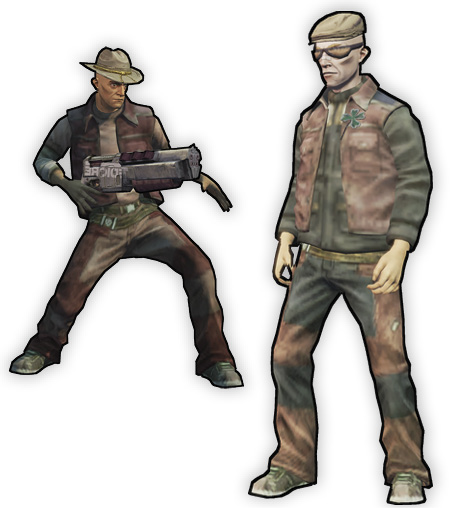
| Health Multiplier | Shield Level | DMG. Multiplier | XP Value | Crit. Areas | Weak./Res. |
|---|---|---|---|---|---|
| 3 | — | 1 | Normal | Head |  / — / — |
Location: The Dust, mission: “Clan War: Zafords vs. Hodunks”
Bruiser
TVHM name: Crusher
Bruisers are especially beefy marauders, so juiced that standard armor doesn’t even fit. Although they’re peon enemies, they’re just about as tough as Badass Marauders, so don’t take them lightly.
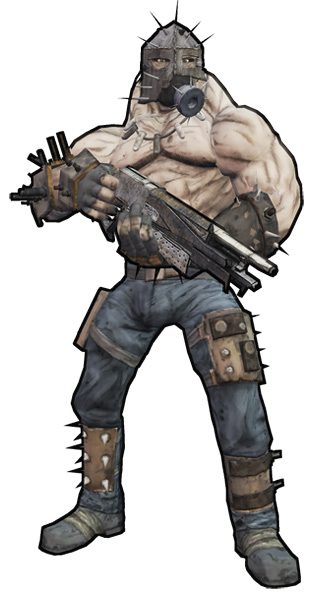
| Health Multiplier | Shield Level | DMG. Multiplier | XP Value | Crit. Areas | Weak./Res. |
|---|---|---|---|---|---|
| 5 | .25 | 2 | Normal+ | Head |  / — / — |
Location: Sawtooth Cauldron, Thousand Cuts, Eridium Blight, The Fridge, Frostburn Canyon, The Dust, Bloodshot Stronghold/Ramparts
Badass Marauder
TVHM name: Super Badass Marauder
A fully upgraded marauder is equipped with an assault rifle, a much deeper health pool, a small damage multiplier, and a mean temper. He maintains the same gunfire and grenades base line that his lower ranking marauder brothers establish. And just like them, he kowtows before nomads, following their commands to either toss grenades at you, shoot you, or charge, all together.
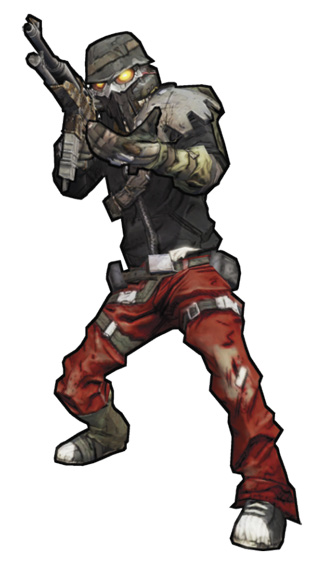
| Health Multiplier | Shield Level | DMG. Multiplier | XP Value | Crit. Areas | Weak./Res. |
|---|---|---|---|---|---|
| 6 | 1 | 2 | Badass | Head |  / — / — |
Location: Southern Shelf, Three Horns, Southpaw, Frostburn Canyon, The Dust, Bloodshot Stronghold/Ramparts, Tundra Express, The Fridge, Thousand Cuts, Lynchwood, Sawtooth Cauldron
Bewm & Boom
This fearsome, folly-prone blast duo are, together, the game’s second boss. Bigger brother Boom begins behind the controls of Big Bertha, a large rotating double-barreled deck cannon. Hey, you’ll want to stay out from in front of that thing, seriously, and you’ll complete a Challenge if you manage to finish the fight without eating a shell to the face once. (Not too hard—either always keep something between you and Big Bertha while fighting Bewm, or always move laterally around the deck, faster than Big Bertha can track.) You have to take down Boom’s health bar twice—once to knock him out of Big Bertha, and again to take him down. Little brother Bewm, lacking the benefit of starting out manning a big cannon, only has to have his health depleted once to kill him.
Either brother, upon dying, has a small chance to drop the legendary Torgue grenade, Bonus Package.
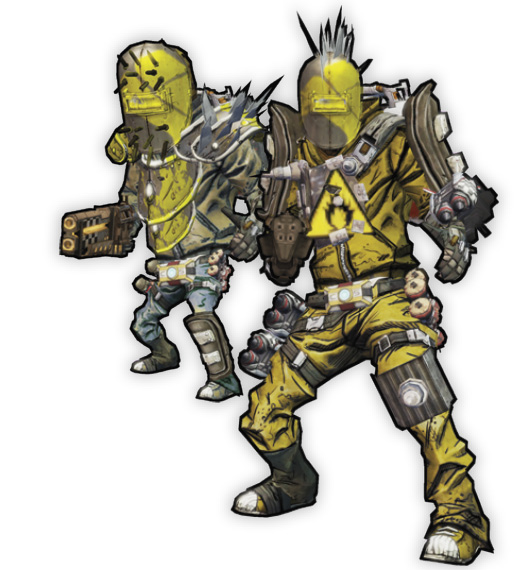
| Health Multiplier | Shield Level | DMG. Multiplier | XP Value | Crit. Areas | Weak./Res. |
|---|---|---|---|---|---|
| 5 | — | 1 | Super Badass | Head |  / — / — |
Location: Southern Shelf
Loot Midget Marauder
Opening containers is usually a somewhat relaxing event between waves of all-out combat, but the calm is interrupted rapidly when a Badass loot midget pops out unexpectedly (and make no mistake—cute or not, loot midgets are technically Badasses, with the health and damage boosts that entails). As he takes damage, the Loot Midget Marauder will drop money and ammo all over the place, and on death he’ll shower the area around him with more. Like all loot midgets, he may also drop the legendary Dahl grenade, Bouncing Bonny.

| Health Multiplier | Shield Level | DMG. Multiplier | XP Value | Crit. Areas | Weak./Res. |
|---|---|---|---|---|---|
| 7 | — | 2 | Tough+ | Head |  / — / — |
Location: Loot containers
Assassin Wot
The relatively early mission “Assassinate the Assassins” sends intrepid Vault Hunters into Southpaw Steam & Power, an utterly bandit-overrun industrial site, tasked with eliminating four assassins. This is one of them. Assassinate Assassin Wot with a pistol to complete a bonus objective during the missions. There’s also a special area Challenge to earn by killing all four assassins within 10 minutes. On dying, Assassin Wot has a chance to drop the legendary Dahl SMG, Emperor.

| Health Multiplier | Shield Level | DMG. Multiplier | XP Value | Crit. Areas | Weak./Res. |
|---|---|---|---|---|---|
| 5 | 1 | 1 | Super Badass | Head |  / — / — |
Location: Southpaw Steam & Power, mission: “Assassinate the Assassins”
Mobley
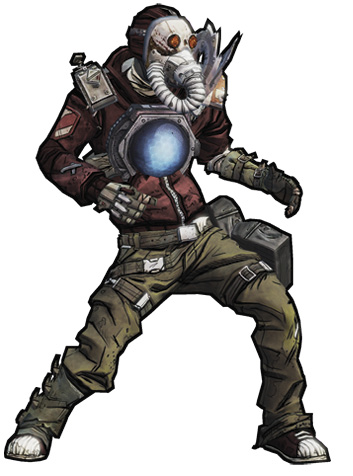
You fight Mobley near the end of the optional mission “The Good, the Bad, and the Mordecai.” When he dies, he has a small chance to drop Dahl’s legendary assault rifle, Veruc. Note that his shield is of above-average strength, so you might open up with a Shock weapon or at least a Shock grenade to knock that off real quick.
| Health Multiplier | Shield Level | DMG. Multiplier | XP Value | Crit. Areas | Weak./Res. |
|---|---|---|---|---|---|
| 5 | 2 | 1 | Super Badass | Head |  / — / — |
Location: The Dust, mission: “The Good, the Bad, and the Mordecai”
Jimbo & Tector Hodunk
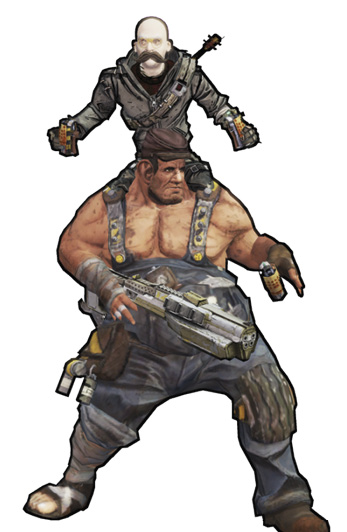
One of the game’s most involved mission lines leads to this—an all-out showdown between the Zafords and the Hodunks. And so here are your main contestants hailing from Hodunk corner. Jimbo riding Tector is similar to the way that psychos can (when they’re very careful) get atop the shoulders of a Goliath and ride him. The Hodunks have a large health pool, and a shield of well above-average strength. Upon death, they have a chance to drop a legendary weapon.
| Health Multiplier | Shield Level | DMG. Multiplier | XP Value | Crit. Areas | Weak./Res. |
|---|---|---|---|---|---|
| 10 | 4 | 1 | Super Badass | Head |  / — / — |
Location: The Dust, mission: “Clan War: Zafords vs. Hodunks”
Mick Zaford
This sleight-of-hand pistolier heads up the Zaford clan, and will lead Zaford Grunts into the heat of battle. Upon death, Mick can drop the legendary Jakobs pistol, Maggie.

| Health Multiplier | Shield Level | DMG. Multiplier | XP Value | Crit. Areas | Weak./Res. |
|---|---|---|---|---|---|
| 6 | 8 | 1 | Super Badass | Head |  / — / — |
Location: The Dust, mission: “Clan War: Zafords vs. Hodunks”
The Sheriff of Lynchwood
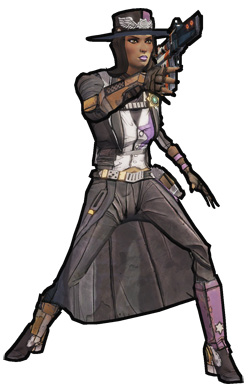
The law round these parts oversees Lynchwood, and the nomadic local agents here. The comely sheriff is actually a bit of a fascist, and Handsome Jack’s girlfriend to boot. She has a chance to drop the rare Sheriff’s Badge relic upon dying. You’ll complete an optional objective during “Showdown” if you take down the sheriff without shooting her deputy. That’s probably a reference to something.
| Health Multiplier | Shield Level | DMG. Multiplier | XP Value | Crit. Areas | Weak./Res. |
|---|---|---|---|---|---|
| 6 | 4 | 1 | Super Badass | Head |  / — / — |
Location: Lynchwood, mission: “Showdown ”
Muscles
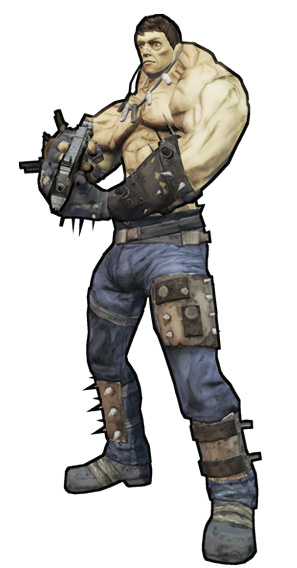
Muscles is Flanksteak’s second most beloved Lieutenant. He was going to be Flanksteak’s favorite, but Mad Mike took that honor because Mad Mike has a shield. Muscles just has muscles. It is Flanksteak’s opinion – one shared by those on Pandora who don’t enjoy being penetrated by bullets – that shields are better the muscles.
| Health Multiplier | Shield Level | DMG. Multiplier | XP Value | Crit. Areas | Weak./Res. |
|---|---|---|---|---|---|
| 12 | — | 6 | Badass | Head |  / — / — |
Location: Bloodshot Stronghold